Tatertots and Jello

COLORFUL HAPPY HOME -- Daily DIY, Decor, Craft and Recipe Tutorial

  • My Home
    • 1905 Cottage
    • Daybreak House
  • DIY
    • DIY Projects and Ideas
    • Organizing
    • Tutorials
    • Printables
  • Decor
    • Spring Projects
    • Summer Projects
    • Fall Projects
  • Crafts
    • Kids Crafts
    • Painting Projects
    • Paper Projects
    • Sewing
    • Wreaths
  • Holidays
    • Valentines Day
    • Easter
    • Halloween
    • Thanksgiving
    • Christmas
    • HAPPY Holidays Series!
  • Recipes

Explore

  • my home
  • diy
  • decor
  • crafts
  • holiday
  • printables
  • recipes

Connect

Home » 1905 Cottage » Paper and Ribbon Chandelier Tutorial!

1905 Cottage, decorating, diy, upcycle · February 5, 2014

Paper and Ribbon Chandelier Tutorial!

Tatertots & Jello is a participant in the Amazon Services LLC Associates Program, an affiliate advertising program designed to provide a means for sites to earn advertising fees by advertising and linking to amazon.com.

paper and ribbon chandelier tutorial at tatertots and jello

I have had such a fun time designing my new line of scrapbook paper and embellishments for American Crafts!! It’s going to be a scrapbook paper line that has a modern home decor spin! I can’t wait to tell you more soon!!

scrapbook paper chandelier tutorial at tatertots and jello

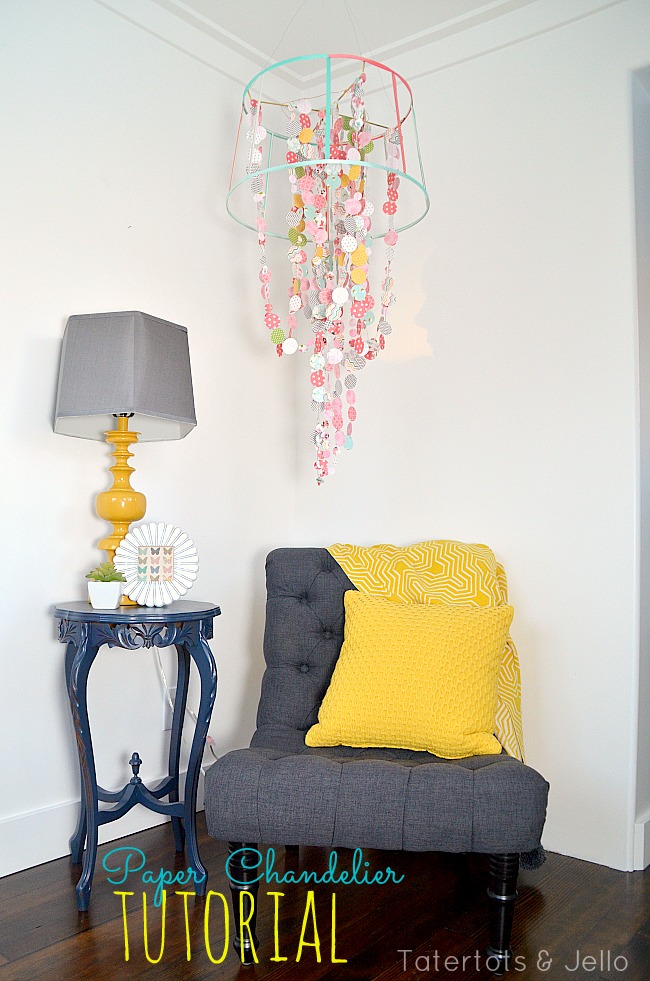
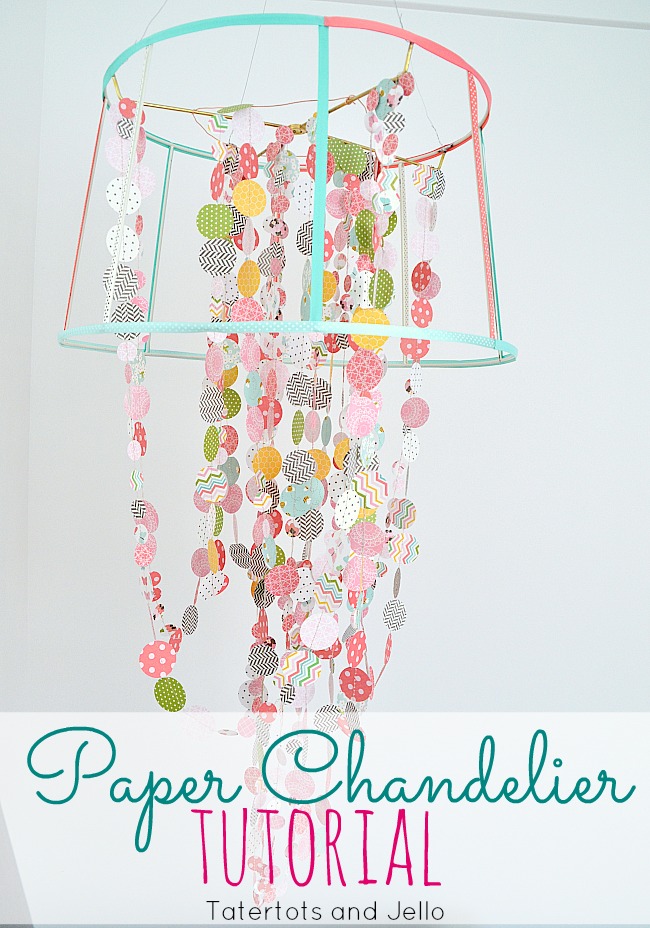
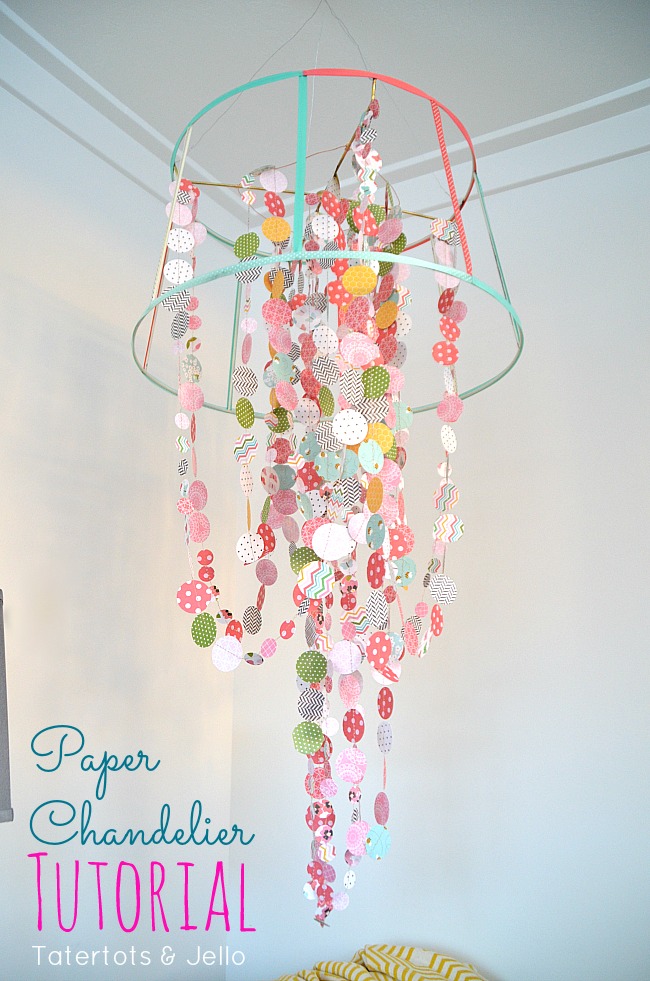
I was able to go down to the Craft and Hobby Association show – CHA a few weeks ago. And I made a little chandelier out of some pretty Pebbles scrapbook paper for the booth. I think this chandelier would be so fun in a little girls room!!

I have seen a few tutorials on how to make paper chandeliers like this. They all seemed super involved and time consuming. So I tried to stream line this project and I think I really did. I’ll tell you how in just a minute.

Here’s how to make our own Paper and Ribbon Chandelier:

paper chandelier tutorial at tatertots and jello

Supplies:

papercircles

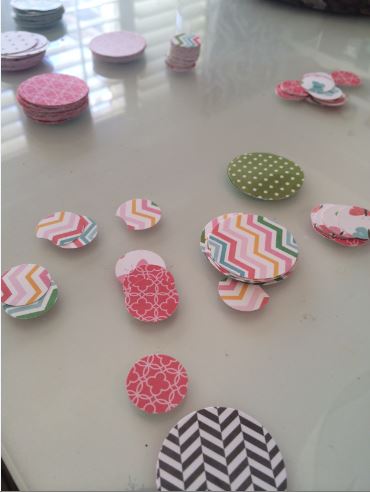
8-10 sheets of 12×12 scrapbook paper

2 different sized circle punches or a craft cutting machine

A sewing machine

Hot glue gun

Wire to hang up the chandelier

And wire to add to the top of the chandelier

A lamp shade

sewing the circles

Directions:

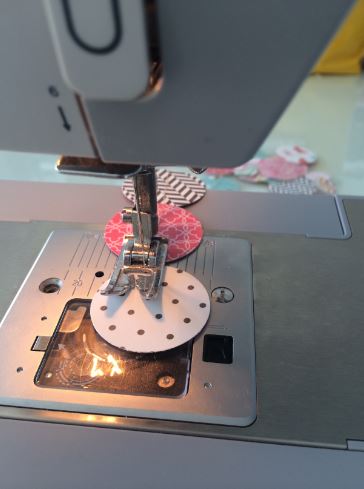
Use your craft cutting machine or circle punches to punch out as many circles as you can from your paper.

Then sew the circles, alternating patterns and sizes with your sewing machine.

I sewed the circles in one, continuous loop that measured about 40 feet long. It seems like a lot, but you will need a lot of footage to drape the circles for your chandelier.

Once you have the circles sewn in one, continuous loop – lay it out on the floor of your home and try not to get it tangled up.

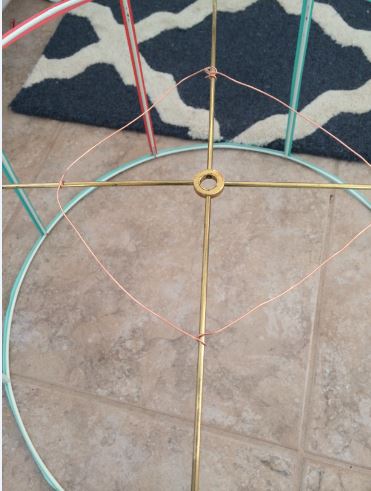
Take the fabric off of your lamp shade. You will need a shade that has spokes that holds the shade together. Many cheaper lamp shades don’t have these spokes. You might need to go to a thrift store and find a vintage shade for this project.

Once you have exposed the spokes and wire of the shade, cover the wire up with ribbon. You can use glue dots or hot glue to glue the ribbon onto the spokes and wire of your shade. I used a few different colors of ribbon. And your ribbon should be thin – mine is craft ribbon and it measured about 1/4″ wide.

At the top of the chandelier, run some wire across the top in an X pattern so you will have somewhere to drape the circle length.

Attach some wire to the top of the lampshade and hang it up so you can start draping the sewn circles.

When you have covered up the wires of the lamp shade, start draping the sewn circle length to the chandelier. I just draped the circle length from the X you made with the wire at the top.I used my hot glue gun to hold the sewn paper length in place and I looped the circles evenly from all four corners of the lampshade. Then I went into the center of the lampshade and made four more loops that were a little longer from the center.

I also hot glued the lengths at the top of the shade to hold them in place.

adding wire to the top

And that’s it! So much easier than using individual lengths of fishing wire and hand placing the paper circles.

paper and ribbon chandelier tutorial at tatertots and jello

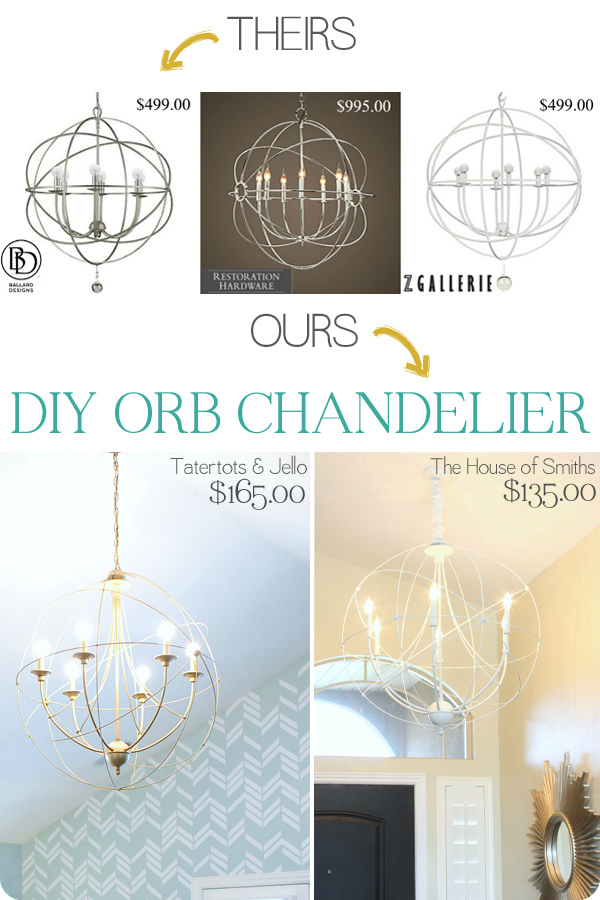
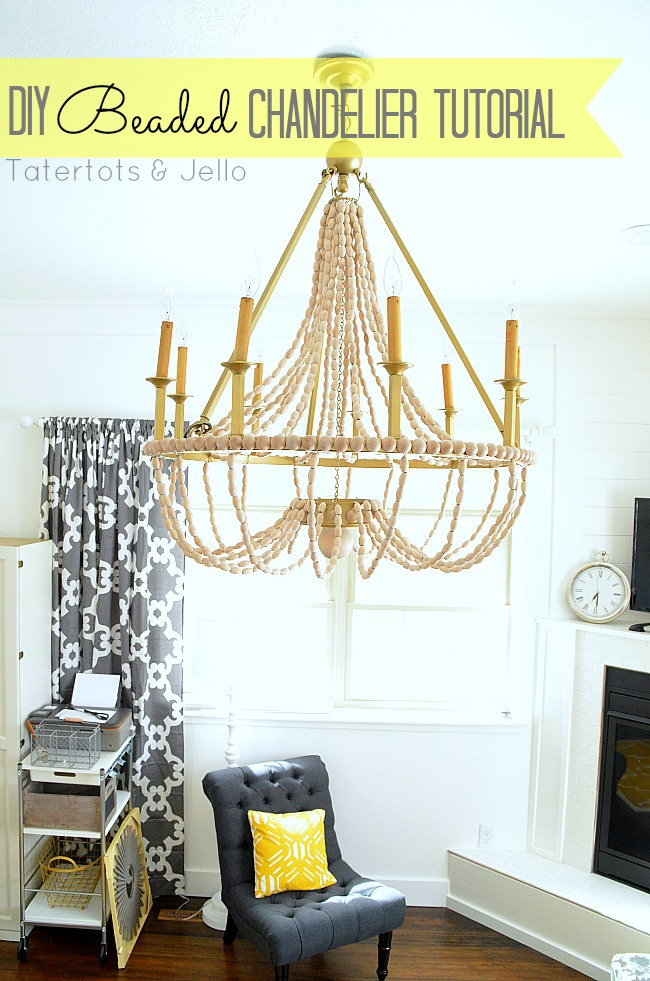
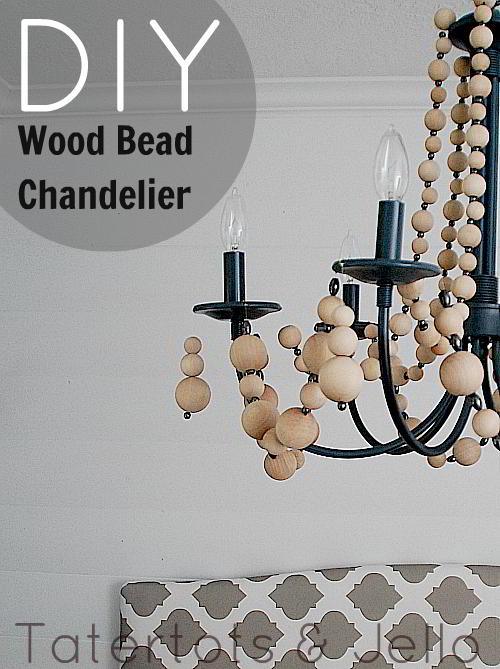
And here a a few more chandeliers I have made. I think a chandelier can really make a room! 

DIY-orb-chandelier-zgallerie-knockoff-orb-chandelier-tutorial

DIY Orb Chandelier 

DIY-Beaded-Chandelier-Tutorial-at-Tatertots-and-Jello

DIY Wood Beaded Chandelier

DIY-Wood-Bead-Chandelier

DIY Beachy Wood Chandelier 

Tatertots-and-Jello-Easy-Chandelier-Redo1

$8 Easy Chandelier Redo

painted chandelier at the 1905 cottage

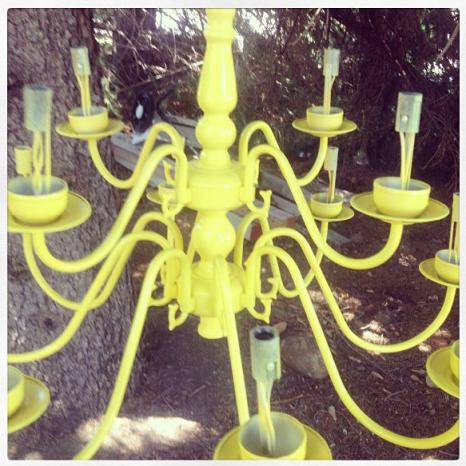
I also spray painted a brass chandelier Sun Yellow at the #1905Cottage – there’s a video showing it being hung up there.


Have you redone a chandelier?
Show us YOUR idea. 

We would love to see it!!! 

Have a beautiful day! 

xoxo

jen signature

Posted By: Jen · In: 1905 Cottage, decorating, diy, upcycle

30 Free Printable Kid’s Valentines!!
Slow Cooker Chicken Tandoori Recipe!

You’ll Also Love

DIY Halloween Bat Mantel Ideas
make a dog playhouse out of a box. all the instructionsMake an Adorable DIY Dog Playhouse Out of a Box!
Make a DIY Marble Kitchen Pedestal

Comments

  1. Jackie brown says

    May 15, 2014 at 9:19 AM

    Hate to be such a copy cat but I am sooo making one if these. I just gotta figure out which room lol.. I’m all over your blog today so u will probably see several comments in several post! lol

  2. Anna Nicholls says

    March 16, 2014 at 3:08 PM

    Heyy! I love your blog! Would if be ok if you checked out mine?!
    http://annalouisenicholls.blogspot.co.uk/

  3. Aga @ Passion shake says

    February 7, 2014 at 12:46 PM

    OMG!!! 🙂 This is so pretty!!! Love it!

  4. Kristyn says

    February 7, 2014 at 5:40 AM

    I love EVERYTHING about this and totally want to make one for my girls! Thanks!!!

  5. Desiree @ The36thAvenue says

    February 6, 2014 at 1:23 AM

    Super cute Jen… Love it 🙂

  6. Heather {Woods of Bell Trees} says

    February 5, 2014 at 10:04 PM

    What awesome ideas! I love striking chandeliers, but they’re pricey…and what do you know it’s possible to DIY some better for less! YAY! Thanks!

    • Jen says

      February 5, 2014 at 10:54 PM

      Thanks Heather!

      xoxo

  7. Krista @the happy housie says

    February 5, 2014 at 3:52 PM

    This is so pretty Jen, it makes me wish I had a little girl to decorate for…maybe I will have to add something like this to my craft room. I can’t wait to see what kinds of amazing paper designs you have come up with!!

    • Jen says

      February 5, 2014 at 10:54 PM

      Thanks my friend!!

      xoxo

  8. Brandi @ Nest of Bliss says

    February 5, 2014 at 1:57 PM

    Oh this is so pretty! Great job!

    • Jen says

      February 5, 2014 at 10:54 PM

      Thanks Brandi!!

      xoxo

  9. Molly Smith says

    February 5, 2014 at 1:09 PM

    Brilliant, Jen! You made the strings of circles so easy. Thanks for all the details and your fabulous photos. I’m looking forward to seeing (and getting) your new product line, congrats, you deserve it! :o)

    • Jen says

      February 5, 2014 at 10:53 PM

      Thanks Molly!

      xoxo

  10. Ericka s. says

    February 5, 2014 at 11:52 AM

    I’ve been itching to try one of these paper banners, can you tell me what stitch type you used?

    • Jen says

      February 5, 2014 at 10:53 PM

      Hi Ericka!

      I just used a straight stich on a long setting.

      xoxo

  11. anna says

    February 5, 2014 at 11:38 AM

    this is so cute! I need “something” extra in my girls’ room and this might just be the ticket! You always have the best ideas!

    • Jen says

      February 5, 2014 at 11:42 AM

      Oh thanks Anna!! Let me know if you make one. I would love to see it!!!

      xoxoxo

  12. MB says

    February 5, 2014 at 10:13 AM

    Its a mobile. A chandelier has a light.

    • Jen says

      February 5, 2014 at 11:39 AM

      Thanks! I guess that’s right. I think it looks more like a chandelier than a mobile. And it would be easy to drop a light kit in the middle. Of course, you would have to use LED light that wouldn’t get as hot as regular bulbs.

      xoxo

  13. Leigh Anne Wilkes @YourHomebasedMom says

    February 5, 2014 at 9:29 AM

    So fun! Love a pretty chandelier! You’ve got my mind going on redoing the one in our entry way now!

    • Jen says

      February 5, 2014 at 11:40 AM

      Thanks Leigh Anne!!! I just love a pretty chandelier. I think I have one in every room LOL.

      xoxo

  14. Gina says

    February 5, 2014 at 7:32 AM

    I LOVE it!!!! I’m already brainstorming on how to decorate the girl’s new rooms- this is definitely on my list. Super cute!

    • Jen says

      February 5, 2014 at 11:41 AM

      Thanks Gina!!

      I am so excited about your daughters rooms. I can’t wait to see what you do!

      xoxo

  15. Mique says

    February 5, 2014 at 6:57 AM

    This is adorable Jen! You are the queen of chandeliers. And I can’t wait for your line to come out!! Woohoooo! xo

    • Jen says

      February 5, 2014 at 11:42 AM

      Thanks Mique!!! I am so excited and nervous. I still can’t believe it’s happening. Love u!

      xoxo

Hi! I'm Jen Hadfield. I'm a mom of 5 restoring an 1891 home in the heart of Salt Lake City. I love being creative and sharing simple ideas to make your life easier and more beautiful!

Receive the Latest Crafts, DIY, Recipes and More in your INBOX!

Follow us on Pinterest! It's awesome!

Top Posts & Pages

Copycat Panera Spinach and Artichoke Egg Soufflés - SO good!
Spruce up Your Outdoor Space with a DIY Recirculating Fountain! (tutorial)
12 Must-Have Items to Pack on an Alaskan Cruise!
A New Deck in Under 30 Minutes!
DIY Fountains to Make Your Yard Amazing!
How to Change a Recessed Can Light into a Pendant Light with No Remodeling!


Popular Posts

  • Copycat Panera Spinach and Artichoke Egg Soufflés - SO good!
    Copycat Panera Spinach and Artichoke Egg Soufflés - SO good!
  • Spruce up Your Outdoor Space with a DIY Recirculating Fountain! (tutorial)
    Spruce up Your Outdoor Space with a DIY Recirculating Fountain! (tutorial)
  • 12 Must-Have Items to Pack on an Alaskan Cruise!
    12 Must-Have Items to Pack on an Alaskan Cruise!
  • A New Deck in Under 30 Minutes!
    A New Deck in Under 30 Minutes!
  • DIY Fountains to Make Your Yard Amazing!
    DIY Fountains to Make Your Yard Amazing!
  • How to Change a Recessed Can Light into a Pendant Light with No Remodeling!
    How to Change a Recessed Can Light into a Pendant Light with No Remodeling!
  • DIY Secret: How to Print on Post-It Notes (and Free Printable Template)
    DIY Secret: How to Print on Post-It Notes (and Free Printable Template)

As seen in


Amazon Affiliate

Tatertots & Jello is a participant in the Amazon Services LLC Associates Program, an affiliate advertising program designed to provide a means for sites to earn advertising fees by advertising and linking to amazon.com.
  • About Me
  • Advertising
  • Get Featured

Copyright © 2025 Tatertots and Jello · Privacy
This site is a place for positive discussion and ideas. Negative talk, comments that disparage others, and similar are not welcome and may be removed.