Tatertots and Jello

COLORFUL HAPPY HOME -- Daily DIY, Decor, Craft and Recipe Tutorial

  • My Home
    • 1905 Cottage
    • Daybreak House
  • DIY
    • DIY Projects and Ideas
    • Organizing
    • Tutorials
    • Printables
  • Decor
    • Spring Projects
    • Summer Projects
    • Fall Projects
  • Crafts
    • Kids Crafts
    • Painting Projects
    • Paper Projects
    • Sewing
    • Wreaths
  • Holidays
    • Valentines Day
    • Easter
    • Halloween
    • Thanksgiving
    • Christmas
    • HAPPY Holidays Series!
  • Recipes

Explore

  • my home
  • diy
  • decor
  • crafts
  • holiday
  • printables
  • recipes

Connect

Home » diy » $8 Chandelier Redo (Hannah’s Room Update)

diy, my home, tutorial · October 29, 2012

$8 Chandelier Redo (Hannah’s Room Update)

Tatertots & Jello is a participant in the Amazon Services LLC Associates Program, an affiliate advertising program designed to provide a means for sites to earn advertising fees by advertising and linking to amazon.com.

I love chandeliers. I would put them in every room in my home if I could – ha!

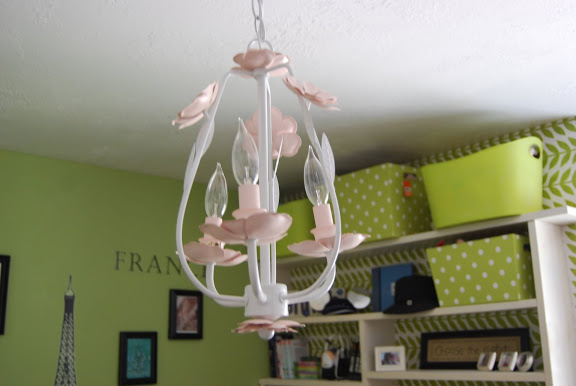
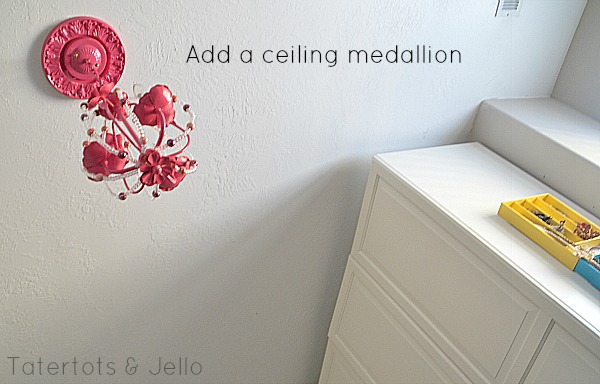
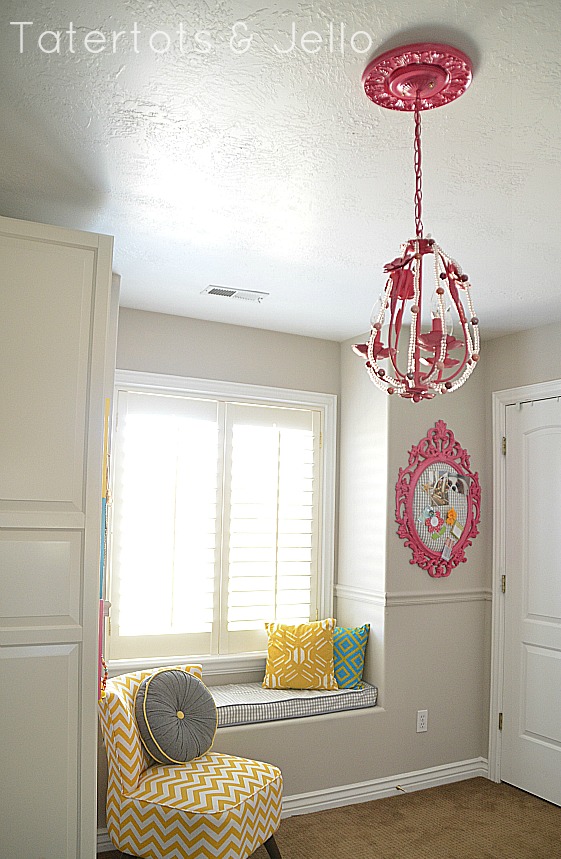
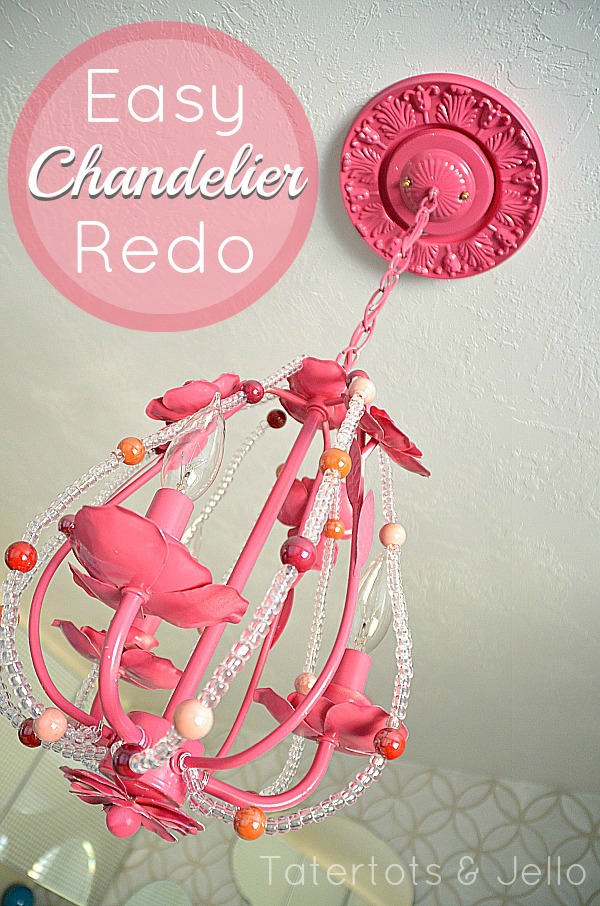
When we redid Hannah’s room 4 years ago we took out a really plain white ceiling fan and put in a really inexpensive chandelier I had bought from Target. We installed it in the ceiling and put a pretty ceiling medallion at the top.

So when we started this room update, I knew I wanted to do a little update on the chandelier.

Here are some easy tips to refinish a chandelier. Go pick one up at a big box store or a thrift store and redo one in your home.  Note – be sure to have an electrician or expert install your fixture.

  • Spray paint the chandelier. It’s so easy and fast. Prime it first and the paint will adhere better. For best results, spray on 2-3 thin coats of paint, letting the paint dry between each coat. Then attach the chandelier to the ceiling.


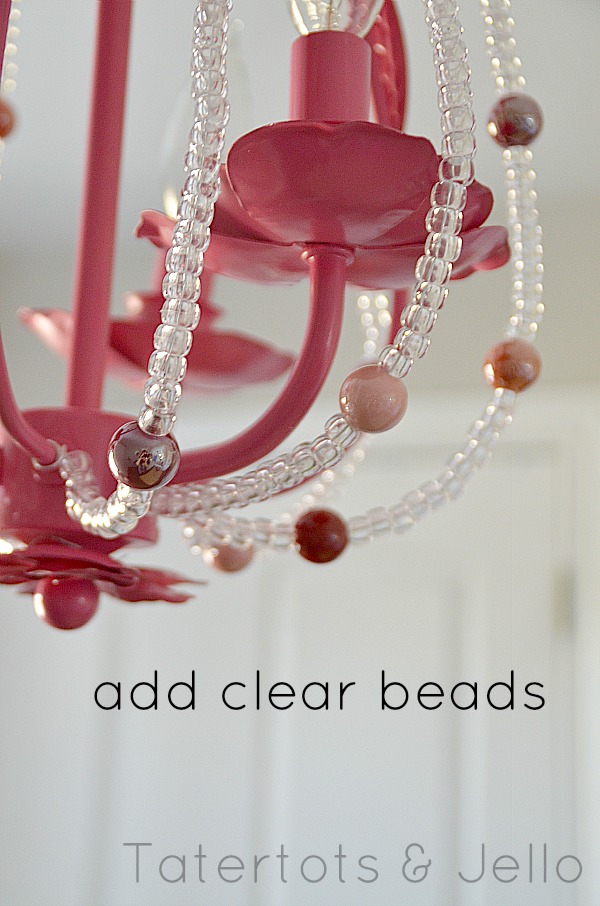
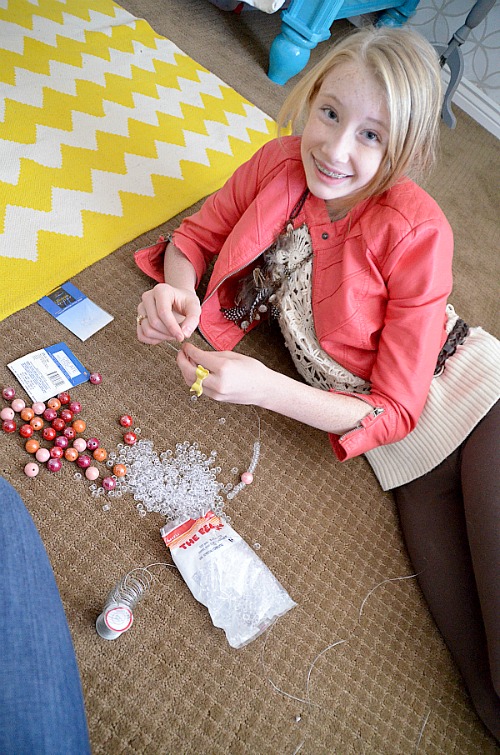
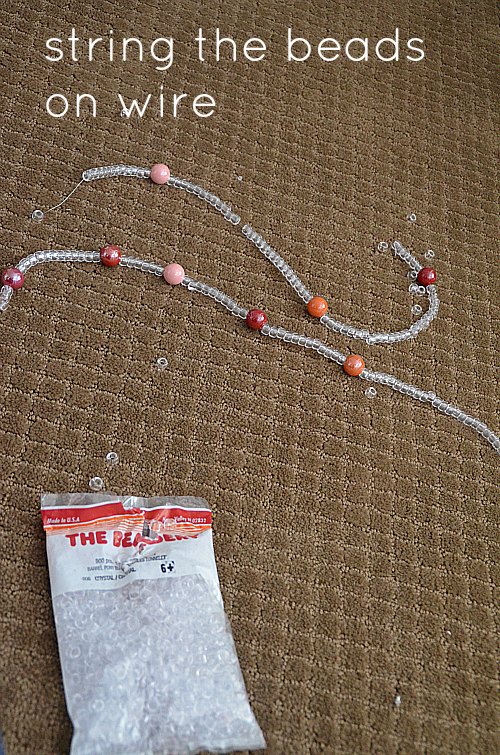
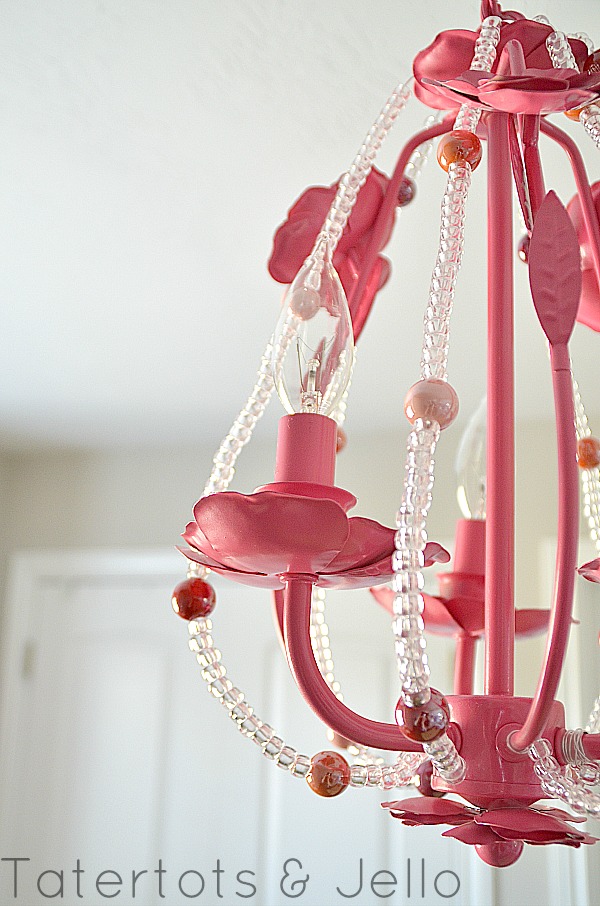
  • Then add beads. I ordered some really inexpensive clear beads from Ben Franklin online – $3. Once you get the beads up, you can’t even tell they are plastic.


  • We strung the beads on 24 gauge wire which is thin but it will hold it’s shape. (note – we started off with 26 gauge wire, but it didn’t hold its shape, so we restrung the beads on 24 gauge wire). Measure the length on your chandelier of where you want to add the beaded wire and add 4 inches at each end of the wire. We also added some colorful beads that I had in my bead stash for a little extra color.


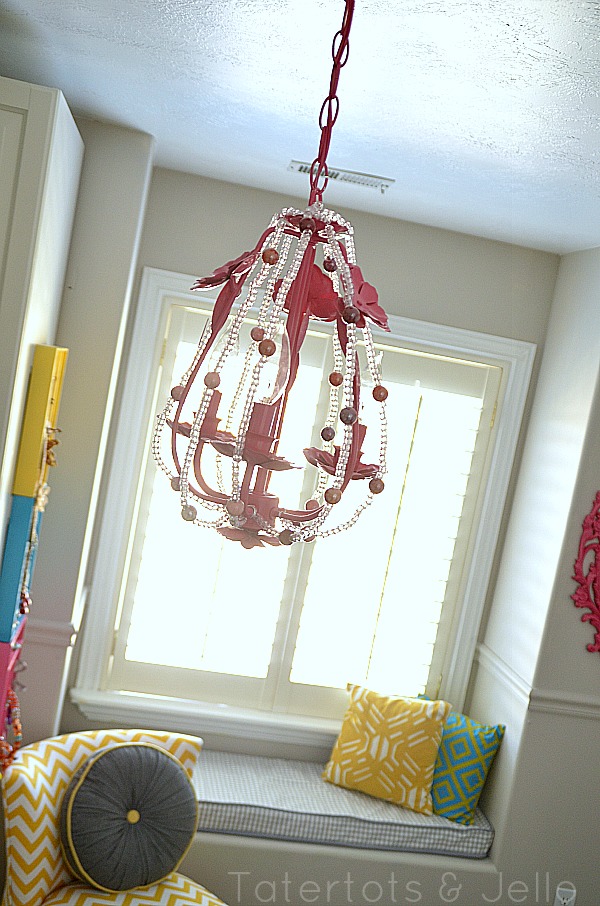
  • Hannah’s chandelier has 3 lights, and I added 6 strings of beads to the fixture. It really just depends on how you want your chandelier to look at the end.
  • Once all of the wires were strung, I attached each string to the top of the chandelier, looping the wire around a rung at the top and wrapping it around 3-4 times to keep it secure. Then I wrapped the end of the string to the base of each chandelier arm and wrapped it around the arm 3-4 times, pulling the beads taut. Once it was secure, I cut off any extra wire at the top and bottom. I did this with each of the strings.

  • After the strings were attached, I shaped each wire strand so they all matched.
  • If you don’t like the look of the metal on the chandelier. You can take your chandelier color and spray some into a plastic cup and then take a small paintbrush and paint the wires the same color as the chandelier. I might do that.

She really loves her little chandelier update and room update. Yay!

Have a Wonderful Day!!

xoxo
Posted By: Jen · In: diy, my home, tutorial

Great Ideas — 30 Before and After DIY Projects
Make a DIY Accessory Display (Hannah’s Room Update)

You’ll Also Love

Make Your Home Cozier with Boucle!
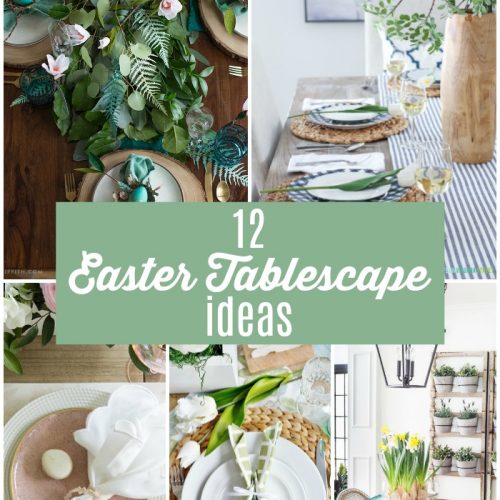
One of my favorite things about Easter is setting a beautiful table! There are so many different colors and ways you can create a gorgeous Easter tablescape. And they aren't hard! Check out these 12 Beautiful Easter Tablescape Ideas!!12 Beautiful Easter Tablescape Ideas!
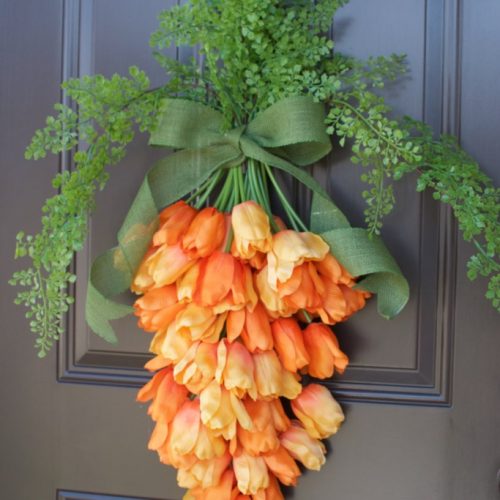
orange tulip carrot door hanging12 GORGEOUS Spring Wreath DIYs!

Comments

  1. Kelli Bonham says

    May 14, 2013 at 8:06 AM

    I just found the exact same chandelier at Goodwill for $4.99! I’m redo-ing it red for our master bedroom. I needed something sort of girl for the gray & black color scheme.

  2. Hatice Begum Be says

    March 31, 2013 at 8:57 AM

    Hi, beautiful room! I wish you would show us full shots of the whole room:) Also what color are the walls ?

  3. taximum73 says

    November 18, 2012 at 2:29 PM

    LOVE everything in the room! Can you tell us the shade of pink that you used on the chandelier?

  4. Beckie says

    October 31, 2012 at 8:14 AM

    Love how it turned out and the simple details that you added to it!

  5. theidearoom says

    October 31, 2012 at 8:11 AM

    Jen! She is so cute and I love how the beads make it just a bit more sparkly and fancy!! Love it!

  6. nest of posies says

    October 30, 2012 at 7:31 PM

    such the perfect shade of pink! and so fun that she got to string the beads! she’ll never forget that, Jen. great project to do together.

  7. Capturing Joy with Kristen Duke Photography says

    October 29, 2012 at 11:18 PM

    The medallion on top gives it that nice extra touch! I just got a chandelier from someone, to fix up my girls room.

    • Jen says

      October 30, 2012 at 1:55 AM

      Thanks Kristen!!

      Yay – I am so excited to see what you do with your chandelier!!

      xxoxo

  8. Leslie Stewart says

    October 29, 2012 at 6:57 PM

    So cute! I love it!
    Leslie

    • Jen says

      October 30, 2012 at 1:56 AM

      Thanks so much Leslie!

      xoxoxo

  9. Bethany Lee (@PitterAndGlink) says

    October 29, 2012 at 2:42 PM

    Love it!

    • Jen says

      October 30, 2012 at 1:56 AM

      Thanks Bethany!!

      xoxox

  10. Caroline @ The Feminist Housewife says

    October 29, 2012 at 1:53 PM

    How ridiculously cute! Can’t believe how awesome it looks!

    • Jen says

      October 30, 2012 at 1:56 AM

      Thanks so much Caroline! Thanks for taking the time to comment. I appreciate it!!

      xoxoxox

  11. Melissa K. says

    October 29, 2012 at 12:53 PM

    If our fans weren’t essential in the top floor of our house, our girls would have a chandelier like this in their room! Very pretty!

    • Jen says

      October 30, 2012 at 1:57 AM

      I know! We have a fan in our room that is so nice in the summer. I want to put a chandelier in our room but we love having the fan too. Thanks for the comment Melissa. Have a wonderful day!!

      xoxo

  12. MiMi says

    October 29, 2012 at 11:45 AM

    Wow, that’s so simple and adorable!!

    • Jen says

      October 30, 2012 at 1:58 AM

      Thanks my friend!!! Love ya!

      xoxox

  13. Melissa Mondragon says

    October 29, 2012 at 11:20 AM

    Super cute! Those little beads are too cute! Great job you two:0)

    • Jen says

      October 30, 2012 at 1:58 AM

      Thanks Melissa!! We had such a fun time making it together 🙂

      xxoxo

  14. Jen says

    October 29, 2012 at 11:14 AM

    That turned out gorgeous!! I love chandeliers, I think I’m going to put one in the nursery I get to work on soon!!

    • Jen says

      October 30, 2012 at 1:59 AM

      Thanks Jen!! I am excited to see the nursery you are working on!!

      xox

  15. Su@TheIntentionalHome says

    October 29, 2012 at 11:07 AM

    I love chandeliers too. Got one in my dining room, one in my breakfast room, and I just picked one up at a yard sale to put in my foyer. My hubby asked, isn’t this a little too much? Oh, I do not think so. They make me smile. I redid an old 1980s brass chandelier for my breakfast room. . all in rainbow colors. . you can check it out here if interested: http://www.susoutter.com/2011/08/my-colorful-gypsy-chandelier.html

  16. the36thavenue says

    October 29, 2012 at 10:33 AM

    So cute Jen! I love it 🙂

    • Jen says

      October 30, 2012 at 2:00 AM

      Thanks my friend!! I adored your girls’ room you just did. Such a happy space!!

      xoxox

  17. Shanna Gilbert says

    October 29, 2012 at 9:12 AM

    So cute! You did a great job!

    • Jen says

      October 30, 2012 at 2:00 AM

      Thanks Shanna!! It was a fun project 🙂

      xoxxo

  18. Amanda @ Serenity Now says

    October 29, 2012 at 8:01 AM

    Oh, Jen, it looks so pretty!! Love that shade of pink.

    • Jen says

      October 30, 2012 at 2:01 AM

      Thanks Amanda!! I love that shade of pink too – it’s so bright and happy!! Thanks for the comment my friend!!

      xox

  19. Sydney says

    October 29, 2012 at 5:36 AM

    How fun, and Hannah is such a pretty girl!!

    • Jen says

      October 30, 2012 at 2:01 AM

      Aw thanks Sydney!! She is a sweet girl 🙂

      xoxox

  20. Anja says

    October 29, 2012 at 5:01 AM

    Cute! I’m with you, I would put chandeliers in every room, too! They are just so pretty =) Maybe I must make my own one using your ideas now.

    • Jen says

      October 30, 2012 at 2:02 AM

      I know!! I love them so much. They add such a pretty touch to a room 🙂

      xoxox

  21. Amy says

    October 29, 2012 at 4:50 AM

    So cute!!

Hi! I'm Jen Hadfield. I'm a mom of 5 restoring an 1891 home in the heart of Salt Lake City. I love being creative and sharing simple ideas to make your life easier and more beautiful!

Receive the Latest Crafts, DIY, Recipes and More in your INBOX!

Follow us on Pinterest! It's awesome!

Top Posts & Pages

Spruce up Your Outdoor Space with a DIY Recirculating Fountain! (tutorial)
A New Deck in Under 30 Minutes!
Copycat Panera Spinach and Artichoke Egg Soufflés - SO good!
12 Must-Have Items to Pack on an Alaskan Cruise!
DIY Secret: How to Print on Post-It Notes (and Free Printable Template)
Mother's Day Cup Holder Gift Basket


Popular Posts

  • Spruce up Your Outdoor Space with a DIY Recirculating Fountain! (tutorial)
    Spruce up Your Outdoor Space with a DIY Recirculating Fountain! (tutorial)
  • A New Deck in Under 30 Minutes!
    A New Deck in Under 30 Minutes!
  • Copycat Panera Spinach and Artichoke Egg Soufflés - SO good!
    Copycat Panera Spinach and Artichoke Egg Soufflés - SO good!
  • 12 Must-Have Items to Pack on an Alaskan Cruise!
    12 Must-Have Items to Pack on an Alaskan Cruise!
  • DIY Secret: How to Print on Post-It Notes (and Free Printable Template)
    DIY Secret: How to Print on Post-It Notes (and Free Printable Template)
  • Mother's Day Cup Holder Gift Basket
    Mother's Day Cup Holder Gift Basket
  • The BEST Fresh Strawberry Cream Cheese Cake Recipe!
    The BEST Fresh Strawberry Cream Cheese Cake Recipe!

As seen in


Amazon Affiliate

Tatertots & Jello is a participant in the Amazon Services LLC Associates Program, an affiliate advertising program designed to provide a means for sites to earn advertising fees by advertising and linking to amazon.com.
  • About Me
  • Advertising
  • Get Featured

Copyright © 2025 Tatertots and Jello · Privacy
This site is a place for positive discussion and ideas. Negative talk, comments that disparage others, and similar are not welcome and may be removed.