Tatertots and Jello

COLORFUL HAPPY HOME -- Daily DIY, Decor, Craft and Recipe Tutorial

  • My Home
    • 1905 Cottage
    • Daybreak House
  • DIY
    • DIY Projects and Ideas
    • Organizing
    • Tutorials
    • Printables
  • Decor
    • Spring Projects
    • Summer Projects
    • Fall Projects
  • Crafts
    • Kids Crafts
    • Painting Projects
    • Paper Projects
    • Sewing
    • Wreaths
  • Holidays
    • Valentines Day
    • Easter
    • Halloween
    • Thanksgiving
    • Christmas
    • HAPPY Holidays Series!
  • Recipes

Explore

  • my home
  • diy
  • decor
  • crafts
  • holiday
  • printables
  • recipes

Connect

Home » diy » Make Halloween Ruffle Trees (tutorial)

diy, halloween, holiday, tutorial · September 18, 2012

Make Halloween Ruffle Trees (tutorial)

Tatertots & Jello is a participant in the Amazon Services LLC Associates Program, an affiliate advertising program designed to provide a means for sites to earn advertising fees by advertising and linking to amazon.com.
5
5Shares

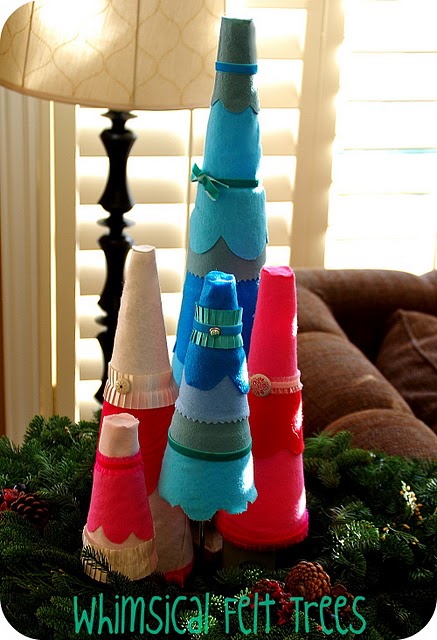
I made some Christmas Ruffle Trees a couple years ago and ever since then I have been wanting to make some Halloween Ruffle Trees.

I decided that this is the year. And they were so fast and FUN to make!!

(felt Christmas Tree tutorial)

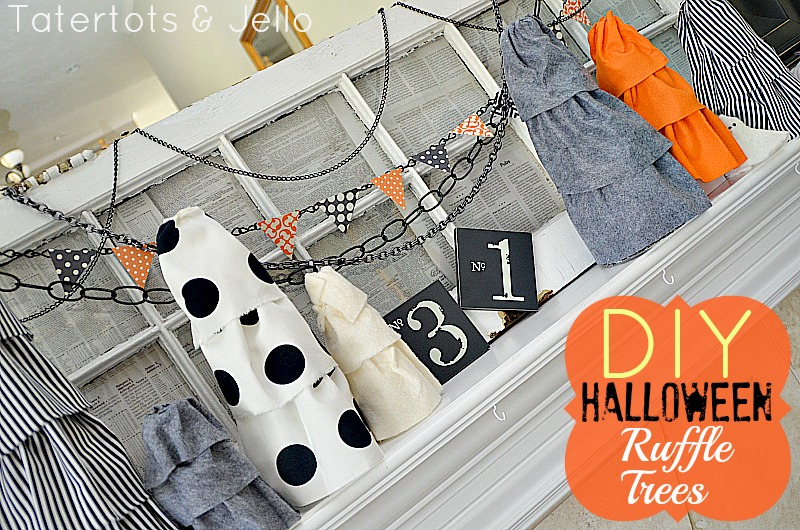
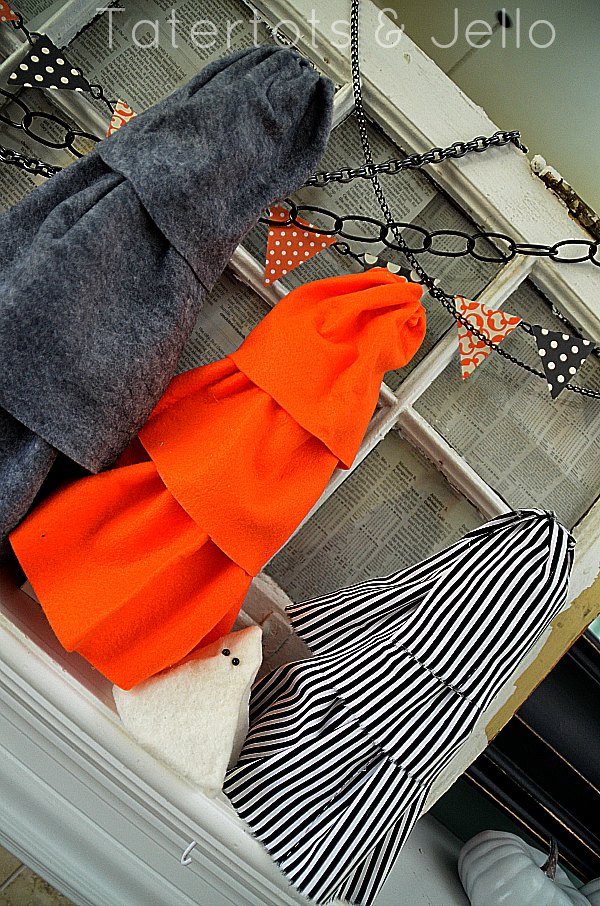
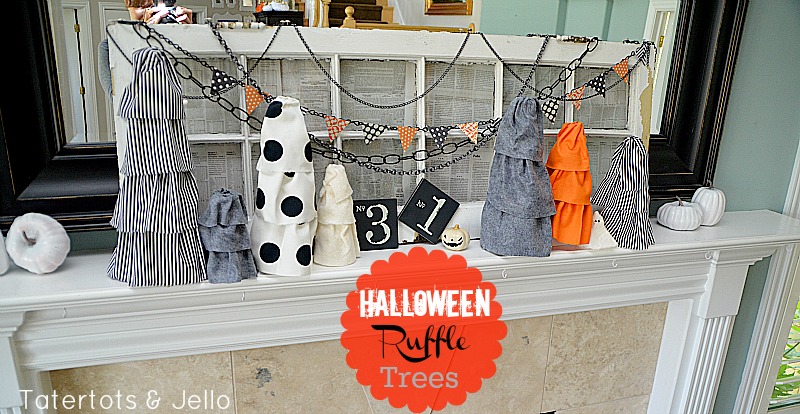
Such a fun way to bring some Whimsical Halloween Color to your decor this year!

And, they are super easy to make too!!

Plus, they are no-sew. All you need is a glue gun. Yay!! (what would I ever do without my trusty glue gun???)

Here’s how to make the Ruffle Trees:

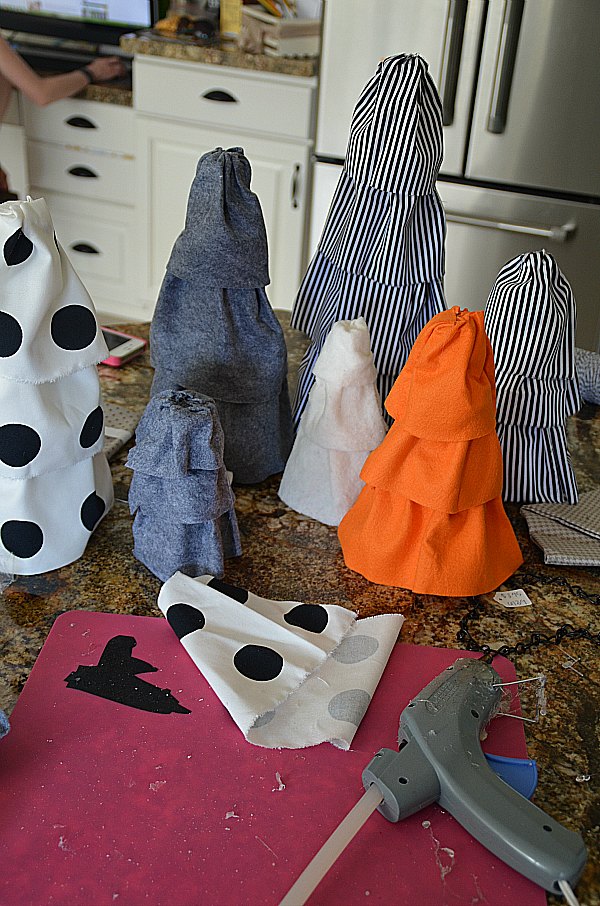
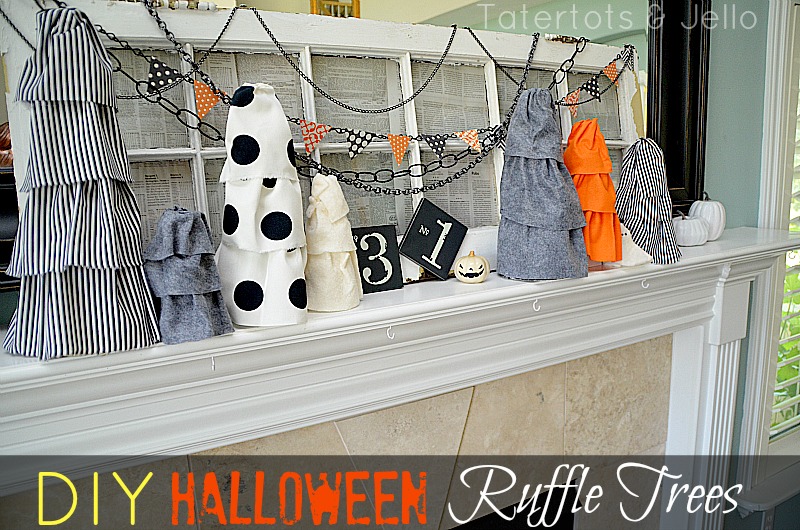
  • Take Styrofoam trees. I used four different sizes.
  • Then cut a strip of 4 inch wide material from felt or cotton fabric.
  • Start at the bottom and wrap the material around the bottom of the tree form. You can either sew a big stitch at the top of the material with your sewing machine, or I just added some gathers as I glued the material onto the bottom of the tree form.
  • Once I got to the back of the wreath form, I cut the material.
  • Then I added another layer of material over the first layer, covering the top of the first layer. I also added gathers as I glued the second layer on.
  • When I reached the top of the tree form, I made sure there was about a 1″ amount of material at the top. After that layer was glued on I put some hot glue at the top and then folded the material over the hot glue to cover the top of the tree.
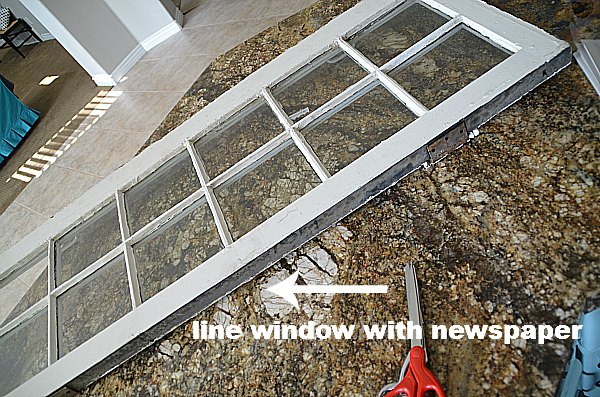
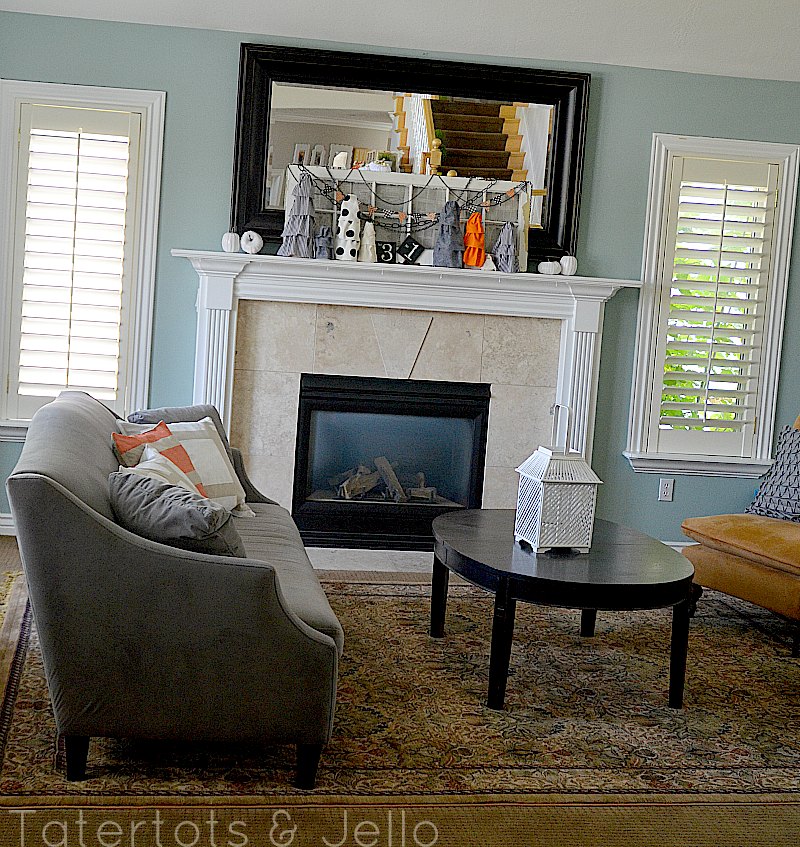
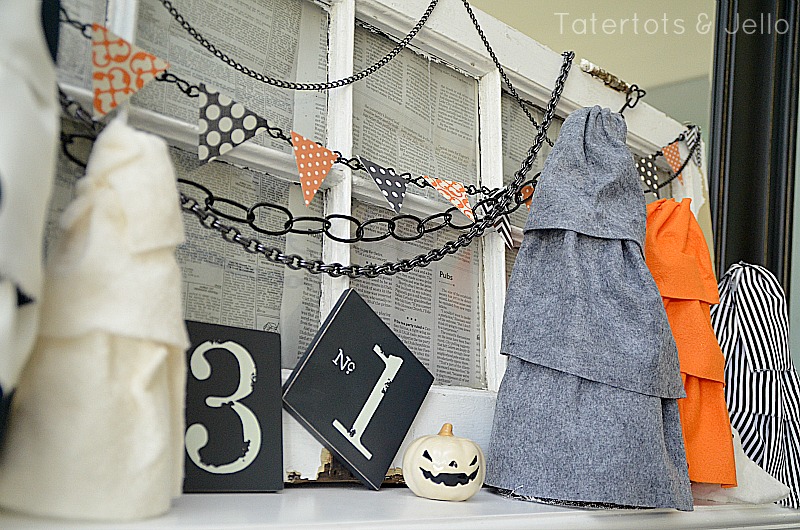
  • After the trees were completed, I took an old window and lined it with some newspaper.
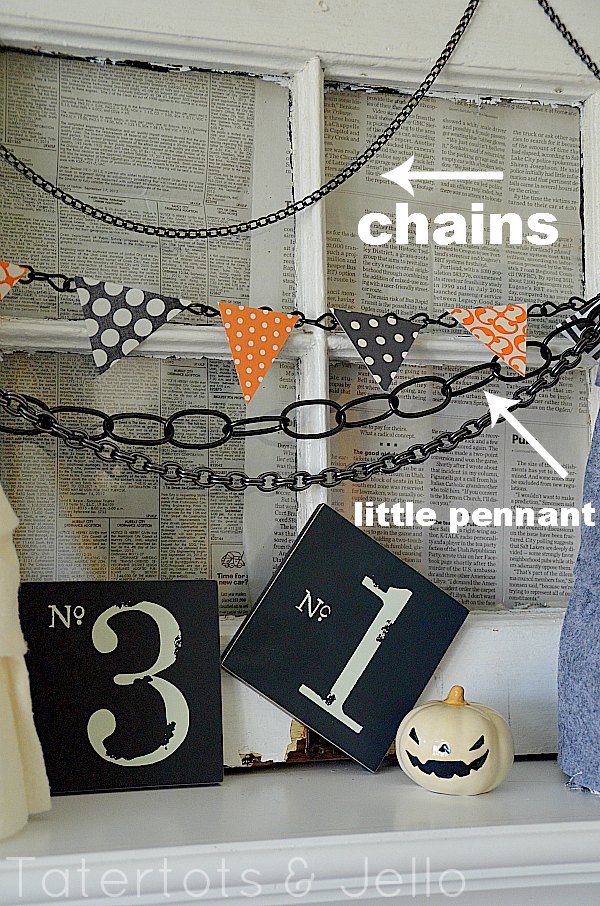
  • Then I put it on my mantel and layered a paper pennant I made using some left-over scrapbook paper. I just glued the pennants onto the chain.
  • I attached the different chains to the window using some tacks.
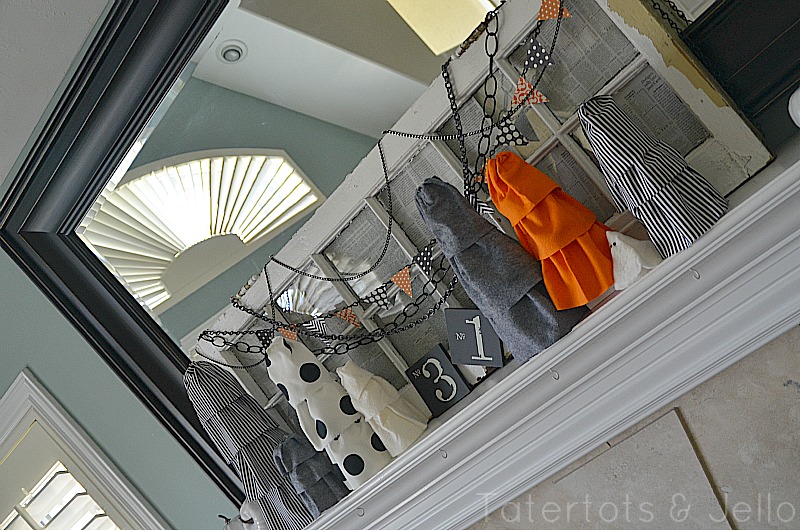
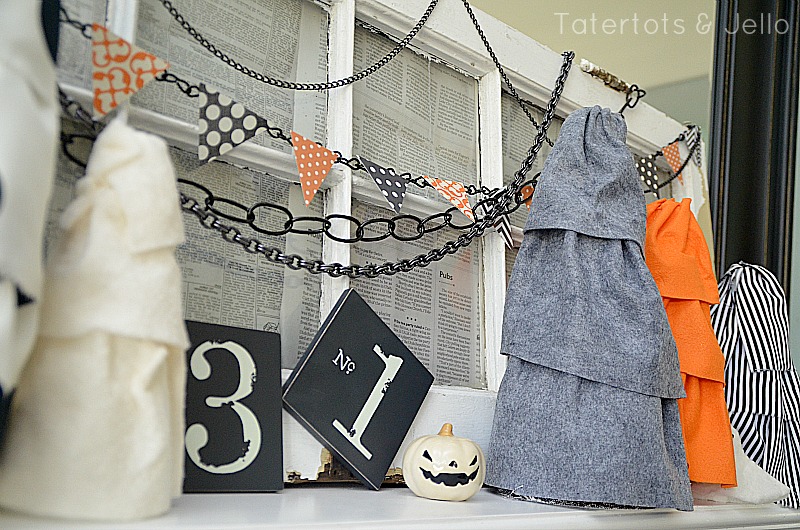
  • And then I layered the felt Halloween trees onto the mantel.

I love these little trees!!

Thanks for stopping by – have a wonderful day!!

xoxo
5
5Shares

Posted By: Jen · In: diy, halloween, holiday, tutorial

Halloween Felt Ghost Wreath and Printable Scallop Template
Great Ideas — 20 Home DIY Projects to Make NOW!

You’ll Also Love

15 Spooky Halloween Sweets!
Easy Black and White Stacked Halloween Topiary!
Good Witch Tea Party Ideas{Good} Witch Tea Party!! [and free Halloween Printables]

Comments

  1. Dianne says

    August 23, 2013 at 7:12 PM

    I visited many sites however the audio quality for audio songs
    present at this site is truly superb.

  2. Jen @ Eat. Sleep. MAKE. says

    October 6, 2012 at 12:01 PM

    Such a cute idea! Never thought to make trees to decorate for Halloween, love it!

  3. Michelle says

    September 20, 2012 at 11:25 PM

    I love the idea of using the chain and of course the trees are so cute!! I will have to try this one, thanks for sharing!!

  4. dottaandbeambeam says

    September 20, 2012 at 2:12 PM

    Love it so much! 🙂

    • Jen says

      September 20, 2012 at 9:17 PM

      Thanks so much!!

      xoxox

  5. nest of posies says

    September 20, 2012 at 9:39 AM

    love it Jen! all of it. those chains are such a clever idea & i love how the trees add a pop of color!

    xoxo
    kellie

  6. Angie says

    September 19, 2012 at 5:49 PM

    These are so cute! I might just have to make one or two to go with my felt trees.

  7. Amy at The Red Chair Blog says

    September 18, 2012 at 8:47 PM

    Hi Jen,

    I love your ruffle trees. And leave it to you to make newpaper-backed salvaged windows look so chic! You’ve got such a great eye and such creative talent!

  8. Mique says

    September 18, 2012 at 4:08 PM

    Jen- I want to live in your house someday. You make holidays so much fun! I love these trees and the directions. xoxo

    • Jen says

      September 18, 2012 at 5:32 PM

      Thanks Mique!! I want to live at your house. I loved that picture you posted on Instagram of your kids playing ball in the house – you are such a fun mom!!

      xoxo

  9. Sharon says

    September 18, 2012 at 12:37 PM

    What an easy way to add a little Halloween fun to your mantel! I’ll be sharing this one for sure!

    • Jen says

      September 18, 2012 at 10:45 PM

      Thanks Sharon!! I thought it might be fun to make some for Valentine’s Day too 🙂

      xoxox

  10. Emily Hill (@emihill) says

    September 18, 2012 at 11:19 AM

    Don’t be surprised if someone is missing a mantle display. (Just don’t come looking at my house…)

  11. Tausha says

    September 18, 2012 at 10:48 AM

    Love the window and the darling chain idea! It ads so much fun texture to the space! you rock!

  12. vintagerevivals says

    September 18, 2012 at 10:28 AM

    Cute Jen!! I love all of your awesome halloween ideas!

  13. crapivemadeChar says

    September 18, 2012 at 10:27 AM

    Jen, I’m loving your mantel! The chains and the tiny pennant are my fave!

  14. Tauni says

    September 18, 2012 at 10:26 AM

    Jen, I love your Halloween silhouette – the trees and such a fun element. I don’t know that I would have thought to do the trees for Halloween. They turned out so cute!
    xoxo

Hi! I'm Jen Hadfield. I'm a mom of 5 restoring an 1891 home in the heart of Salt Lake City. I love being creative and sharing simple ideas to make your life easier and more beautiful!

Receive the Latest Crafts, DIY, Recipes and More in your INBOX!

Follow us on Pinterest! It's awesome!

Top Posts & Pages

Spruce up Your Outdoor Space with a DIY Recirculating Fountain! (tutorial)
A New Deck in Under 30 Minutes!
DIY Secret: How to Print on Post-It Notes (and Free Printable Template)
12 Must-Have Items to Pack on an Alaskan Cruise!
Copycat Panera Spinach and Artichoke Egg Soufflés - SO good!
How to Change a Recessed Can Light into a Pendant Light with No Remodeling!


Popular Posts

  • Spruce up Your Outdoor Space with a DIY Recirculating Fountain! (tutorial)
    Spruce up Your Outdoor Space with a DIY Recirculating Fountain! (tutorial)
  • A New Deck in Under 30 Minutes!
    A New Deck in Under 30 Minutes!
  • DIY Secret: How to Print on Post-It Notes (and Free Printable Template)
    DIY Secret: How to Print on Post-It Notes (and Free Printable Template)
  • 12 Must-Have Items to Pack on an Alaskan Cruise!
    12 Must-Have Items to Pack on an Alaskan Cruise!
  • Copycat Panera Spinach and Artichoke Egg Soufflés - SO good!
    Copycat Panera Spinach and Artichoke Egg Soufflés - SO good!
  • How to Change a Recessed Can Light into a Pendant Light with No Remodeling!
    How to Change a Recessed Can Light into a Pendant Light with No Remodeling!
  • Mother's Day Cup Holder Gift Basket
    Mother's Day Cup Holder Gift Basket

As seen in


Amazon Affiliate

Tatertots & Jello is a participant in the Amazon Services LLC Associates Program, an affiliate advertising program designed to provide a means for sites to earn advertising fees by advertising and linking to amazon.com.
  • About Me
  • Advertising
  • Get Featured

Copyright © 2025 Tatertots and Jello · Privacy
This site is a place for positive discussion and ideas. Negative talk, comments that disparage others, and similar are not welcome and may be removed.

5