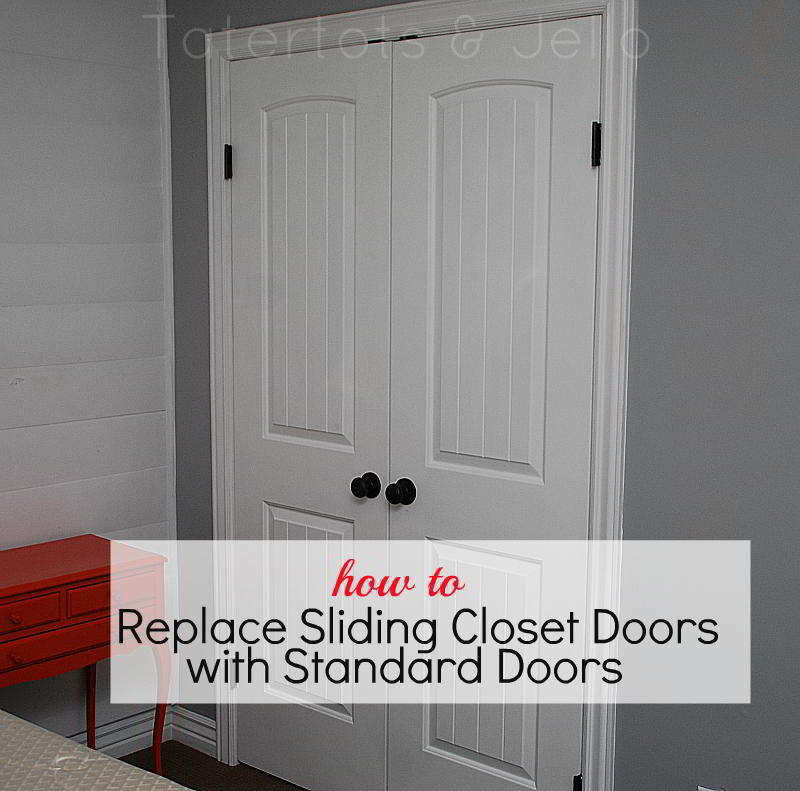
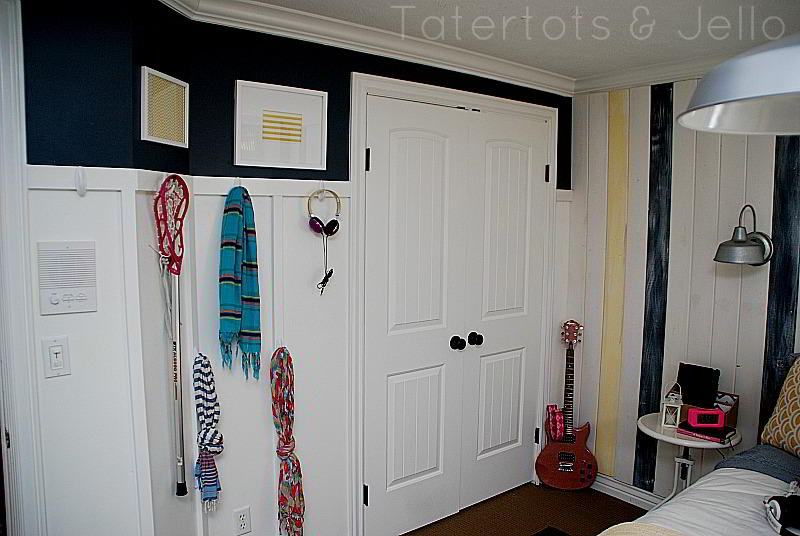
In my last two room makeovers, one of the biggest and most dramatic changes I’ve made is to replace the old sliding closet doors with regular hinged doors.
The old doors weren’t horrible doors — at least they had a colonial look. But sliding doors are a little awkward to use and mine kept coming off the tracks. I love closet doors that open wide, it’s so easy to see what’s inside. Plus, if you need to keep something large like a desk or something wide, it’s a much more efficient use of space.
{Hayley’s Nautical Bedroom Redo}
In my basement, the original home owners added sliding doors because they were cheaper than traditional ones. But I have found that my daughter is able to use her closet much more efficiently now that her closet doors both open. And, I’m right in the middle of a BIG guest room remodel and I decided to do the same thing in there.
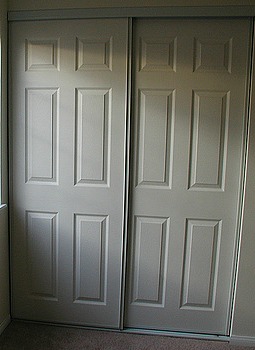
(an example of sliding doors, not my exact doors. I couldn’t find a before of the doors)
I searched the Internet for any helpful tips about this, and came up with nothing. So instead, I consulted my handy father-in-law, who, once I’d consulted him, consented to make it happen.
So, here’s how YOU can do the same thing!
It’s not very hard, but it will take some patience and power tools.
Here’s what you’ll need to buy/use:
- Hammer
- Chisel
- Drill/power drill, various bits
- Screwdriver
- Hinges (2 per door, 4 total)
- Ball Catch (1 per door, 2 total) (this is the little spring-loaded ball thing at the top of the door that holds it closed, like this one from Lowe’s)
- Dummy doorknob (1 per door, 2 total) (this is a door knob that just fits on the outside of the door; it doesn’t actually turn. Like this one.)
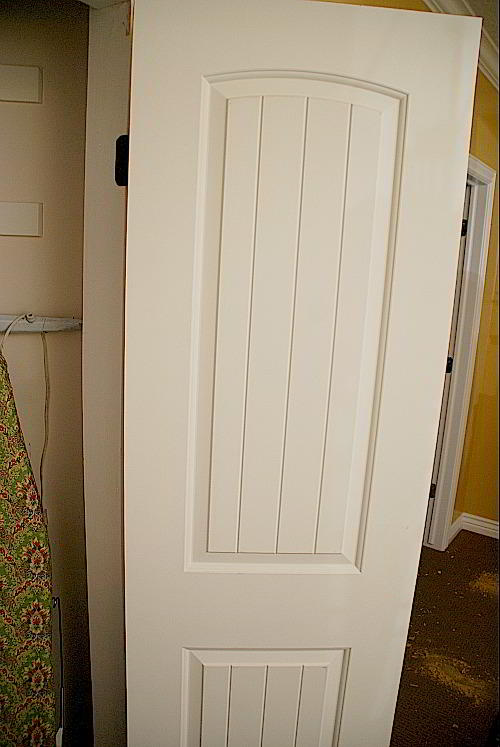
- Slab doors (not pre-hung — I used these from Lowe’s.)
- A butt marker to mark where you’ll want the hinges. Yes, it’s called a butt marker. (Make sure you buy the right size to match your hinges — 3 1/2″ or 4″.)
I can’t cover every detail, but I can outline what I did and provide a few tips.
0. Before you start, make sure your door frame is square or close to it. If it’s wildly off from square, it might be more pain than it’s worth to try this project. Go buy some shoes instead.
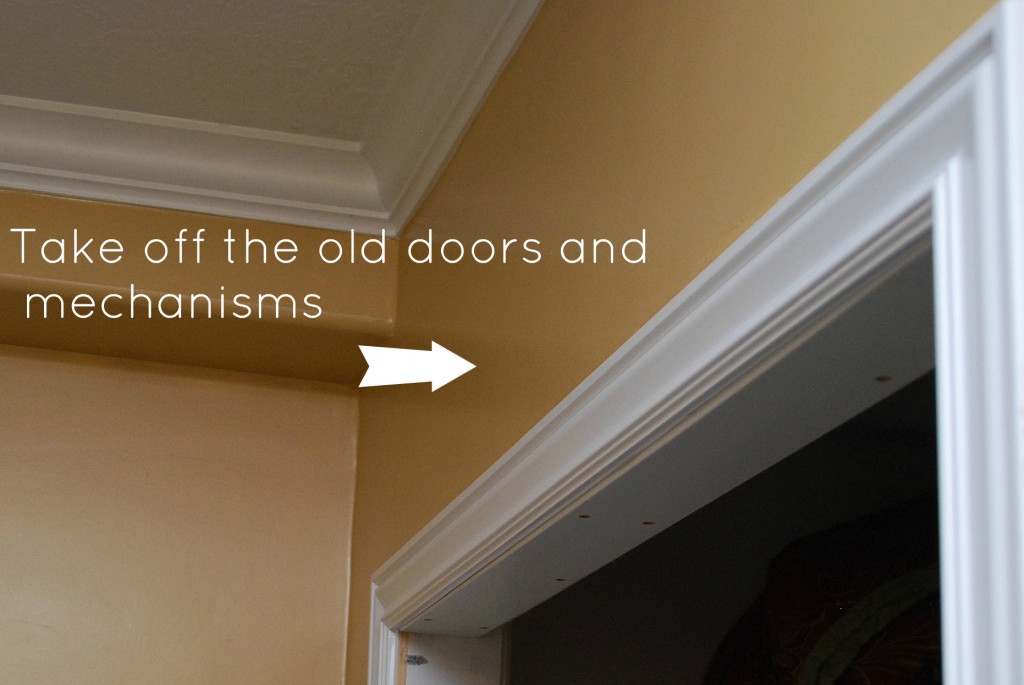
1. remove the old doors and the old closet track and any extra molding inside the door frame
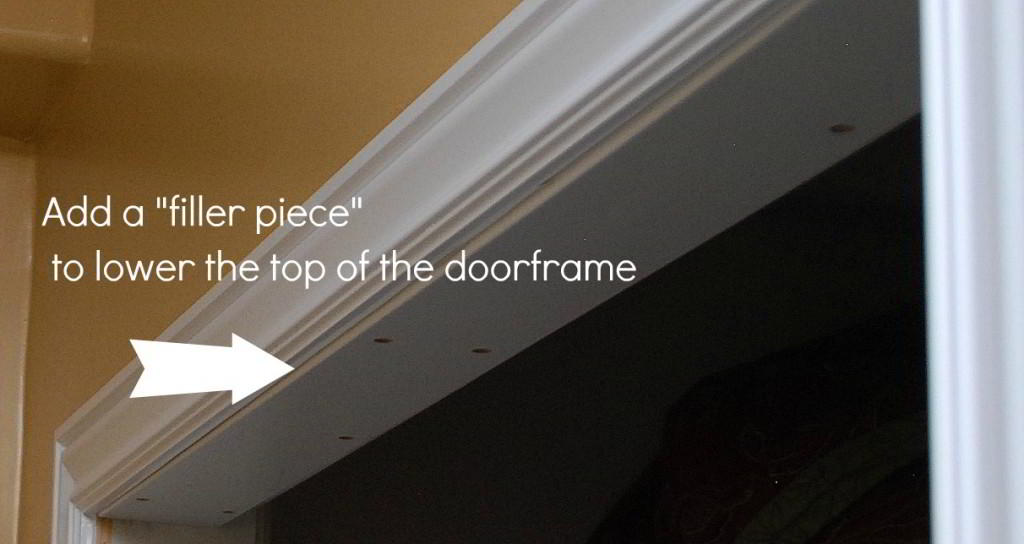
1a. prep the top of the door to accommodate the new doors. Once I took out the old molding, I had to put in a “filler piece” to lower the top of the doorframe to be level with the door molding at the top. I used a thin piece of 1×4, cut to fit the door and screwed into the top of the door frame. I then put a small 1/2″ x 1″ stop to keep the doors from swinging into the closet. I did mine the entire length of the door, but you could do yours only a few inches in the center if you prefer.
2. measure the opening and make sure you have the right size “normal” doors, trimming them as necessary
I had to trim both doors by 5/8″ on each long side with a table saw
3. Mark where you’re going to put the hinges on the doors with a pencil (you can use another door in the room as a model), and then mark where you’re going to put the hinges on the doorframes with the butt marker and a hammer. Important: leave 1/8″ or so clearance at the top of the frame so you can put in the ball catch (below)
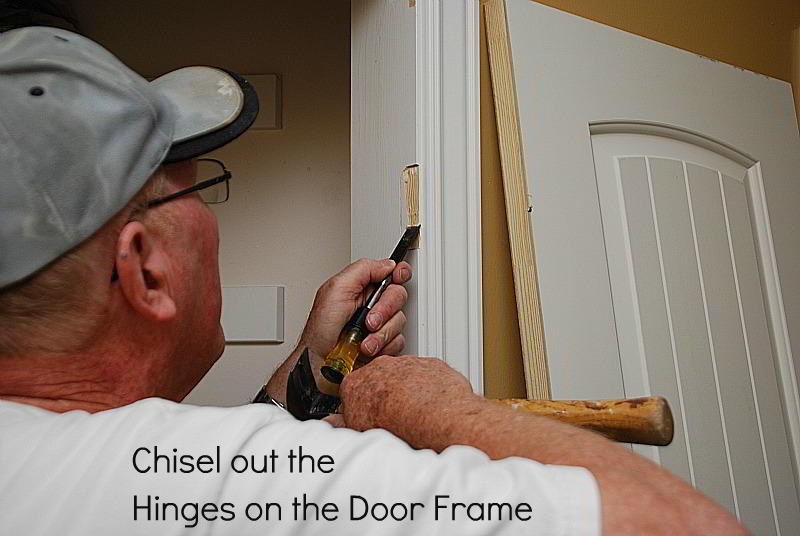
4. With the hammer and chisel (and maybe a utility knife), carefully hollow out hinge cutouts on the door frame
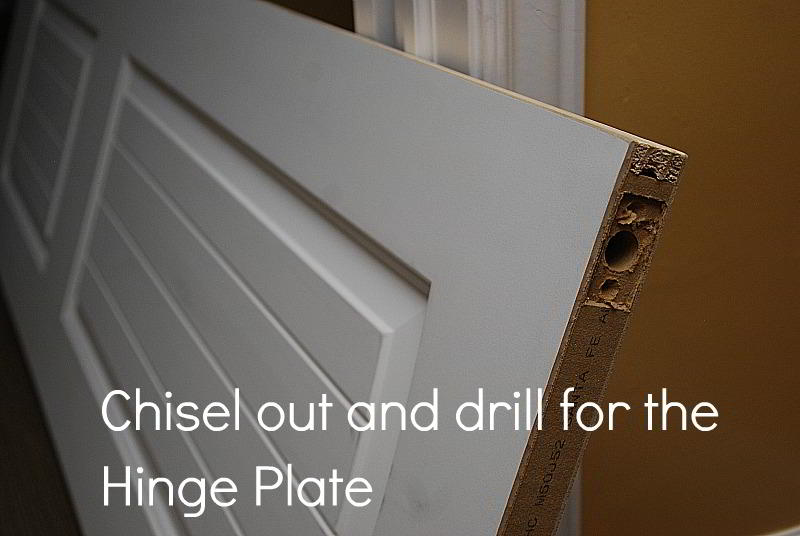
5. Mark where you’re going to put the ball catches on the top of each door (remember the catches will be in the middle, so treat the doors as a left-hand and right-hand doors), and chisel a shallow, rectangular space on the top of each door accordingly so the plate will sit flush. Using the appropriately-sized drill bit, drill a hole to accommodate the tube of the ball catch.
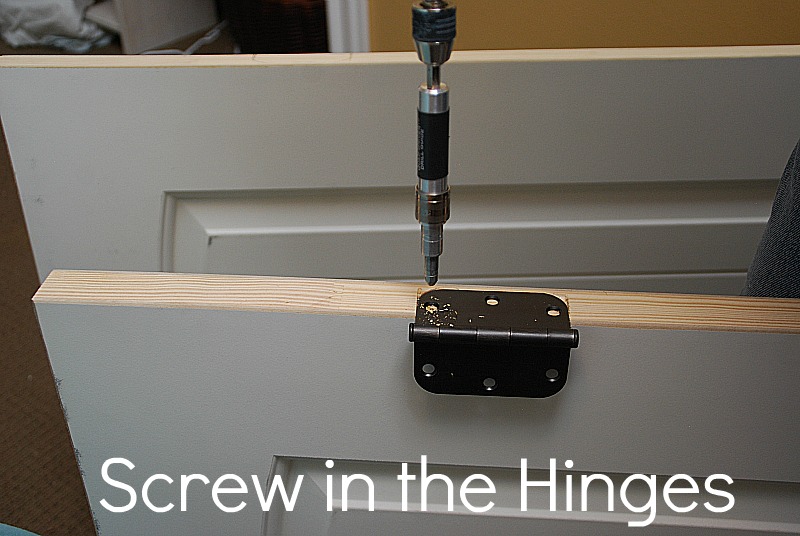
6. Attach the hinges to the doors and then hang the doors on the frames.
*here’s where it gets tricky. You may have to adjust the doors up or down a bit so they are the same height — so put the screws in the hinges loosely to start.
*when you’re all done, you can adjust the doors to hang straight in two ways:
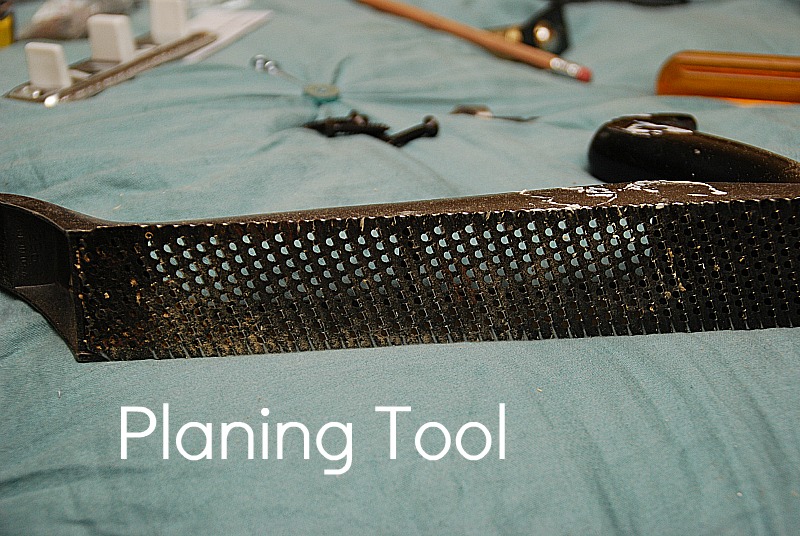
1. planing the doors to keep them from dragging, or
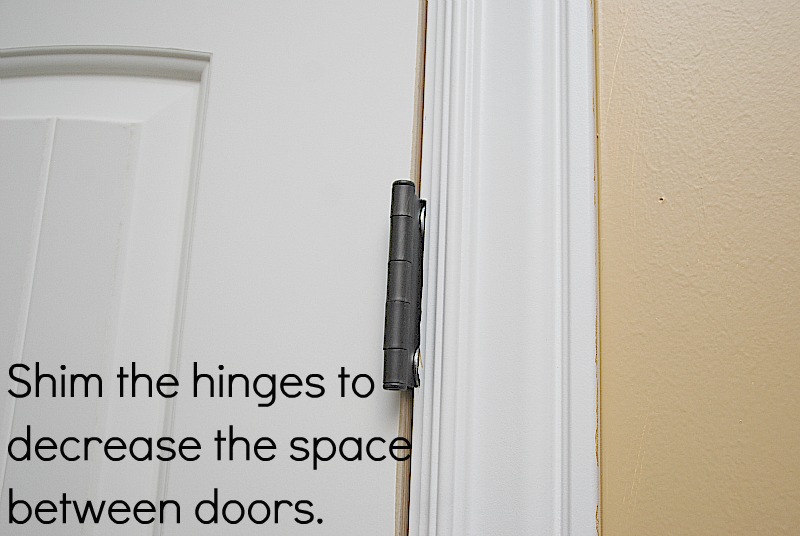
2. using thin shims behind the hinges. For example, if there’s too much space between the doors at the bottom, you can shim either or both of the bottom hinges by putting thin shims (thin pieces of wood) behind the doorframe side of the hinge. We used some leftover washers instead of shims.
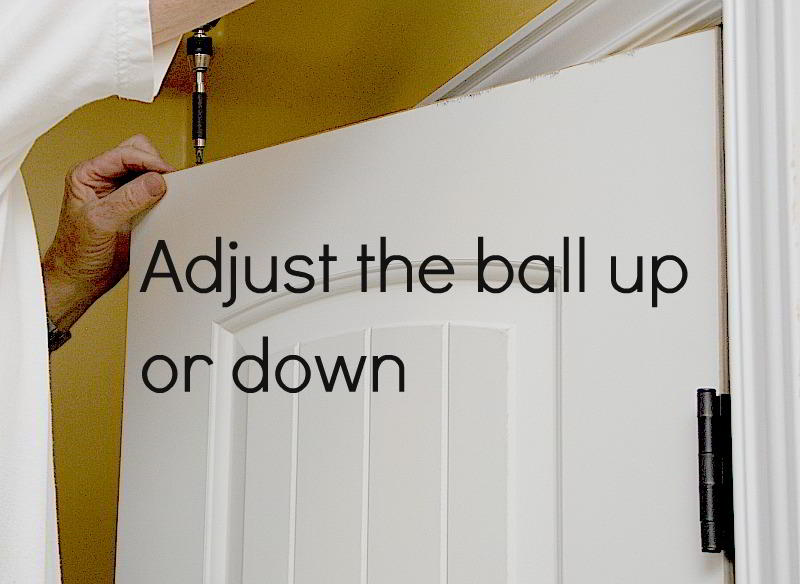
7. Mark where the ball catch plate will go on the top of the doorframe, and then whip out that chisel again so the plate will sit flush at the top of the doorframe. Install it and cross your fingers. If the ball catch doesn’t stay caught, open the door and adjust the ball catch up or down. The cylinder in the ball catch is adjustable either up or down so you can get the tension just right. (All the ones I’ve used I can adjust with a coin while they’re installed in the door.)
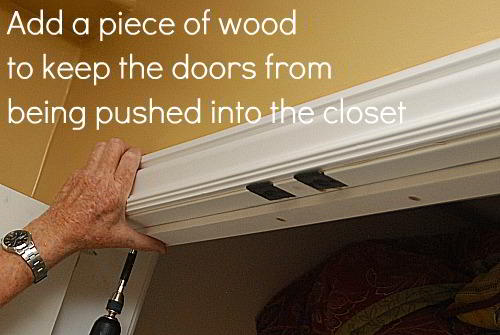
8. Then install a piece of wood across the back of the closet opening to keep the doors from being pushed inwards. This keeps the doors straight.
9. Now you can paint the doors a nicer color than the default primer. In our experience, the doors will suck up the paint even if they’re pre-primed, so plan on a couple of coats.
10. Mark the location of and install your dummy doorknobs so they’ll hang evenly once you’ve got your doors hung and balanced the way you like them.
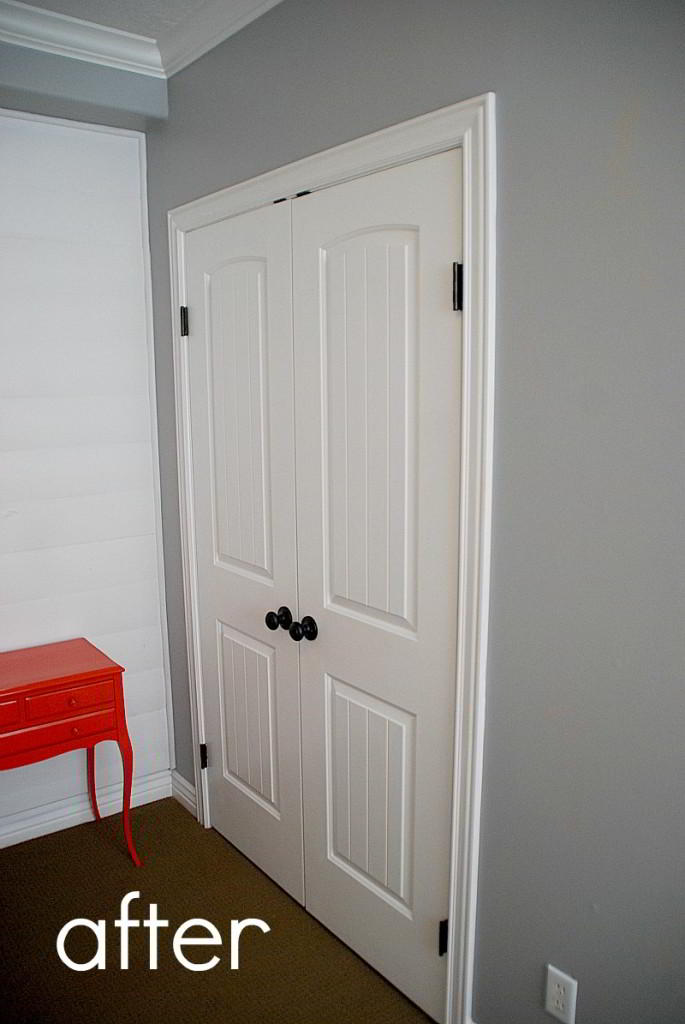
I love the look of the new doors.
And I am almost done with the guest room!!
I am SO excited to share it with you soon!!
Have a Beautiful Day!!!
xox






Thanks Jen, straightforward and quite useful. I’m in the final phase. Doing ball catches tomorrow. I would maybe add a section about trimming the doors to this wonderful blog. Seems like a lot of us had to. And it’s tricky. Painters tape on the cut line to stop splintering; letting people know there’s an inch of solid wood that is trimmable. But people will need to learn how to plug the hollow opening if bigger than that. Also, I ran into uneven cutting when we trimmed the bi fold doors which preceded these (I don’t advise them… They’re flimsy). So, I had to extend my table saw surface with plywood and made my own guide to cut on the outside edge of the door. (23 1/4″ cut instead of 3/4″ cut). That did the trick. It was easy to keep straight and under control with help from my wife. And with painters tape, the edges were clean. Chiselling the hinge beds is also quite tricky. But I did it. Let you know how it goes. Keep up the good work!
I LOVE LOVE LOVE you for solving this problem! There were no doors at all in this house I just bought. And a weird sized opening. This will be so classy I can’t wait to do it! Thanks for the idea and instructions
I am using my existing sliding doors, cutting them down and adding the hardware. So hoping this works like I think it will. My husband is very handy, can do just about project I come up with.
He can do just about ANY project I come up with.
How did they work out for you? I’ve been wanting to do the same thing to my daugthers room. Just didn’t know if it was possible.
What size was the opening of you closet? I have one that is 72″, would using 2-36″ doors work with this?
Thanks
名古屋 miu miu,
全品送料無料
の《特価SALE》
ミュウミュウ miu miu 財布
miu miu 新作
ミュウミュウ miu miu
miu miu がま口
miu miu 財布 値段
Great tuitorial! Our house was built in 1977 and has all floor to ceiling sliding closet doors. When we moved here we paid for new set of rollers to make them operate efficiently. I wont to replace these closet doors with bi-fold doors, standard size to make it easier to get things in/out of closet and to see what it in there better. It will mean building a header and making a frame before any new bi-fold doors can be installed. It iwll mean a skilled carpenter, drywall man, and painter. My DH can no longer physically handle task like this. He never was good at drywall so I asked our son-in-law or a former neighbor. What would be the standard bi-fold door size that can be purchased without having to cut any off top or bottom? Do bifold doors fit into some type of track at the bottom like these existing sliding particle board doors do?
You’ll have to look at the hardware store! I haven’t used bi fold doors for a long time. I think the ones we had way back when only had top tracks, but I forget!
Bi-fold doors only have a top track. The bottom operates on a pivot only.
hi Jen,
this is beautiful! so inspiring!! 🙂
I really want replace my sliding closet doors to french doors. But the size will not match.
my closet doors width is 71″. which means 2 of 36″ doors wouldn’t fit in there. Do I have to cut a half inch of each door to make it happen?
would you give me some advice?
have a great day!!
Thanks,
Kate
Yes, that should work. I would not cut much more than 1/2″ inch off the door, and remember you’ll need to leave a bit of room so the doors will close. If you really wanted to be meticulous, you could cut 1/4″ off of each of the left and right sides on each door, but then you’d have to re-recess the hinges, which would be a big pain.
Cutting 1/2″ off of the doors is a pretty straightforward task, but be sure to use the guide on your table saw (and all appropriate safety precautions) to make sure it’s a straight cut. Since the knobs are just dummy closet knobs, you won’t have to mess with holes for them!
Good luck1
I don’t know why it would be cheaper since you use the exact same doors for both; only the hardware is different. Funny thing, I just changed out a couple of these back to bypass sliding doors! The doors kept hitting everything! I even changed my door to the backyard back to sliding glass doors! I hated the way the door was swung open to let air in. I love just sliding it open about a foot or so to let air in. That being said, these sure are pretty!
Where did you buy these doors? They would look perfect in my new country home. I need to know where! 🙂
I think I bought them at Home Depot — if not, it was Lowe’s!
smartest idea ever…i have broken every single sliding track door i owned. Am def doing this! thanks!
Hey, if you replaced the doors………how come you look like an older male?
She says in the post that her father in law helped. 🙂
Thanks for the wonderful tutorial. I am curious about the measurements. How much room to you allow where the doors meet? Thank you!
just a tiny bit — not more than 1/8.
I love your door idea were renovating our home & im definitely gone to do this. Thank you..
Love your room. You are so creative! Definitely want to try your door idea. Awesome. Thanks so much for sharing your makeover.
Would this work the same if I had closet doors that slide out? As in needing to replace the door frame and all?
I have two completely flat doors that make up my sliding door closet right now. Can I use those doors instead of buying new? You had to trim off some of the new doors you bought anyway, and I could just trim off some of the my old doors to make them fit in the space, right?
So excited if this works!
Great idea however looking at the pictures don’t the door hit the furniture on the sides? I’m afraid my kids would let the doors fly open and scratch them all up.
Hi there!!
No – you can adjust the hinges so they have enough room to swing all the way out to the wall without hitting the frame 🙂
xoxox
Thank you Jen this is wonderful. We just recently renovated our home but didn’t replace the bifolds in the front entrance because we thought it would be to difficult but after looking at your site I will definately take this challenge on.
Had someone do this in my house and the fronts of the doors hit the side jams when they open. It’s so annoying and scratches the paint. Any thoughts on how to fix this? Does anyone else have this problem?
Wow, very clever and they look gorgeous too! I have this linked to my closet doors post as well today, it’s a keeper!
looks great – thanks for sharing. What is the name of the style doors and where did you purchase them? I am looking for the exact same doors, but can’t seem to find them anywhere. Thanks!
Jen,
I love this idea and can’t wait to try it out soon with our closet doors! 🙂 We’ve already got it priced out and putting it into our to do list!
This tutorial just SAVED me! I am pregnant and due in September. We have to fit a dresser inside the closet and have sliding doors that are not wide enough for us to have access to opening the drawers. I am looking for closet doors and could find ones I liked for a price that makes sense and I am SO GLAD I saw this and theres a link to where you purchased the doors. CANNOT SAY THANK YOU ENOUGH!!!!
I cant find the exact style of these doors… help! =(
This style of door is called Santa-Fe. A similar style with no arch would be called Corvado. The names of the styles can vary from manufacturer to manufacturer.
Some people might be interested to know that there is another type of ball catch sold that doesn’t have a mortised boarder. They are called drive in ball catches and all you need to do is drill a hole for them and pound them in with a hammer and piece of scrap wood. It saves a lot of time and fuss that is involved with chiselling and drilling holes for the ball catch. Word of warning, hammering the ball catches in the wrong way can split your door.
I love this. I want to do this in my sons room! Opening doors are so much easier than sliding doors.
Love this tutorial! This is something we have been wanting to do to help transform our pantry!
I have the same doors and just the other night was trying to dream up a way to have them open, THANK YOU!! I think I can use the existing doors, awhile back my husband cut our laundry room door down the center to make it a bi-fold. The washer kept creeping out of place and blocking the door. He had to put a few filler pieces of pine for the hinges, might have to do the same for the closet on the edges. My master bedroom also has these sliding doors, they are located opposite each other along a short hallway,I always feel cramped in there even though they are a good size. Do you think they could work there? I need an impartial expert weighing in on this because I know that my husbands first instinct would be to say that it can’t be done!! Love all your posts!
Thanks for the great tutorial. Love the doors you chose! Can’t wait to do the same for our 2 kids’ bedrooms. Doors definitely maximize closet space. We had them @ our last home.
I love this idea! We have already removed the sliding doors in both the kids’ rooms years ago & they’re both just open now. My boy’s room opening doors wouldn’t work anyways, there room is too small. I would love to do this in my room, but again no space to do so, but I also removed an opening door on another closet in my room & replaced it with a curtain. Oh yeah, we also removed bifold doors off the laundry room closet in the kitchen. Yeah, I don’t like sliding doors or bifolds either.
I love your new doors – and your father inlaw! I would love to remake my daughter’s sliding doors, but my husband is not a DIY’er and my DIYing is limited to sewing, crafting and painting! Great job!
You know what they say: If you can run a sewing machine you can run a drill or a saw!
That looks so awesome! I LOVE it! Do the door handles come in pkgs with just the front part or do you have to get a whole set?
Jen, I have soooo needed this post! My laundry room had those horrible sliding doors, and they used to keep falling off of the track. I finally took them down and made curtains to use instead. I hate them! The kids and husband never close them all the way when they come out of there, and I swear heat comes out of the room. Drives me nuts! This is totally going to be my next project! Thanks again!
Jess
Yep this is going on my TO DO LIST!!! Love it. Thanks for sharing.
You will love how much bigger your closets will seem 🙂
xoxoxo
I am DYING to do this, but what do you do if you have double wide (meaning the doors are already about 5 feet wide (each)?
Could you add a column in the middle and install 4 doors?
I have a wall of sliding (GAG: BEVELED MIRRORED) doors in the master that I am dying to do something to. But they are so large, I have no idea what!
Great post btw!
Hi Kim!!
Do you have straight walls on both sides? I think a double barn door would be so cool. Like this — http://contentinacottage.blogspot.com/2010/05/sliding-barn-doors-used-inside.html.
xoxo
Jen,
this is JUST what I needed! Both of my kids’ bedrooms have the slider doors and they are so frustrated at those darn doors! Can’t wait to convert into swing-open-all-the-way doors! 🙂
You will love the doors that open out! It makes the closet seem so much bigger!
xxoxo
Thanks for the tutorial. I hate the sliding closet doors in my boy’s room–they come off the track weekly. I was hoping to be able to use the existing doors, but that might not be easily possible.
The problem with using the existing closet doors is they would be too wide since they overlap when used as sliding doors. The cost of the doors depends on which width you need and which type you like. You can get a basic colonial door for $31 each. http://www.lowes.com/pd_30403-42734-30403_4294859730__?productId=3191235&Ns=p_product_qty_sales_dollar|1&pl=1¤tURL=%2Fpl__4294859730__%3FNs%3Dp_product_qty_sales_dollar|1&facetInfo=
xoxo
Well explained tutorial, Jen!! Have been thinking of doing this for my daughter’s closet that has sliding doors but using the same old doors (big believer in reusing and recycling..:D), thought of taking off the extra width, do you think that will work??
So I decided to use the existing doors. The width wasn’t that much of a problem; Jen mentioned she trimmed her purchased doors as well. The length was more of an issue–needing to take 3 inches total off. It worked out though. But the worst part was when we went to chisel the door frame, we found the door frame wasn’t actually wood. It is a wimpy metal frame then covered in plaster. We put the hinges on anyway–not all the screws actually caught anything. I hated the sliding doors, so I really wanted these hinge doors. We’ll see if they hold up! Always turns into a bigger project than expected!! Thanks for the tutorial.
We did this project last year for my Daughter. I hated her sliding doors on her closet. So hard for me to visualize what her clothing options were for the day. My Dad and Husband harassed me so much about this project. They insisted the ball idea would never work. I was crazy. I had seen it years ago and loved how clean it looked. Dad insisted they build a wall between two doors. I stood my ground. Walked them through what I thought had to get done and the final look is perfect. Just what I wanted. I am lucky to have such handy guys in my life. Usually they are more willing to go along with my crazy ideas. So glad you posted this today. It looks great!
Courtney
I am so glad it worked out for you!! Yay! I bet you love the new closet doors now. It sounds like your guys are so handy and nice!
xxox
This is so awesome Jen! Thanks for sharing! I want to do this in all our rooms now!!! :0)
Thanks Melissa!! I think they are so much prettier and more efficient 🙂
xoxoxoo