Why am I so fascinated with the Dollar Store? It’s truly amazing to me that everything in there is just a buck. I get a little mesmerized when I’m in there…
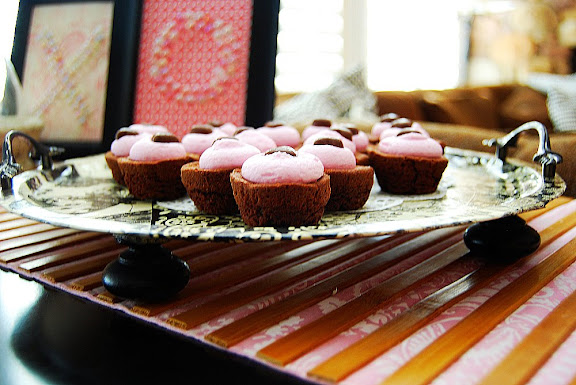
I picked up a couple metal pizza pans a few weeks ago, thinking that I could do something fun with them. As I was going through my kitchen cupboards the other day I discovered that I really don’t have many serving trays and I thought — why not turn one of those pizza platters into a serving tray? I was going to make a Valentine’s one, but wanted to use it all year — so made it match my kitchen.
I thought it would be cute to add some little feet to the tray so it sits up off of the counter. I have a box of old knobs from when I switched my knobs out in my kitchen. So I grabbed a few of those. But you could probably find some at a thrift store too. I also added a couple dainty little drawer pulls (from an old dresser redo) to use as handles.
Here’s what I did:
- I flipped the pizza pan over and measured where I wanted to put the feet. I measured the space between each foot as well as the distance diagonally across the sheet. They all ended up being 6 inches. Then I marked the spot with a black sharpie.
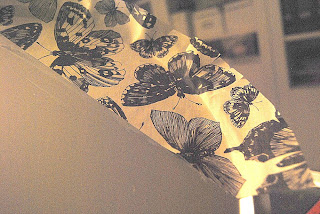
- Then I picked out 4 different black and white papers to use for the projects. I cut 4 inch strips of paper. I had to cut the paper diagonally in my paper cutter so that the length would be long enough to cover the pizza pan and go over the sides.
- Then I Mod Podged the paper onto the pan. I started at one side. I laid the first sheet of paper over the side of the pan to see where I needed to place it. I made a little mark with my sharpie on the edge of the paper. I trimmed the edges of the paper so that they mimicked the edges of the pan – -leaving about an inch longer than the edge of the pan. I made little cuts at the edges of the sheet so that when I flipped the edges under that they would lay flat.
- Then I applied the mod podge. I put a layer on the pan itself and another layer on the back of the paper. Then I layed the sheet on the pan with the edge where the sharpie mark was. I smoothed it down using an old credit card. I used my fingers to smooth it down over the rim of the pan and around the side of the edge. (you need to put mod podge around the side to the back of the sheet). I continued pressing with my fingers over the edge of the pan and flipped the pan over to smooth down the edges on the underside.
- Note: At this point, only put Mod Podge on the underside of the paper — not the outside of the paper.
- Then I applied the next strip of paper, doing the same thing.
- Once all of the paper was applied and wrapped around to the back of the pan, I let it sit until the Mod Podge dried.
- Once it was dried, I put a layer of Mod Podge on the top of the paper. I found that this cuts down on the bubbling.
- Once that layer of Mod Podge was dried, I sprayed the sheet with polyurethane spray. This will make it so you can wipe down the platter. I put 3 layers of polyurethane spray on – letting each layer dry for about 15 minutes in between coats.
- While the polyurethane was drying, I painted my old knobs black. I applied two coats and let them dry. Once the paint was dry, I applied 2 coats of polyurethane spray and let that dry.
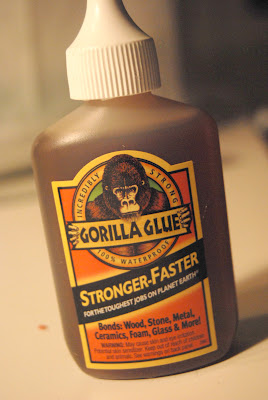
- Once the polyurethane was dry — about an hour after the last coat, I flipped the pan over and applied the black knobs to the pan. I used Gorilla Glue and it is awesome stuff! It takes about 2 hours to dry so I let it dry overnight.
- The next morning I applied a very small amount of the same Gorilla Glue to the handles on top of the tray and let those dry for a couple of hours. And I was done!
And, for a buck — how could I go wrong??
XOXO
www.tatertotsandjello.com











Hi we are stopping by from Holiday Snob and wanted to let you know that we are featuring this tutorial in our post today! We made an Easter version of this–thanks for such great and genius ideas!! We always love your ideas!! here is the linkhttp://holidaysnobs.blogspot.com/2011/03/easter-cake-standcould-that-really-be.html
This is genius! I need a large tray for a centerpiece on my kitchen table and haven't been able to find the "right" one. I'm borrowing this! Thanks so much for the inspiration! I love you blog!
Jen
Scissors & Spatulas
So, I have made 2 of these trays in a week…and I already have requests from my friends for more! Thanks for such a great idea…keep it coming!! I LOVE your blog!!!!!!
Jennifer very creative and elegant!! Smart lady!!
I have a New Giveaway from the French Basketeer I think you will love!
Karena
Art by Karena
I am blown out of the water with this idea! Unreal and so savy! I love it! And I will try this as well. WOW! TFS
Be blessed, Cindy
made some and LOVE them!
http://jarenandkathryngilbert.blogspot.com/2010/02/serving-trays-cooking-party-donated.html
THANK YOU for being creative and sharing it with the world!!
wow wow wow!! another wonderful black and white idea
Gpt to try this one
thanks again for sharing
Hugs Suz x
I really like this tray. Your love for the dollar store is rubbing off on me. Thanks for the tutorial.
LOVE the black and white combo!
This is so adorable! I love Gorilla glue!
Amazing! Not bad for a dollar! I love how you repurposed this tray. Great idea!
🙂
Candy
It's beautiful, I love it Jen! Looks like I'm headed to the Dollar Tree!
I love your blog! Your ideas are so CUTE, easy, cheap, and fun! You are TALENTED!! Thanks for sharing!!
Your tray is just gorgeous! Those brownies are the best (I had them last year and just saw them again, we were so excited)! I just LOVE your ideas and blog. Each time I stop by I know that I will be inspired!
Best wishes,
Tammy
Another fabulous creation.
We are huge fans of Gorilla Glue. My grandparents say the Gorilla tape is wonderful as well.
It must be because I am pregnant but those treats on the plate look wonderful.
Have a great day!
Girl, you amaze me!!!!! Now I gotta run to the Dollar Store and do this! I SO LOVE it! :o) Thanks for the tutorial! :o)
Way way cute… whata great idea. I love that your mind creates all these beautiful things that I can copy.
Now that is the perfect project!! Love the way that tray turned out.
Jen – it looks fabulous! You are so Mod Podge talented! I need to feature you again soon . . xo
Flipping awesome!
Amazing Jen 🙂 I really need to shop the dollar store more often, without my little distractions along so I can think! Lol!
What a lovely tray! Nice work!
And your little treats look good too!
Love this idea!! COme over and add it to Thrifty Treasure Thursday!
Wow! What an incredible idea!! I could use some serving plates myself but hate spending $10-$40 dollars on one…I love how cheaply this can be done and that they also look way cute! I can't wait to try this!!
What a cool idea!!
You are so creative — and get such fun ideas from the dollar store — i love it!
I am going to have to work in a trip to the Dollar Store now! This is GREAT!
I love it Jen! Tell me….is there anything you can't decorate?
C.U.T.E!!!! Love this idea for old ugly trays!
You make it sound so simple. Some of us don't do things quite as easily! This really turned out lovely.
Sue
Awesome! Your projects and tutorials are always so great.
I'm hosting my first giveaway on my blog and wanted to invite you to stop by for a chance to win free art print(s):
http://theredchairblog.blogspot.com/2010/02/introducing-prairie-storms-prints-and.html
What?! Who would have thought? Srsly. You have a designer's eye, I don't know how you do it but I LOVE it!
That is so clever! You're truly brilliant!
OMG what a cute idea! Now i'm going to have to go to the dollar store before it snows again so I have a snow day project to work on!
Are you serious!!! I love it!!! Off to get some pizza pans…
What an adorable project. Kudos to you for cleverness. Glad that I came across your blog today. I'm definitely a new follower.
Kathleen
http://www.firefliesandfamily.blogspot.com
What a great project…! I love the black/white design. And the treats on top look yummmm:))
Wow! I would have seen that pizza pan and thought 'Hey. A pizza pan.' You are awesome and I love how you see the possibility in everything!
So cute! Need to run to dollar tree now!
Your creative vision is like nothing I've ever seen before! You truly amaze me!!!
Love it!!!
So stinking cute! love it 🙂 Seriously how do you think of this stuff?? amazing….
Oh my gosh you are so dang creative!! You're seriously my craft hero now.
I'm thinking soo cute…hmmm wonder if I could do it then the dreaeded words mod podge were used and it was down hill from there! Why does mod modge freak me out so bad?! I think I just need to bite the bullet and give it a go!
I LOVE this! It is beautiful! Thank you for sharing!
alemonsqueezyhome.blogspot.com
It's gorgeous! I'm going to have to give it a try. Thanks for sharing such a fun and usefull idea!
I love your tray, it's beautiful! I also enjoy the dollar store; I get butterflies of excitement when I shop there!
I would love the recipe of the desserts on your tray-they look delish!
WOW amazing, I am a true follower now!!! love love love this. I'm off to the store. thanks for sharing
GENIUS! I made a chore board out of an old pizza pan last week. You can see it on my blog!
what a great idea! making a trip to the dollar store this weekend…
amazing as ever. I did some crafting too and will show them off next week.
Okay obviously that should have said MATTE or glossy?
That is so cute! I love that you put feet on it…such a great idea! I have a question…what kind of Mod Podge do you use…the matter or glossy?
So cute! Who would have thought? You, of course! 🙂
Very creative!
You are UNreal!!!!!
Absolutely Fantastic, you have such a creative mind.
VERY cute!
You keep getting more and more creative! I love this idea…and I love serving trays.
Jen, I don't just want to do this, i have to do this. WHEN I DO i will link up to your blog and maybe email you the one I make. SO DARLING! Love the paper choice as well. P.S. you are totally justified with your love for the dollar store, I AM WITH YOU ON THAT ONE. See ya later friend, JGG
Brilliant. Your tray is so freakin' cool.
I love that you use Mod Podge. My dad used to use it year's ago. It just makes me smile.
Love the tray!!! Love everything you do!! I also think the cupcakes on the tray are adorable…would you be open to share a tutorial on the those, as well???
Oh my gosh – you are amazing! I love this. Running to the dollar store on my lunch break – this will be a great project while I am snowed in this weekend.
Can you just come to Texas (aka my house) and make things for me?? All I need is a week with you- your kids won't miss you a bit!!!
~Becca
Another project to add to my list. I love it! I tried your burlap wreath and I love how it turned out. You'll have to check it out. Keep the craft ideas coming. Your Awesome!
lifeaswearelivingit.blogspot.com
soo cool! I have zero serving trays, this would be great to make and have!!!! Thanks for posting!
This is great!
Cool project!
Now I'm wishing I saved all my old knobs (or knew where they are). You are so clever !
I love this idea, Jen! I like that you did it for everyday use and not just a holiday ~ you could even use this outside when it's warmer for BBQ's. Love it and great tutorial!
I'm going to try that!
Thanks
That is tooo cute! I can see a two or three tier one too! Probably have to use smaller trays and different sizes, but that would be so cute! I think I would always make sure whatever food was put on it, has a liner under it and not put the food directly on the poly'd surface! Love it love it love it!
This is such a cute project and would make a great gift, too. I see a trip to the dollar store in my future!
What a beautiful tray Jen! You always come up with the most fantastic ideas! xxoo
So so cute! I can't wait to try this myself- thanks for sharing! And, I agree- the Dollar Store is indeed mezmerising!
LOVE it! Such a fun idea!
You are brilliant! That tray is gorgeous!
Awesome Jen!
Absolutely Gorgeous!
Cute idea. Is it ok to put food directly on the tray when it's finished? I guess you would have to read the finish to see if it is huh?
Hugs
Joanne
This is so cute! And actually looks easy enough that maybe even I could do it. Not to mention, its a cheap project so its in my budget!
I can't believe this…I will look more closely at the $ store…truly so cute! Come say hi 😀
This turned out SOOO great! I just adore it! Thanks for such an awesome explanation of how to make it! 🙂
I hate misspelled words! I typed that out so fast and hit publish just like I was somebody. Dang it.
Tomorrow, tomorrow.
I think that was brilliant! I love it, I'm going to the Dollor Store tomarrow.
Great idea, thank you.
Love your stuff and I love your blog.
Ok, that is really cute! You are so clever!
You always have such cute ideas. I am going to try and make some of these to coordinate with a baby shower I am giving. Thanks for your inspiration..
I love this transformation! It's defiantly going on my to-do list! I love your blog! 🙂
It looks great! And it is even cuter when you find out how cheap and cheerful it is!
Oh, this is fantastic! Your tray looks AMAZING! I am definitely going to buy a metal pizza pan or two the next time I'm at the dollar store and try this! 🙂
Thank you so much for sharing the crafts and projects you do; I am always so inspired by them! 🙂
Have a good night! 🙂
LOVE IT! I can not wait to make one of these and some delicious treats to go on top!
this is amazingly beautiful!!!
Adorable my dear!
Love it–It is so pretty (those treats don't look to bad either!).
That is such a great idea, Jen!! I love the little feet & the drawer pull handles. I've seen a serving tray made out of a cabinet door and drawer pulls as the handles. I've always wanted to do one. Now I'll have to try this one too!
♥ ♥ ♥
Cute! You are so CRAFTY!
Love you!
I am going to have to try this out. What a great idea!
WOW! this is sooooo adorable! I can't wait to make some to match my college apartment, we're always making cookies and cupcakes and these trays would be perfect for that!
Are you kidding me??? You are full of fun & fabulous ideas:) I love it!!!
Oh I love it! I used one of those same papers for the back of my open shelving I just posted about in my kitchen. One of these would match perfectly! Thanks! Oh and I love the dollar store too. So addicting.
So cute! Your mod podge skills never cease to amaze me!!!
~Amanda