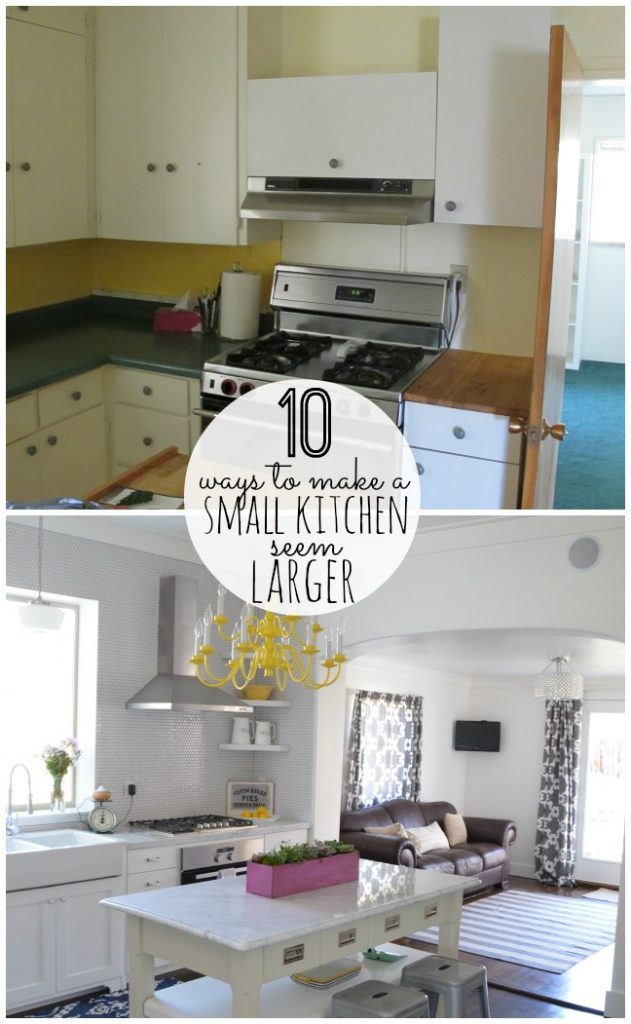
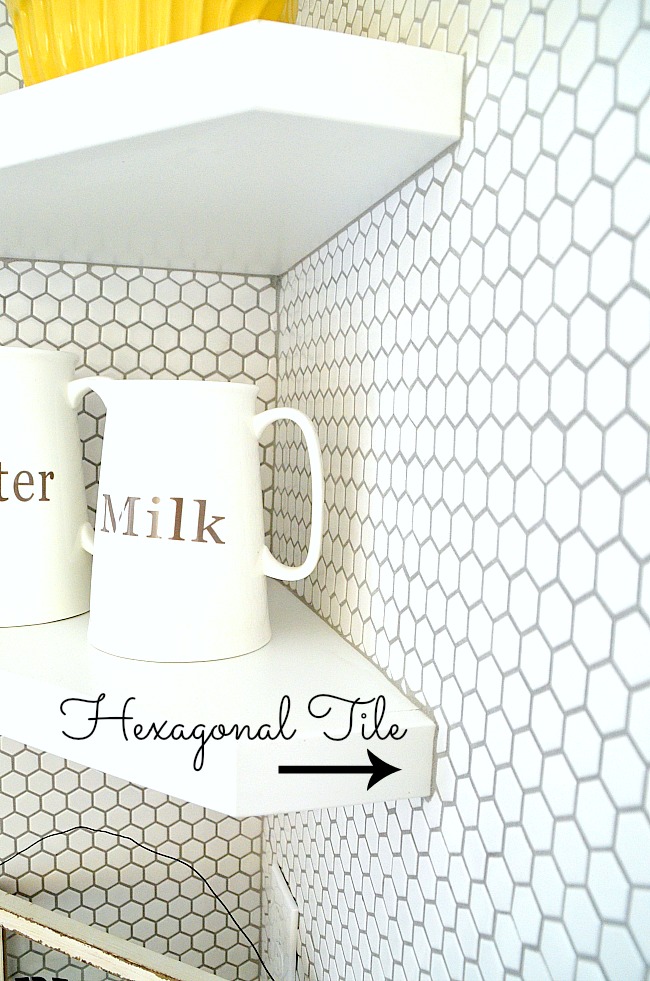
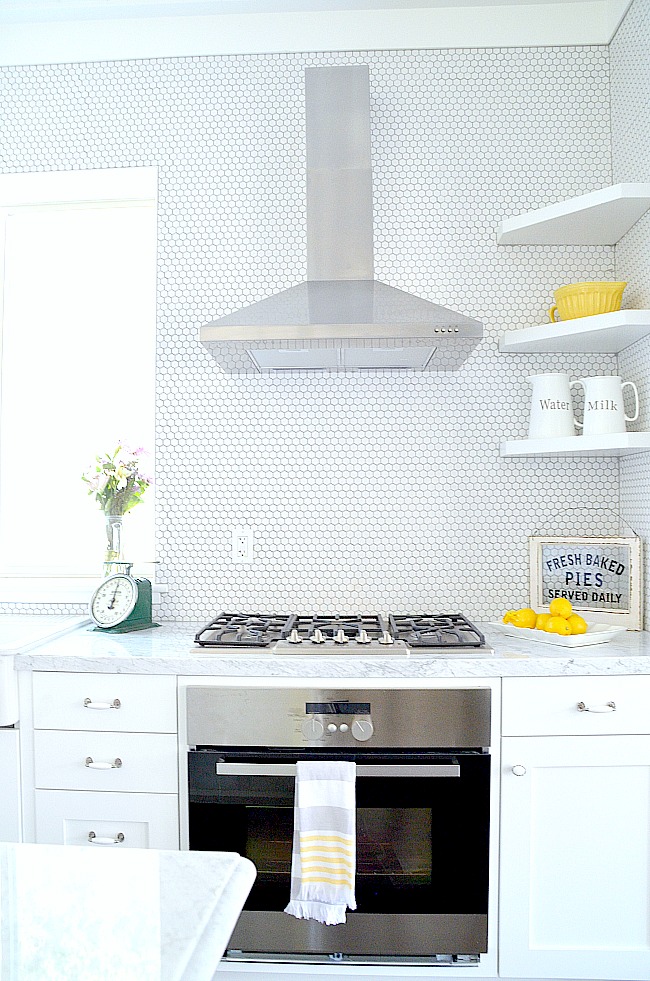
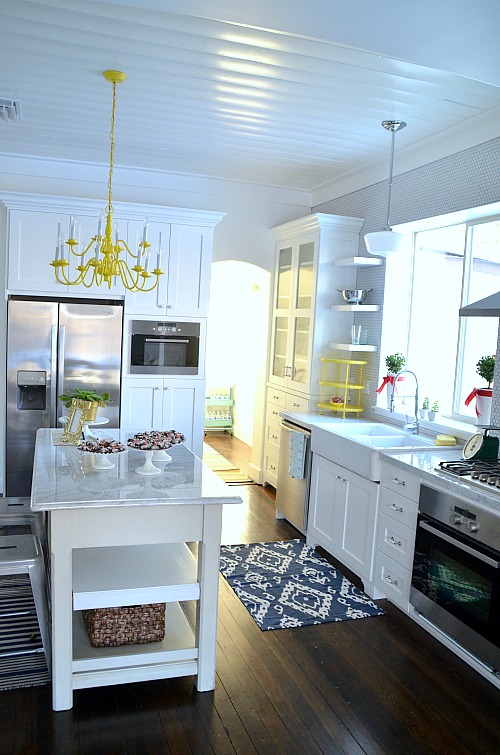
I’ve had so many emails and comments on the #1905Cottage remodel kitchen. I thought it might be fun to show some different ways that we used design and planning to make the space seem bigger. 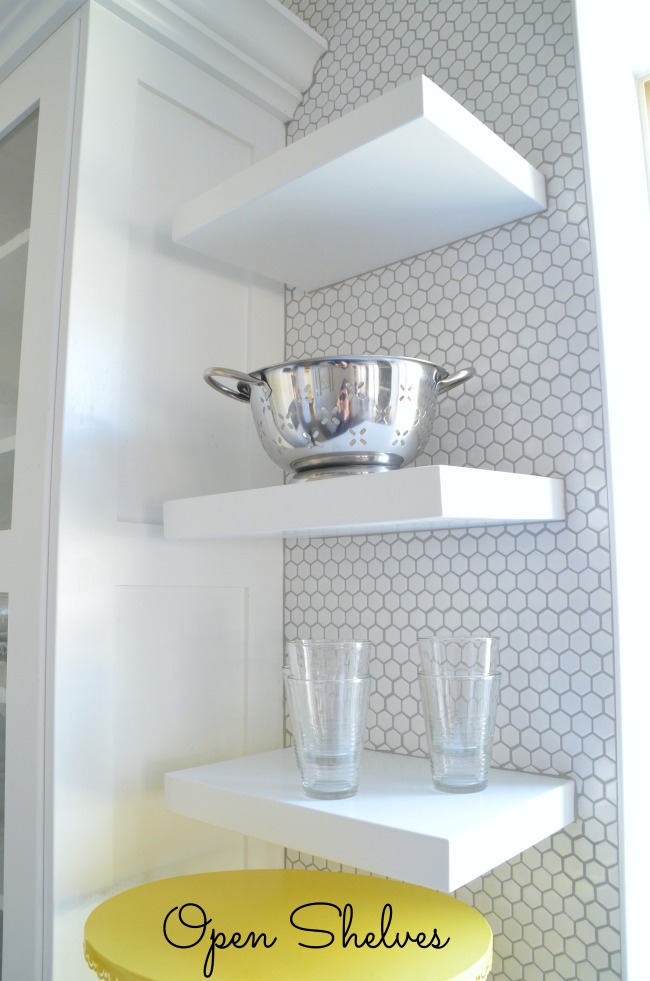 1. Use open shelving to maximize storage but also keep the room as open as possible. We used custom-made shelving that we added before the tile was laid; it was custom-made to match the cabinetry and the odd shape of the room. But you can use premade open shelving inexpensively and just as attractively!
  2. Use shallow shelving to accommodate awkward spaces. When we worked on the cottage, we learned of a cinderblock chimney that rose from the basement into the attic — and that we could not remove without causing major damage. So instead we had to work around it. With our kitchen shelving, we designed a shallow set of shelves on each side of this awkward chimney to provide storage but turn a negative into a positive: what was a pain to work around became a feature of the room.
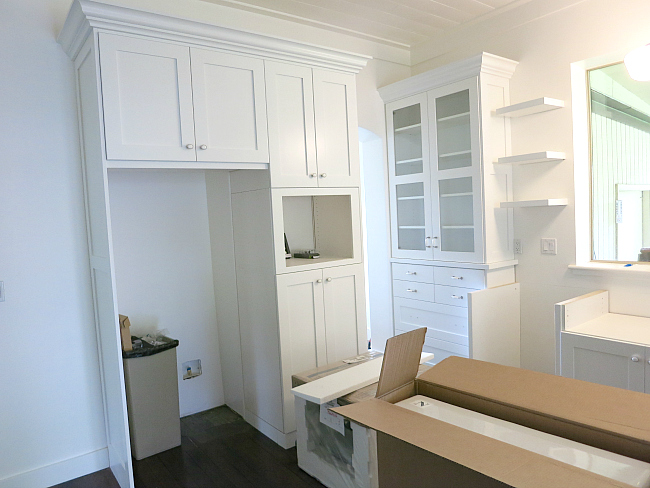
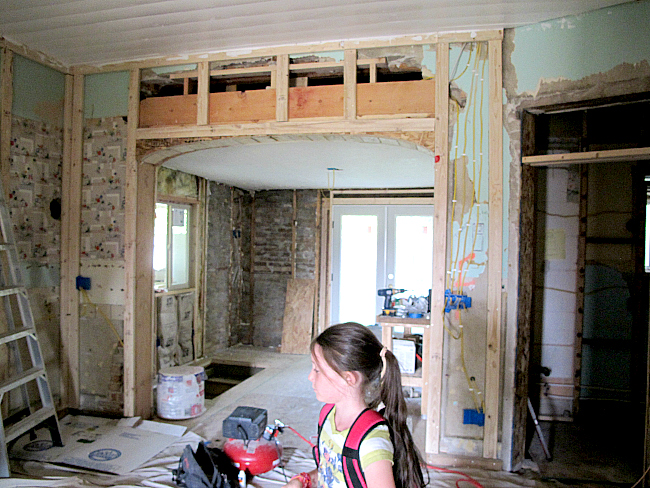
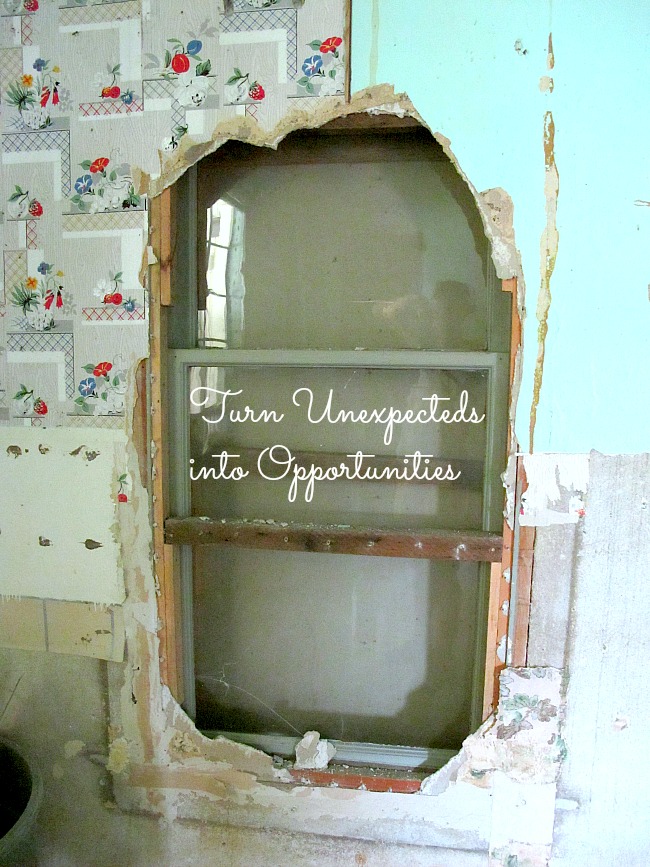
3. Don’t be afraid to open up spaces. We discovered a hidden window in the kitchen wall … which made us think: why not turn the narrow doorway into an open wall? We had to modify our original kitchen plan to do it, but it has become one of our favorite features in the cottage. We had an engineer specify how we should add a “header” to manage the structural stress.
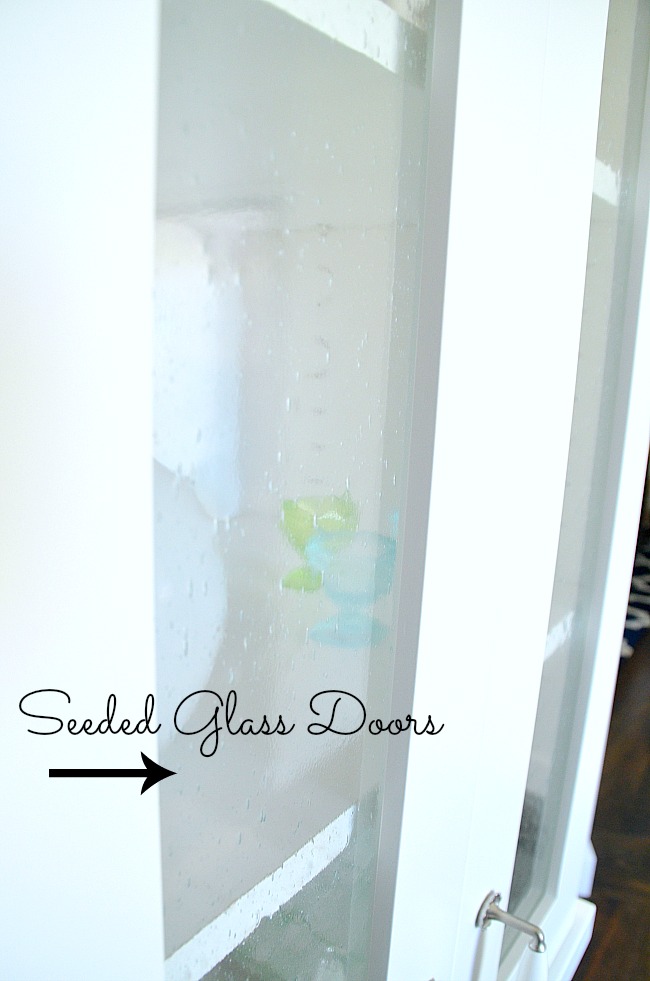
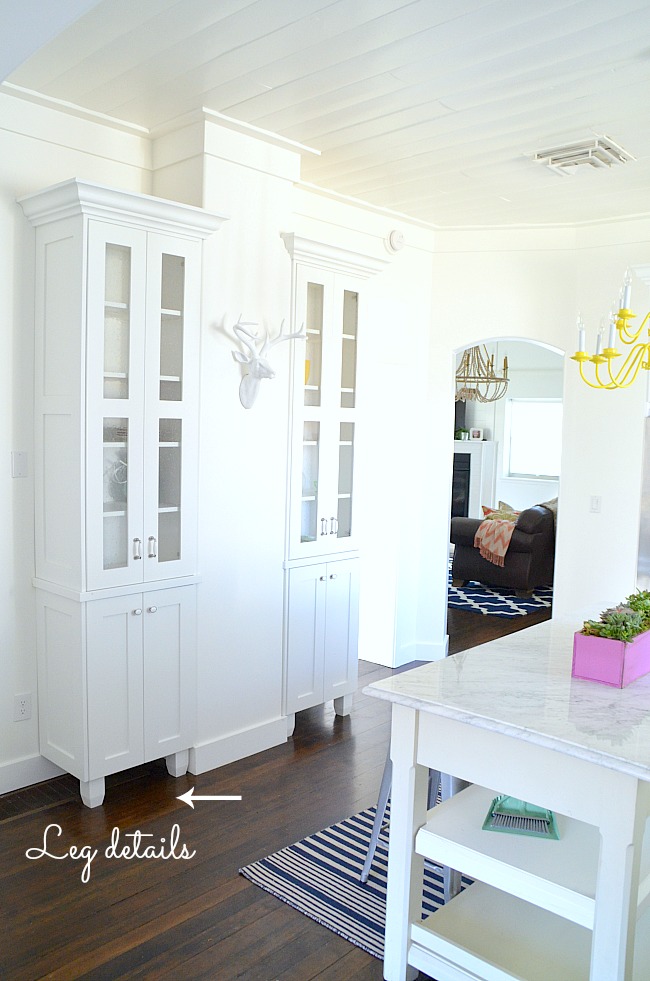
4. Add small touches to your decor to add interest and surprise. Just like a great movie, a great room should reveal details you missed the first time you saw it. In this kitchen, I wanted to add details that didn’t add clutter but did add interest and character. So I chose things like the seeded glass in the cabinets and the feet in the cabinets near the disguised chimney. I chose knobs with character (see the reveal post), too!
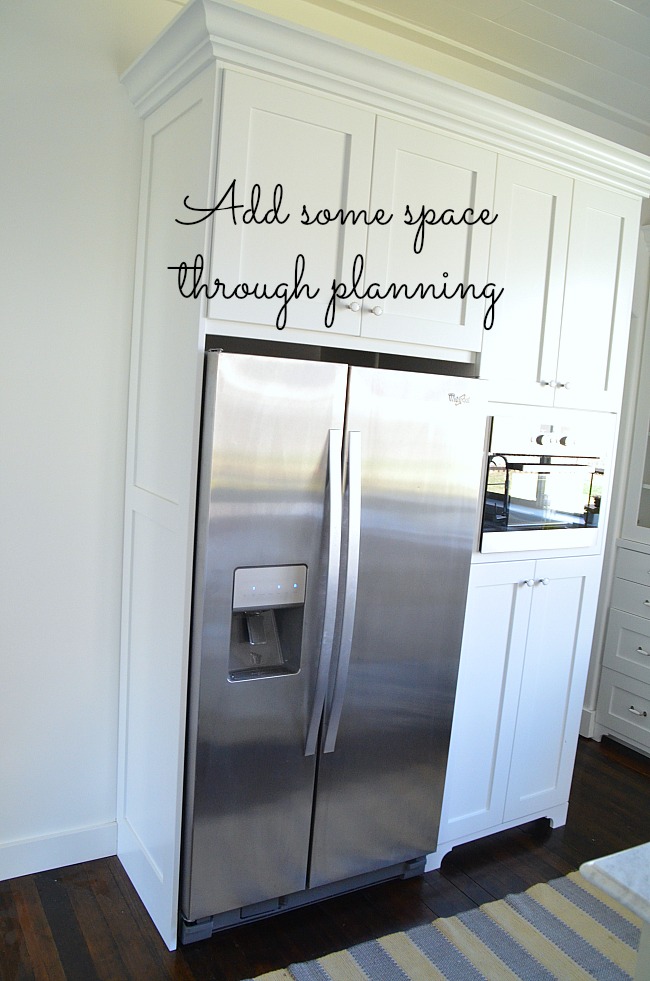
5. If you’re remodeling, think outside the walls. When we remodeled the entryway, we “stole” back some space (about 14″, if I remember right), from the former closet to create a special space where we could put in a full-size refrigerator but still have it not extend past the cabinets. This was kind of tricky, but we knew that the space wouldn’t be missed in the entryway but would give us a lot more options for standard-sized refrigerators.
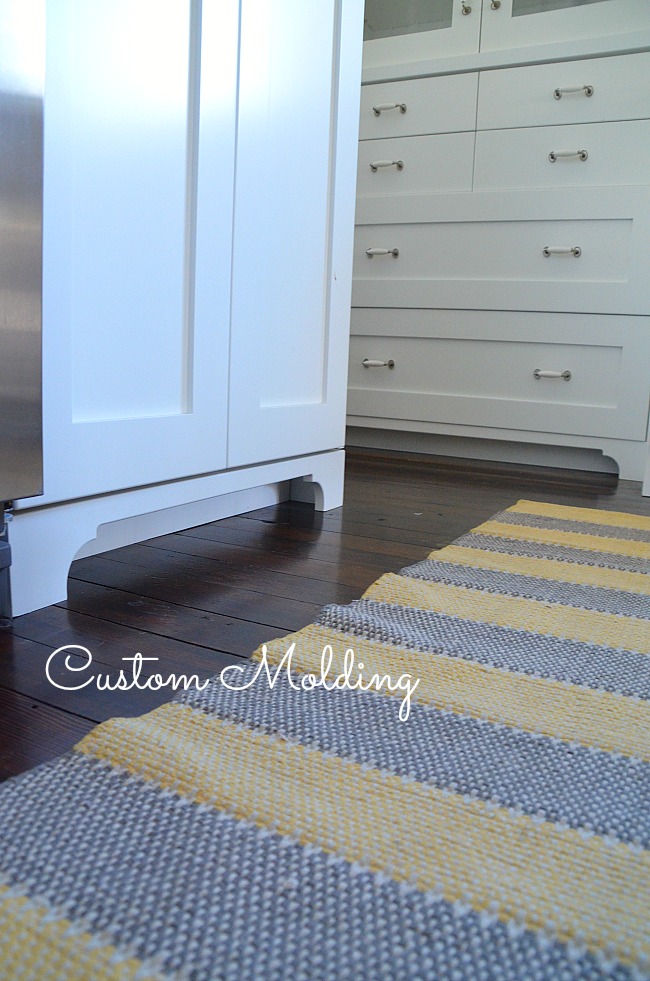
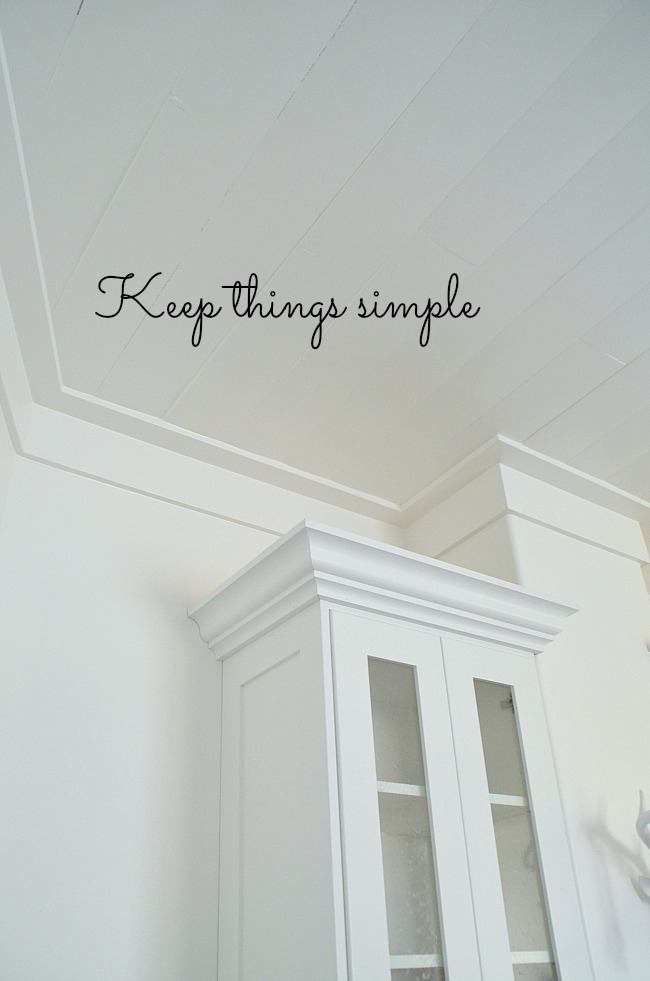
6. Choose very clean lines. We chose very clean lines for the molding, choosing simple (yet tall) molding for all of the base and crown molding. These clean lines help a small room seem bigger. And we added decorative molding to the bottom of the cabinets that give the cabinets a little something special and make them seem more true to the age of the home.
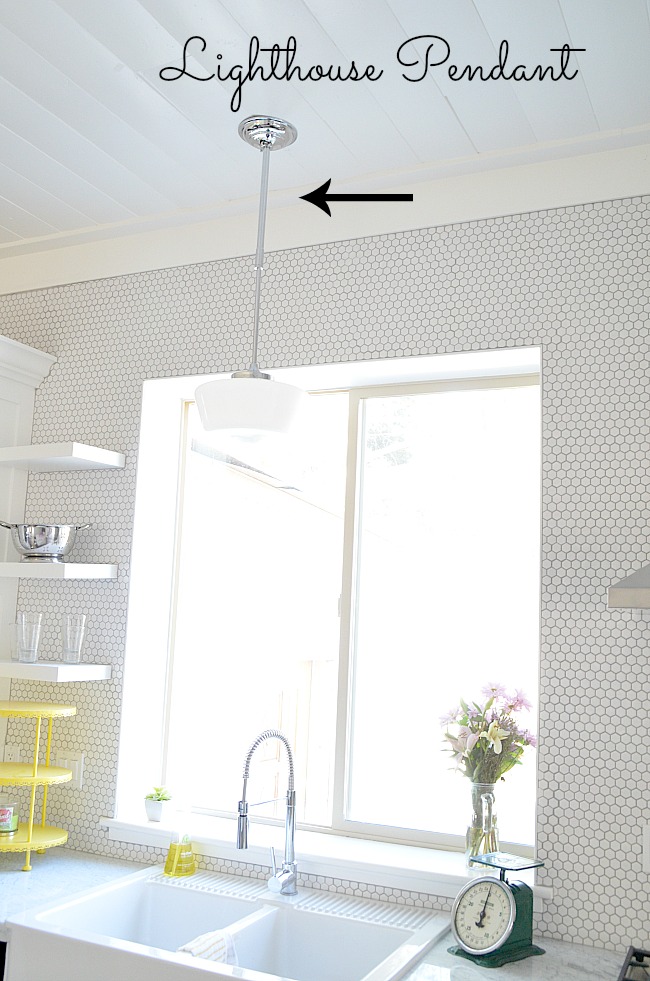
7. Where you can, open up the space as much as possible; even giving up a bit of counter space to enlarge a window. When we bought the house, the kitchen window was somewhat odd; it was awkwardly sized with a row of glass block underneath.
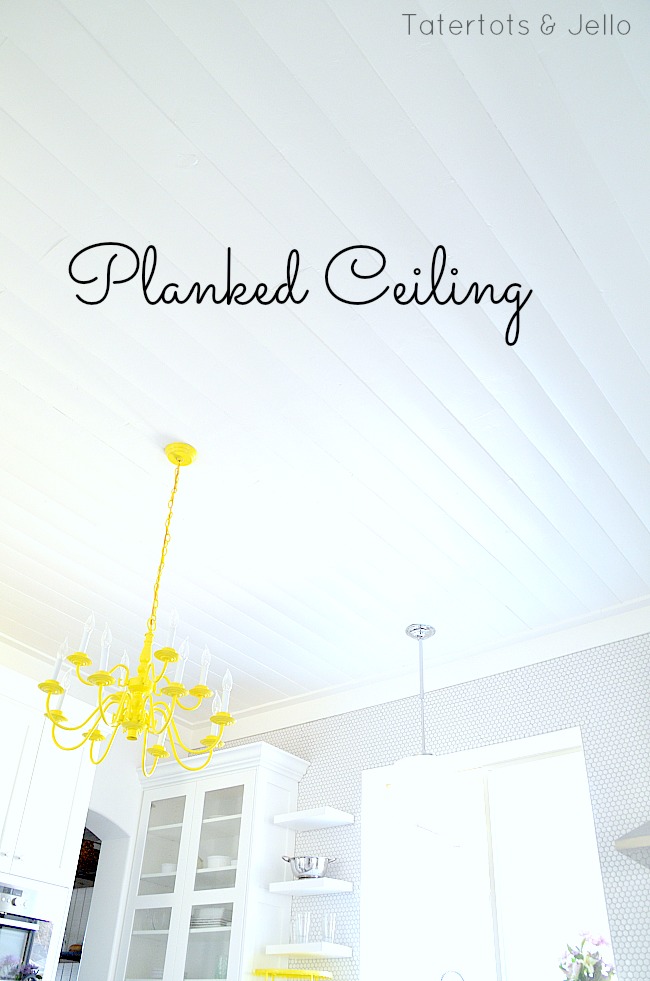
8. Raise the ceiling. We ripped out the suspended ceiling and planked the original, higher ceiling. You can read all of the details here from the original project.
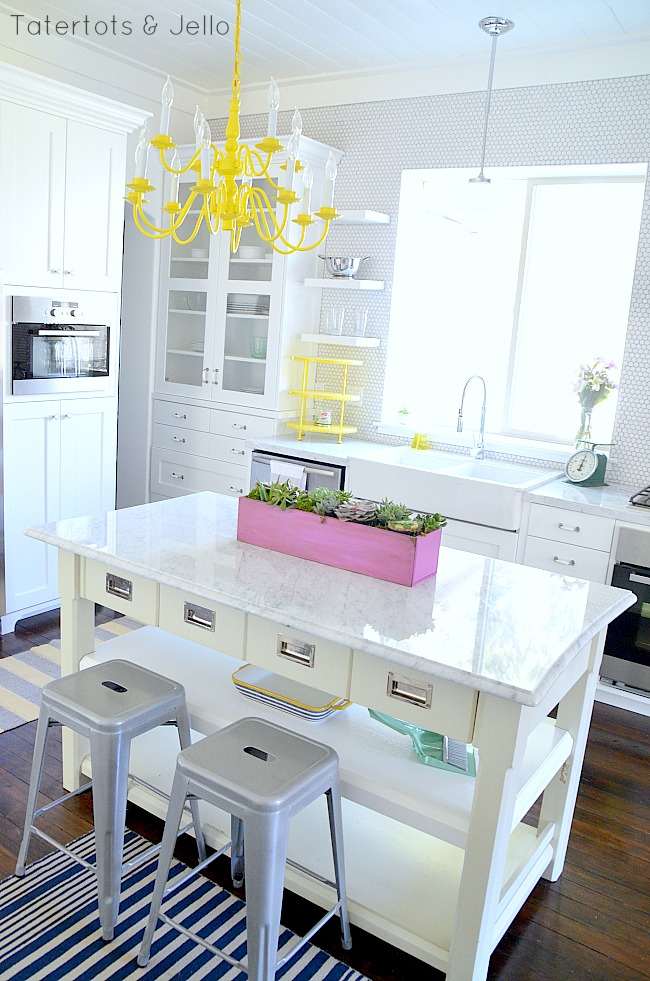
9. Choose a bright, monochrome color palette and stick to it. I chose all white to help brighten and enlarge the room. Accent colors really pop in the space and it’s completely neutral when I’m ready to change the decor or try something bold like Pantone’s color of the year, Radiant Orchid.
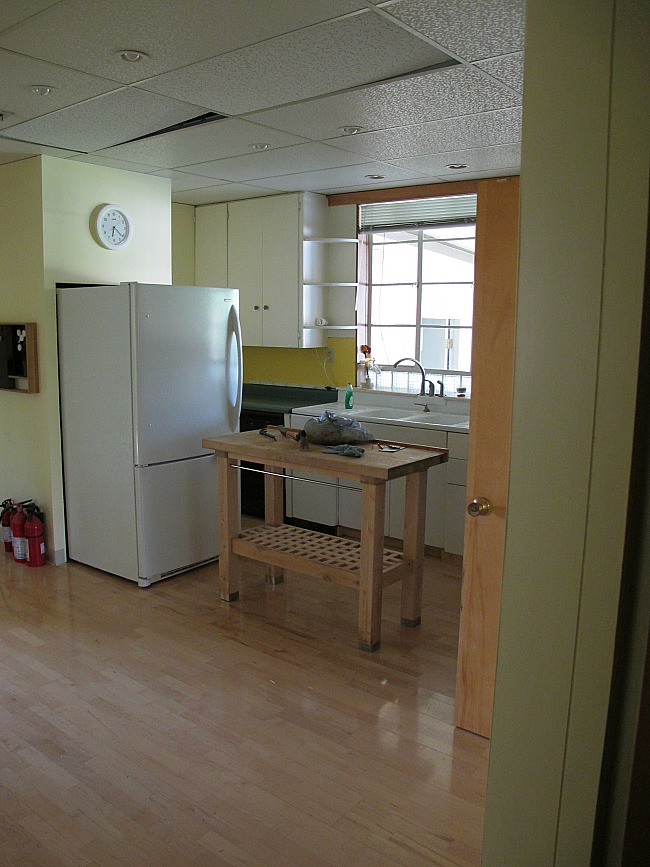
10. Don’t be afraid to change things around. For example, while we ended up keeping the fridge about where the original one was, we demolished a well-intentioned but awkwardly placed drywall “box” in the middle of the room to open up the space further. And while we kept the sink in roughly the same spot, we shifted it a bit and we did move the stove and oven to new spots. And I’ve already talked about how we knocked out a former window and turned it into a door so we could have a pantry/laundry instead of a laundry room you entered via the porch! For more details on the kitchen remodel, check out the sneak peek post!
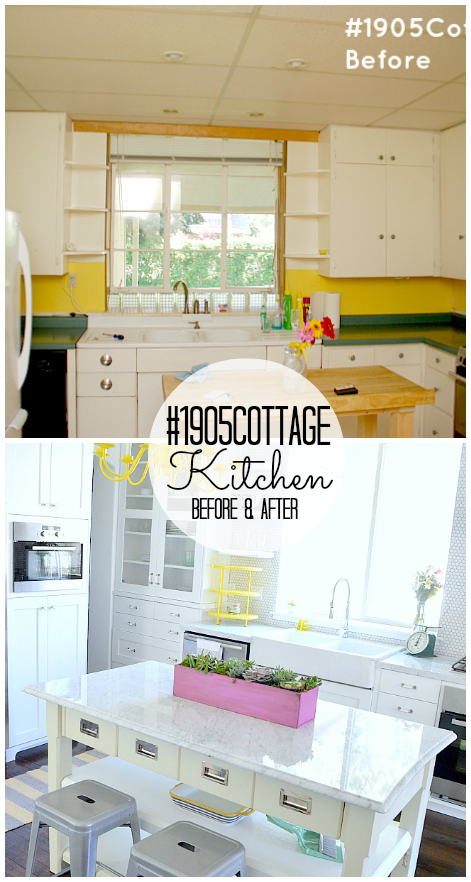
Those are some of the things we did to make the #1905Cottage’s kitchen stay true to it’s roots and give it a much needed remodel
Thanks for stopping by!
Have a HAPPY day!
xoxo


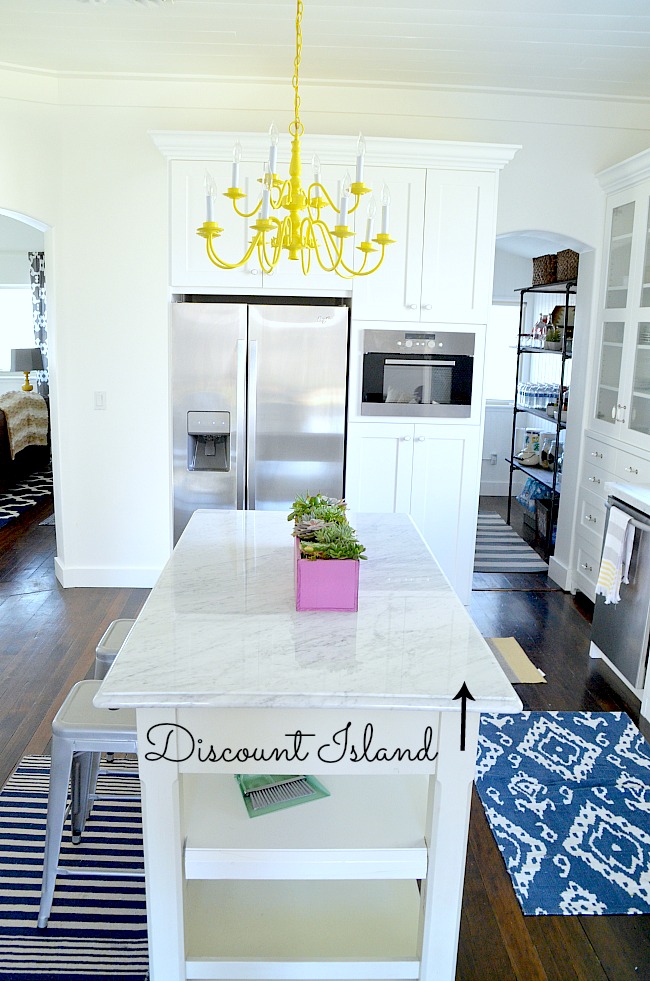
Can you tell us more about the island. I want to purchase a quartz counter top for my table and use it as an island. Do you purchase the island to assemble in your home or did you design and make it? Thanks!
where did you get the island??
LOVE the kitchen, Jen – one day I hope to see it in person. SO cute!
Very nice ideas. A small kitchen is difficult to use. But you can definitely make your small kitchen more functional and look bigger. By installing the right flooring and lighting in your small kitchen you can make it look bigger. You can also hire a reliable kitchen renovation company to make your small kitchen more functional and look bigger as well as stylish.
Gorgeous updates! You are so talented. Are you planning to sell the house after the updates? You have turned this house into a real gem!!
Hi Jen!
I love and adore every single crafty project you do!! Every time I visit your blog, I am just inspired!! I wanted to ask you 2 questions! I just purchased an inexpensive brass chandelier on Lighting Direct. I am planning on jazzing it up with some spray paint. I wanted to ask you what color/brand of spray paint you used on the chandelier in the kitchen of the 1905 cottage? And which model of Cricut do you have? Explore, Expression 2 or Expression?
Thanks so much!!
Nicole! You made my day. Thank you!!
Yes! The spray paint I used on my 1905 Cottage kitchen chandelier is Krylon’s Sun Yellow.
And my Cricut is the new Cricut Explore machine. I really love it.
xoxo
Thank you so so so much for getting back with me Jen! I really appreciate it! Any tips of spray painting a brass chandelier? I plan on hanging mine from a tree also to make it easier to paint. Did you prime the one you did for the kitchen in the 1905 cottage? Did you use a clear gloss to seal it?
And the Cricut Explore will be coming to my house very soon so I can re-create quite a few of your fabulous designs! And my first project I cannot wait to make is the “Choose Happy” sign with those adorable paper flowers! AND my heart skipped a beat when I came to the Paper/Ribbon Chandelier!
Thank you so much for your time Jen!
Blessings!
Your kitchen is just beautiful and great ideas for a small kitchen…
Jennifer has created this site to be a place for positive discussion and ideas. Negative talk, comments that disparage others, and similar are not welcome. Comments of this type from this post have been removed.
Maybe Jen (you) should add that disclaimer to your website.
It is stated at the bottom of the site. Thanks.
Really beautiful kitchen….really inspiring
http://vodkaandarose.blogspot.co.uk
I’m also shocked at some of the rude comments. Can anyone tell me where in this post the blogger said you need to have thousands of dollars and splurge on custom cabinetry to make your kitchen appear larger? The tips that are given (incorporate “open shelving,” “camouflage imperfections,” use a “monochromatic color scheme,” etc) are simple things that anyone could do, even on a budget.
Hi,
just wondered why you ran the ceiling plants at 90 degrees to the flooring direction. Does it look strange?
Love the Yellow /Gray striped rug in the kitchen – where is it from?
Kelly » Hi Kelly! I found the rug at HomeGoods.
xoxo
What is with the rude comments? I feel sorry for people who need to put down others in order to feel better about themselves. The kitchen looks great and the post had some wonderful tips.
Kristin » Thanks Kristin!!
xoxo
Beautiful! So thoughtfully planned. Your attention to small details makes it so smart!
Great ideas. I loved the shelves and the fridge.
L x
http://workingmumy.blogspot.com
I think what you did with this kitchen is so brilliant and fabulous! I am sure that Better Homes & Gardens will come knocking on your day to feature it! I would take this kitchen in an instant. So well thought out and beautiful! Angie xo
Simply gorgeous. We have a super small kitchen also. Loved the ideas! Thanks!
You have incredible vision my friend – it’s so pretty
Isn’t it remarkable how they thought those suspended ceilings were better at that time than the gorgeous planked originals??!! Loving the charm of the originals & that you kept the bones of the home. What you changed still fits with the age of the house, just updated.
beautiful remodel. I love the ceilings and the tile backsplash. Really gorgeous
What range hood did you use? I would be interested in a source list for all of the items used in your remodel!
Thanks for sharing – great ideas!
Very inspiring! You did such a beautiful job on your kitchen.
I LOVE the kitchen….actually, the entire house. you did a great job on it. I know that this is a “spare” house, what do you use it for? how far is it from your current house? just curious….. 🙂
I’m curious too! What do you use this home for? It’s beautiful!