
How to DIY a Rustic-Planked Ceiling.
I’ve just finished stage ONE of a HUGE, top to bottom kitchen remodel. It’s just part of an even bigger remodeling project that I’ll tell you more about soon, I promise! Remodeling takes so much longer than you think it will. I was hoping to have the cabinets in and have a subway tile tutorial for this month, but we ran into some plumbing and electrical problems and are still waiting to get the drywall on.
So for now, I want to show you how I finished this important piece of the kitchen remodel, with a rustic planked ceiling, and show you some things you’ll want to make sure you do — and some things to make sure you don’t do — if you ever decide to try it!
I’ve done some planking projects before, like this multicolored, planked wall in my nautical-themed teenager room makeover:

(Here’s the tutorial for that nautical planked wall.)
And I loved those thinner wall planks I used vertically in the bedroom so much that I tried something similar with wider planks — horizontally this time — in my guest room makeover:

(This pic is from the post where I tell you how to make the nifty shower curtain duvet, and you can see the wall well in other posts about the room, like this one where I show you how to replace sliding doors with real, grown-up doors.
I loved how that wall turned out … so I decided my next big project would be to create a planked ceiling from the same, wider planks I used for the guest room wall.
(I purposely chose a more rustic look, with concave boards that are about 6″ wide for this 100+ year old cottage. If you like a smoother, less rustic look, check out my friend Amy’s awesome new tutorial on how she planked her kitchen ceiling with the smoother paneling at The Idea Room. It’s awesome!)
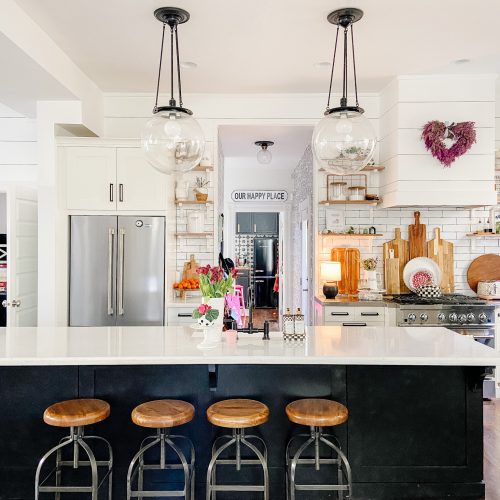
Let me give you a bit of the story on this kitchen before I share my dos and don’ts. As I mentioned earlier, this is just a tiny part of a large remodel project. I’ve stripped this room to the walls … and the walls are plaster-covered brick (they are 14 inches thick!!). I’m going to share more about each aspect of this big remodel, but the first big step that’s ready for pictures is this ceiling.
The ceiling in this room is a beautiful, high, 10-foot ceiling that some previous owner had dropped down to about 7 1/2 feet with a suspended ceiling. I totally get how decorating trends change over time … but why? WHY?
Anyway, once I got that suspended ceiling ripped out, I discovered that the ceilings were amazing and tall … and that I had a huge swamp cooler vent sticking out of the roof.
Before I could plank the ceiling, I (by “I” here I mean my husband) had to trim the swamp cooler duct and prepare the vent to be moved up. You’ll see the vent in the pictures — I wish I didn’t need to have it in the ceiling, but it’s in a central place in the house and it does an excellent job of keeping everything cool.
I used the same planks I had used in my daughter’s bedroom and in my guest room for this project from Lowes. They come in 10-foot lengths, and I needed a LOT of them for this 12×15-foot room. Here’s what they looked like loaded up in the car from my Instagram photo that day:

Notice that the planks have overlapping edges — one goes under and one goes over the preceding plank.
IMPORTANT: because these boards have a bit of a curve to them, don’t make the mistake we did. Even though we’ve now done this three times, we did not follow our own advice, and we started a bit out from the first wall, thinking it would be easy to tuck the underneath edge under the overlapping one when we trimmed one side of the room. Bad idea — the curved boards made that difficult. YOU SHOULD always start at one side of the room and work across.
It’s also important to note that these board — since they’re fairly rough-cut and rustic-looking, are not perfectly straight. I tried to choose the most straight ones I could fine, but since I had to nearly clean out my local Lowe’s to get enough boards, many of mine were imperfect. You will find that your planks will not always fit together perfectly, and that’s OK — that’s part of the rustic charm.
Here are the basic steps:

1. Estimate how many planks you think you’ll need based on the size of the room. We estimated the planks at about 6″ wide. Add an extra 10% just in case.
2. Go buy the planks and BRING GLOVES. These planks are rough and you will have more splinters than you want. If you forget to bring gloves, go buy a pair of the inexpensive leather ones in the garden section. It’s worth the extra few dollars. Buy your paint and a can of white KILZ primer, too.
3. Bring the planks home and prime them. First, cover over any of the colored mill printing (you’ll know it when you see it) with a nice coat of the KILZ primer. It WILL show through if you don’t. We tried this on the guest room wall project and it worked well, too. We used white primer for the boards so they would not soak up as much paint when we did the final coats.
4. Ready your ladders — you’ll need two — and your equipment. We used a table saw, a miter saw for trimming the planks (a sliding 10″ saw or a 12″ saw would have been nice, but we made do with a regular 10″ one), and a pneumatic nail gun.
5. Take your first plank, starting on one end of the room, and put the “top” lip of the board against the wall. This will take two people with a long plank, and two ladders. You want the next board to overlap on top of the other side — so the lip on the exposed side should be closest to the ceiling. (Hopefully that makes sense). Because we had to nail our planks into a lath-and-plaster ceiling, we used 2″ nails from the pneumatic gun, and placed them about 18-24 inches apart in pairs. Don’t skimp, but if you’re planning on covering the nail holes later, don’t be overly generous, either.
***Tip: If, like me, you plan to cover the edges with a fairly thick piece of molding, you don’t need to be super precise about the plank ends next to the wall. Just come pretty close and realize you’ll cover it with the molding when you do that as a final touch. (Check out the molding in the bedroom and guest room posts, since the molding on this project will be coming much later.)
6. Keep going until you run out of ceiling. A few pointers: you will likely want to stagger the seams for the planks. In my case, although the ceiling was about 12 feet by 15 feet, I was careful not to make the planks a regular 12 feet plus 3 feet — I used semi-random lengths, and in some cases, purposely added a couple of shorter boards next to each other to add some visual interest.
7. Angles can be a bit tricky, and it can be a bit of a pain when you get to the end of the room and discover you’ve got only 4 inches to go … and wide boards. We ripped the boards lengthwise using the table saw. We had to do a few other entertaining cuts around the swamp cooler vent and where we will later hang a chandelier in the middle of the room.
8. After we got the planks mounted, we went back and caulked most of the seams and the nail holes — and even a few particularly offensive knots. I then sanded any rough bits with my trusty mouse sander after the caulk dried.
9. Paint! We used bright white satin, and used a roller with a long nap to put it on, followed by a quick smooth out with a brush. (my father-in-law helped with this part – he is a master painter)

And there you have it!
The kitchen itself is far from finished. I have just barely gotten the plaster walls framed for drywall! But the ceiling is awesome, and I love the texture and interest it provides with the rustic/modern look. I am going to add some modern molding around the edges. And I am so excited to hang a big chandelier in there.

(Watch for later posts where I’ll walk you through how you, too, can do the same top-to-bottom remodel I’m in the middle of!)
Okay — I think I covered everything. Questions, anyone :)?

I also have a 1905 Cottage Pinterest board for this little cottage. I would love to have you follow along there and I would love to have you send me ideas to pin for the board. (all of the links to the original projects are on the board). This is a historical house and I am a little in love with it. I can’t wait to share more soon!!!

You can get tons of great ideas from the Lowe’s Creative Ideas Magazine:

Thanks to Lowe’s for providing the materials for this (big) project!
 You can also now follow along with Lowe’s Creative Ideas magazine on your i-pad or i-phone! Awesome!!
And you can follow along with Lowe’s here:
- Facebook – https://www.facebook.com/lowes
- Website – http://www.lowescreativeideas.com
- LCI Blog –http://www.lowescreativeideas.com/community/lciblog.aspx
- Pinterest –http://pinterest.com/lowes/
- Lowes Creative Ideas Magazine App –http://www.lowescreativeideas.com/lowescreativeideas_app.aspx
Have a Happy Day!!
xoxo

Disclosure — I was given a gift card to purchase materials for this project. All opinions and ideas are 100% mine.
PS — It’s FRIDAY!!
My favorite day of the week!!
I hope you can stop by the Weekend Wrap Up Party tonight.
I love featuring YOUR ideas.
The party starts tonight at 6 pm MST.xoxo


Hi!
I love the clean look of your white wood ceiling. You added so much character and kept it simple. We recently installed a wood plank wall in our baby girl’s nursery but stained it instead. It turned out great… you can check it out here: http://purposefulproductions.blogspot.com/2014/04/diy-wood-accent-wall.html
Kassy
What if there aren’t many studs in the ceiling? Is it ok to just nail them into the popcorn ceiling? I love all the detais in your tutorial! It’s the best one!
Thank you so much for sharing this with us! Book marking this for our future house 🙂
Timing is everything – I have been looking to do something like this for my foyer and this definitely gives me yet another resource for ideas. Nicely done and can’t wait to see the progress of your room. Enjoy your Labor Day weekend!
So this isn’t YOUR kitchen, right?
Hi Mimi!!! How are you? This is a house about 4 houses down from me that I’m fixing up. It’s a teeny tiny little cottage 🙂 Thanks stopping by my friend!
xoox
I can’t wait to see the finished product! 🙂
Oh my gosh…i LOVE that ceiling!!! I want one….right this second. Wonder if my hubby would be up for that on Labor Day weekend? 😉
I love this, too: “(by “I” here I mean my husband)” Haha!
Thanks Bridget!! You should do it!! Let me know if you have any questions. I think you will love it. You can put 3/4 molding around the edges. That’s what I did in my guest room or I am going to put shaker-style square molding around the edges once I get the drywall on.
Thanks for your sweet comment!!
xoxo
It looks awesome. Can’t wait to see it! xoxoxo
Thanks!! Me too!!! Thanks for the comment 🙂
xoxo
Wait…didn’t you do a kitchen reveal with the gorgeous aqua paint, and the pendant lights just a few months ago? Is that the kitchen you are remodeling? Can’t wait to see the results.
LOL yes!! I remodeled my kitchen last summer. This is a new project just around the corner from me. It’s the last historical house in our little neighborhood and I wanted to save it from being bulldozed from developers who would want the lot. So I am remodeling it, trying to get it back to where it was when it was built. It’s a tiny little house and I think it will be so cute when it is done.
xxox
Jen!! That house is going to be so amazing! I am so excited for you! The ceiling looks fabulous! You can bet I will be following along waiting to see all your progress!!
Thanks Amy!! It’s been so fun working on this project. I love your kitchen and your ceiling is amazing amazing!!!
xoxox
this rocks, I will have to show to my sis, she has a 1912,bungalow, with arts and crafts details,her kitchen ceiling is part of a add on in the 30’s. this would be perfect
Hi Kathryn!!
Your sister’s home sounds amazing! Does she have a blog or pictures of her home somewhere? I would love to see it!!
Thanks for the comment and have a great weekend!!
xxo
wow that is a lot of work but looks beautiful.
Thanks so much for your comment!! Yes, it was a lot of work, but I love the interest it gives to the room. It’s so fun to work on something yourself and then see the results. The room is just getting started, but I think it’s going to be so pretty when it gets done.
Have a great weekend!!
xox
Is it expensive to do a ceiling like that? I looooove it! My wheels are turning…
Hi Jen!! It’s really pretty affordable. The planks are 100% ,real wood so you have to pay for that. The total cost for everything to make this project was under $700. And I still have some boards left. There is a cinderblock column on one side of the room that has a pipe from a wood burning stove. And it goes all the way from the foundation to the ceiling. So I am going to use those same boards to cover that up and I think it will give the wall over there a pretty focal point when I get the room finished. I wish the room was more finished than it is, so I could have done a big reveal. But we took out the bathroom floor and found that the sewer pipe had a big crack in it so I have been dealing with that and we had to have all new plumbing and electrical put in. So that has delayed the drywall and getting the kitchen finished. But I think it’s going to be so cute when I get it done. I am so excited about this tiny cottage.
Thanks for your comment!! Also, I wanted to tell you that I did my guest room with these same boards and the whole wall in there was under $200. A ceiling is just a bigger project.
xoxo