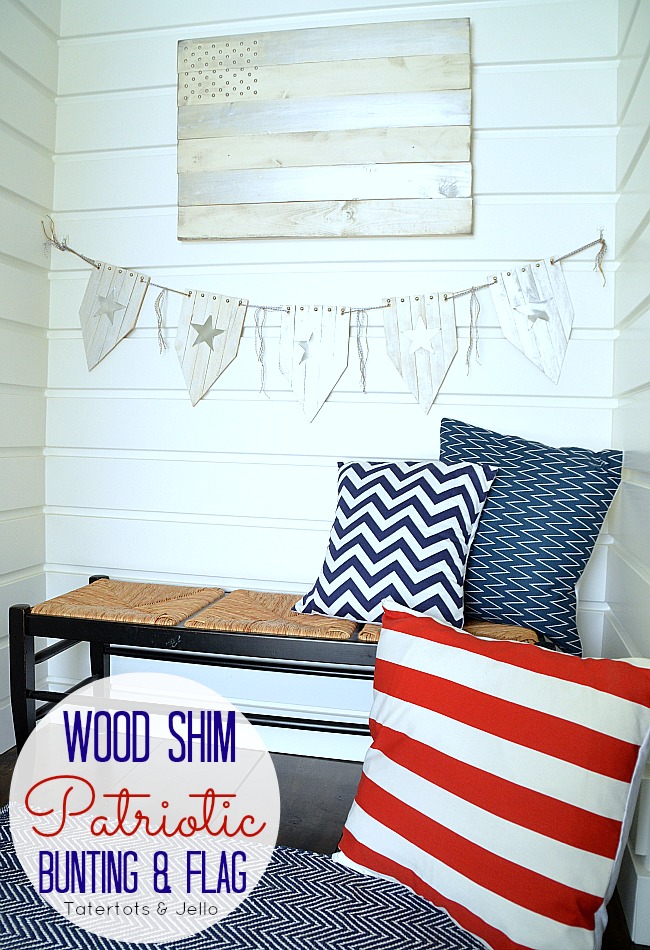
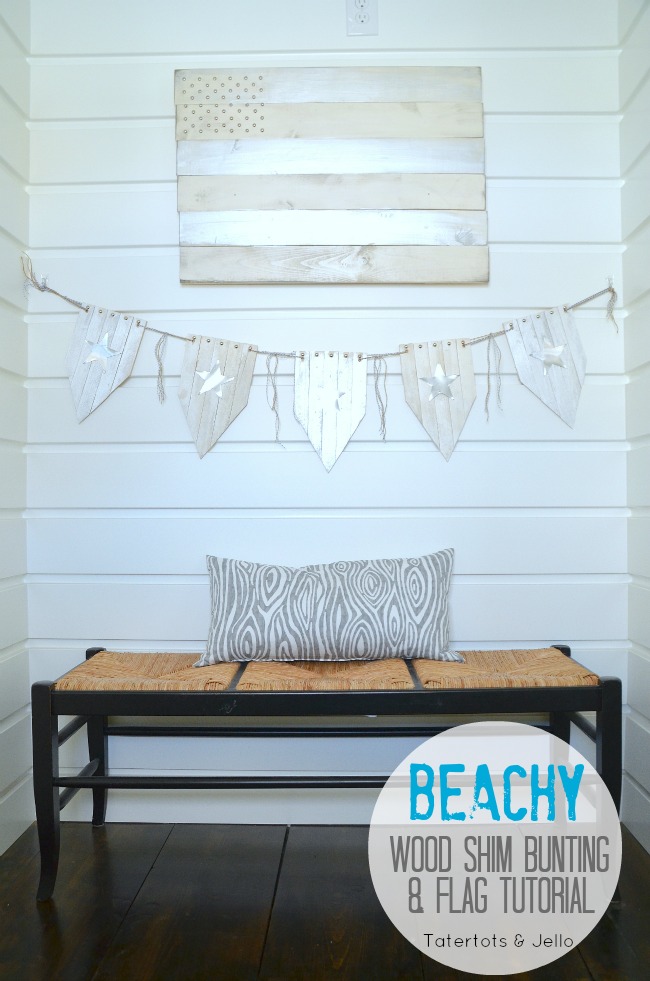
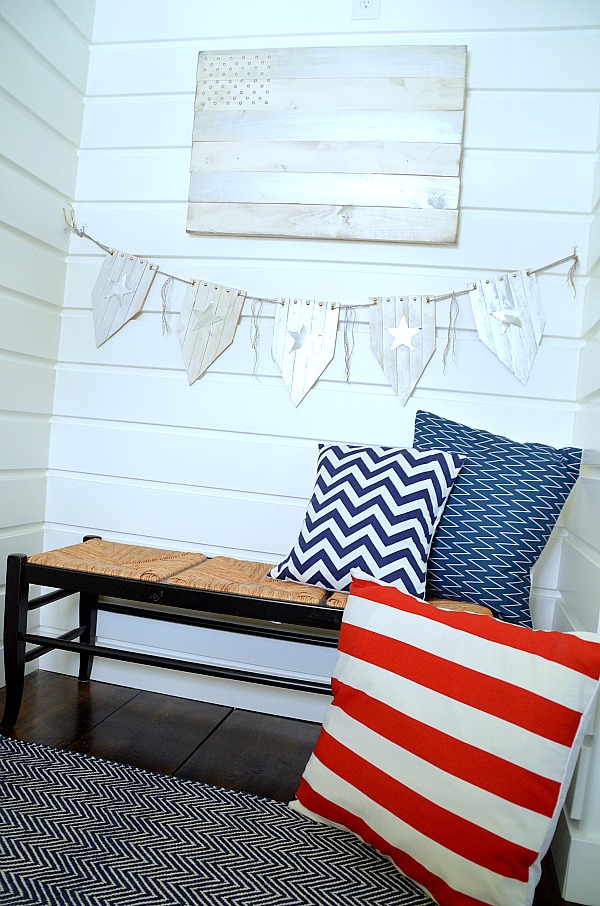
Our June challenge from Lowes was to create a Patriotic Project. I thought it would be fun to make a wood bunting and flag to display. I wanted to create a “beachy” patriotic feel. It’s perfect if you have a home that doesn’t go with the traditional “Red White and Blue” theme.
Here’s how I made the Wood Shim Bunting and Flag:
Materials:
3 packages of Wood Shims (buy the quality shims from Lowe’s — the “contractor” shims. They’re bigger and less brittle)
3 2×4 8-foot boards, cut into 6 3-foot sections
Upholstery Tacks
Silver Paint
White Spray Paint
Sheeting Metal
Metal Shears
Twine
Here’s What To Do:
To make the Wood Shim Bunting:
- The wood shim bunting is nearly identical to making the individual petals on the wood shim flowers (see the full tutorial for that here, complete with pictures.)
- Depending on the size you want for your bunting, you may want to adjust the instructions, but here’s what I did.
- Lay out five sets of five shims each, lined up against the thicker end.
- Get the glue gun warming up while you lay out the shims. (Note: you can use wood glue instead – and it will be more secure, but it will take longer to dry.)
- Glue horizontal shims across each set. You want to set the horizontal piece more than halfway up from the thick end of the shims because you’ll be cutting at an angle at the thin end.
- Once the glue has dried, take your glued shim sets to your miter saw. You should wear gloves and eye protection. With your saw set at the standard 90 degree angle, trim off the extra horizontal shim piece (the part that hangs off like a handle).
- (Optional: if you want to make your cuts extra smooth, you can quickly trim the thick ends of the shims so the ends are all even, and that also increases your odds of cutting your angles straight later.)
- Set your miter saw on a 30 degree angle.
- Measure and mark the middle of your uncut shim block – whatever size it is – along the thin end. (For me, they were about 7” wide.) If you have a saw that has a ruler along the back – and especially if it has a laser to show you where the blade goes – this will go faster, but it doesn’t matter.
- Lay the shim block with the thin end against the back of the saw. Set the saw to cut at the 30-degree angle beginning in the middle where you made the mark.
- Cut the shim block to cut the first half of the triangle at the bottom of the pennant.
- Flip the shim block over – we’re going to cut the other side of the bottom. Make sure the shim block is square against the back and that it’s lined up correctly and make the second 30-degree cut, completing the triangle at the bottom of the pennant.
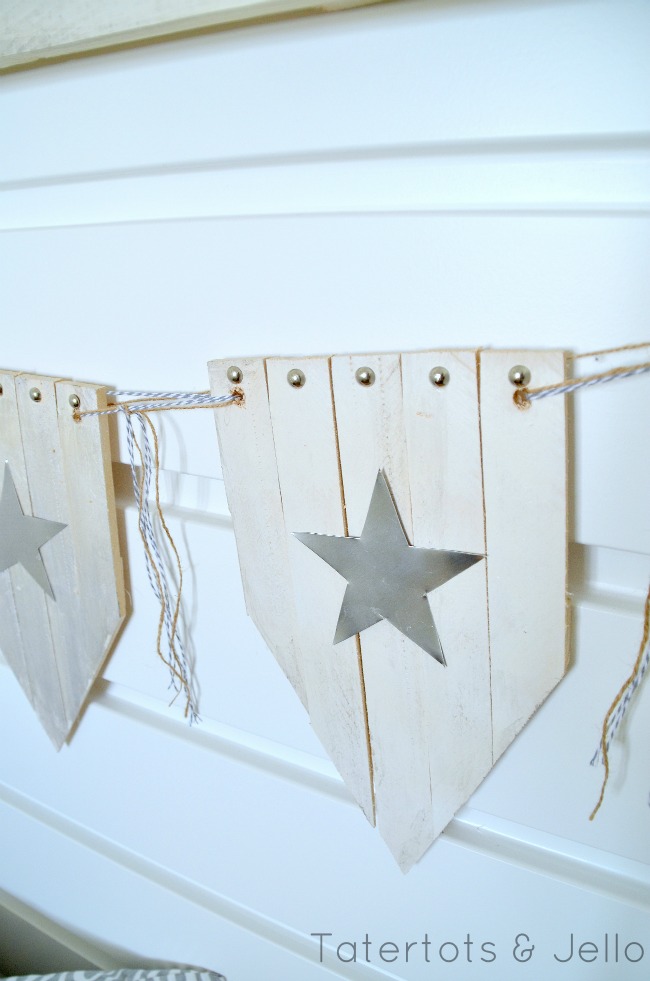
- Now, assuming you’re going to tie your individual pennants together with string like I did, you will probably want to use a power drill to drill holes at the top left and right corners — about 1/4 inch or so in from the top and sides.
- Spray paint and distress the pennants. I also painted every other pennant silver.
- Cut out stars from metal roofing sheeting, using metal sheets. Hot glue those on.
- Add a row of upholstery tacks to the top of the pennants.
- Then tie the bunting pennants together with twine and hang them up. I used Command Strip hooks so I can take the hooks down easily.
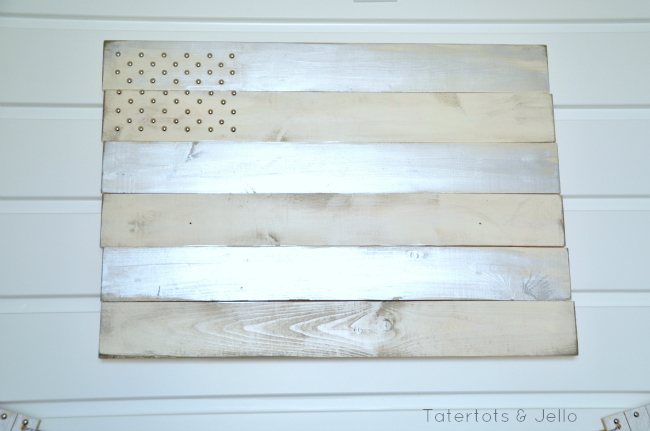
To make the Flag Sign:
- The flag sign assembly is super easy. Once you have the main 6 pieces cut, lay them side by side, and then lay two (or three) pieces perpendicular to them on the back. Once you’re happy with the placement, screw the perpendicular pieces on the back. You can add a picture hook to the back and then hang it up. I also used a Command Strip Hook to hang this flag. I used picture hanging wire on the back and then hung the wire onto the Command Strip Hook.
- I spray painted the flag white and then painted every other sat on the flag with metallic paint. Then I distressed the whole thing with my mouse sander.
- And then I added upholstery tacks to the flag and to the top of the pennants. I marked the spaces where I wanted upholstery tacks to go on the wood and then pounded them in with a mallet.
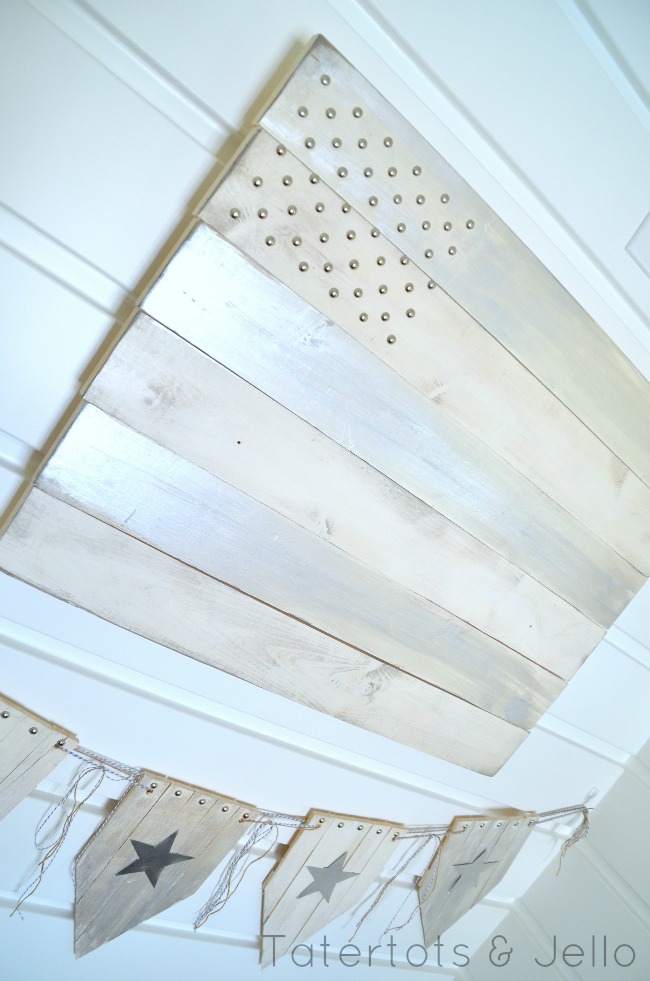
The thing I love about this project is how neutral this can be for a Patriotic Project. I also love that it doesn’t have to be precise. I think it looks even better when slats are a little uneven.
You can follow along with Lowe’s on Facebook for more great ideas and sign up for their FREE Creative Ideas Magazine with TONS of great DIY ideas and instructions!!

Have a CREATIVE Day!
xox

Thanks Lowes for the gift cards to make this project.


Hello to every one, it’s actually a pleasant for me
to go to see this site, it contains valuable Information.
Quality content is the crucial to attract the visitors to visit the site, that’s what this
website is providing.
this is so beautiful! and a wonderful variation on the traditional colors. I love the pearly white washed-on effect.
Now that is super cool! Love the metallic!
How did I miss this earlier this week??!! Love the tones- so calming & definitely takes me back home to the beach.
LOVE it! The flag is awesome!
so fun Jen! I love the neutral look!
I think your materials list was supposed to read “cut into 6 3 foot sections”, not 4. 😉
I absolutely love this effect. Love the upholstery tacks and the metallic paint accents. Such a soft feel that could blend with any decor, really. And you could beachify this even more with starfish.
I love flags and I will absolutely have to try to duplicate this! Thank you for another beautiful tutorial!
Oh thanks for catching that Wendy!! I’ll go in and chnhe that 🙂
xoxo
Love how creative these decorations are! They turned out SO beautiful! obsessed…
Great tutorial!! I would love it if you would link up at my {Work It Wednesday} linky party!!
xo
amy
http://theblissfulbee.com
Looks wonderful Jen. The neutrals are great break from the traditional red white and blue. Love it.
Thanks Chelsea – I was hoping to show a more neutral way to display Fourth of July decor.
Thanks for your comment!
xoxox
Too cute!
Thanks Jessica!!
xxox
I love how you did these in the neutral tones! They can stay up all year for more enjoyment! TFS!
Thanks Barbara! I think it’s a fun project for people that have decor that doesn’t go with the traditional red white and blue theme too.
Have a great day!
xoxo