Tatertots and Jello

COLORFUL HAPPY HOME -- Daily DIY, Decor, Craft and Recipe Tutorial

  • My Home
    • 1905 Cottage
    • Daybreak House
  • DIY
    • DIY Projects and Ideas
    • Organizing
    • Tutorials
    • Printables
  • Decor
    • Spring Projects
    • Summer Projects
    • Fall Projects
  • Crafts
    • Kids Crafts
    • Painting Projects
    • Paper Projects
    • Sewing
    • Wreaths
  • Holidays
    • Valentines Day
    • Easter
    • Halloween
    • Thanksgiving
    • Christmas
    • HAPPY Holidays Series!
  • Recipes

Explore

  • my home
  • diy
  • decor
  • crafts
  • holiday
  • printables
  • recipes

Connect

Home » gift ideas » How to Make DIY Rosette Headbands

christmas, crafts, gift ideas, HAPPY Holidays, holiday, kids, tutorial · December 8, 2016

How to Make DIY Rosette Headbands

Tatertots & Jello is a participant in the Amazon Services LLC Associates Program, an affiliate advertising program designed to provide a means for sites to earn advertising fees by advertising and linking to amazon.com.

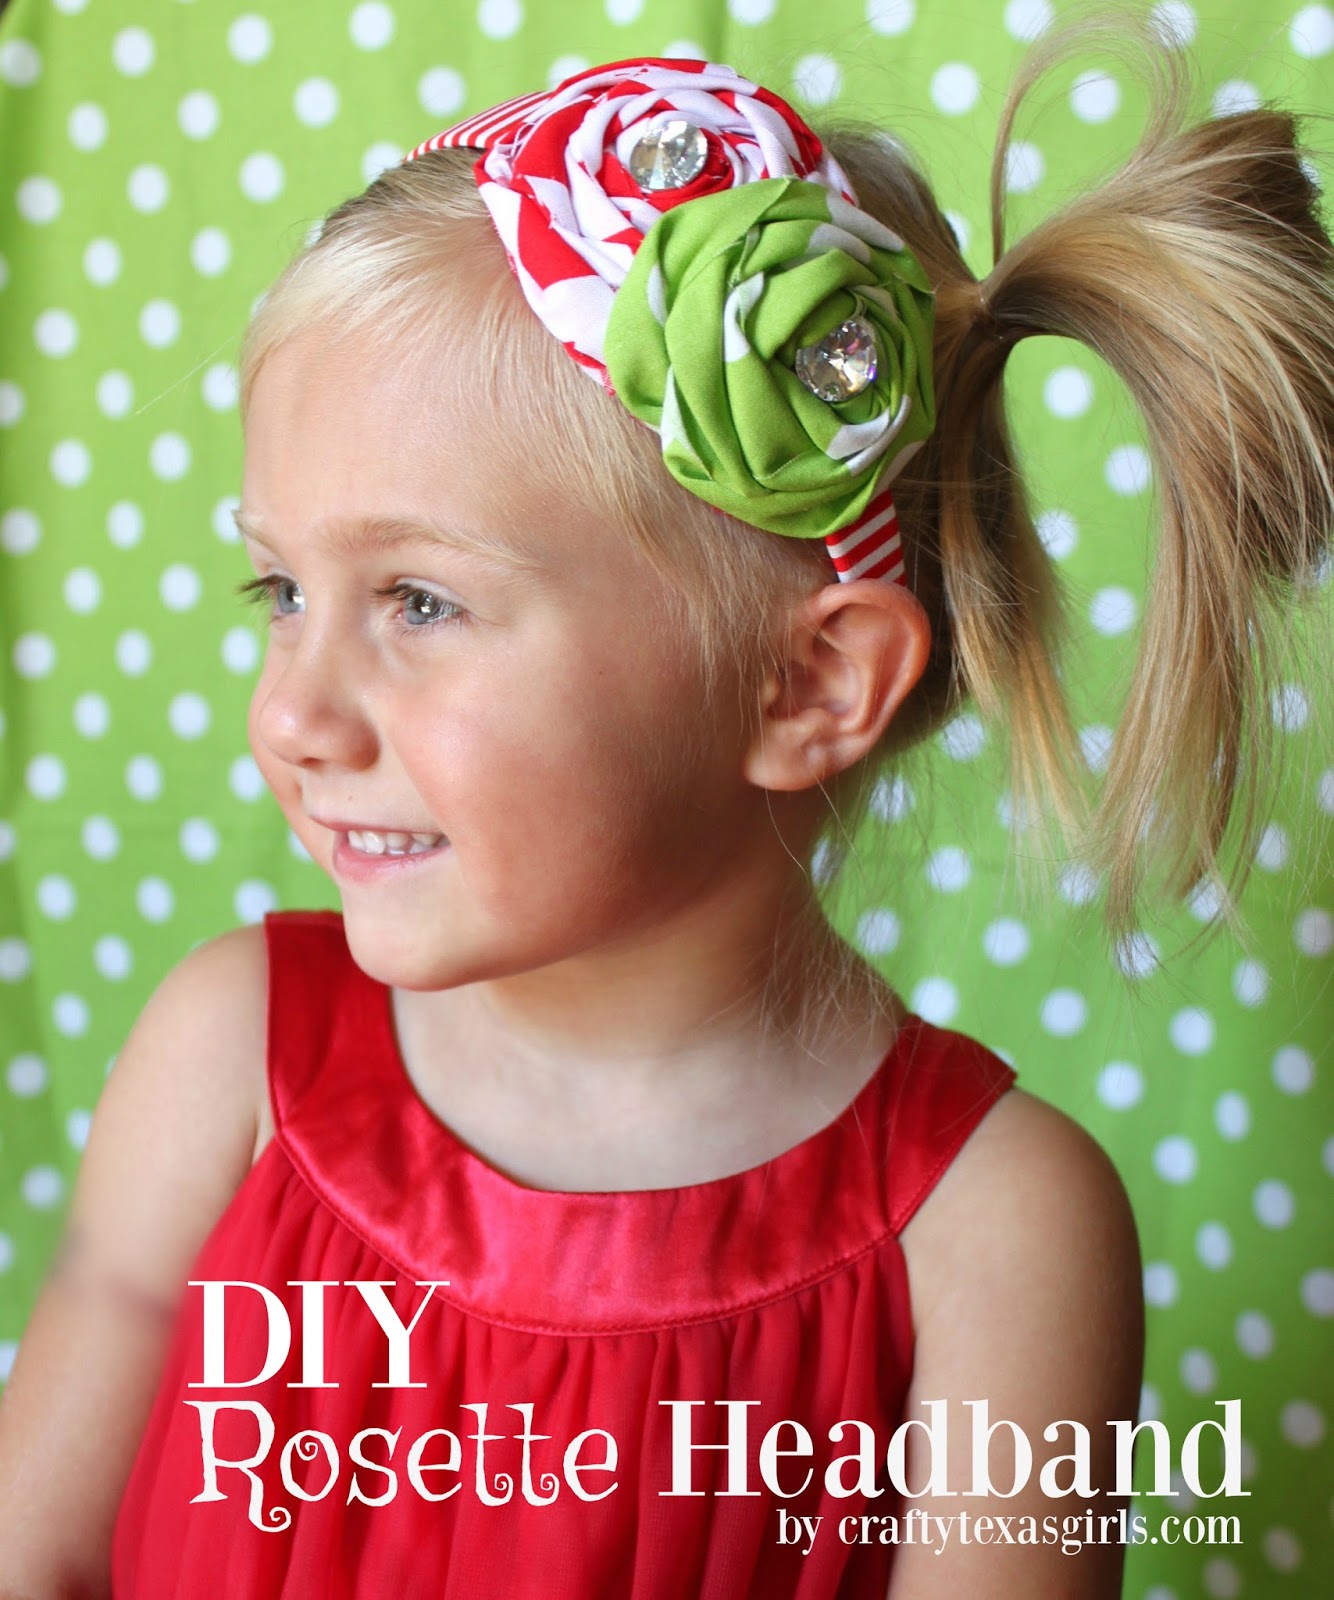
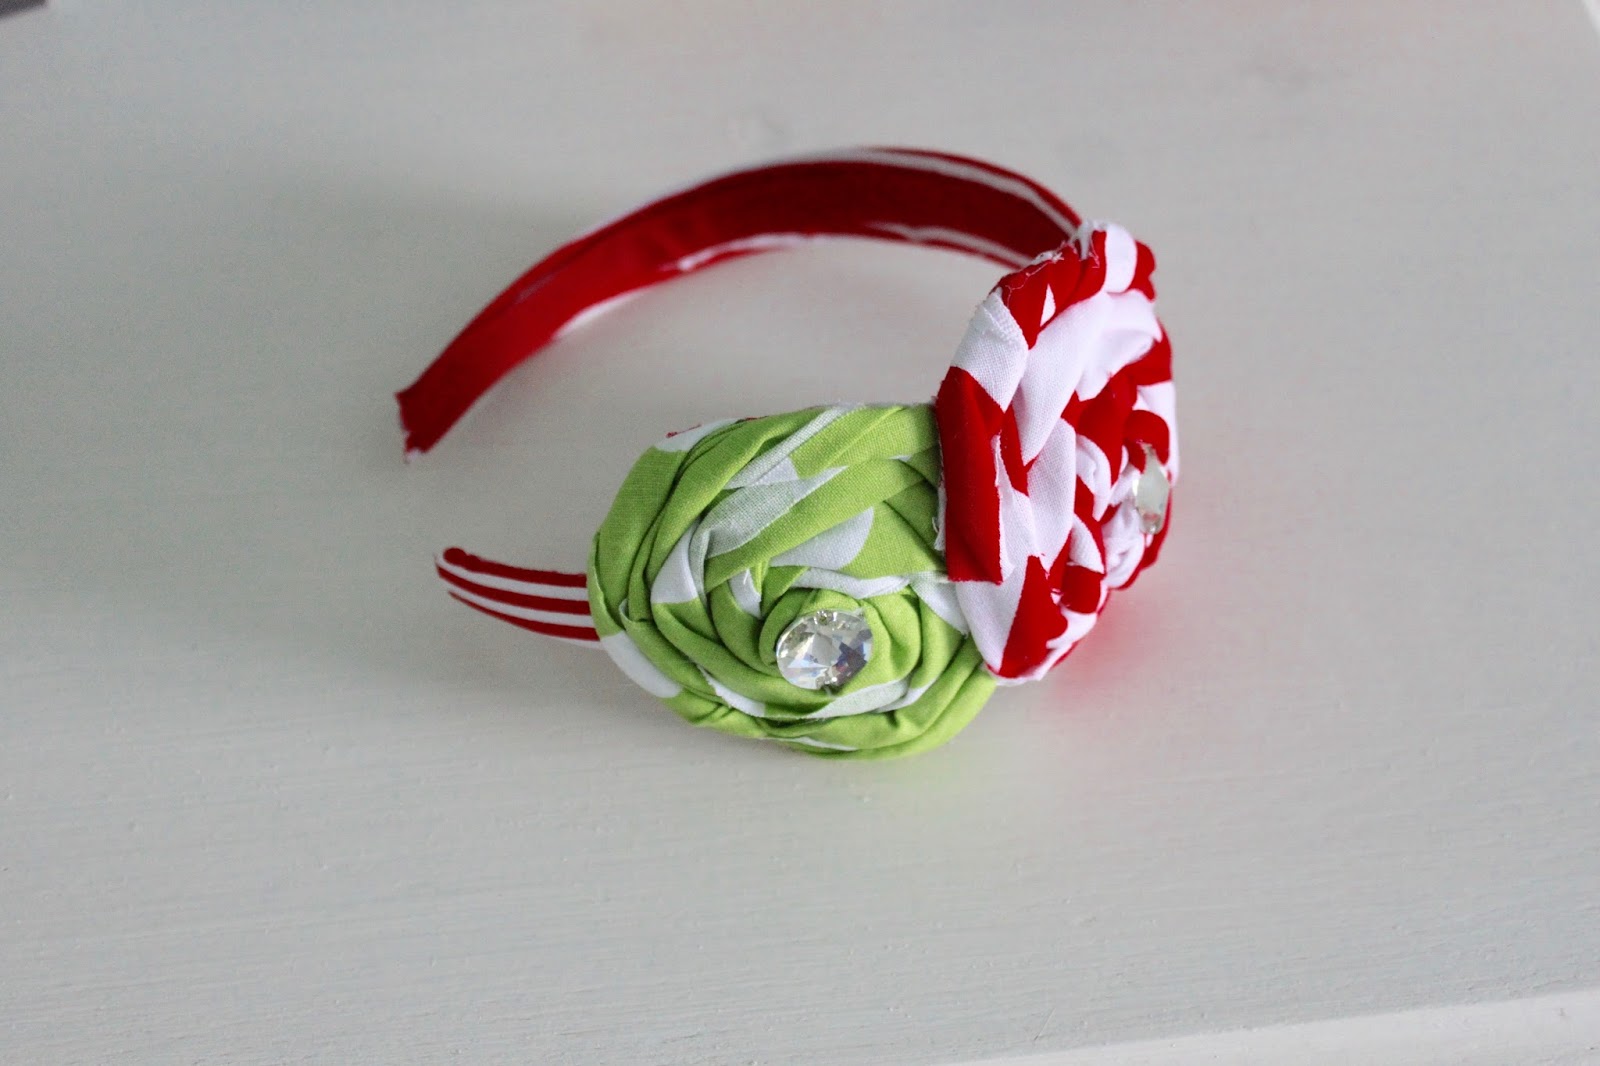
Hi I am Samantha Conner from Crafty Texas Girls. Today I am so excited to share with you my favorite hair accessory project- DIY Rosette Headbands! I have been making these headbands for years- I used to sell them to boutiques all across the country. Today, I will share all my best tips and secrets for making this adorable headband. This is the first time I have ever shared ‘the how-to’ for this perfect ’boutique accessory’. It makes a great gift for girls (and women) of all ages. Now let’s get started! How to Make DIY Rosette Headbands:


How to Make DIY Rosette Headbands 


Supplies for needed for the DIY Rosette Headband:
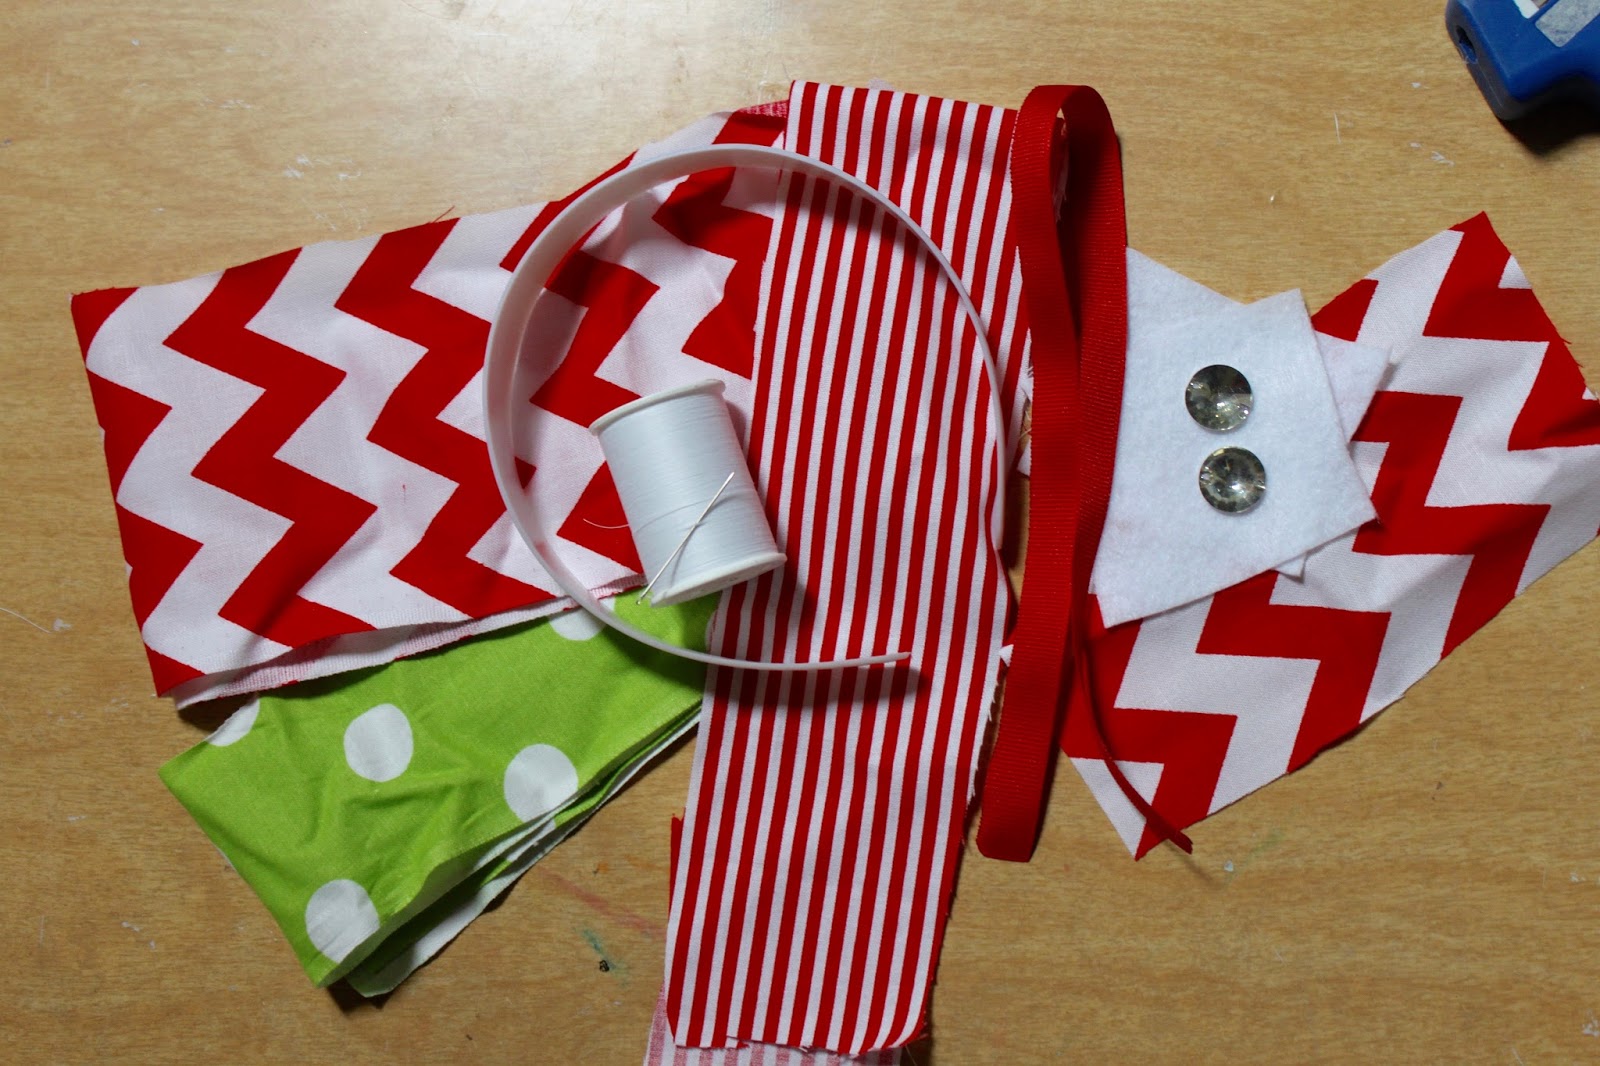
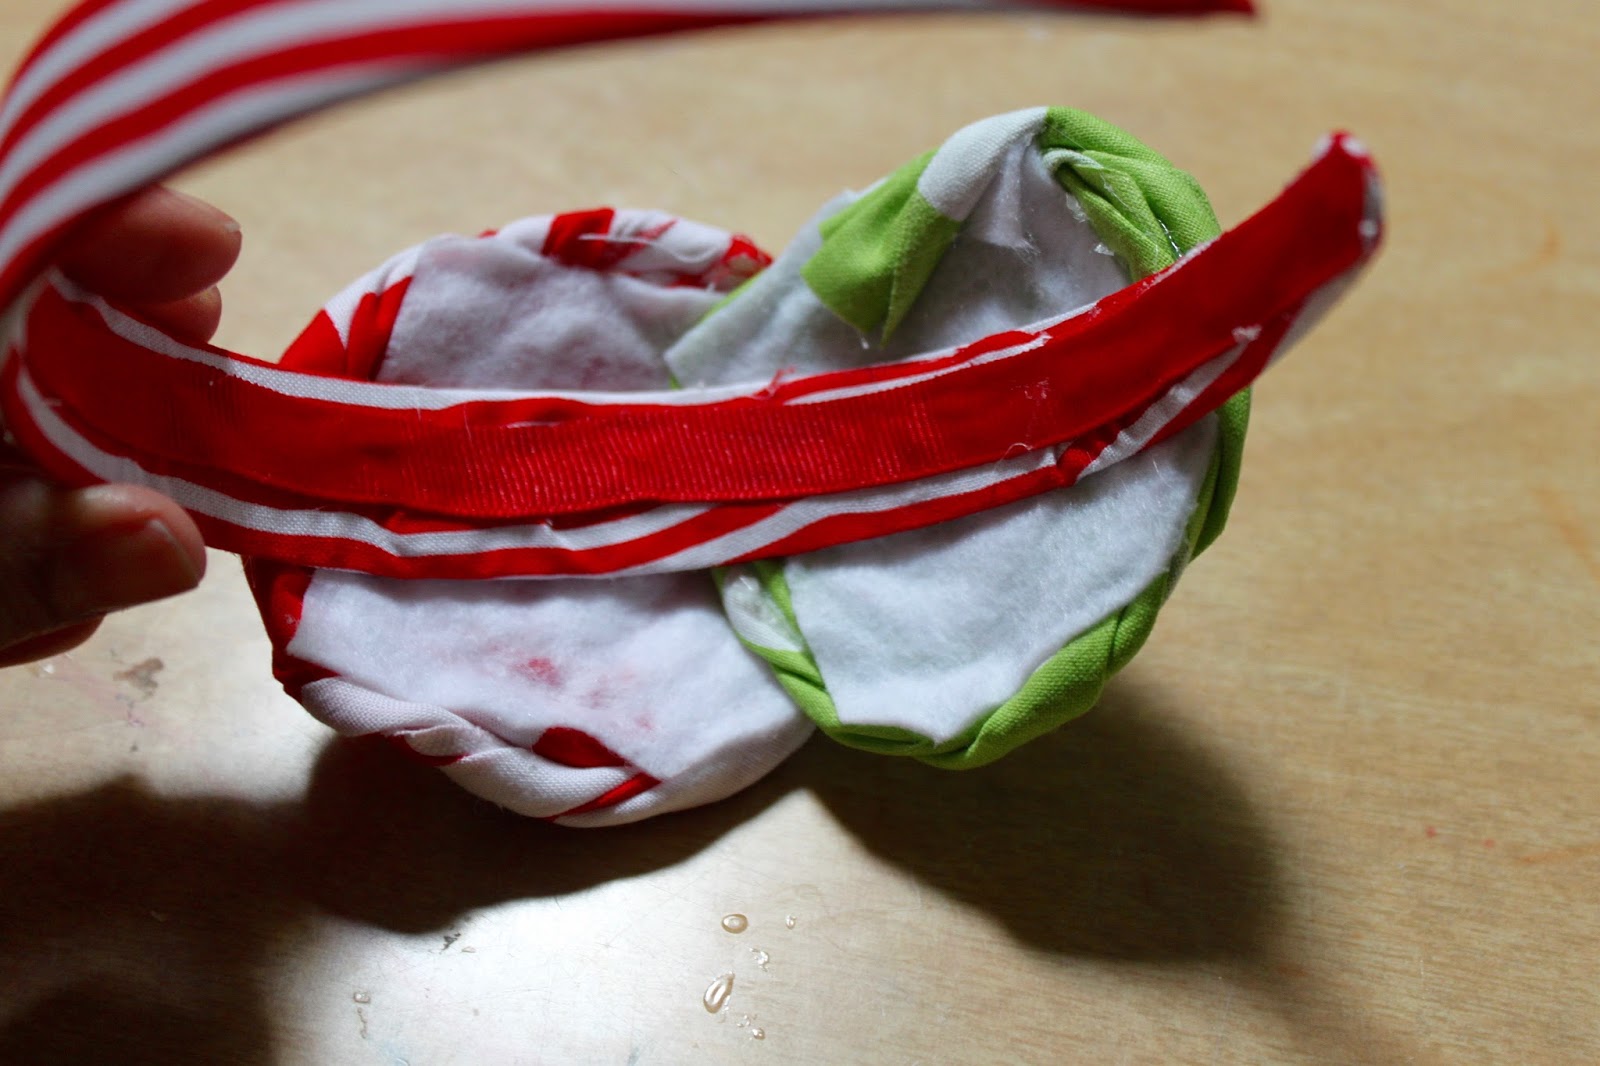
-1 inch plastic headband (here)
-19 inch long, 2.5 inch wide striped fabric (similar here) to cover the headband
-19 inch 3/8 ribbon (similar here) to line the inside of the headband
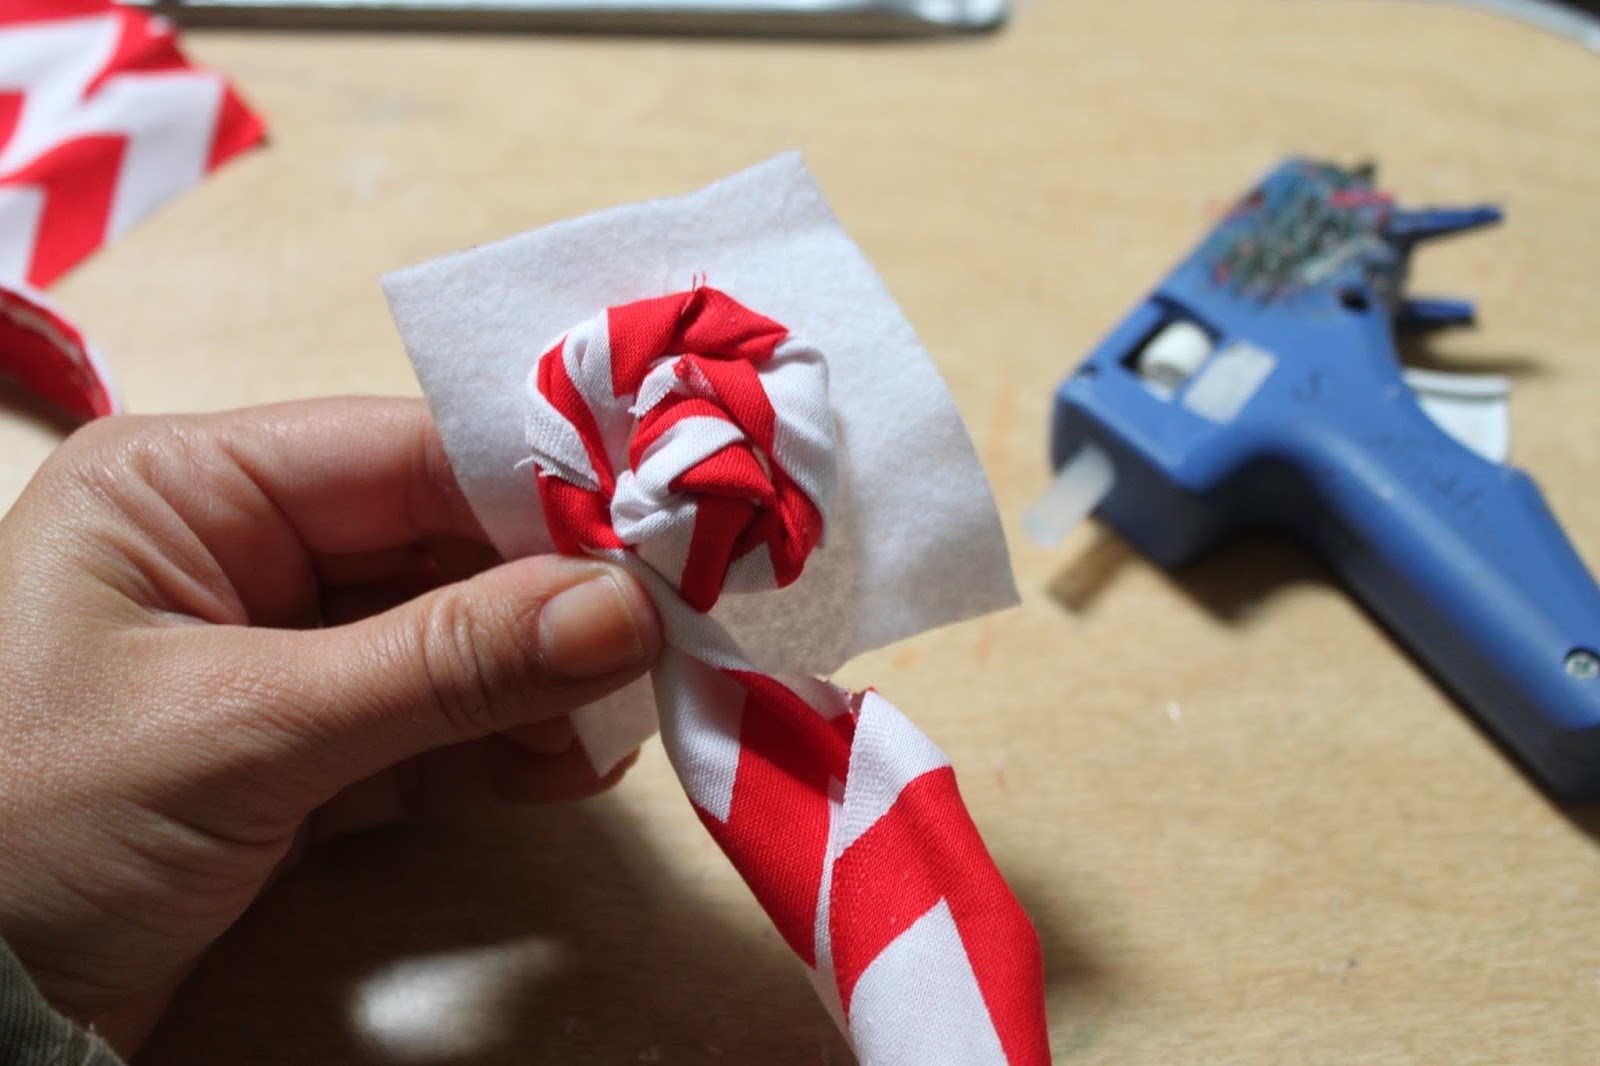
-2 pieces of 32 inch long 3.5 inch wide fabric (similar here & here) used to make the rosettes
-2 pieces of felt for the back of the rosettes (similar here)
-2 jewels (similar here)
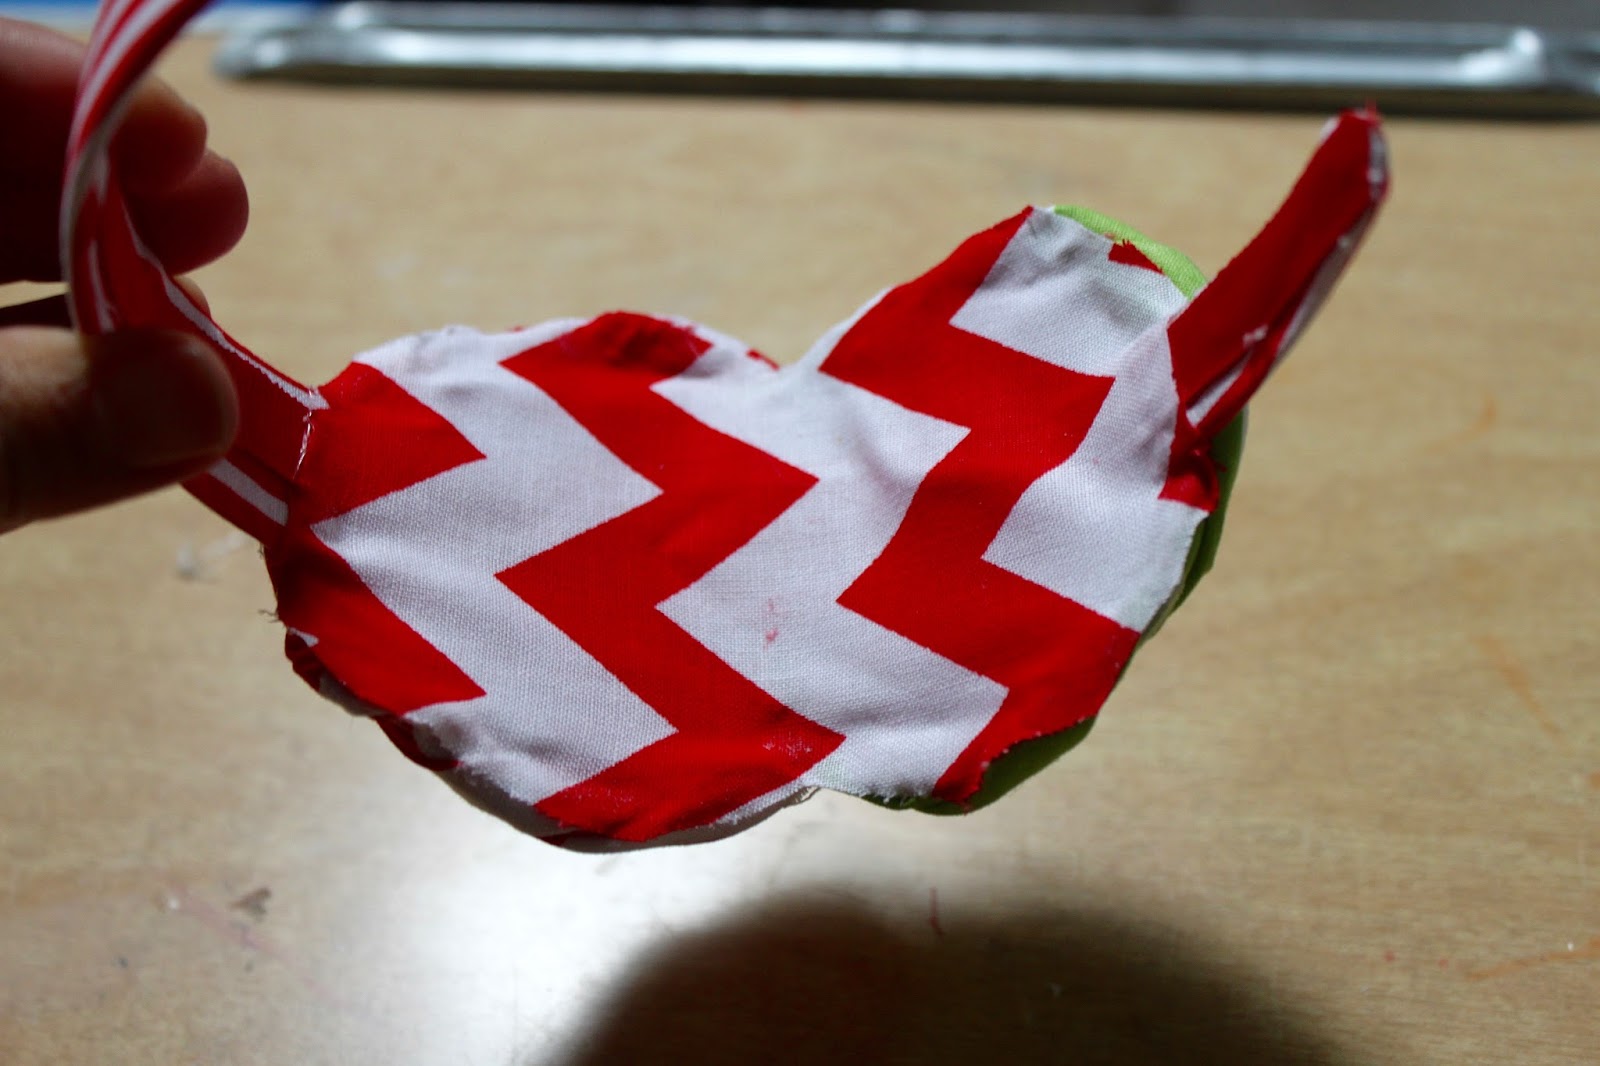
-fabric approximately 3×5 inches to finish the backs of the rosettes
-hot glue
-needle thread (optional- if you prefer to sew on the jewel)

This is a great project to do with your scrap fabric. You can use Christmas colors, your favorite team colors, neutrals (my personal favorite), or even make it to match a special outfit.

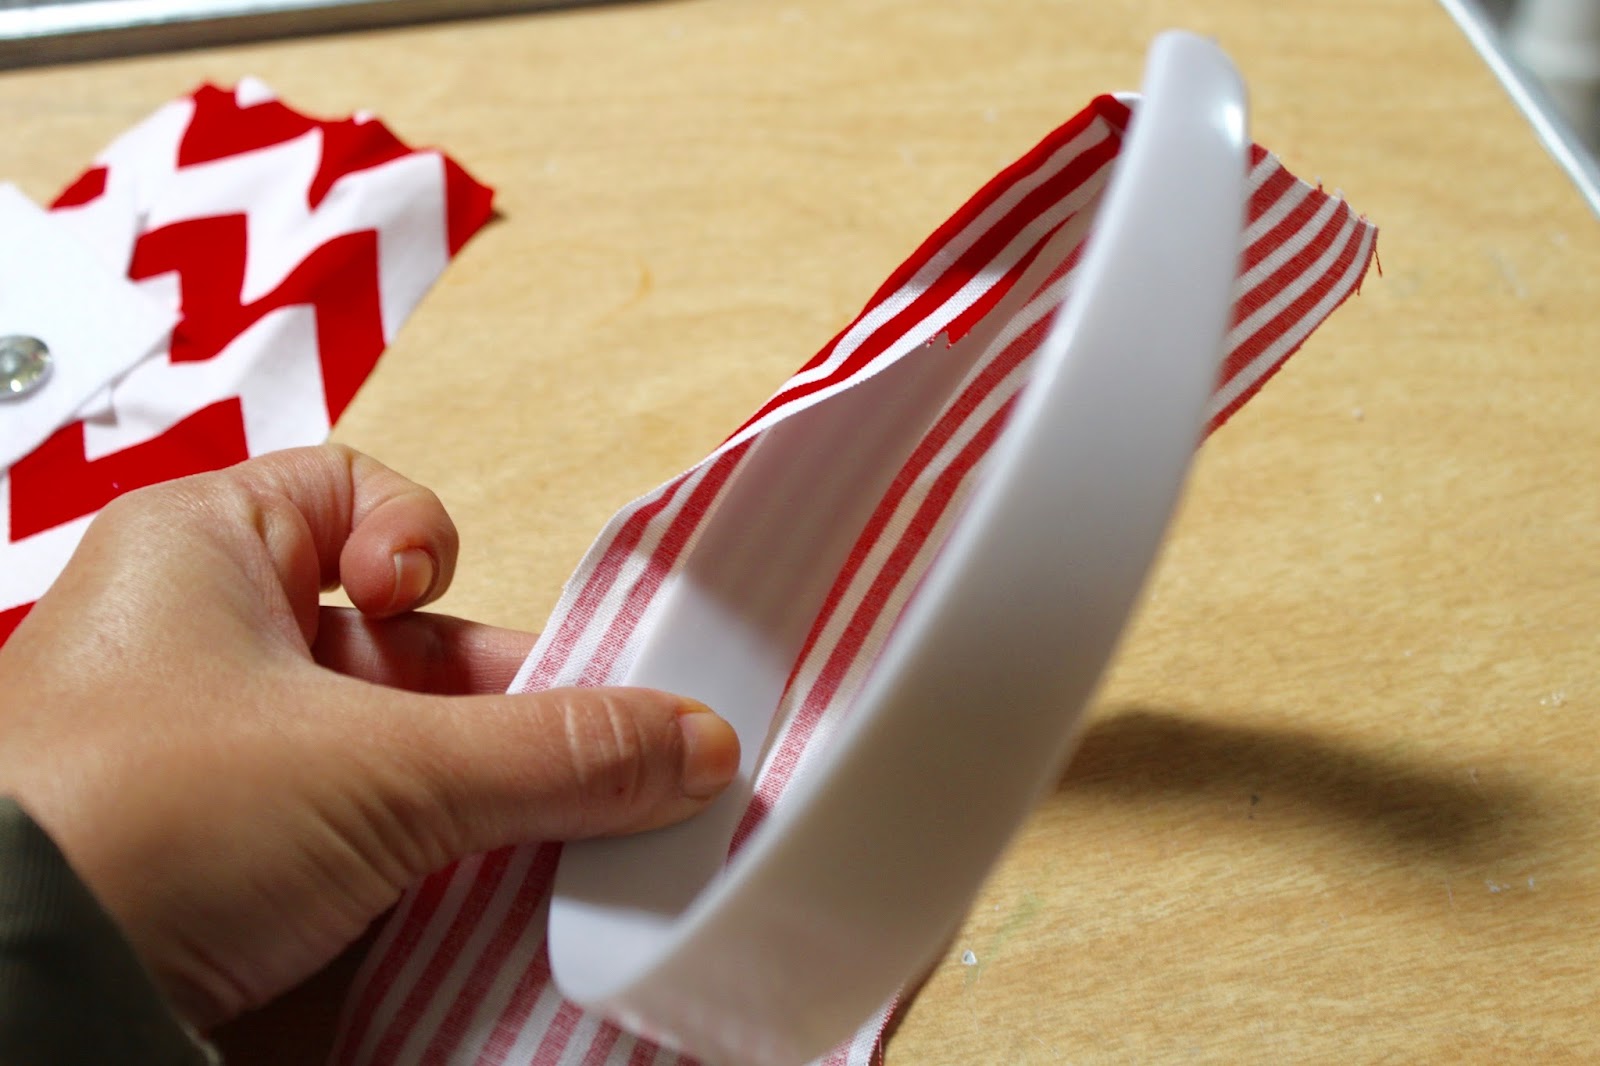
1. Use the striped fabric to cover the headband. Work in small sections and apply hot glue to the back of the headband. Pull the fabric tight and press into the glue. Continue working until the entire headband is covered. It’s ok if the back gets a little messy looking, we’ll cover that up later!

2. Set the headband aside. Now it’s time to make the rosettes. Take the chevron fabric and make a knot at the end. Add a circle of hot glue to a small piece of felt. Press the knot onto the hot glue. Then twist and glue, while making a circle with the fabric. This circle will be your rosette.


3. When you reach the end of the fabric, tuck under it into the rosette and secure with glue. Repeat with the green fabric to make another rosette.
4. Use the skinny red ribbon to line the inside of the headband. Then glue the rosettes into place. The bottom of the green rosette should be about one inch from the end of the headband. This way the rosette flowers sit on the side of the head, not the top.


5. Add a backing to the rosette with the chevron fabric. This will make it look “finished and neat”.

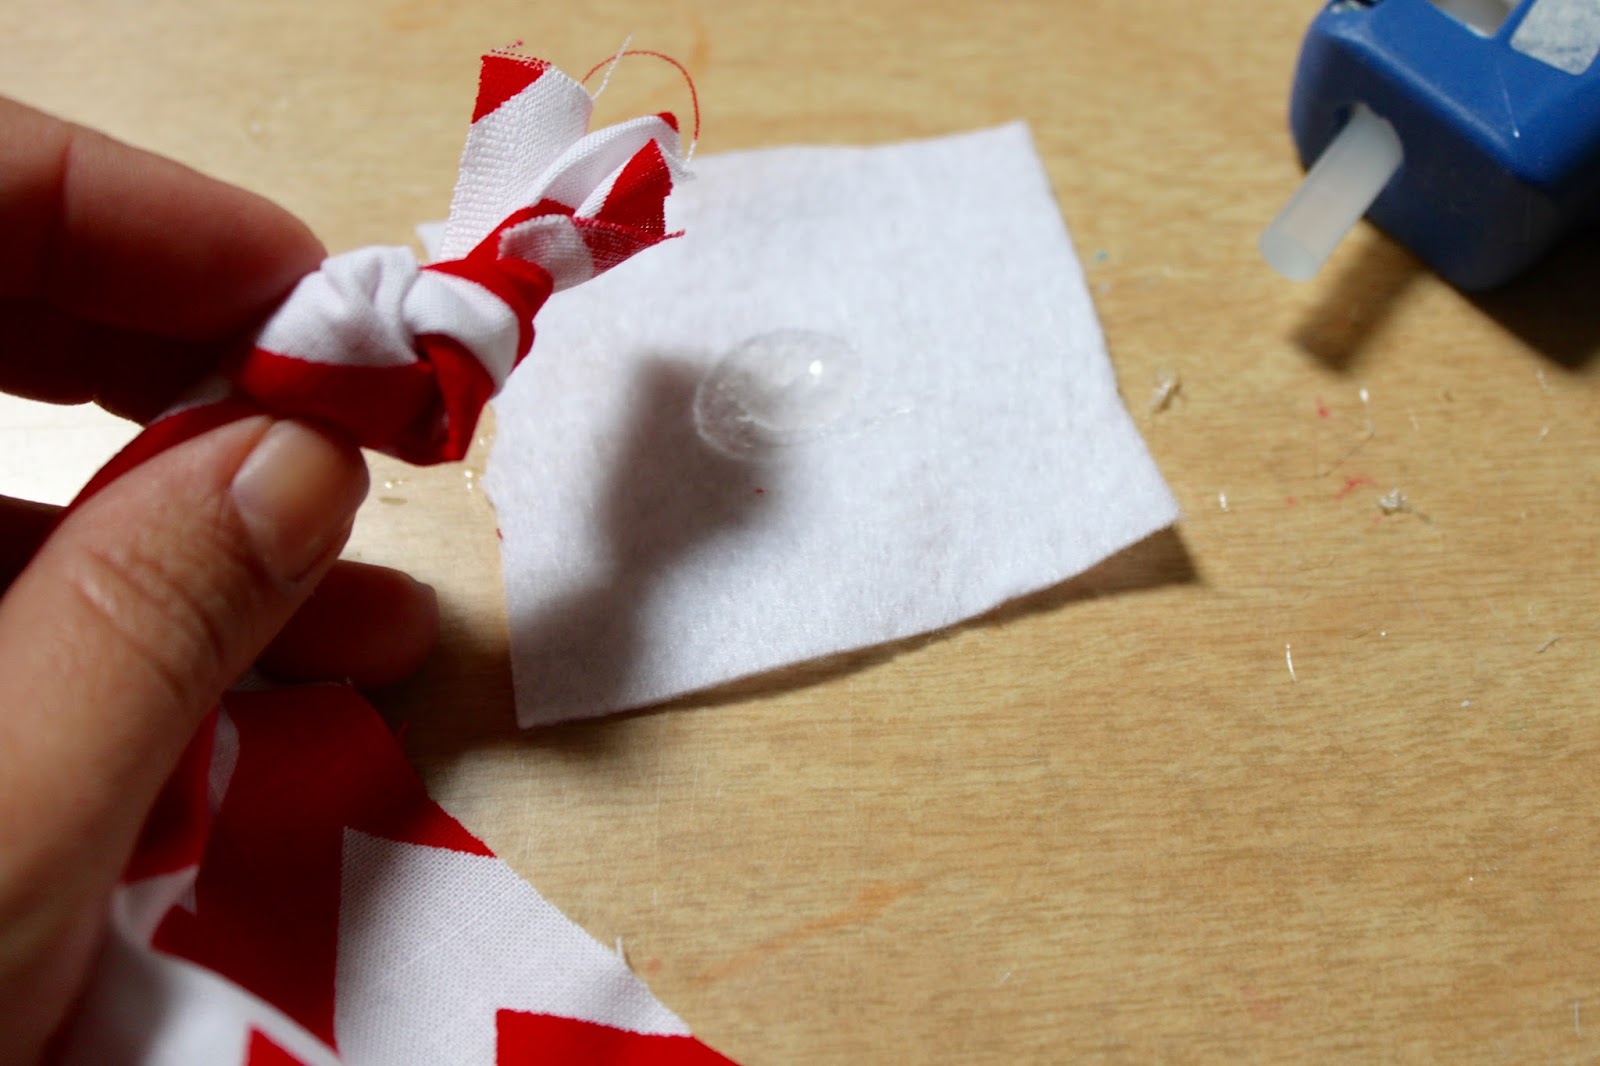
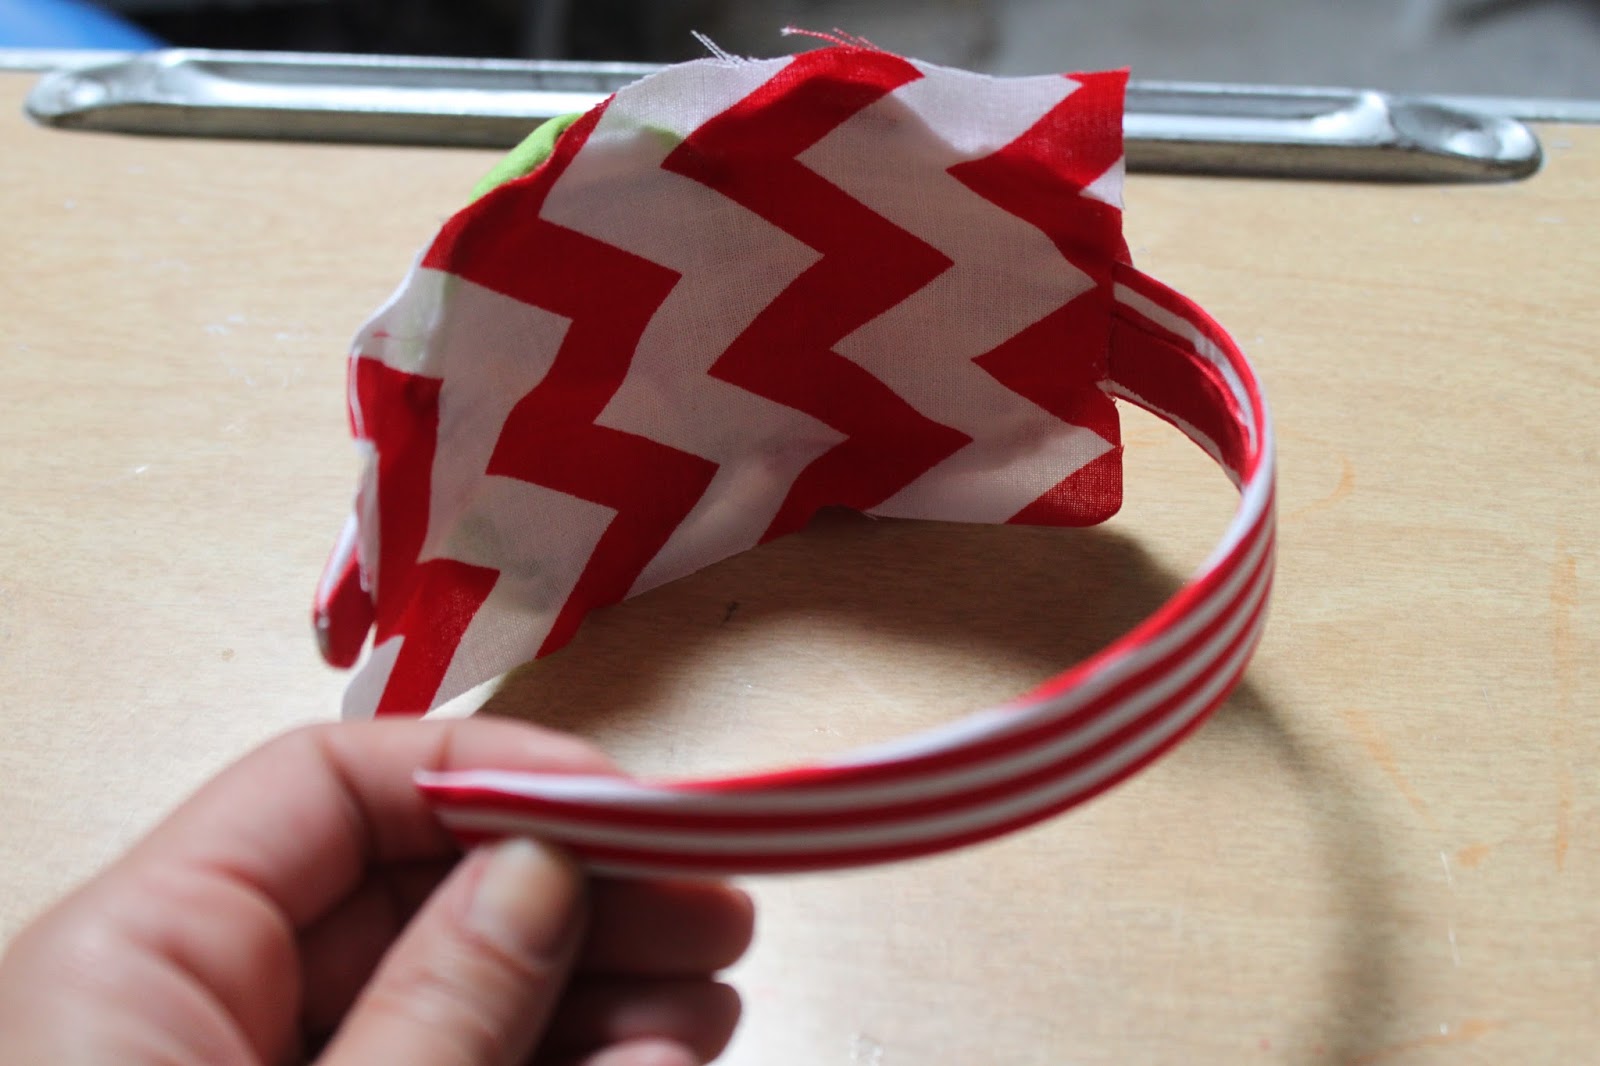
6. Trim away the excess fabric on the backing.


7. Then glue the jewels the center of each rosette and you are done! (Note: if this headband is for a young child, pick jewels that can be sewn on. That way you don’t have to worry about them coming off. Small jewels could be a choking hazard for littles.)


How to Make DIY Rosette Headbands


How To Make DIY Rosette Headbands 


Isn’t this just the cutest Rosette Headband ever?! Thank you so much for crafting with me today!

Keep in Touch with Crafty Texas Girls
Facebook | Instagram | Pinterest | Twitter | Blog

If you liked this project, hop on over to Crafty Texas Girls for these fun posts:

1. Jingle All the Way Tote Bag
2. How to Throw a Tea Party at Home 
3.  DIY Glitter Christmas Shirts

 Those headbands are so adorable. And what a fun gift idea. My girls will love making them!

Be sure to follow along with Crafty Texas Girls:

Crafty Texas Girls on Pinterest:
pinterest.32x32.icon.circle
 Crafty Texas Girls on Facebook:
facebook.32x32.icon.circle
 Crafty Texas Girls on Instagram:
instagram.32x32.icon.square
 Crafty Texas Girls on Twitter:
twitter.32x32.icon.circle
Have a CREATIVE  Day!
xoxo
Be sure to check out the hundreds of FUN holiday DIY ideas in the Happy Holidays series too!!
 

HAPPY Holidays Guest Series - Recipes, Party, Home Decor Ideas!

Posted By: Jen · In: christmas, crafts, gift ideas, HAPPY Holidays, holiday, kids, tutorial

Mini Christmas Shortbread Cookies
DIY Photo Frame Ornament

You’ll Also Love

Warm and Cozy Hygge Christmas Gift Boxes
Make a T-Shirt Quilt! Take treasured t-shirts and supplement them with thrifted shirts with meaningful places, logos or sayings for a quilt that will be treasured always. It is a fun craft to make with a teen or tween or give as a gift!How to Make a T-Shirt Quilt!
Year round interchangeable wreathYear-Round Interchangeable Wreath

Comments

  1. E si mina anche un sacco di cultura 21 says

    December 12, 2016 at 3:47 AM

    MYRTLE Shore, South carolina (WMBF) Your believe stole a Georgetown state police force car and guided a higher swiftness car or truck fall in love with in April 31 in to a different talk about, reported by Idaho Hwy Patrol Sgt. Sara Lewis.WMBF News obtained el presidente del comité 69 911 phone calls with the Georgetown Nation Police Office. An example may be from the hospital member of staff revealing delivery, “we simply just stood a psychological affected individual get out of Waccamaw C

  2. Lindsay @ The DIY Mommy says

    December 8, 2016 at 8:28 PM

    This is so cute! Just perfect for the holidays! My little girls out LOVE these!

  3. Donna Harvey says

    December 8, 2016 at 5:25 AM

    The headband is just so cute. I wish I had a little one to make it for. Do you think it would look silly on me? Oh, that’s right I can’t cover up my halo???? Ho you all have a Joyous and Blessed Christmas.

Hi! I'm Jen Hadfield. I'm a mom of 5 restoring an 1891 home in the heart of Salt Lake City. I love being creative and sharing simple ideas to make your life easier and more beautiful!

Receive the Latest Crafts, DIY, Recipes and More in your INBOX!

Follow us on Pinterest! It's awesome!

Top Posts & Pages

Spruce up Your Outdoor Space with a DIY Recirculating Fountain! (tutorial)
A New Deck in Under 30 Minutes!
12 Must-Have Items to Pack on an Alaskan Cruise!
DIY Secret: How to Print on Post-It Notes (and Free Printable Template)
How to Make a T-Shirt Quilt!
Copycat Panera Spinach and Artichoke Egg Soufflés - SO good!


Popular Posts

  • Spruce up Your Outdoor Space with a DIY Recirculating Fountain! (tutorial)
    Spruce up Your Outdoor Space with a DIY Recirculating Fountain! (tutorial)
  • A New Deck in Under 30 Minutes!
    A New Deck in Under 30 Minutes!
  • 12 Must-Have Items to Pack on an Alaskan Cruise!
    12 Must-Have Items to Pack on an Alaskan Cruise!
  • DIY Secret: How to Print on Post-It Notes (and Free Printable Template)
    DIY Secret: How to Print on Post-It Notes (and Free Printable Template)
  • How to Make a T-Shirt Quilt!
    How to Make a T-Shirt Quilt!
  • Copycat Panera Spinach and Artichoke Egg Soufflés - SO good!
    Copycat Panera Spinach and Artichoke Egg Soufflés - SO good!
  • 15 Between the Studs Bathroom Storage Ideas
    15 Between the Studs Bathroom Storage Ideas

As seen in


Amazon Affiliate

Tatertots & Jello is a participant in the Amazon Services LLC Associates Program, an affiliate advertising program designed to provide a means for sites to earn advertising fees by advertising and linking to amazon.com.
  • About Me
  • Advertising
  • Get Featured

Copyright © 2025 Tatertots and Jello · Privacy
This site is a place for positive discussion and ideas. Negative talk, comments that disparage others, and similar are not welcome and may be removed.