I’m having such a fun time making over our master bedroom! I realized that it hasn’t really been redone in about 9 years. Wow!
I’m participating in something really exciting — Jo-Ann and HGTV HOME™ Magic with Fabric & Trim challenge. And I only have 30 days to complete the room so I have been working really hard on it and it’s been so much fun!!
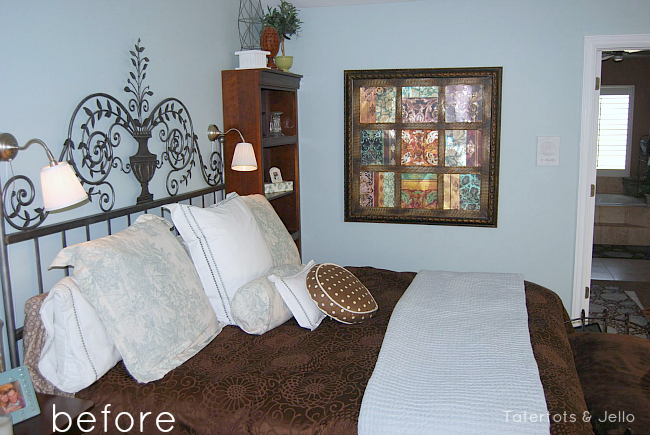
Of course the main part of a bedroom is the bed. We had a cool headboard before but it was hard and not comfortable at all for reading in bed. I really wanted a soft fabric headboard. So when I was deciding what to create for this challenge, a soft headboard was at the top of the list!
I found a headboard at a thrift store. It was a dark black color and a little too masculine for what I had in mind. But was a great size and I loved the shape. So I thought “why not try to slipcover it”?? And while I was pondering the headboard issue, I thought it might be fun to make a couple different slipcovers and change them out at different times of the year?? Maybe one for the summer months and another for the winter months?
I ended up making THREE different slipcovers!! And I love them all for different reasons.
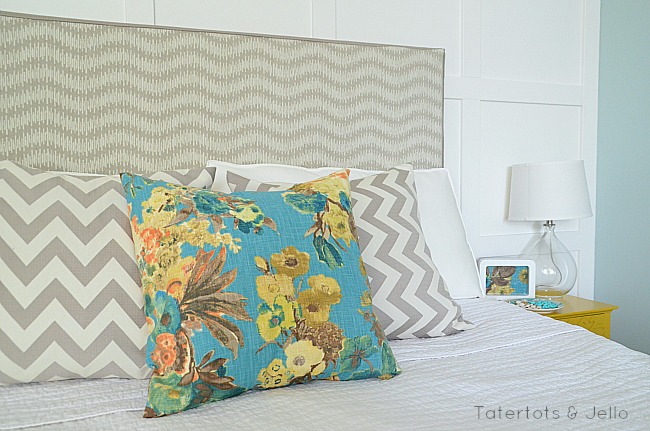
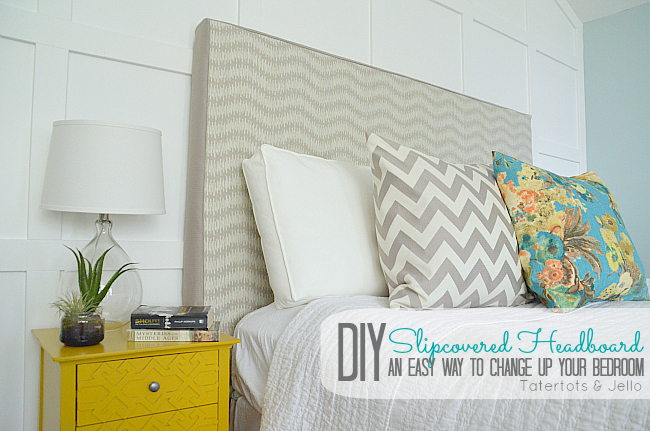
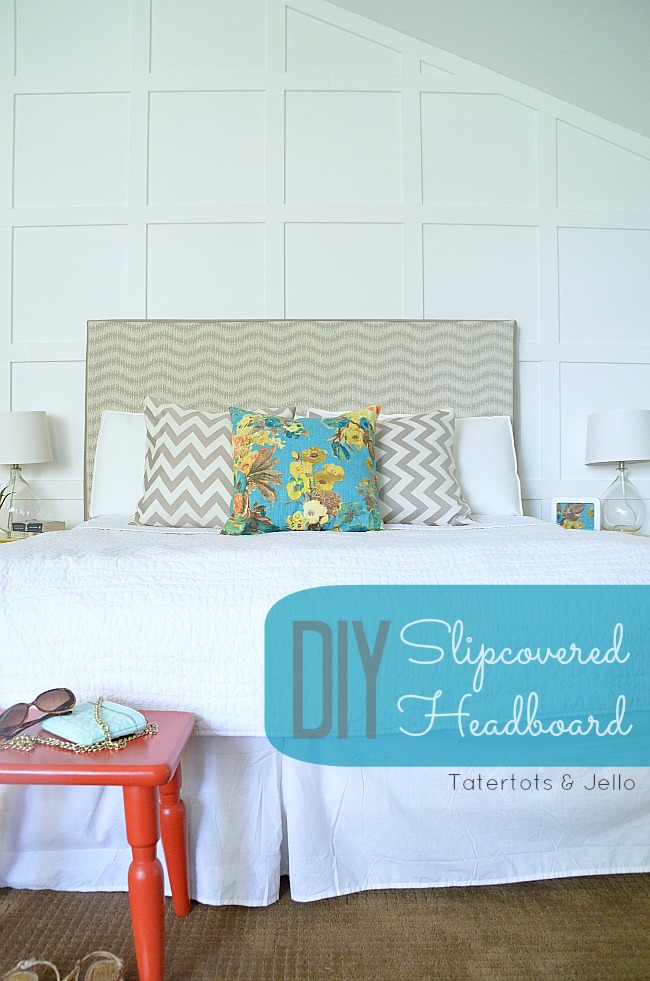
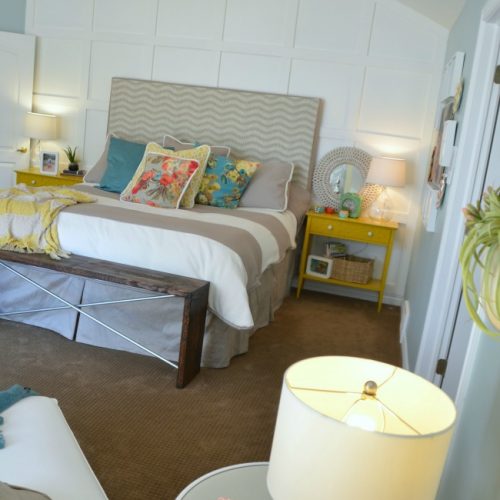
The first one is grey and cream Wavering Quarz Upholstery Fabric (and Orbit Quartz) and I love it because it’s neutral. I thought it would be the perfect background to go with some bright colors.
I paired it with Chevron Chic Quartz and Garden Odyssey Lagoon upholstery fabrics which I made into pillow covers.
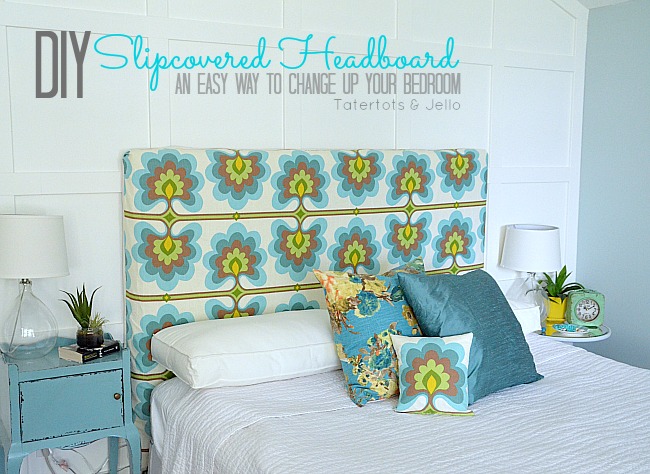
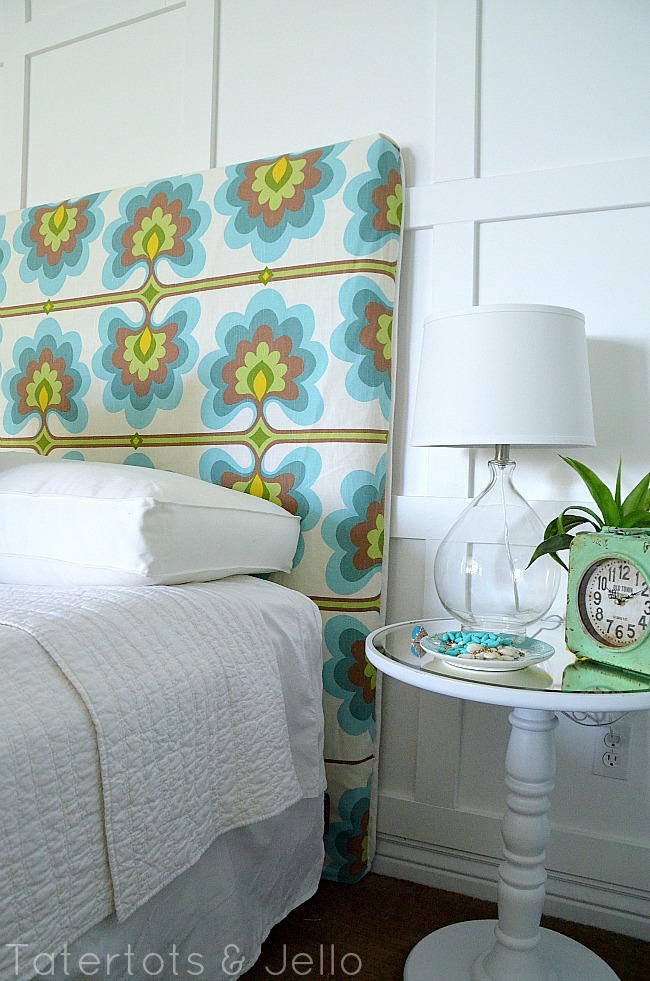
The second slipcover is this bright and happy modern pattern.
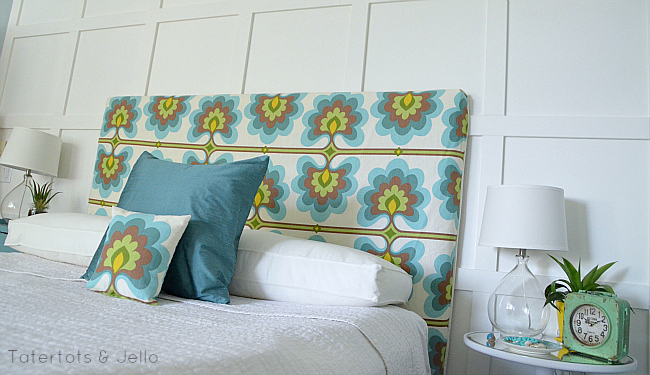
When the fabric came from HGTV Home™ fabric and trim, my husband was drawn to this Flower Tower Turquoise fabric. He lived in Finland for a couple years and loved their Scandinavian designs. He says it reminds him of his time there. So I thought it would be cool to make it into a slipcover that we could use in the Summer. I paired it with Dazzler Teal material and made that into a big pillow cover and then made a smaller pillow using some of the left-over Flower Tower Turquoise fabric.
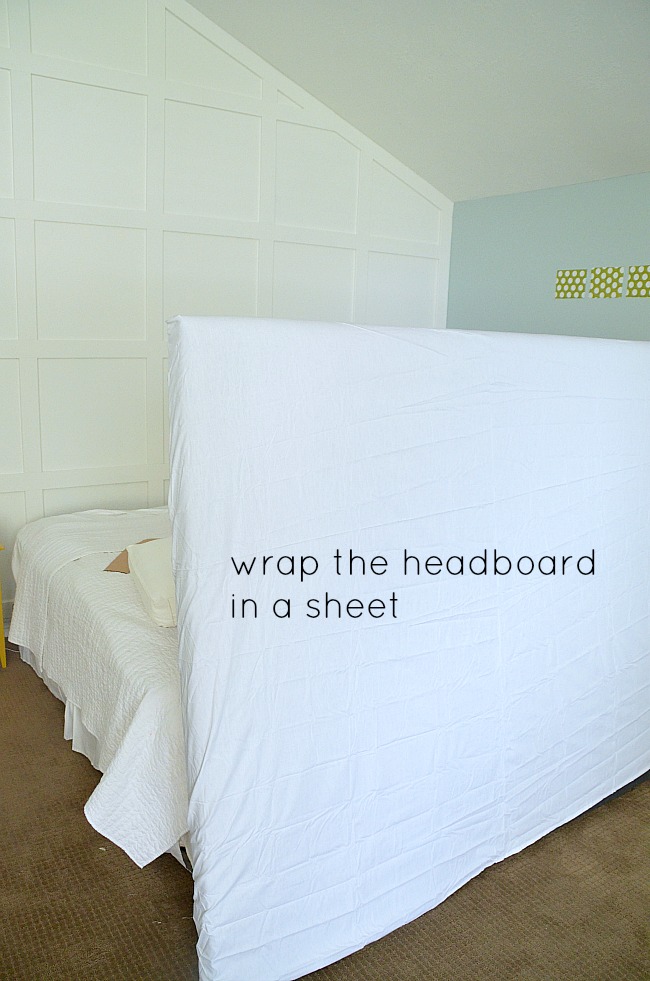
And here’s a tip if you make a light color slipcover and want to put it on top of something dark. I wrapped a white sheet around the headboard and pinned it in place on the back and then slipped the slipcover over the sheet.
I also switched out the nightstands with tables from other parts of my home to completely change up the look.
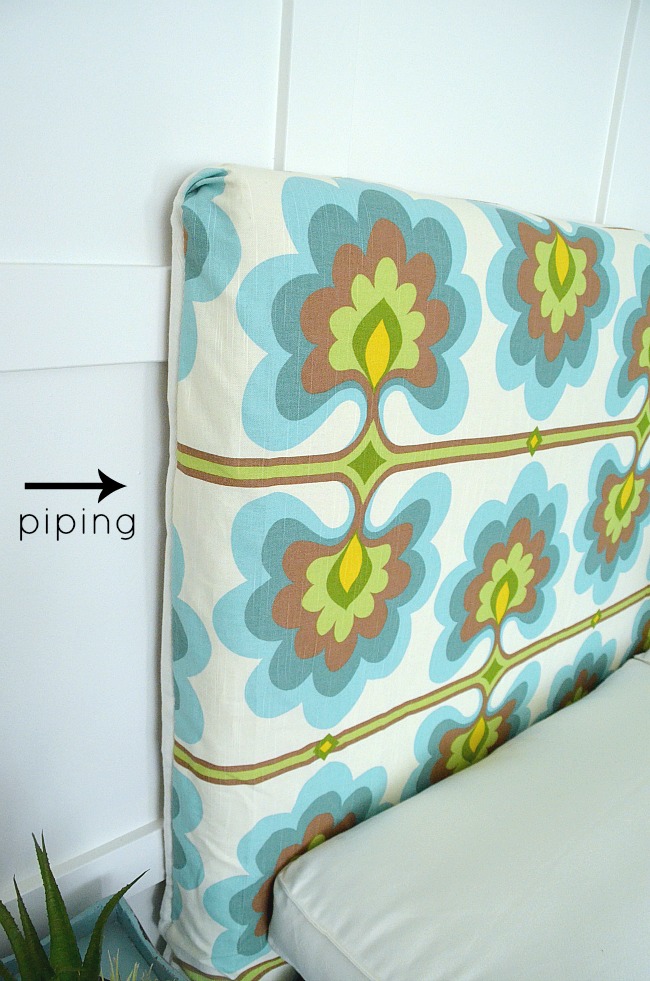
I made each of the slipcovers in different ways. For the floral slipcover, I took the floral material and wrapped it around the front and sides of the headboard and then covered cording with coordinating fabric and attached the cording. This is a more fitted and tricky way to make the slipcover.
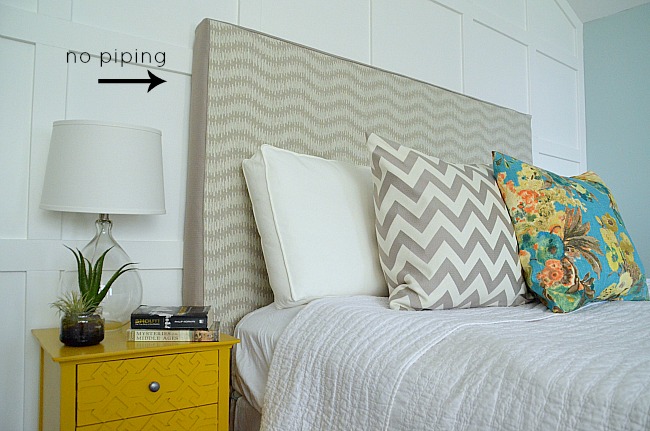
The grey and cream slipcover was easier to make since it doesn’t have cording (piping) and is less fitted. Here’s how I made that:

Slipcovered Headboard:
- Since my headboard was symmetrical, it was easier to make than a curved slipcover would be. If you have a curved headboard, you can lay the headboard on top of your fabric and trace it with a fabric pencil and then add 4 inches for the seam allowance.
- Also, my headboard was wider than my fabric so I had to cut a section for the bottom and sew those two sections together to make the front and back of my slipcover.
- First I measured the front, sides and back of the headboard and added 2 inches to each measurement to make sure it wasn’t too tight.
- I cut out the fabric for the front and back of the slipcover.
- Then I took the measurements for the sides and added them all together to get the total. I didn’t have enough fabric to cut a continuous pieces, so I cut out two pieces and sewed those pieces together to make one long piece – I added an extra 4 inches to this measurement just to be safe.
- I pinned the edges of the front fabric to the side fabric all the way around and sewed it together, with the right-sides together so the seams would be on the inside when I flipped it right side out.
- Then I put the back side of the slipcover on the floor, right-side facing up, and placed the sewn front and sides material that I just sewed together on top of the back piece and pinned the back onto the open sides, with the right sides facing each other inside the slipcover.
- Once that was done I sewed the back onto the slipcover.
- and then sewed the front fabric to the sides.
- To make the corners sharp, I folded them like a package when I got to the top corners. But you can also just gather them at the corners like I did on the floral slipcover.
- The last thing I did was I hemmed the bottom of the slipcover.
- NOTE — to make the slipcover fit best, make it less fitted and make sure all of the measurements are correct and straight. It’s easier to correct a slipcover that is too big than one that is too small.
I made THREE slipcovers. The third slipcover ended up being my favorite — it’s bright AND classic. I was going to show it to you today, but I decided to save it for the big reveal. I am so excited to show you all of the projects I’ve been working on for this space. It has already changed so much. It’s like a completely different room and I already love it so much!

Thank you so much JoAnn Stores for inviting me to be part of this challenge. You can find out more about the #HGTVHomeMagic challenge and the FUN bloggers at the Jo-Ann HGTV Home Website – they are awesome!! And stay tuned for more information on the cool Pinterest party at the end of the challenge.
Have a Beautiful Day!
xoxo

This post and the challenge are sponsored by Jo-Ann Fabric & Craft Stores … but the opinions and projects are all mine! For more information, see my disclosures.
I’m linking up to 30 Days Blog Linky Party – check it out!


Wow…What a great tutorial! I love the two different slip covers, as well!
Stopping by today from the Made by You Mondays party.
I’m a new follower. I’d love for you to come check out my blog and follow me back!
BAH! I totally am in LOVE with this headboard! Now I need the perfect room to do it in! If you have any desserts you love {um, I know you do!}, we’d love for you to come over to our newest link party over at The Inspiration Network: DELISH- a desserts only link party. I know you probably don’t even link up anymore…..but we’d be honored! Bring your desserts and let’s party!!
http://theinspiration-network.com/delish-dessert-link-party-no-1/
Smiles,
Melanie {Reasons To Skip The Housework} and Diana {The Girl Creative}
The Inspiration Network
That fabric is absolutely amazing. I love it!!
I also love the idea of slip covers so you could change them out periodically! Might have to keep this in my back pocket for when I have a guest room!
I’d love it if you shared these on our link up this week!
http://www.sowderingabout.com/2013/08/on-display-monday-15.html
Wow. This is such an amazing idea! I’d love for you to link up to The DIYers: http://homecomingmn.blogspot.com/2013/08/the-diyers-and-our-country-weekend.html
Oh my goodness Jen. You’re a freaking Genius. I’m putting this on my must-do this.
<3 ya
CorinnaAshley.com
You’re so sweet Corinna!! I just know that I like to switch things up a lot so slipcovering my headboard made sense. I am excited to make a few more slipcovers. I was thinking I could even thrift some vintage sheets and make some headboard slipcovers out of them too! So excited!
xoxo
I adore this idea. I think you are so ingenious to find a seasonal way to change your bedroom so amazingly. I also think this is a mighty clever way to utilize so much great fabric for your challenge.
Thanks PJ!! I am really loving my different slipcovers. I can’t wait to make more! Maybe a Christmas one??
xoxo
Beautiful! Absolutely stunning! I cannot wait to the the third one in your bedrroom reveal! YOU are always so inspiring Jen! Angie xo
Oh Angie – You are so sweet!! Thanks so much. It’s been such a fun challenge!
xoxo
What a genius idea – I especially love the look of piping.
Thanks Laurel!! I think the piping really gives it a polished look. I finally figured out how to use my zipper foot on my machine so my piping looks better haha!
xoxo
oh I LOVE this Jen!! and I love what you did to the wall! I can’t wait to see the whole room!!
Thanks for linking up to I’m Lovin’ It! I featured your post in my wrap up http://tidymom.net/2013/creative-projects/
have a great rest of the weekend!
Oh thanks Cheryl!! You are so wonderful!!! I appreciate it so much!
xoxoxo
What a smart idea! I have this beautiful headboard that was upholstered about 15 years ago and it was beautiful and still is with the exception that my DH’s Natural hair oils has stained the cover. It is a silk fabric and I’m sure it’s never going to come out. This would be not only be inexpensive, depedning on material/fabirc selected, but you feel you can make changes so easily. I would chose a fabric that can be washed and dried by machine. Thanks for sharing this great idea, Hope others that try this will share their pictures on here.
Hi Betty!
Your headboard sounds beautiful!! I agree – fabric that can be washed is a must. With 4 kids I am sure the slipcovers will get dirty and I can pop them in the washer 🙂
xoxo
Love this Jen!!!
Thanks Brooke!! You are so sweet!
xoxo
p.s. I also slipcover all my throw pillows in the bedrooms and main rooms so I can change the look each season 🙂 did you slipcover your cute pillows? The end tables are super cute too!
Shara,
Your idea bought some fond memories back to me of a dear friend/close neighbor that used to change her interiror rooms for the different seasons. In the winter, she would have several colors that she used, in the Fall, of course, the Fall colors would come out, then Spring and Summer. She might change pillows, throws, candles, figurines or other decorative accents. This neighbor and her husband were the first people we met when we moved into our first home (March 1967). We remained close friends until both passed away. I continue to place fresh flowers throughout the year, except at Christmas, when I have to resort to artificial arrangements due to freezing temperatures. Her husband and I shared the same birthday and we would always try to celebrate together. I cleaned her house for her to come home and die after she was told she was terminal. I cleaned on Thursday, she came home from hospital on Friday and died Saturday morning. I learned a lot from this beautiful lady; and the memories of this couple will stay with in my heart and soul forever. They were special!
Hi Sharla!
Yes, I am a pillow addict LOL!! I love making slipcovers for pillows and then changing them out and storing the slipcovers until I need them again.
xoxo
I do this all the time! I made my first slipcover for our headboard years ago and love it- because it makes cleaning so much easier. Plus it is so fun to change it up every once in a while. Yours looks great and I love the fun fabric! I have a print on mine too 🙂
That’s so cool! Do you have a picture of your slipcover? I would love to see it!! Yay!
xoxo
Wow! I’m LOVING that headboard! Pinning for sure Jen! XO, Aimee
Thanks Aimee!! I appreciate it so much. Happy Friday!!!
xoxo
Did your hubby serve in Finland? My brother in law and his family live there, his wife is a native. I’m dying to visit them soon! Love the slipcovers, great way to change the mood of the room!
Yes! He loved it. Other than the weather LOL. How cool that your brother in law and his family are there. You should go visit them sometime!!
Thanks for the sweet comment!!
xoxoxo
These look so wonderful! I’m gathering ideas for a boudoir makeover of my own, thanks for the idea!
This looks awesome–what a great project. It’s sad that we always tend to neglect our own rooms and save them for last when really they should be put first!
love the chevron pillows and that headboard! amaze!
Wow, I love them both Jen! I have been thinking about switching to a padded headboard from the iron headboard that I have been using for the past 18years!!! Thanks for the tutorial, now I think I might just be able to figure it out 🙂
Oh my goodness Jen!! Love love love this. Everything about it. Definitely worth the 9 year wait! I love the fabrics you used. So pretty!
I really love this idea & how they turned out. LOVE the wall change too! I’m completely inspired & I’m so ready for some changes in the decor of certain rooms in this place. Feeling antsy. 😉
Have a great weekend Jen!!!
Hi Jen, Great tutorial and I love all the color combinations! It will be so fun to see the great reveal! Thanks for sharing! Blessings from Alaska, Jackie
Love the second one – the color and the pattern. I have plans to make an upholstered headboard and had toyed with the idea of making it so that I could make additional slipcovers. I change my mind on colors so often. Seeing yours has pretty much sealed it for me – I will need slipcovers :). Can’t wait to see the final reveal!!
super cute! super smart! Love the board and batten wall. Now this room fits in with the rest of your house!
These are just beautiful! What an amazing talent you are. 🙂
Jen they both turned out great – I do love the bright pattern. What a great idea!! Pinning!
xoxo
Just gorgeous! Love the upholstered headboard.
Wow! They look brilliant. I adore the flower fabric. It’s such a nice style. I also love the colours your paired the grey&cream one with!