Tatertots and Jello

COLORFUL HAPPY HOME -- Daily DIY, Decor, Craft and Recipe Tutorial

  • My Home
    • 1905 Cottage
    • Daybreak House
  • DIY
    • DIY Projects and Ideas
    • Organizing
    • Tutorials
    • Printables
  • Decor
    • Spring Projects
    • Summer Projects
    • Fall Projects
  • Crafts
    • Kids Crafts
    • Painting Projects
    • Paper Projects
    • Sewing
    • Wreaths
  • Holidays
    • Valentines Day
    • Easter
    • Halloween
    • Thanksgiving
    • Christmas
    • HAPPY Holidays Series!
  • Recipes

Explore

  • my home
  • diy
  • decor
  • crafts
  • holiday
  • printables
  • recipes

Connect

Home » decorating » Guest Project — $7 Yard Sale Nightstand Makeover!!

decorating, diy, guest tutorials, painting projects · January 25, 2011

Guest Project — $7 Yard Sale Nightstand Makeover!!

Tatertots & Jello is a participant in the Amazon Services LLC Associates Program, an affiliate advertising program designed to provide a means for sites to earn advertising fees by advertising and linking to amazon.com.
Hey Y’all! 
I’m Myra from The Casabella Project and My Blessed Life. 
I’m thrilled to be here at Tatertots and Jello! 
{Thank you, Jen!!}

I’m a yard sale, thrift shop, spray paint, craft and decor junkie and I’m excited to share my yard sale nightstand makeover with you!


I spotted this nightstand/end table at a yard sale for $7. I hesitated slightly when I saw that it was laminate, but it’s actually good quality with a dovetailed drawer and solid wood instead of particle board under the laminate. The shape is just adorable and the price was right, so I bought it. I couldn’t wait to give it a new look!
1. I lightly sanded it down with a coarse sanding pad. Old stringy tape was stuck to the sides {eewww}, so sanding took care that.
2. Then I primed the nightstand with white Rustoleum American Accents oil-based spray primer and let it dry for a few days.
3. I used Rustoleum American Accents Blossom White spray paint in a few light coats to finish off the paint process.
{lookin’ better!}

After a few days of forcing myself to allow the paint to dry and harden, I lightly distressed the nightstand’s edges. I also distressed the drawer a bit. I love how it added texture, color and depth. The knobs are from Hobby Lobby where I scored them for 50% off – only $2.50 each! Woo to the hoo!

Now for the really fun part… stenciling!!
{supplies I used}
1. I divided the top into quadrants so I would have the center vertically and horizontally. I couldn’t find my hard measuring tape, but a sewing measuring tape and a ruler worked just fine.
2. Then I taped down my stencil with blue painter’s tape.
3. I squeezed Americana’s Bleached Sand acrylic paint onto a foam plate {fancy, I know!}.
4. Then I lightly brushed the paint onto the stencil with a foam brush. The key here is to not saturate the brush, but to lightly and repeatedly add more paint to the stencil. You could also use a small foam roller for this step.

I continued stenciling the design all over the top of the nightstand. {Don’t you just love those sweet little fingers peeking over the edge?} Once the stencil was dry, I sprayed two light coats of clear matte spray paint on it to give it a little bit of extra protection.

{swoon}
I’m thrilled with how my nightstand turned out!

It was easy and inexpensive to makeover. I only spent about $12 for supplies that I didn’t have on hand.

{more eye candy}
We all love a good before and after, right?
I hope you’re inspired to makeover a piece of furniture or even to stencil something in your home. I would love for you to visit my blogs – The Casabella Project and My Blessed Life.
Again, thank you SO much for having me, Jen!
Such a great project, Myra. I adore that stenciled top!
I can’t wait for the weather to get warmer so I can get out to the yard sales again!
If you haven’t been over to My Blessed Life or The Casabella Project, this is what you have been missing: 
{Valentine’s Day Vignette}


Photobucket
{Before and After: Mirror Makeover}
96%
 {DIY Nursery Decor}
And now with her new blog, the Casabella Project, Myra and her husband are redoing a 1950’s home and showing us all of the DIY projects. I am so excited to see what they do! 
Don’t miss out on all the DIY goodness going on at 
The Casabella Project and My Blessed Life!! 
xoxox
PS — There’s a super sweet deal at GroopDealz today from my friend Brittany at {Love Stitched}. She is selling these amazing Cabochon Rings for 1/2 off — $5 each!!
These would make awesome Valentine’s or Birthday gift for your mom, sister, best friend, neighbor, babysitter, teachers — anyone who loves cute things!!
Check them out here.

Posted By: Jen · In: decorating, diy, guest tutorials, painting projects

My Mantels love a good Party! {Valentine’s Day ♥ Mantel Decorating}
Quick {Valentine’s Day Giveaway} and a couple winners!!

You’ll Also Love

Make Your Home Cozier with Boucle!
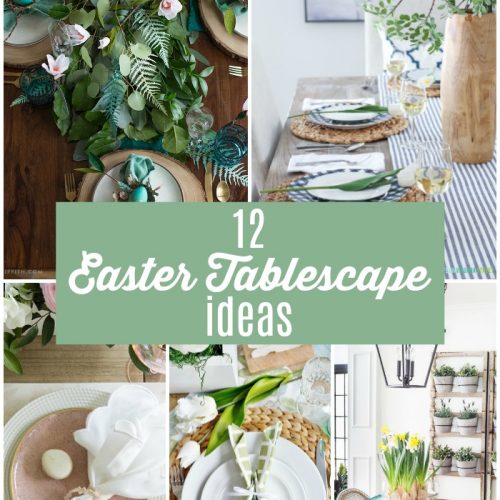
One of my favorite things about Easter is setting a beautiful table! There are so many different colors and ways you can create a gorgeous Easter tablescape. And they aren't hard! Check out these 12 Beautiful Easter Tablescape Ideas!!12 Beautiful Easter Tablescape Ideas!
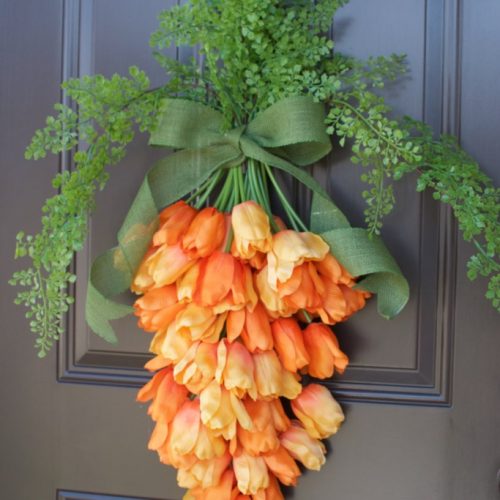
orange tulip carrot door hanging12 GORGEOUS Spring Wreath DIYs!

Comments

  1. Craft Snob says

    January 31, 2011 at 3:35 AM

    The night stand redo is right up my alley. I want to try my hand at before and after furniture and decor. The stenciling inspires me! Thanks so much for sharing.

  2. Ruth says

    January 26, 2011 at 4:05 PM

    I love the transformation. I am going right over to check both sites. So many lovelies.

    Ruth

  3. Sue (Someone's Mom) says

    January 26, 2011 at 2:12 AM

    What a great makeover and the step by step instructions are really helpful. I like the stenciled top…makes it very unique.

  4. Cascia says

    January 26, 2011 at 12:48 AM

    That is beautiful1 You are really talented.

  5. Vivienne says

    January 26, 2011 at 12:42 AM

    I love the stencil on top. Sweet!

  6. Kassi @ Truly Lovely says

    January 25, 2011 at 10:33 PM

    This nightstand turned out lovely! I really like the knobs she used! And on sale!! Whoop!

  7. MiMi says

    January 25, 2011 at 6:40 PM

    I'm gonna be redoing my nightstands this summer! If I can wait that long. 🙂

  8. Lesley K Yates says

    January 25, 2011 at 6:15 PM

    So cute!!! Love your ideas!!!

  9. Good Time Charlie says

    January 25, 2011 at 5:46 PM

    I am on my work avoidance program this morning, and so glad I am! What an adorable little project and what a very talented girl. Thank you so much for sharing!

  10. everyday muses says

    January 25, 2011 at 4:50 PM

    Why is that everyone else seems to be able to find cute stuff second-hand but me?? 🙂

  11. Lil Mama Stuart says

    January 25, 2011 at 4:35 PM

    love it! agreed with others, where does one pick up cute stencils?

  12. Kelli @ RTSM says

    January 25, 2011 at 4:06 PM

    Such a cute table! I love the stencil and the knobs!

  13. Ali Rockwell says

    January 25, 2011 at 3:21 PM

    Very cute! I want to do a stenciling project SO BAD but I am afraid I will ruin it… and I don't know where to find good stencils… Some day I'll try it.

  14. Allison says

    January 25, 2011 at 3:10 PM

    I'm loving the nightstand – I'm totally inspired to go stencil a piece of furniture 🙂

  15. rindercella @ neatheringourfest says

    January 25, 2011 at 2:52 PM

    that is such a cute makeover! 🙂 i love the stenciling on the top!

  16. Trisha @ The Sweet Survival says

    January 25, 2011 at 2:38 PM

    Love the nightstand!!

  17. Amanda @ Serenity Now says

    January 25, 2011 at 2:18 PM

    It's beautiful, Myra! I think the stencil on top was the perfect touch. 🙂

  18. Carmen @ Life with Sprinkles on Top says

    January 25, 2011 at 1:14 PM

    I love that nightstand! It turned out so cute!

  19. Katie says

    January 25, 2011 at 1:04 PM

    I love your blog! You won a blog award! Check it out:

    http://katieedean.blogspot.com/2011/01/my-first-blog-award.html

  20. Admitted Fabricaholic says

    January 25, 2011 at 11:24 AM

    love the table! Came out so cute, and I Love it even more because it was a yard sale find – those are my absolute favorites!!! Ummm…and that green desk in the other photo? Loving that too!

  21. Monica says

    January 25, 2011 at 8:43 AM

    Love it! And definitely have to head over to check out that Valentine's decor! 🙂

  22. Kimmie @ Sugar and Dots says

    January 25, 2011 at 7:03 AM

    What a CUTE table! I have an old crib that turns into a full headboard, but the "wood" is laminate, and I'm desperate to paint it and actually use it! I think this post just gave me the guts to do it! 🙂

Hi! I'm Jen Hadfield. I'm a mom of 5 restoring an 1891 home in the heart of Salt Lake City. I love being creative and sharing simple ideas to make your life easier and more beautiful!

Receive the Latest Crafts, DIY, Recipes and More in your INBOX!

Follow us on Pinterest! It's awesome!

Top Posts & Pages

Copycat Panera Spinach and Artichoke Egg Soufflés - SO good!
Spruce up Your Outdoor Space with a DIY Recirculating Fountain! (tutorial)
A New Deck in Under 30 Minutes!
5-Minute T-Shirt Neckline Refashion
DIY Secret: How to Print on Post-It Notes (and Free Printable Template)
How to Change a Recessed Can Light into a Pendant Light with No Remodeling!


Popular Posts

  • Copycat Panera Spinach and Artichoke Egg Soufflés - SO good!
    Copycat Panera Spinach and Artichoke Egg Soufflés - SO good!
  • Spruce up Your Outdoor Space with a DIY Recirculating Fountain! (tutorial)
    Spruce up Your Outdoor Space with a DIY Recirculating Fountain! (tutorial)
  • A New Deck in Under 30 Minutes!
    A New Deck in Under 30 Minutes!
  • 5-Minute T-Shirt Neckline Refashion
    5-Minute T-Shirt Neckline Refashion
  • DIY Secret: How to Print on Post-It Notes (and Free Printable Template)
    DIY Secret: How to Print on Post-It Notes (and Free Printable Template)
  • How to Change a Recessed Can Light into a Pendant Light with No Remodeling!
    How to Change a Recessed Can Light into a Pendant Light with No Remodeling!
  • DIY Fountains to Make Your Yard Amazing!
    DIY Fountains to Make Your Yard Amazing!

As seen in


Amazon Affiliate

Tatertots & Jello is a participant in the Amazon Services LLC Associates Program, an affiliate advertising program designed to provide a means for sites to earn advertising fees by advertising and linking to amazon.com.
  • About Me
  • Advertising
  • Get Featured

Copyright © 2025 Tatertots and Jello · Privacy
This site is a place for positive discussion and ideas. Negative talk, comments that disparage others, and similar are not welcome and may be removed.