This post is brought to you by Lowes. I love being part of their Creative Ideas Team. 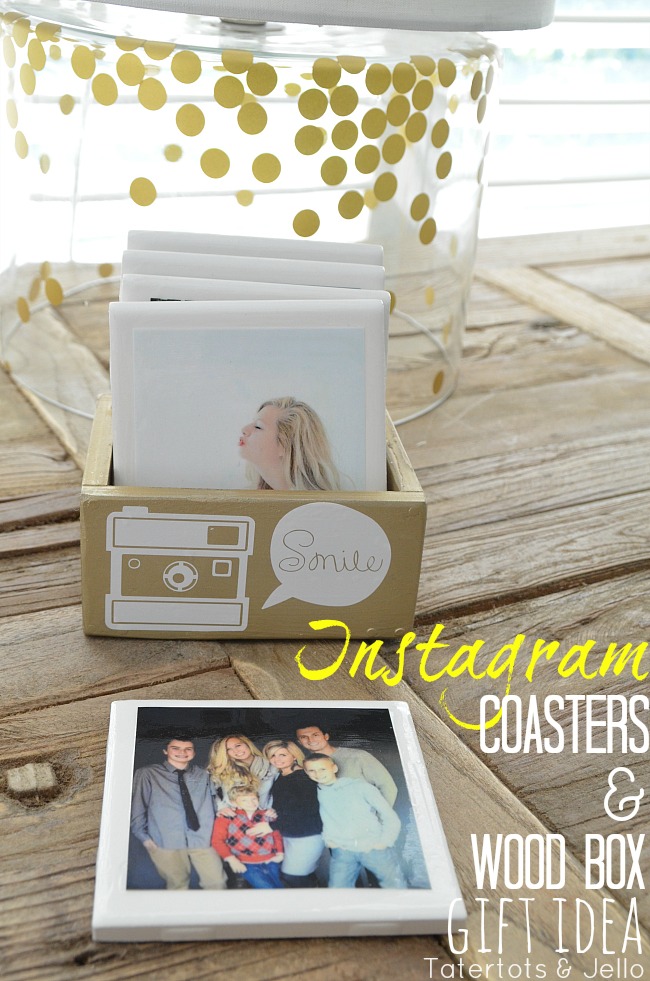
Here’s a great gift idea for Christmas or anytime — a set of customized Instagram coasters and a colorful, personalized box. Surprise your family, friends or neighbors with a gift made from their Instagram pictures!
Making the Instagram Coasters
Supplies:
4×4 gloss white tiles
Printed Instagram pictures (I printed mine to about 3 and 3/4″ square; you can experiment to see what you like best). (You don’t have to use Instagram — you could use any picture source.)
Mod Podge
Dimensional Magic
Printing Instagram Pictures Wondering how to (fairly) easily get your Instagram pictures ready to print? Check out the video below if you’ve feeling kinda techy, or see the tips in this past post, and thanks to Brittany (Pretty Handy Girl) for this techy tip she left in the comments of that post.
Here’s how to make the coasters. Similar projects have been done before; I added the dimensional magic step to waterproof the coasters (and the printed pictures) and the little box idea which I think makes the project into a changeable photo display. Fun.
1. Print and cut out your Instagram pictures 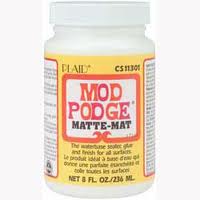
2. Coat the front and back of the picture with a small paint brush coated with Mod Podge and place it on the tile. By coating the back of the picture too, it will allow you to move the picture around on the tile to get it perfectly centered. I used my fingers to smooth all air bubbles out, I pressed on the picture firmly from the center outward, pressing the air bubbles out under the edges of the picture. Once you have the air bubbles out, you can smooth the mod podge out with a paint brush. Allow to dry.
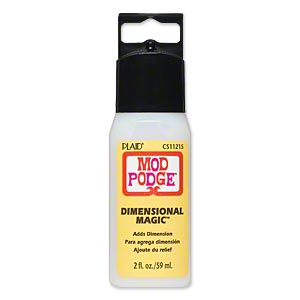
3. Add a top coat of Dimensional Magic to each coaster to protect it. I used a small paint brush and covered the entire top of the tile in smooth strokes, all one direction. The Dimensional Magic will be shiny, so in the light you will be able to see the brush strokes. So be sure to make them very even and uniform. Let the Dimensional Magic dry overnight before stacking the tiles in the box. You don’t want them to stick to each other. 4. Add felt feet (see below) to the bottom of each coaster, one in each corner, to protect the surface underneath the coaster.
Making the boxes
 Supplies
(I included a pic of the tile I used in the collage above just for reference.)
Craft Wood. Lowe’s has a special type of wood called “craft” wood. I found mine underneath the molding section (see picture). You can choose the right pieces for the box size you want. Be sure to check each piece to make sure it’s straight — some can warp a bit. Buy about four times as much of the sides as you do of the bottoms. The bottoms were about 4.5″ wide; the sides about 2.5″ wide — so in lumber terms, those are 5″ wide and 3″ wide. Yes, they’re not really what they say they are!
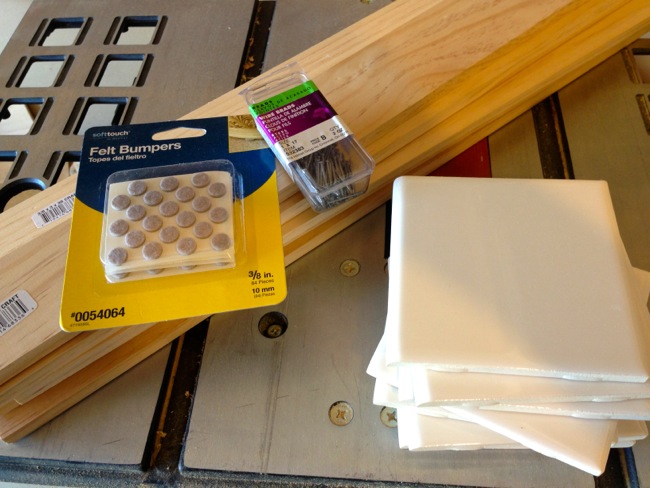
Finishing nails (brads) — I chose the ones with a larger head.
Wood glue
“Felt bumpers” you’ll use as feet on the bottom of the box Here’s everything all ready to go on top of my table saw:
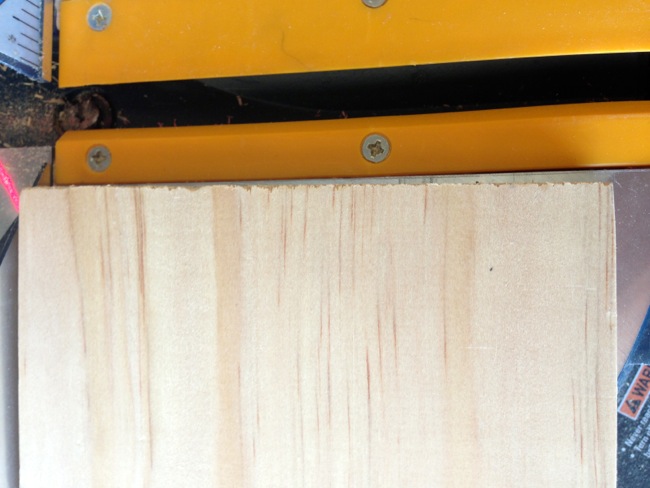
 Tip: always cut the rough end of the board FIRST before you measure. You’ll want to cut both ends. See this picture below — see how much better the edge looks? Before:
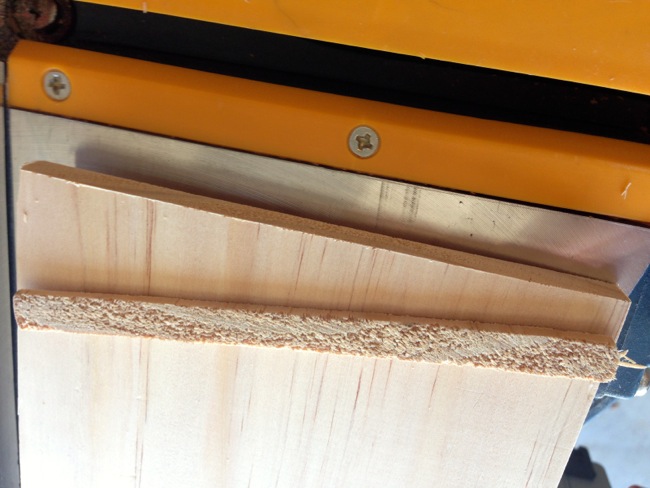
After:
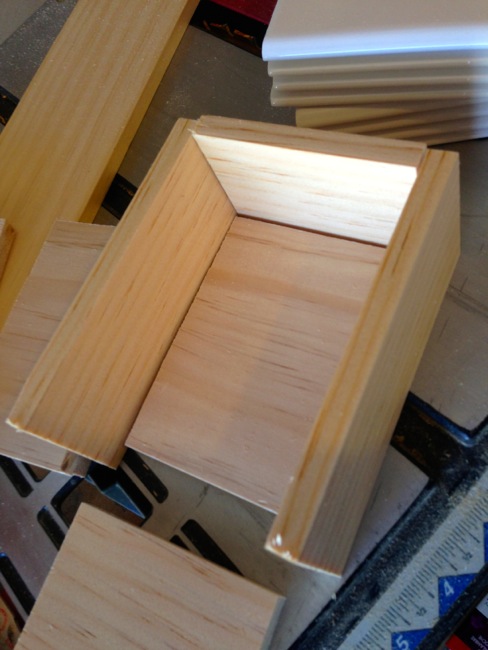
Note: for each of these steps, I’m not giving precise measurements because finished wood can vary in width. You will also want to custom-tailor each box to match the number of coasters you’re planning to place in the box. Be sure to allow room for not only the individual tile coasters but also for the felt feet on the bottom of each coaster. Still, these steps should give you an easy guide to making your own. 1. measure and cut the bottoms. The tiles are about 4.25″ wide, so use the 4.5″ wood as the bottom. With the box facing you, the width of the bottoms will go front to back. So you will cut the bottom section to accommodate the appropriate number of tiles with feet. 2. measure and cut the sides – note that there are two short and two long sides. The long sides are pretty easy: they will equal the width of the bottom PLUS enough on each end to overlap the sides, like this:
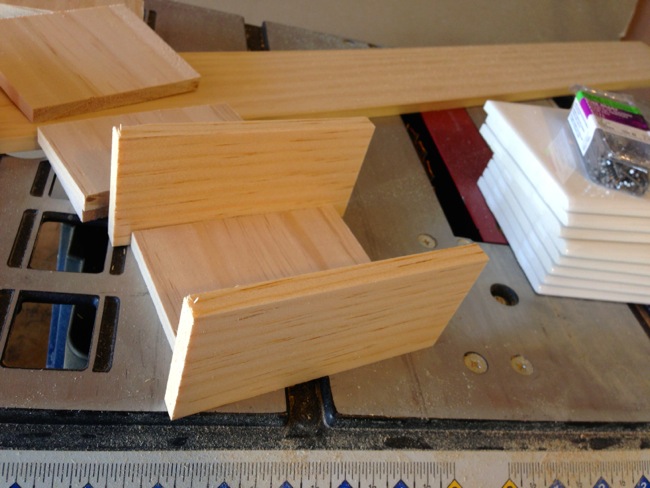
When you cut the sides, you’ll want them to fit neatly inside the front and back side pieces, like this:
3. Assemble your boxes. Lay a bottom piece on the work table. Lay a long side next to it, add a bit of wood glue, and gently nail with finishing nails. Make sure you’re aligning your nails correctly so they don’t go too high and miss the bottom piece. Then, do the same with the opposite long side and then the shorter sides, with wood glue along all but the one exposed side.
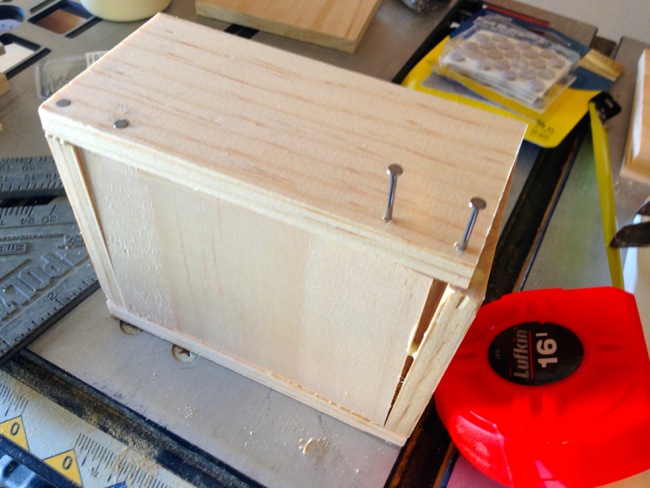
… and let the glue dry. Tip: don’t worry too much about perfect assembly. If you’re going for a distressed look, like I did, it doesn’t have to be a work of art; just sturdy and attractive.
4. Paint/distress. You may first want to paint and distress the box. I used a mouse sander to smooth edges and show some wear.
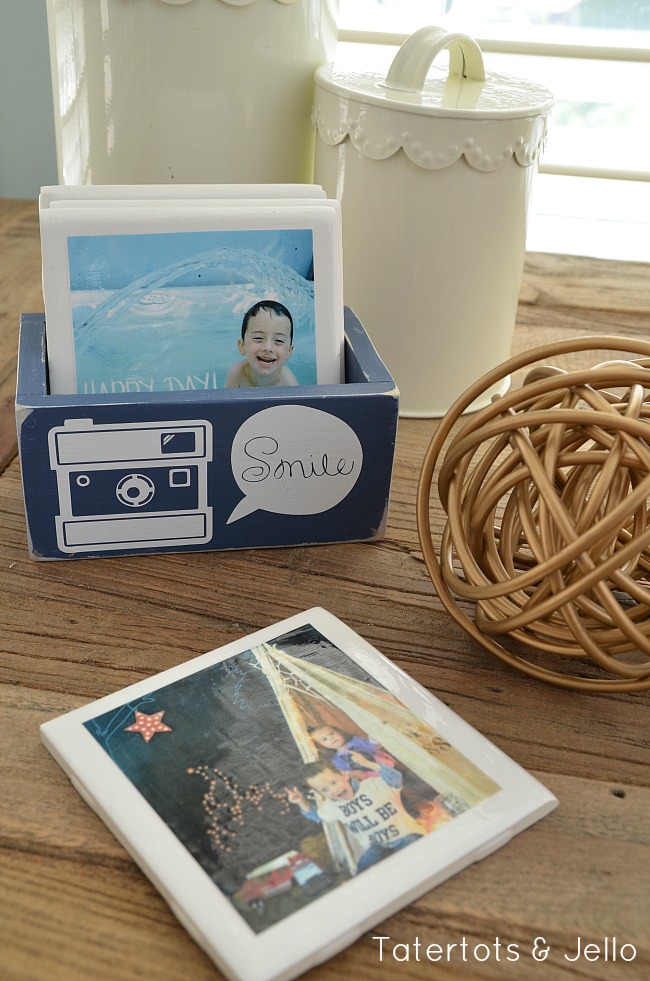
5. Decorate The last thing that I did was I cut out some vinyl using my Silhouette of an old fashioned camera and added words to a word bubble graphic that says “Say Cheese” or “Smile” and I applied the vinyl onto the box. And then I added some felt feet to the bottom of the box.
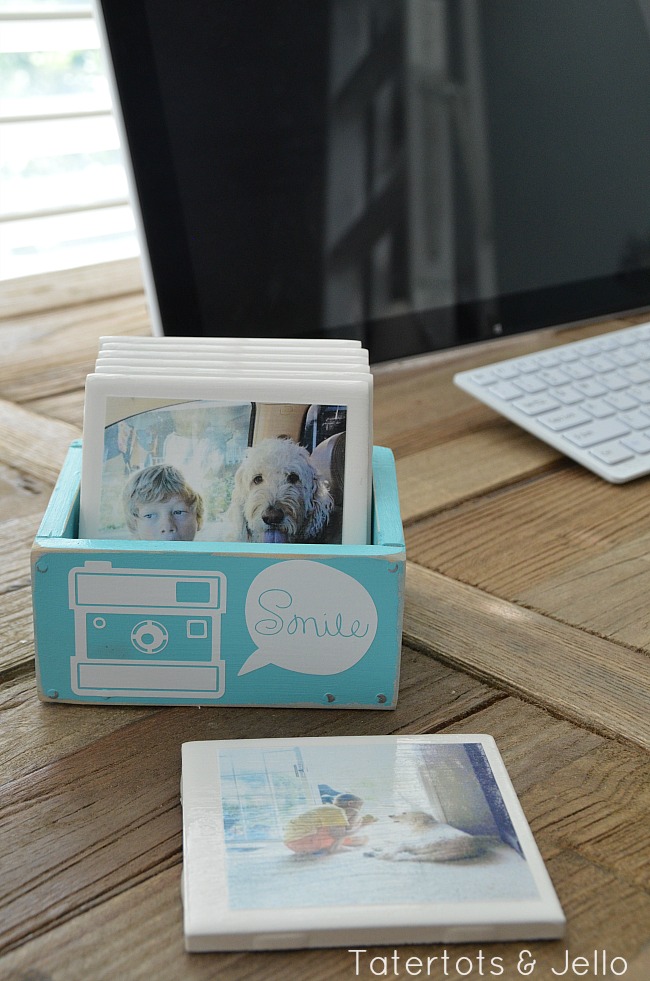
Now, just place your coasters in the box, wrap and you have a personalized, creative gift that doesn’t break the bank!
You can follow along with Lowe’s on Facebook for more great ideas and sign up for their FREE Creative Ideas Magazine with TONS of great DIY ideas and instructions!!

Have a CREATIVE Day!
xox

Thank you Lowes for the gift cards to make this project. All opinions are 100% mine.


How well have these coasters lasted? I read that these might not last well if really hot beverages sit on top of these coasters (i.e. the photo actually gets ruined)…so I’m a little worried if we need to apply an extra layer (of some other kind of varnish) to these coasters to prevent any mishaps like that.
Thank you, and great stuff by the way!
SO stinkin’ cute and such a great gift idea. Love!!
Thanks for the dimensional magic tip!
Love it!! If you haven’t already I would love for you to link up to this weeks linky party on my blog so you can share it. http://www.somedayilllearn.com/2013/11/18/teach-tuesday-42/
such a fun idea!!! especially for us, instagram junkies. 😉
xo
Hey these turned out amazing!! Thanks so much for the Instagram tip 😉
You are welcome Helen!! Thanks for stopping by 🙂
oxox
Does the dimensional magic make it sticky at all? I’ve made scrapbook paper coasters previously and have used acrylic spray and it remained sticky. So that the coasters stuck to each other or to glasses…
Hi Heather!!
No – the dimensional magic is like resin. So once it sets up it’s super hard and nothing can penetrate it. That’s why I thought it would be perfect for this project. I think you will love it.
xoxo
SO cute, Jen!! LOVE the box – great idea!! XO
Thanks Kristyn!! I’m a little addicted to making them, they’re so fun! LOL!!
xoxo
I love the coasters!! This is a great gift idea!! Thanks for the tutorial!!
You are welcome!
xoxo
I love the coasters. What a great gift idea.
I love this idea! Such a cute way to get your photos off the computer and into the home!
Yes!! And it’s fun to display them even when we aren’t using them 🙂
xox
Love this so much it’s being pinned! If I can wrangle photos from my unsuspecting coworkers, this may turn into Christmas gifts for them. Thanks for sharing!
Michelle @ On A Wing And A Prayer
Oops, I forgot to ask if you know what the total cost was for the project, approximately?
Hi Michelle!!
The tiles at Lowes are .16 each and the wood for each box was about a dollar. If you already have some paint and mod podge then it would be under $2 per gift. If you need to buy dimensional magic it’s about $5 at the craft store, but less if you use a coupon 🙂
xoxo
Great idea! My daughter got married this summer and we have a lot of candid pictures. I thought this would be a fun Christmas gift for her and hubby. One question: Do the pictures have to be printed on photo paper or can you use printer paper? Thanks!
Hi Linda! I think your daughter and her husband would love that!
Yes, you should print them off on photo paper. It’s a little thicker and the thicker paper will create less bubbles and wrinkling.
xox
Thank you so much for replying. I’m off to buy the supplies!
This is such a cool idea. Where did you find it? Or is this a brainchild or yours?
Photo coasters have been around for awhile, but I put my own spin on it with creating a custom box to keep them in and with using Dimensional Magic over the top which helps the coasters last longer.
xox
This is such a great idea! Thank you so much for sharing!
You are welcome! Thanks for stopping by!
xoxo
I’m making these for a friend of mine for Christmas! I was going to do cork backing but you’ve got me rethinking that! Super cute!
Your friend will love them!
xoxo
Such a cute idea!
P.S. You have two comment boxes going on and it keeps jumping back and forth between them (i’m using Firefox.)
Thanks Melanie!!
I know, I need to figure out how to get rid of that other box. Thanks for reminding me!
xox
Amazing idea! I am totally using this one as a friend gift! Thanks!
xo Kylie
Thanks Kylie!
I think your friend will love them!
xoxo
SO cute!! Such a fun gift idea Jen. LOVE!
Thanks my friend!!
Have a wonderful weekend Mique!
xox
That is a great idea for Christmas gifts!
Thanks Amy! I love that you can make them for men or women and everyone would love to get them.
xoxo
I love Instagram and pictures… but don’t always know what to do with them after get them printed. This idea is useful & creative. Thank you!
Amanda
http://www.girlaboutcolumbus.com
Yay!! I hope you make some. I think it’s a really fun project to create.
xox
Love them. We made some exactly like it a few weeks ago. It was so easy to do and it’s great to have personal touches around the house. You can check out our coasters turned out here: http://www.littlehouseonthecorner.com/roller-instagram-coaster/
Hi Christine!
Yours turned out so great!! It’s such a fun project to make and give for gifts!
xoxo