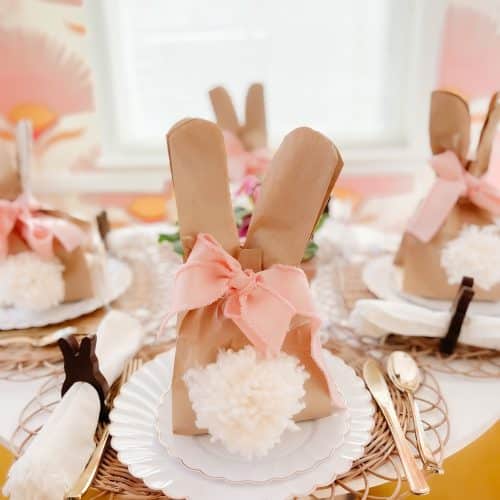
DIY Spring Moss Bunny Topiary. If you make one craft this spring, let it be a charming organic Moss Bunny Topiary that will add a whimsical touch to your seasonal decor.
DIY Spring Moss Bunny Topiary

Spring is the perfect time to add fresh and natural elements to your home decor, and if there’s one project you should tackle this season, it’s this DIY Spring Moss Bunny Topiary! This adorable bunny is simple to make, mess-free, and will bring a touch of whimsy to your space for years to come.
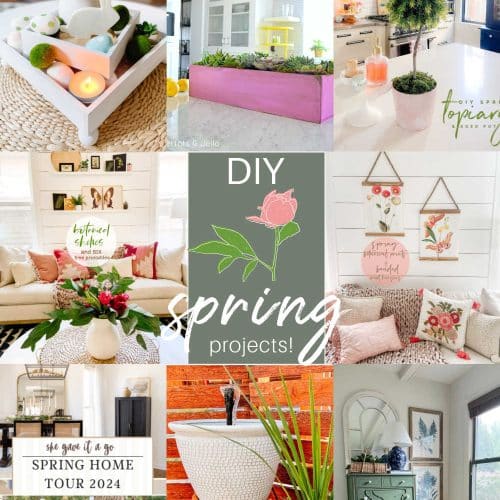
Spring DIY Ideas
But before we get started, I am joining some creative friends who are all sharing the cutest Spring DIY ideas! Be sure to scroll down and HOP over to see them!
Supplies You’ll Need
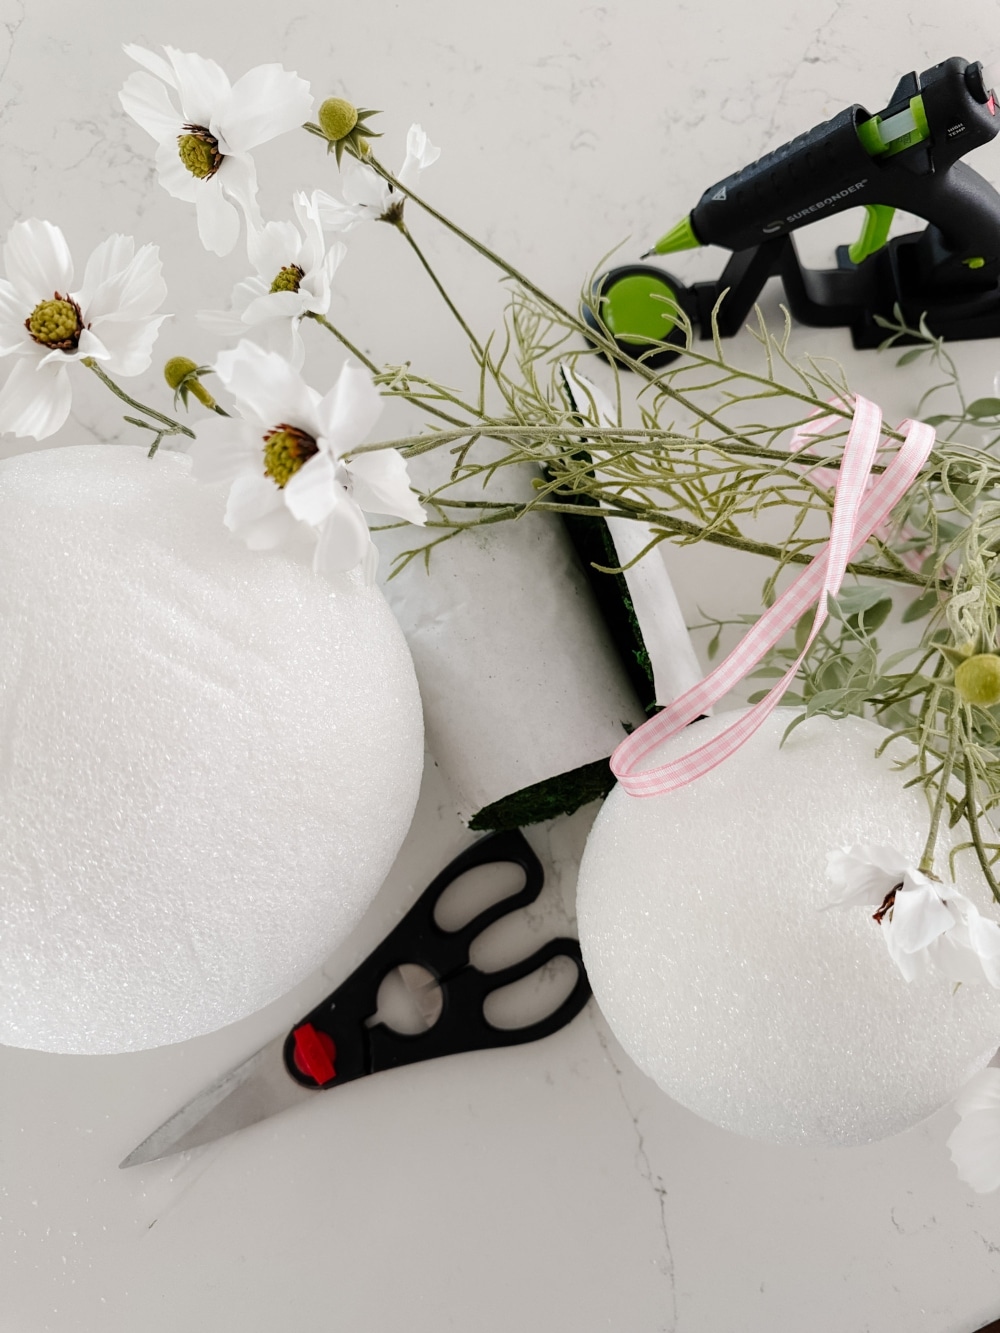
Ok — Let’s get to work! To create your own DIY spring moss bunny topiary, gather the following supplies:
- Two styrofoam balls – 12 inches and 8 inches
- One roll of moss with adhesive backing
- Hot glue gun and glue sticks
- Cardboard (for ears)
- Toothpicks or skewers (optional but make it easier to attach the ears to the head)
- Ribbon
- A cute pot – I love this textured one and I think it is on sale!
Why use a Moss Sheet instead of Regular Moss?

I chose to use a moss sheet with an adhesive backing because it makes this project incredibly easy and much less messy. Unlike loose moss, which can be a hassle to glue on piece by piece, the sheet adheres smoothly and quickly. This means you can complete your bunny topiary in no time and avoid a moss-covered workspace!
Step-by-Step Directions
Create a Flat Surface on the Styrofoam Balls
Start by using a knife to cut a small flat surface on one end of each of the styrofoam balls. This step is essential because it allows the two balls to fit securely together and helps the bunny’s head stay in place.
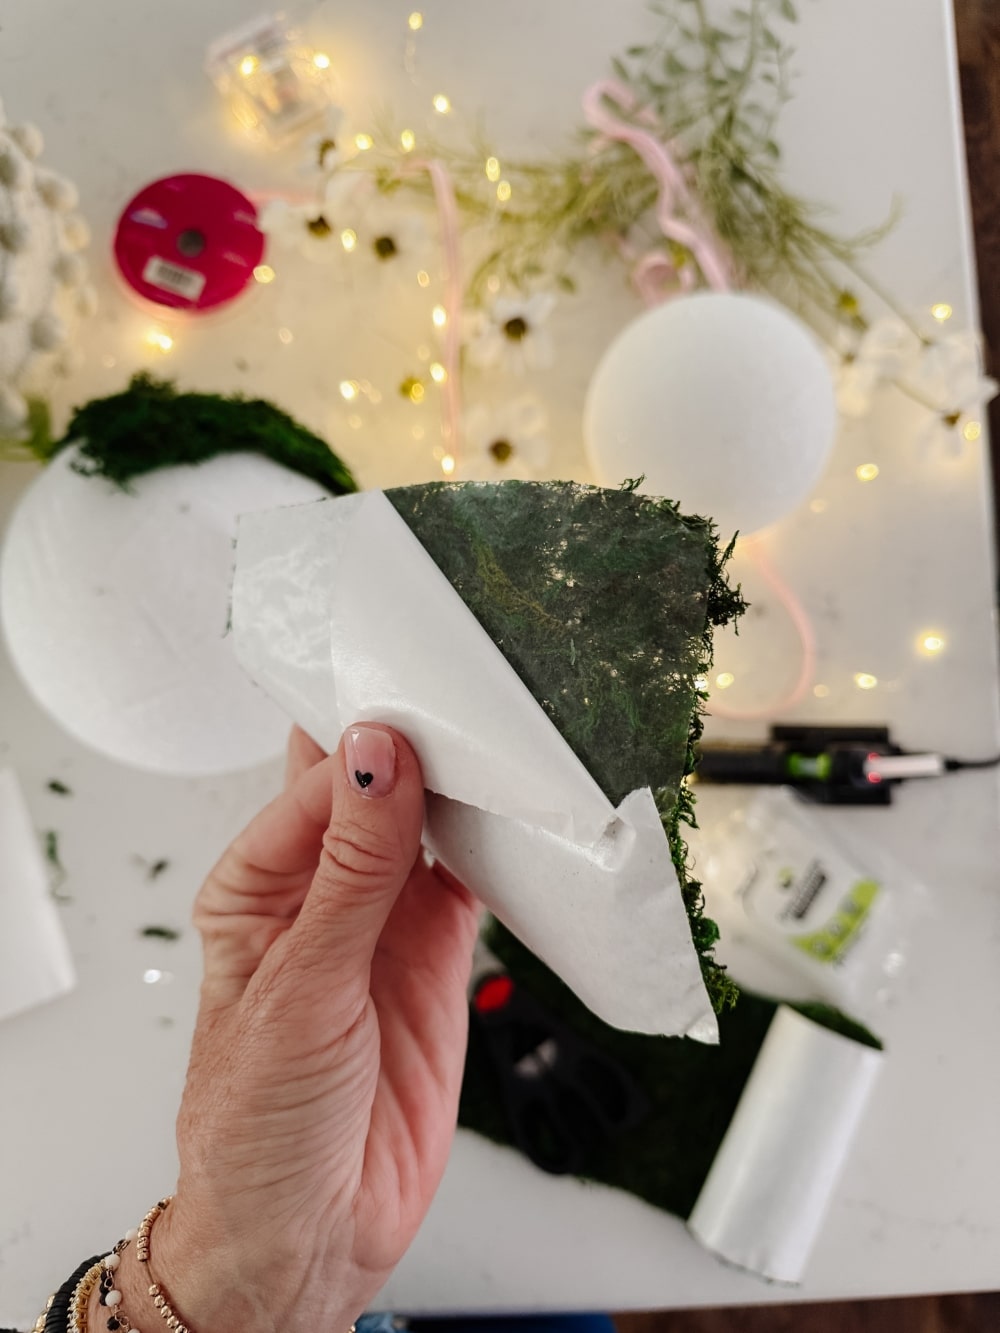
Cover the Balls with Moss
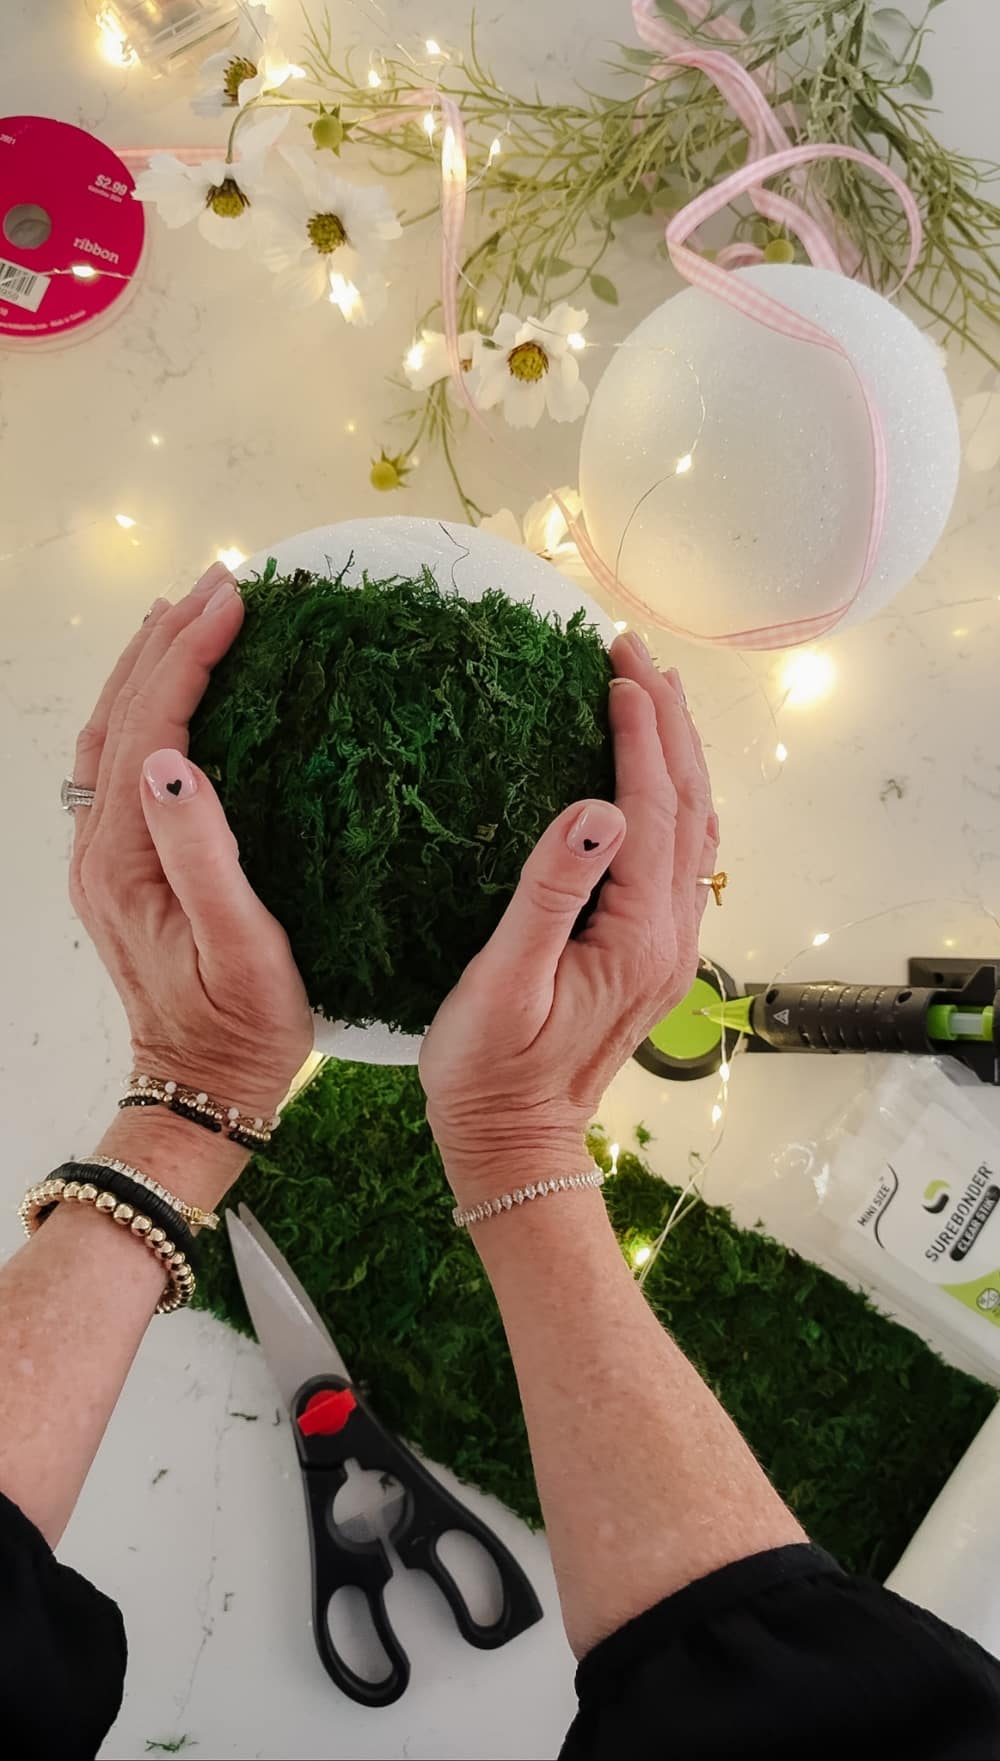
Now, it’s time to apply the moss! If you’re using the same size styrofoam balls I did, you’ll need just ONE roll of moss. However, to make it stretch, don’t apply moss to the bottom third of the larger ball (the bunny’s body). This ensures that you have enough moss for the whole project.
And don’t discard any extra moss that comes off the sheets! You’ll need it later to create the bunny’s ears.
Attach the Bunny’s Head to the Body
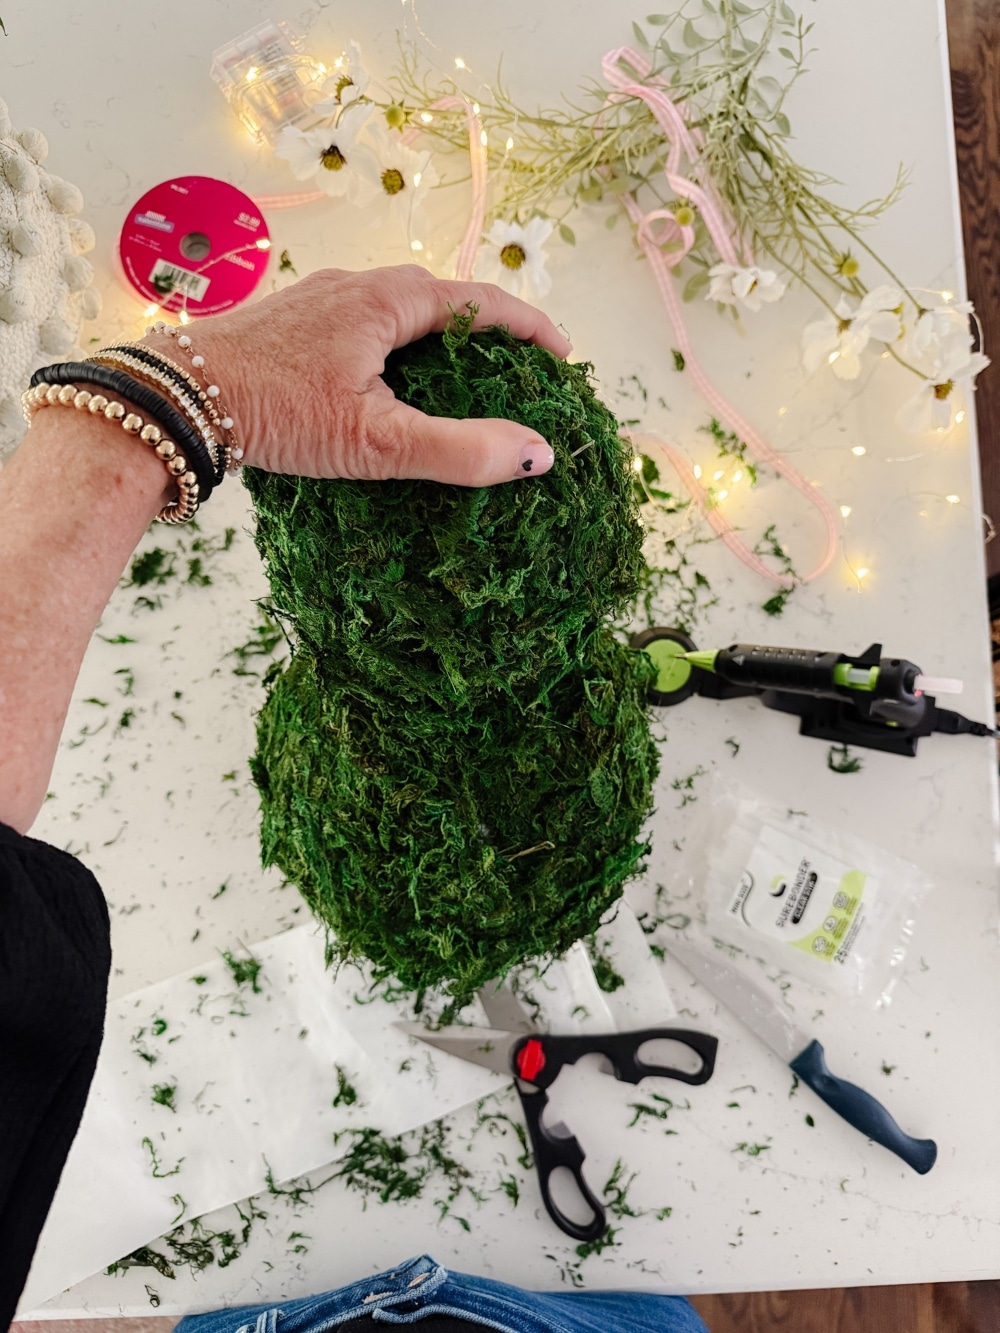
Once both styrofoam balls are covered in moss, it’s time to attach the head to the body. Apply a thick layer of hot glue to the flat parts of both balls and firmly press them together. Hold the head in place while the glue cools and dries to ensure a secure hold.
Make and Attach the Ears
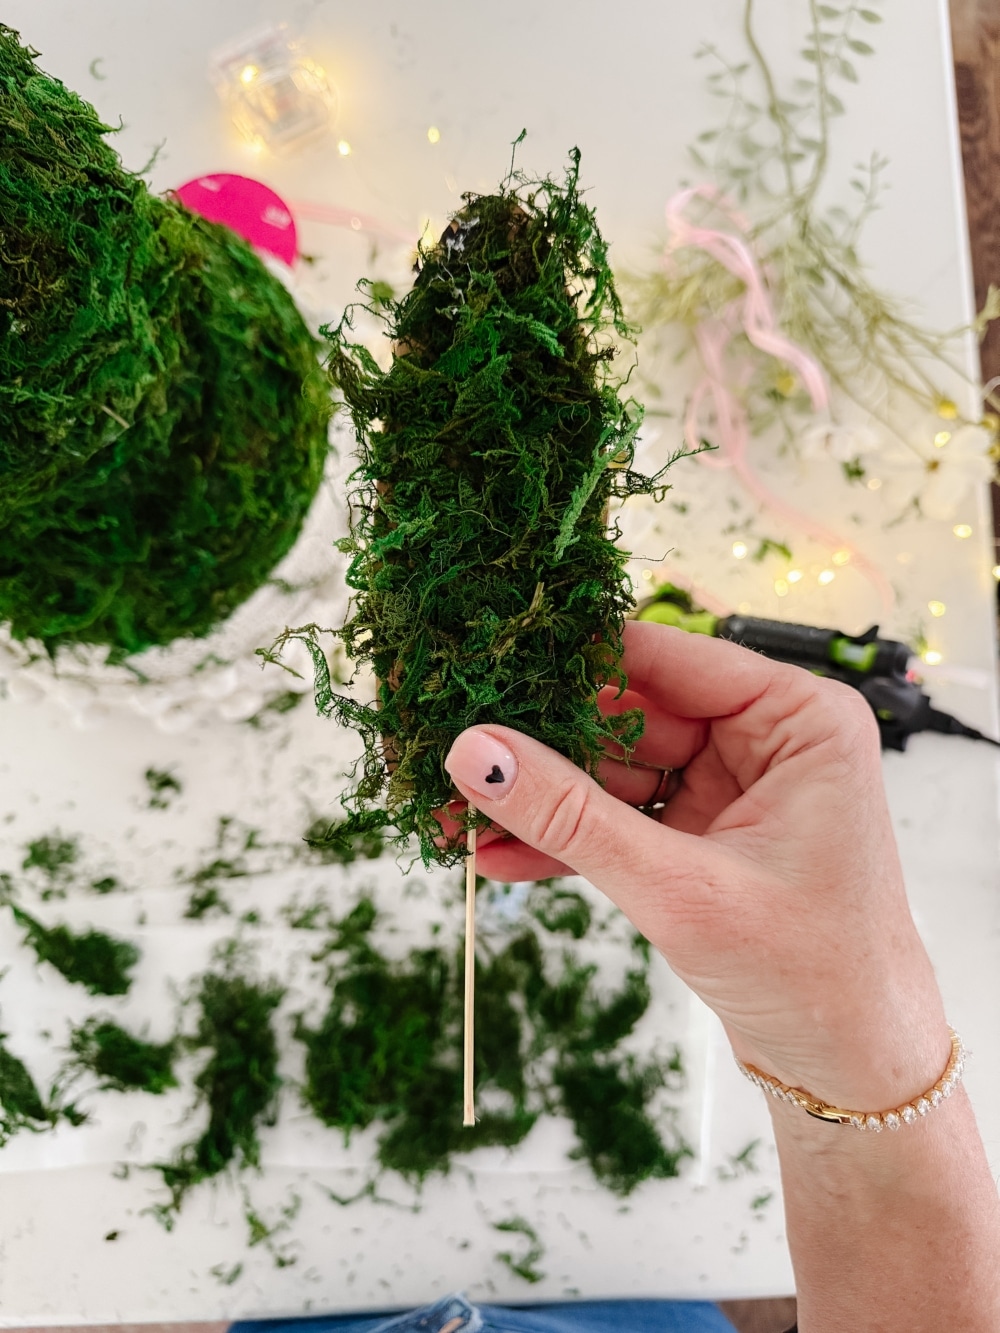
Next, cut out two bunny ears from cardboard. You can make them any size you like, but I made mine about the length of the bunny’s head. Once cut, insert a toothpick or wooden skewer into the base of each ear.
To cover the ears, spread a layer of hot glue on the front of each cardboard piece and press the extra moss onto it. Repeat this step on all sides of the ears, then trim up the edges with scissors for a polished look.
Once the ears are fully covered, insert the skewers into the top of the bunny’s head to attach them securely.
Fill in Gaps and Add Finishing Touches
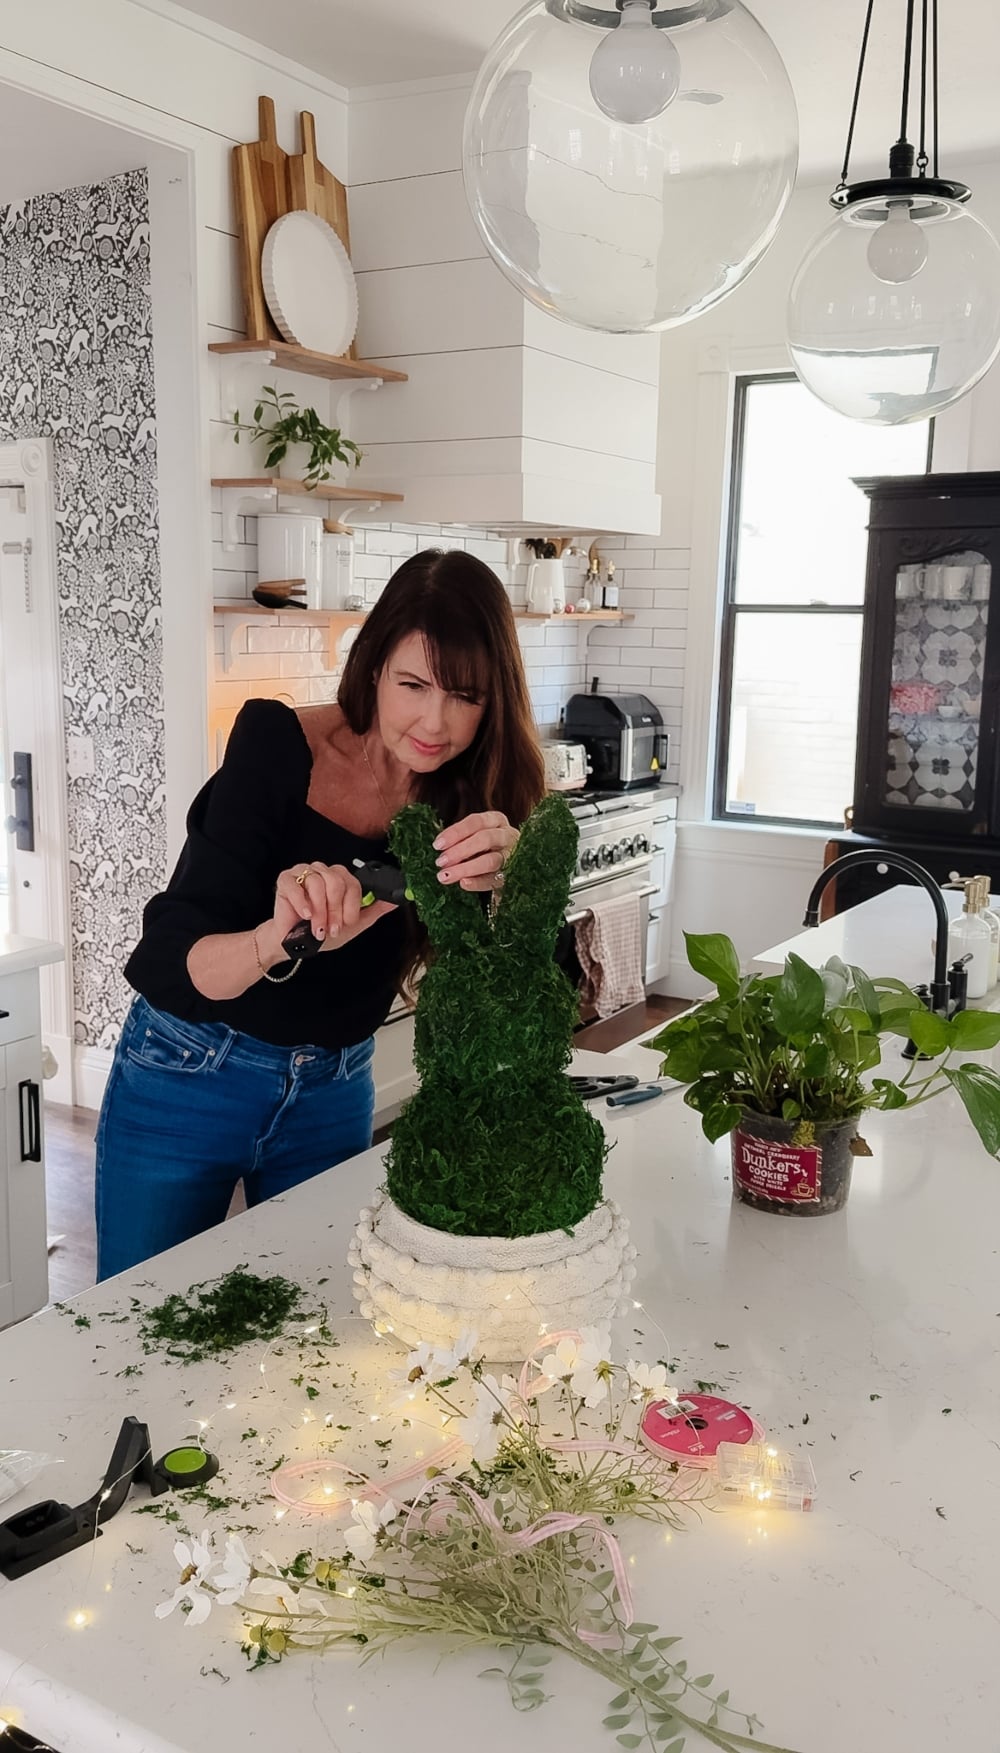
Check for any gaps in the moss and use leftover moss to fill them in. This will give your bunny a complete and seamless look.
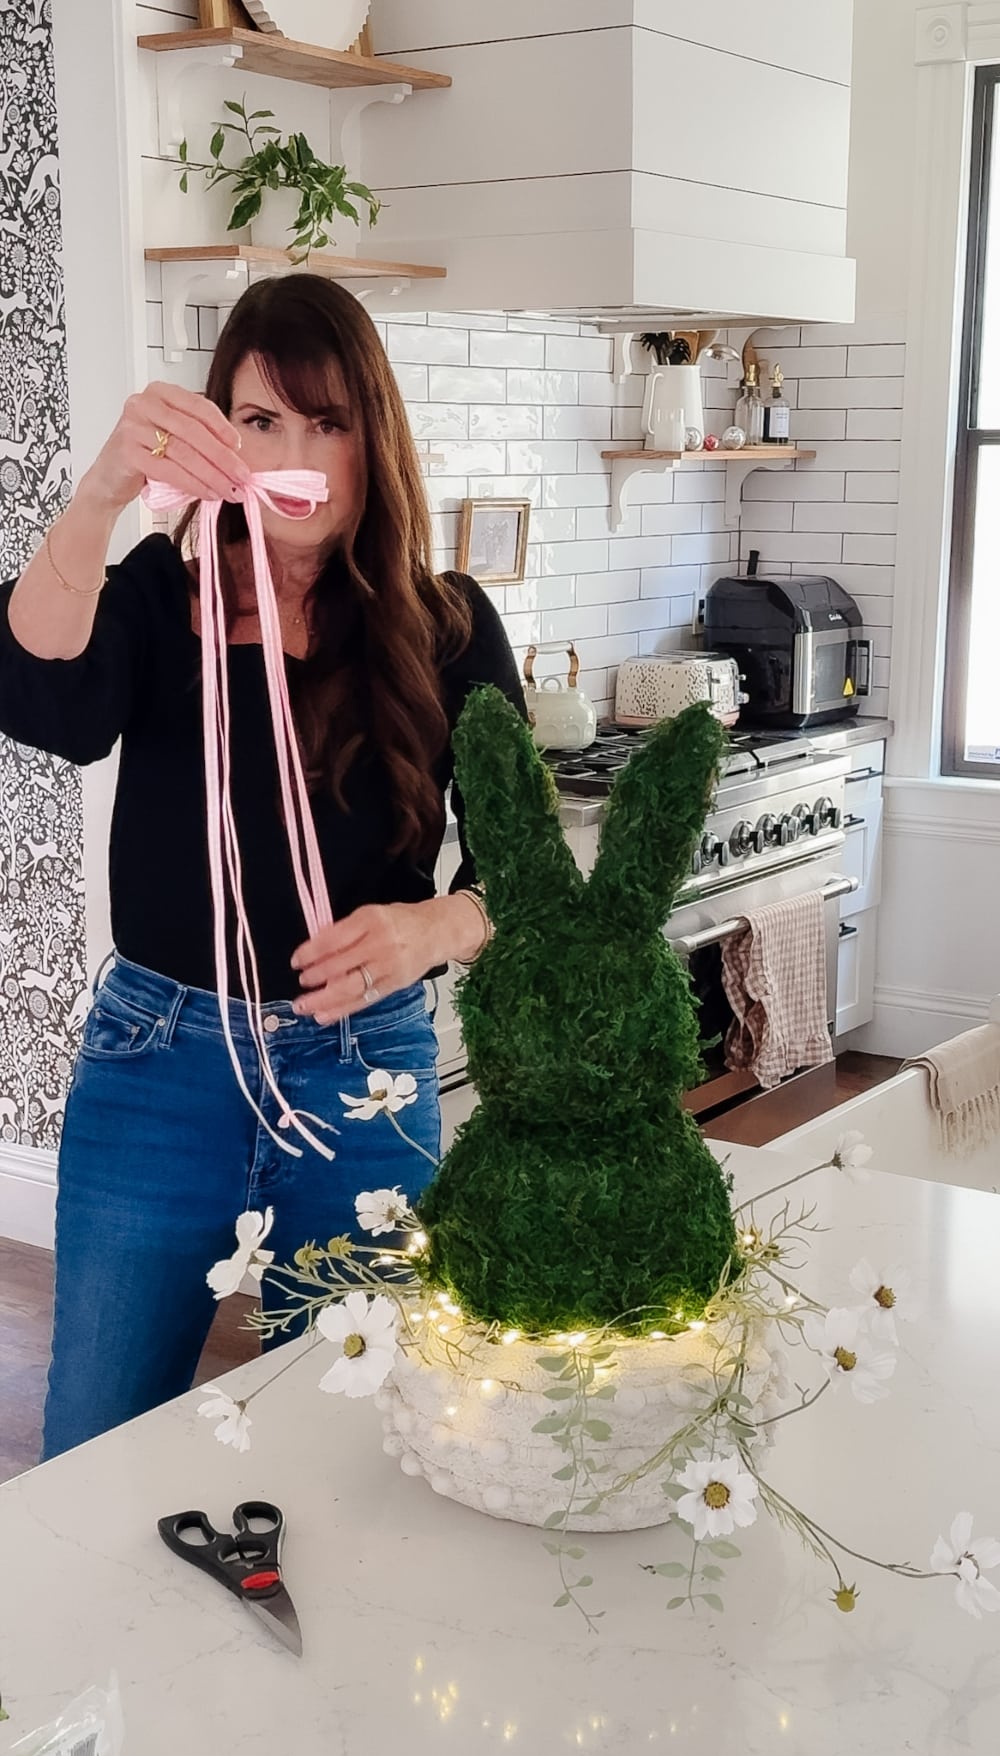
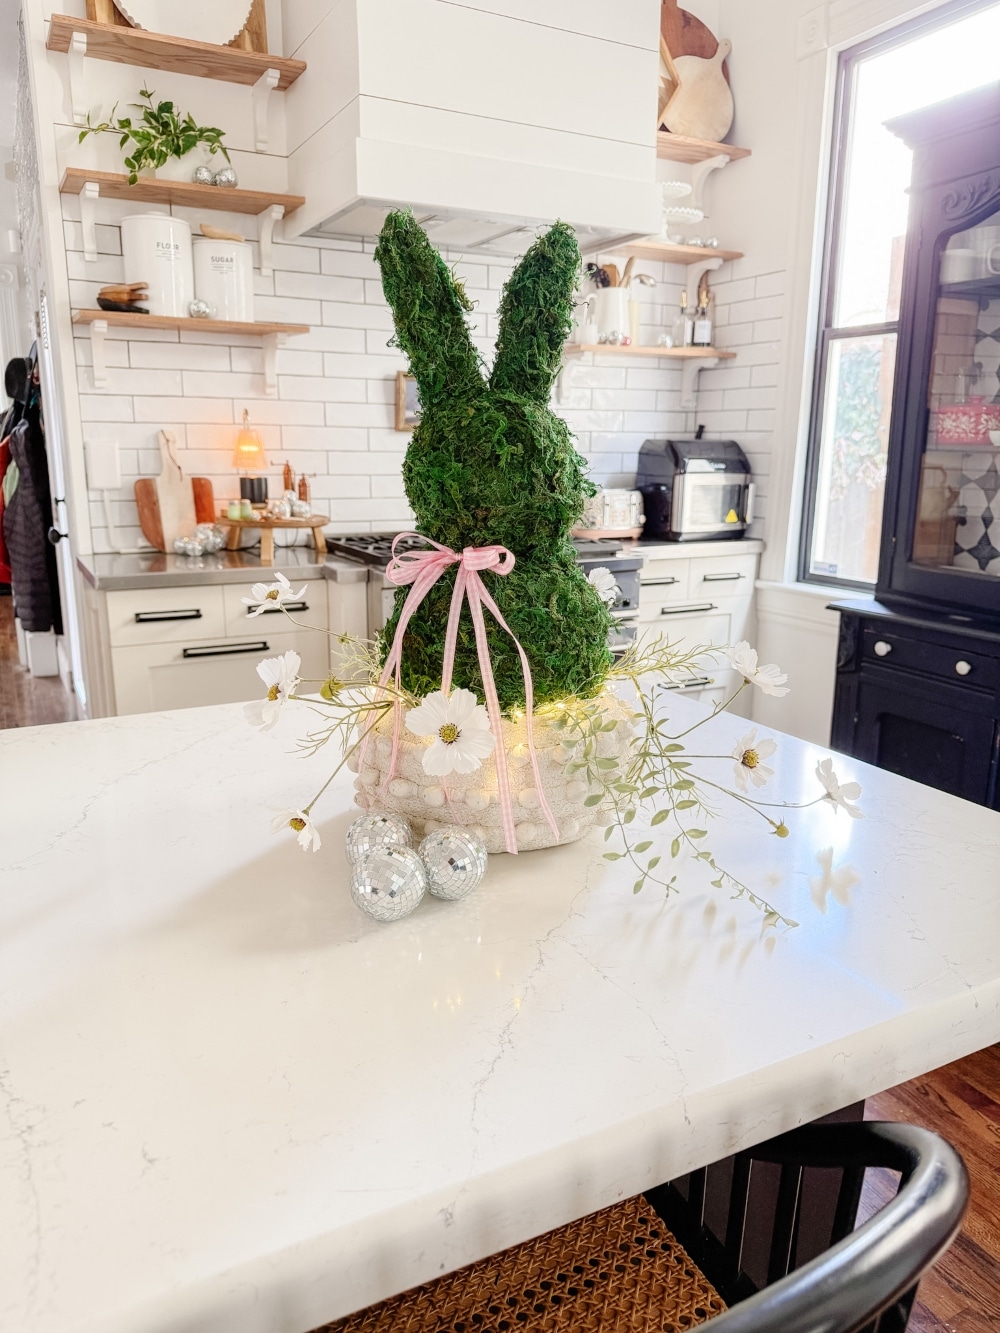
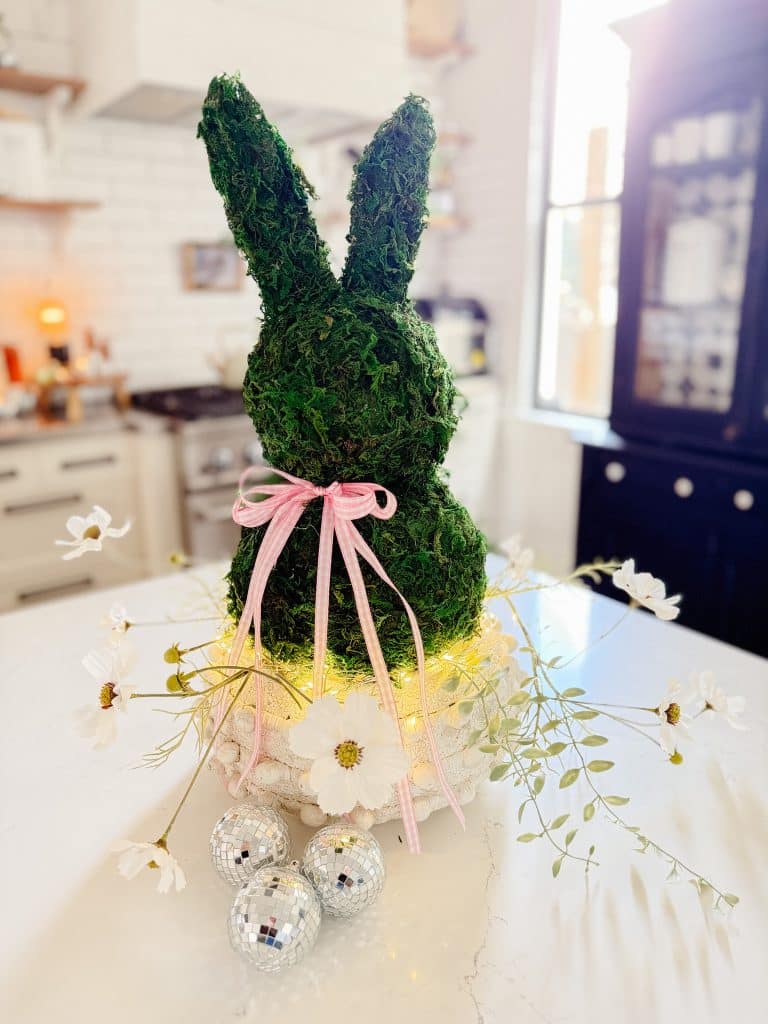
Now for the fun part—decorating! Make a bow with your ribbon and attach it to the bunny with hot glue. I also placed some faux flowers in the pot around the bunny for an extra touch of spring charm. To make it even more magical, I added twinkle lights at the base of my bunny. I used lights with a timer and remote for easy setup and control!
Enjoy Your DIY Moss Bunny for Years to Come!

Now that your adorable spring moss bunny topiary is complete, find the perfect spot for it in your home! Whether you place it on a mantel, a tabletop, or a covered porch, this charming DIY bunny will bring joy for many springs to come.
More Spring DIY Inspiration!
I’m also joining five friends who are sharing the cutest spring DIY projects! Be sure to HOP over and check out their tutorials for even more spring decorating ideas!
Blogger’s Best Spring Decor DIY Ideas!
DIY Spring Moss Bunny Topiary | Tatertots and Jello
If you make one craft this spring, let it be a charming Moss Bunny Topiary that will add a whimsical touch to your seasonal decor.

Floral Candlesticks: A Fresh Spring Decor Idea | My 100 Year Old Home
As the seasons change and winter fades away, it’s time to refresh our homes with spring decor that feels light, airy, and full of life. One of my favorite spring decor ideas this year is floral candlesticks—a simple yet elegant DIY project that adds a beautiful seasonal touch to any table setting.
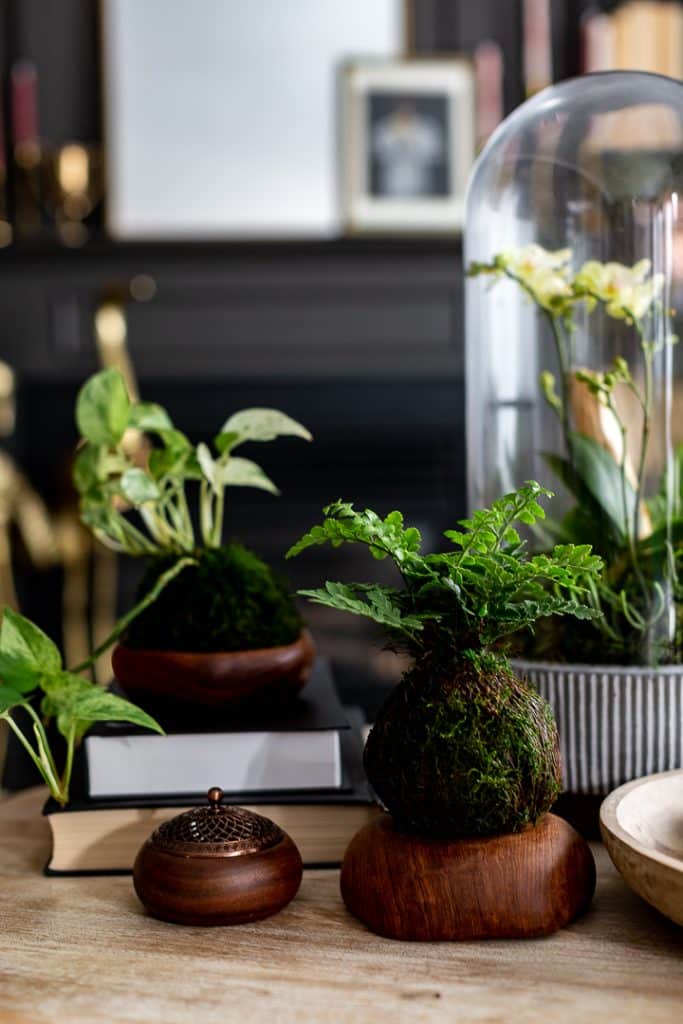
How to Make a Moss Ball Planter | Craftberry Bush
A kokedama or moss ball is a beautiful Japanese style of displaying plants. Perfect to welcome spring or any time of year.

Spring Paw Print Craft: DIY Pet Art | My Sweet Savannah
Create a fun, personalized piece of art with your pet this spring! This easy DIY paw print craft uses non-toxic paint to capture your pet’s paw prints on fabric, making a unique keepsake for your home.
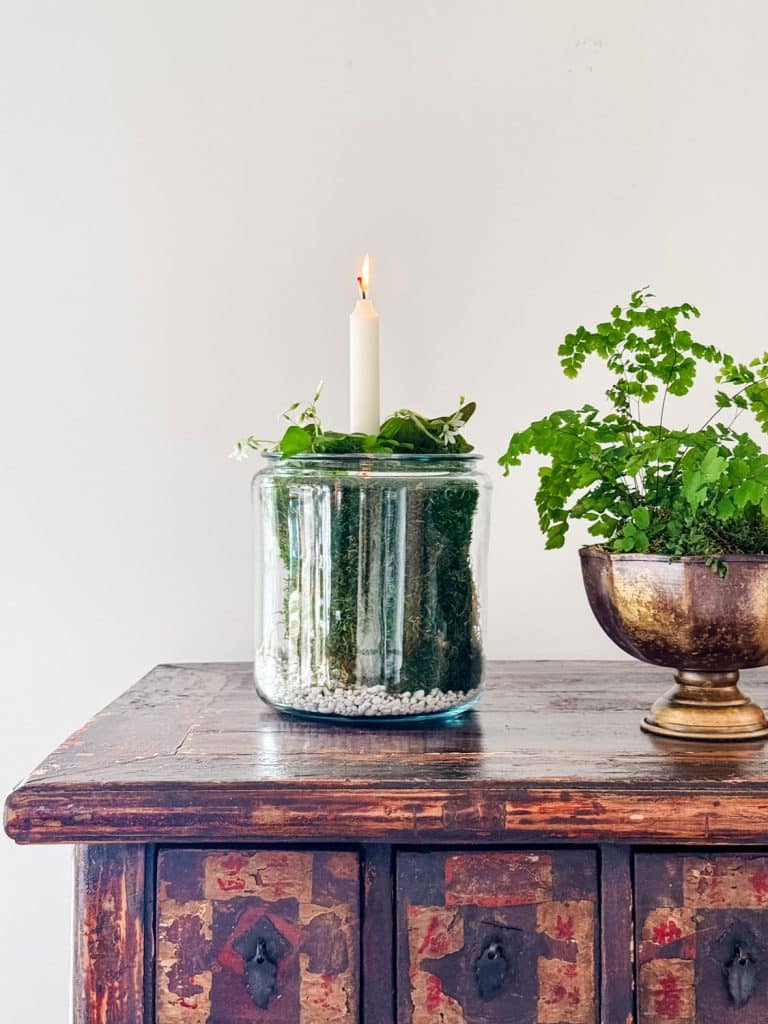
Make a Shamrock Terrarium in a Glass Jar | Most Lovely Things
Make a simple spring terrarium with a gorcery store shamrock plant, and a glass jar.
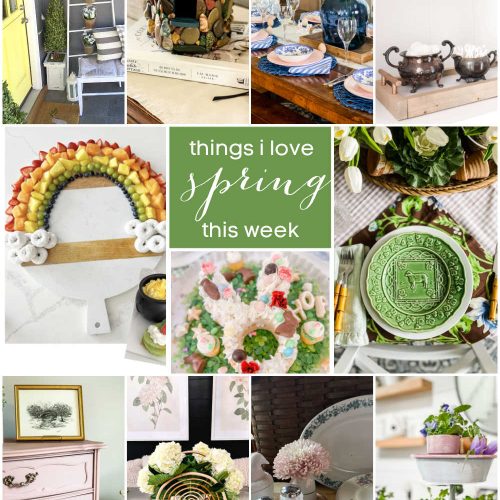
More DIY Spring Ideas
And here are a few easy Spring DIY projects and recipes I have loved creating!
- Spring Home Tour
- DIY Spring Paper Wreath
- DIY Spring Colorful Blocks
- Robin Egg Nest Cookies with Whipped Cream Filling
- Here Comes Peter Cottontail Easter Printable Signs
- Easter Jelly Bean Bark and Free Printable Tags
- Easter Scavenger Hunt Game with Free Printable Clues and Signs
Let’s connect on Instagram @tatertotsandjello, where I share DIY decorating and decluttering ideas as well as behind-the-scenes tips and tricks!!
xoxo,


HI Jen, Your moss bunny is adorable! I tried to subscribe on this post and I got an error message from Mailchimp. Just thought you should know!
Thanks jodi! And thanks for letting me know. I will see if I can figure out what the issue is 🙂
xoxo