Welcome to the Summer of Paper series – where we’ve invited fabulous guests to create projects using supplies from my Home + Made paper decor line.
 Hello Tatertots and Jello fans! I’m Natalie from A Turtle’s Life for Me, and I’ve been so looking forward to sharing my project with you today! Not only because I’m excited to help celebrate the launch of Jen’s new Home + Made line, but because it means one more thing is ticked off the list of my daughter’s bedroom makeover!
Jen’s style is always so modern and classic, and this new line is no exception. I received the box of goodies in the mail and, while I thought I was excited for it, it was nothing compared to how my daughter squealed when she caught sight of the products! I had an idea I was tossing around originally, but quickly switched my mind when I saw her enthusiasm for these designs.
I know after seeing that picture, you’re all dying to know… the answer is YES, she LOVES color!! She is a tween with a vibrant personality, and an empty wall just wasn’t cutting it for her. We’ve been working on her room for almost a year now, and it is nearly completely but this blank wall was bothering her.
Honestly, it was still blank because the light switches were bothering me! They were smack dab in the middle of the wall and stuck out the same way I do on a dance floor! She’s running out of blank walls in her room, though, so I knew if we wanted to use her room as our canvas for this project, it was time I faced my fear of the light switches.
This was one of those projects that took maybe 5 minutes total and made such a difference.
Supplies:
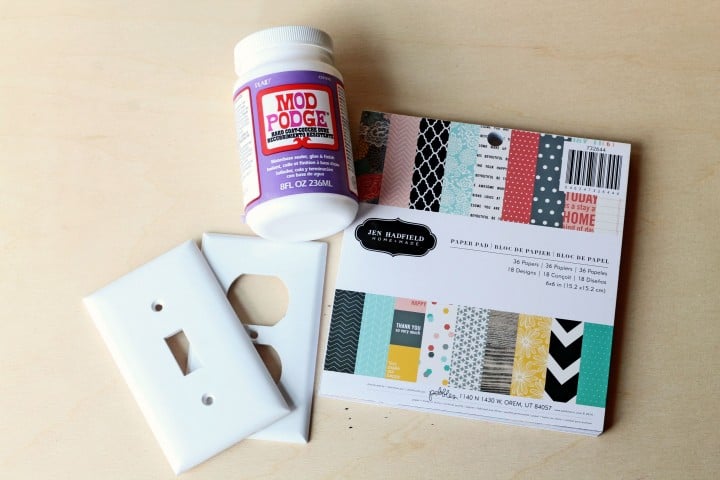
- scrapbook paper (I used Jen Hadfield’s Home + Made line)
- switch plate covers
- decoupage glue (I used Mod Podge)
Remove your switch plate covers and give them a quick cleaning to make sure they’re dust and grime-free! Then choose your piece of paper. I used the smaller pieces of paper so needed 1 piece per cover.
1) Cut your piece of paper so it’s about 1/2″ longer on each side than your switch plate cover.
2) Apply a liberal amount of Mod Podge on the backside of your paper and place your cover right in the middle.
3) Using scissors, cut a slit at each corner, so it folds nicely. I also trimmed each corner after I slit it like you can see on the upper right side of #3.
4) Fold over all your sides and apply more Mod Podge if needed. Press down with your fingers. Use an X-acto knife to cut a slit in the center and fold those edges back as well.
Your covers will look like the picture above. Let dry completely. You can also paint an additional coat or two of Mod Podge on the front if you would like. It helps later if you need to wipe it down. Let dry completely and then re-attach to the wall.
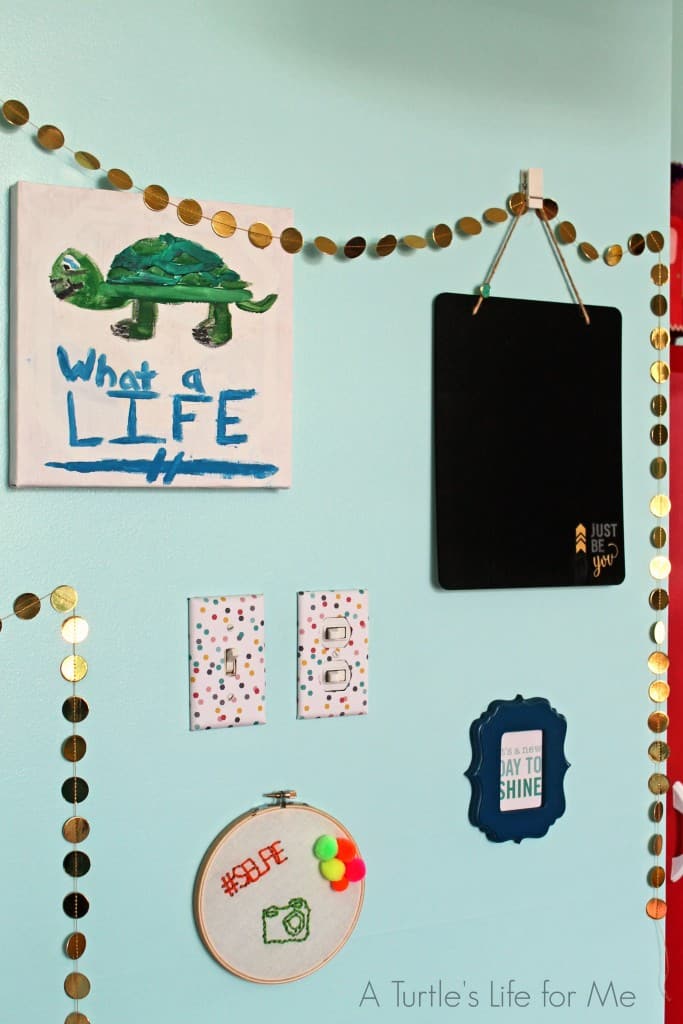
We were so excited with the way they turned out, that we decided to keep going with this wall! The little blue frame has a piece of scrapbook paper from Jen’s collection too! I just cut it out and it was instant artwork. My daughter just made the #selfie hoop art a couple weeks ago and she painted the turtle canvas last year. I try to include her personal artwork as much as I can.
The garland and chalkboard are from the Home + Made collection!
We cut out the rub-on quote we wanted and applied it to the bottom corner of the chalkboard and then hung everything up!
I love the difference it made in such a short amount of time!
I can be a bit challenged when it comes to matching colors and patterns, so I’m always appreciative for packs like this that take all the guesswork out of it for me!
I’d love for you to keep up with the progression of her tween bedroom and more! I share all kinds of easy, delicious recipes, simple crafts, cake decorating tricks and so much more!
**********
Thanks Natalie! What a fun room makeover! I love all the pops of color too! Natalie has great ideas on her blog. Here are a few I know you’ll love:

She has some great living room makeover ideas!

And I can’t wait to try her Grilled Chicken Cobb Salad recipe with marinated veggies! She has so many great recipes!

And this wooden photo board is such a great gift idea! Or keep it for yourself! 🙂


