Halloween Pillow Covers in 4 easy steps!

I have a small obsession with pillows. They are such an easy way to change the look of the room and add seasonal festivity.
But I don’t have tons of room to store them. So that’s where pillow covers come in. Pillow covers are slipcovers for your pillows. I recently saw some pretty pillows on one of those daily deals sites. A set of pillows for $99. And they were reduced from $238. That’s a pretty good deal.

I realized that I already had that same material. And guess what? I made the same pillow covers for $4 each. Plus, my pillow covers are almost twice as big as their pillows.
Granted, that $4 didn’t include the pillow form. What I love about pillow covers is I can take a pillow form and change out the covers as often as I like. And, when I’m not using the covers, I can fold them up and store them in my linen closet.
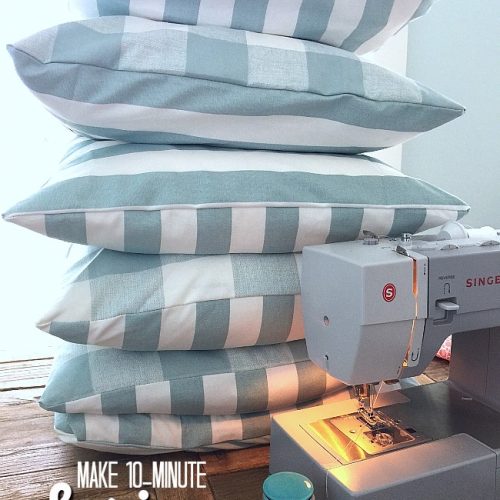
This summer I learned how to make a pillow cover with a zipper and that was not nearly as hard as I thought it was going to be. But, making a envelope pillow cover is even easier. You can do it in just minutes in 4 easy steps.

Here’s how to make the covers:

1. Measure your pillow form. Add 1 inch total to the width and height for seam allowance and cut out the material.
2. Cut out the back panels of the pillow. Take the width of the front pillow cover, divide it in half and then add three inches to the total for both panels. So if you have an 18 x18 pillow, add an inch for the seam allowance — so the width will now be 19 inches, and each back will be 12.5 inches in width. The height will be the same as the front.
3. Take the length of each of the panels that will be overlapping and fold the seam twice to create a smooth seam. Sew the seam on both back panels.
4. Pin the back panels to the front panels with the right sides facing inward. Then sew around the entire pillow cover. I back stitched over each of the seams for durability. Turn it right side out and put the pillow insert inside.
Note — if you want even crisper edges, you can sew a stitch around the entire outside of the pillow once it’s turned right-side out. Like this:

Here is a picture of the back of the pillow, showing the two panels that open so you can insert the pillow cover:


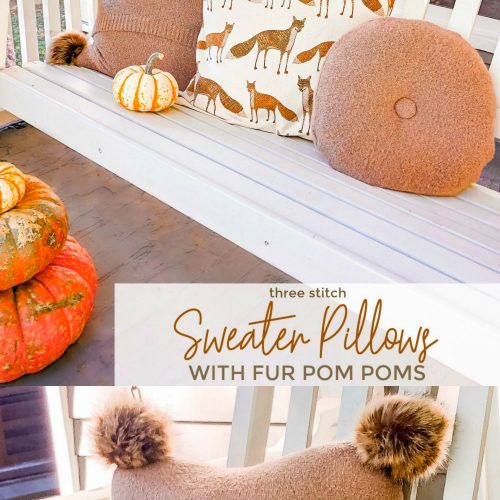
These are just a few pillows I’ve been working on for my Halloween Pillow Display. The whole reveal is coming up next week! This is what my pillows looked like before:

and after:

And I love that my Spring Pillows are still there under the pillow covers, all I have to do is take the covers off when I want to use them again!
Happy Halloween!!
What’s YOUR favorite holiday to decorate for?
xoxo


I am math-challenged! Would you look at your #2 on the pillow directions and explain that a little more, please? Thank you.
However, many websites have forgotten this fact and made intricate desiigns out
of it, such as using dark font colors against dark background or
white foont color with light background. Somee companies
aare putting thee knowledge of HTML 5 to the optimum use.
Disclosure statement: Transportation and lodgng were provided by
West – Jet for this event.
I have read a few just right stuff here. Definitely price bookmarking for revisiting.
I surprise how so much attempt you place to create any such
wonderful informative website.
You posted this on a day when I was going out to buy fabric to use up 2 pillow forms. I thought I’d try this instead of another pattern I have. I JUST finished it and it’s definitely going to be the way I do the 2nd pillow. SO easy! Thanks!
Thanks so so much! I really appreciate the time you put into typing this all out !
Thank you for the inspiration!
http://roseleej.blogspot.com/2013/10/custom-halloween-pillows.html
Thank you for the inspiration! http://roseleej.blogspot.com/2013/10/custom-halloween-pillows.html
What a great idea, was about to sew pillows for twin beds and this is a great idea on how to do it, many thanks. I didn’t want to out a zipper in but did want to remove the cover for cleaning, so this will work well.
Excellent site you have got here.. It’s difficult to find quality writing like yours nowadays.
I truly appreciate people like you! Take care!!
I’m trying to figure how much total fabric I would need for one pillow. Is 1/2 yd enough for one?
I love the pillows but…I have a question. Did you also make slip cover for sofa? If so…do you have instructions for it as well?
Thanks for the tutorial. My question is, if you want to do the last step of sewing around the outside to make it crisper, wouldn’t you need to add to the fabric measurements to allow for this?
Thank you, thank you, thank you!!!!!! I have 4 pillows to make, and I’m SO glad I read your instructions before starting! This will be so much easier and look much better than what I was planning to do! I really like the idea of being able to remove the cover and change them out! You’re fantastic!!!
Oh my gosh! I love this! I want to get sewing ASAP! You do such a great job explaining! Love your ideas!!
WOW!! I am so glad I found this post. I just made the cutest pillow cover for my daughters’ room. It is literally the second time I have ever touched a sewing machine. Fantastic. Thank you so much! Can’t wait to finish the next few to finish it off!
How much would you charge to make these for someone?
I made some envelope backed pillow covers recently that are fall colors but still incorporated in my turquoise and browns and rusts that are in my living room. So cute and easy to do, I’m so glad you are sharing these with everyone. I made six of them in 30 minutes (I’d cut them out the night before). So fun!
Perfect timing I just bought some fabric to recover a dying pillow meaning it’s falling apart but the stuffing is still good. I was gonna sew it up but the envelope cover is much more convenient and easy. Thanks
Thanks for this! I have some pillows to make and I would have made it much more difficult. 🙂 P.S. I love the orange and black with the dots!
kelly
Where did you get this fabric. A the yellow one too? I just bought two of these polka dot pillows from etsy for my nursery because I could not fin the Fabric. 🙁 so ridiculously expensive. Would love to know where you find such modern prints.
Hi Ashley! Sure – I bought them from fabric.com. They were $5 per yard. I posted the link down a little in another comment.
xoxo
Did this! Even posted about it. So easy. I even used some rick rack on the “back” and now it is the front. So cute and easy! thanks for the tutorial!
Jen, I can’t believe it is this easy! I love making pillows, but I just sew them shut and hope that the person buying them at my boutique space doesn’t get them dirty! This would definitely “up” the appeal. I have an endless supply of pillow forms and fabric. I am starting on some tonight!
I had to think about the back…but once I thought it through (while in the shower! ha) I got it. Thanks SO much for this tutorial. I too am a beginner and have a machine that does WAY more than anything I’ll probably ever accomplish. My Mom was a quilter and this was her machine. LOVE these!
Thanks so much for the easy peasy pillow tutorial – I’m always looking for an easier way.
This tutorial is so great I had to pin, tweet, and like it. I never do all that! Thanks again.
Hi Jen. I use this method to make pillow shams for our beds too. So much cheaper than buying them at the store & I can make exactly the color or pattern I want.
can’t you post a pic of the envelope back?
Hi Jenn!
I just added a picture of the back of the pillow cover so you could see it 🙂
xoxo
I share your pillow cover obsession! My hubby gives me a hard time because I have Fall, Winter, and Summer throw pillow covers (who doesn’t?) 🙂 I might have to give this a shot!
Me, too! 🙂 And I’m thinking I need to add Christmas pillow covers. It’s an obsession, but a pretty safe one if you make your own covers!
My mil (a FIVE STAR seamstress) when visiting a few weeks back, I had asked her how to do this very thing you are showing. She explained it to me as visually as she can. Now with your tut. and her visual tut. I need to dive in and go for it. Love the pillows.. now about that ghost one? I WANT ONE! did you make him? or can I buy him somewhere? please share. xo, jen
Where did you get the ghost pillow?
Hi Rachel!! The ghost pillow was a gift I received for my birthday a few years ago. It would be really fun to make though!
Love! I hate sewing zippers so I’m always looking for ways around them! Thanks for this great tutorial. I love those orange and white polka dots!
Thanks Brenda!! I agree. These are so much easier and faster than making ones with zippers 🙂
xoxo
These are so adorable! Thanks for sharing 🙂
Thanks so much for stopping by! I appreciate it so much!!
xoxo
Cute pillows. $99 for pillows is NEVER a good deal. That is a major rip off, unless the pillows have gold or diamonds woven in them. I don’t know why you would do that, but still, that’d be my conditions. Or a secret treasure map hidden inside.
hahaha!! Yes!! I was so bummed when I saw the price on those because there were some really cute styles. A secret treasure map would be awesome 🙂
xoxo
Love. Had to pin it. 🙂 Jessica
SweatismySanity.com
Thanks so much Jessica!!
xoxoxoxo
That looks adorable. I love the ghost pillow too!
Thanks Ahna!! I love the ghost pillow too. Those pom poms are so fun 🙂
xoxox
Really cute–and what’s great, is when you have the black and orange together, it’s totally Halloween, But split them up and they could fit into regular decor!
That’s so true Steph!! I am loving orange right now for some reason. I think I’ll keep those out 🙂 Thanks for stopping by!!
xoxoxox
These are so cute! Everything you do is incredible! Thanks for all the work you put into your blog. I visit your blog pretty much every single day, but don’t always leave comments. But thanks to our good friend Lara I’ve been inspired to leave more comments & express my appreciation. So thanks.
-Meg
So cute and simple thanks so much for sharing! And is that your famous crib inch I see in the background that use to be black? I absolutely love it I think it’s still my favorite project of yours… well, 1 of them! 😉
Sorry for the typo…I meant crib bench 🙂
Monica!! Thanks so much for taking the time to comment. That means so much to me. You are so sweet to remember my projects. Wow – you made my day.
xoxo
You lostme at the divide?? After adding an inch it’s 19….so how do you get 12.5 for width? Isn’t it 19? Sorry if I’m sounding dumb here…..
Those are real cute and I’d love to give it a try
I’m with you. I don’t get it.
I was lost at “cut out back panels of the pillow”.
Hi Colleen and Nancy and Joan. Sorry to confuse. I was thinking maybe I would make a little video. I always think it’s easier to figure something out if I can see it. So you cut out the front panel which for my pillow was a square. Then for the back you have TWO panels. They are each the same size, but they overlap in the back so you can put your pillow inside the panels and the overlap keeps the pillow inside the cover. So you take half of the width which was 19 inches for my pillow — half of that is 9.5 inches and then add three inches for the overlap — so each back panel is 19 inches high and 12.5 inches wide. Then when you sew it together the back panels overlap. I hope that makes sense. Send me an email if you have any other questions and I would be happy to help.
xoxoxo
Where did you find that fabulous polka dot fabric?
Hi Teishi!
I got the fabric through Fabric.com — http://www.fabric.com/ProductDetail.aspx?ProductID=89c90237-1957-41be-ad40-8e2db15ab7a6
xoxoxo
OK, love the polka dot covers, of course, but that ghost pillow?! That has got to be the cutest thing ever!!!You always have such great ideas, Jen. Thanks for sharing.
LOVE those halloween pillows (and that ghost is stinkin cute). I need to keep calm and pull out my sewing machine because threading that thing intimidates me, but I’m limiting myself so much by not using it!!! I need new pillows and have tons of fabric, great tutorial!
Thanks Kristen!! I was afraid of sewing machines for so long. I finally decided that I wanted to learn. So I am still just a beginner. But it’s so fun to create things myself, even if they aren’t perfect lol.
Thanks for the comment my friend!
xox
I love this money saving idea! 🙂
Thanks Heidi!! It’s amazing how much money I saved yay!!
oxox
I do the same thing myself! I love pillow covers, it is so easy and quick to change the decor from one season to the next. In fact, as a gift for my SIL, I gave her a pillow form with covers that I made for all the different holidays, and she just switches it out for the season.. she loved it! Envelope back pillows are the best! I never thought of sewing a stitch around it for a crisper edge, think I will try it next time.
Oh my gosh – I love that idea!! I am totally doing that. What a great gift idea. You are so smart Sandy!!
xoxoxo
Oh Sandy…what a FABULOUS idea! I’m always looking for different Christmas gifts!
Thanks for these…I LOVE pillows!
Thanks for stopping by Amy!! I appreciate it so much. Have a happy day!!
xoxo
Hi Jen. Thanks for this tutorial. I too can make pillow covers with zippers, but I always tend to put off the project because it seems to take so long. Your method seems so simple – and quick. I really need to update my couch pillows – I’ll be trying this!