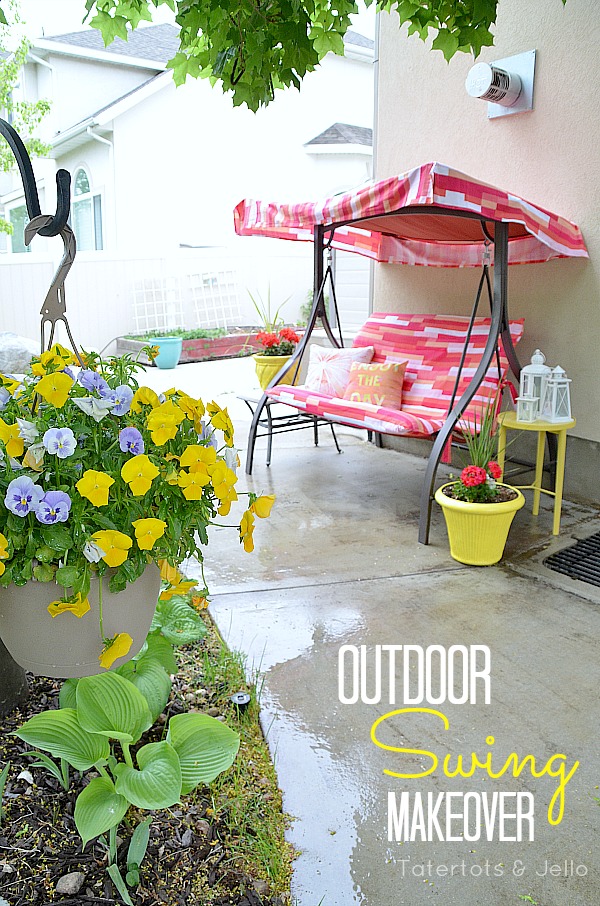
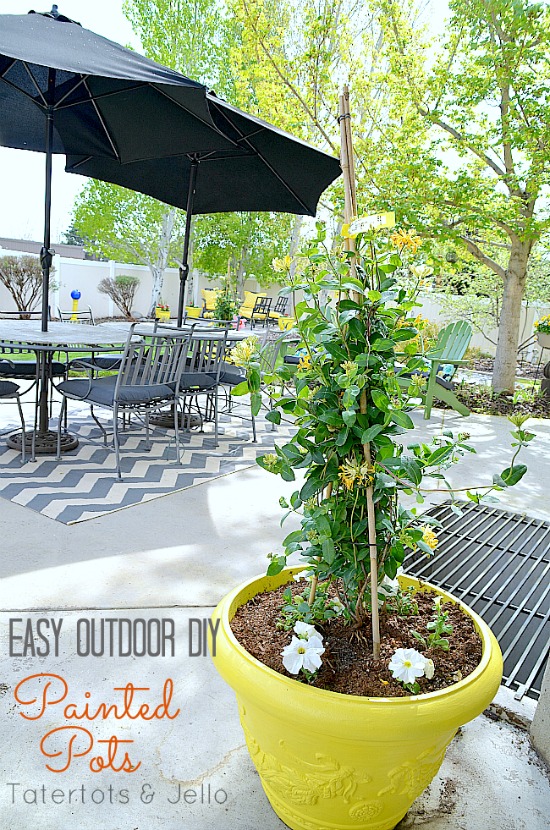
I’ve been working hard trying to get my yard prettier. Last week I painted my brown and tan resin pots — yellow. And I love the change that made in our yard.
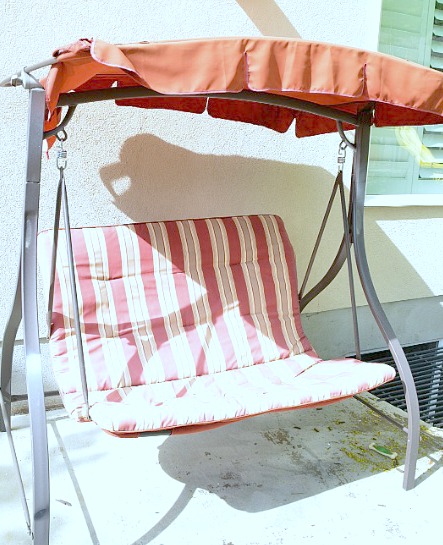
With all of the new pots and cushion covers, it really made my old, faded porch swing stick out. So I thought I would try recovering it.
You know those projects that SEEM like they will be really easy to do?? This was one of those. I didn’t really think it out very well. And it almost became a “craft fail” quite a few times.
But I pushed through and I am SO glad that I did!!
Here’s what I did (and some mistakes to avoid in case you want to try this sometime). Plus, this would be a fun thing to look for in yard sales this summer. You should be able to pick an old swing up very inexpensively.
Here’s what I did:
The first tip I can give you is — think this project out.
I thought I could get rid of the old cover and make a new one with ties that tied to the frame, but once I got that made, I discovered it wasn’t going to work. So I had to start all over again.
What I discovered is that the material that was used in the original cover is made to be VERY strong. It’s criss-crossed the way that duct tape is and that makes it able to bear the weight of several people sitting on the swing. Another thing that I discovered is that the way this swing was constructed, there is very little support in the frame, most of the support comes from the cover fitting EXACTLY to the frame and attached through ingenious straps on the back.
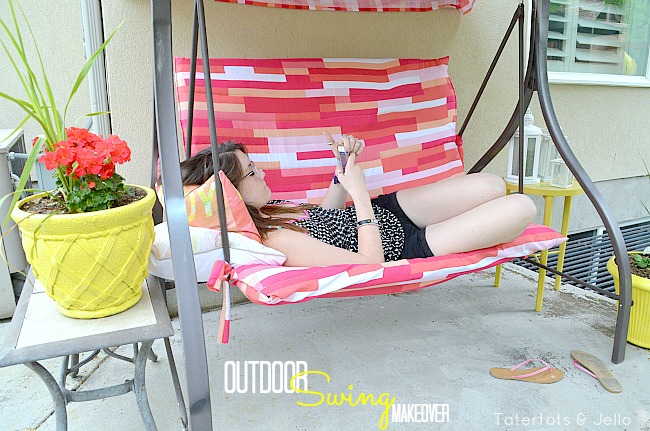
So I went back to the drawing board. I decided to use the old cover, but to make a NEW quilted cover that fits over the old one. That way I still use the strong original cover that fits perfectly with the extra strong material. But it also looks pretty with the new, quilted cover.
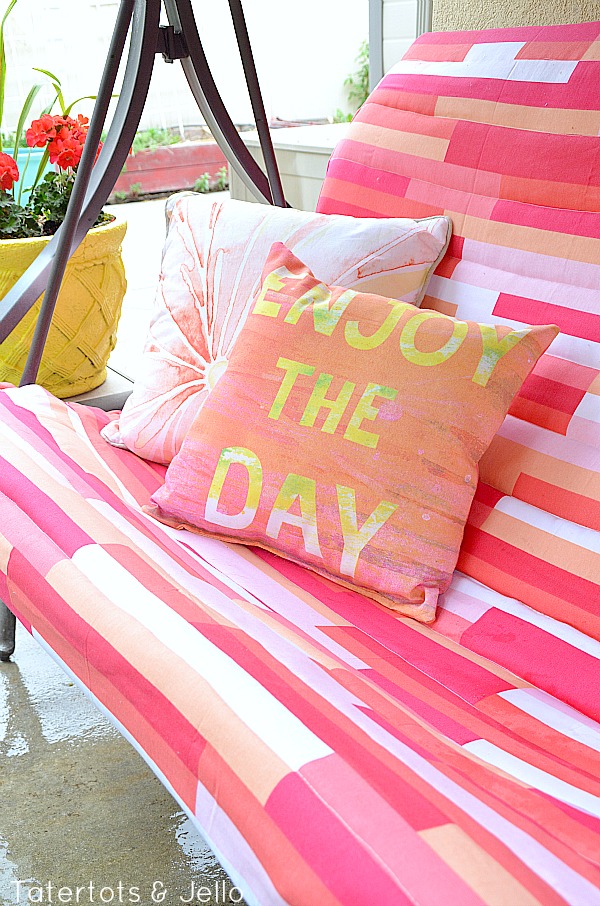
For the material, I used OUTDOOR TABLECLOTHS from Target. I wanted to use outdoor fabric and I thought using outdoor fabric tablecloths would cut down on the cost of the project. Plus, I loved the bright colors of the tablecloths.
I used three tablecloths for this project. Two for the cushion – the front and the back, and another for the canopy. But if you want to cut down on the cost, you can use a different piece of material for the underside of the cushion instead of a tablecloth.

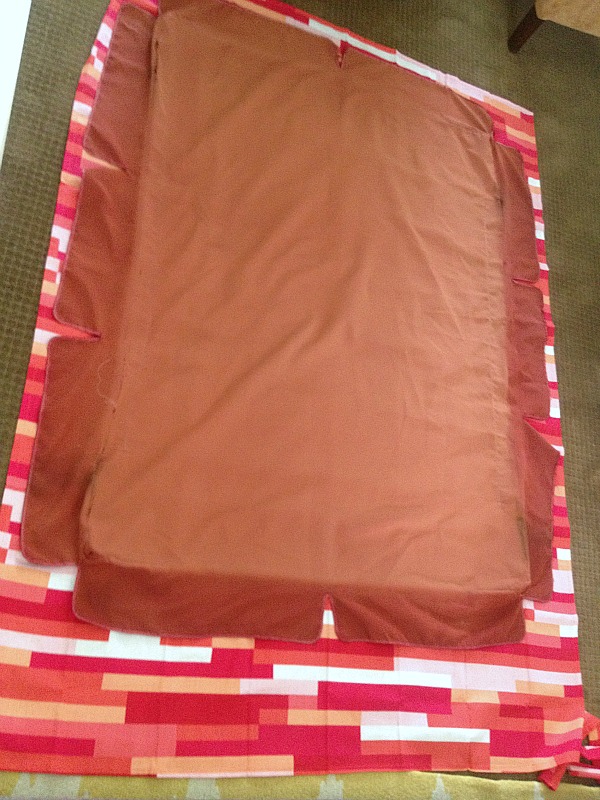
So what I did was I laid out one tablecloth and then laid the old cushion on top of the tablecloth as a pattern — I cut the tablecloth to the same size, but added 1 inch around each side for the seam allowance and to leave room for the batting inside.
For the front side of the cushion, I cut the sides the same size as the first, then I added 8 inches to the top and bottom sides of the cushion cover. I did this because I wanted to make a flap on the top and bottom of the cushion cover so that it would fold over the top and bottom of the cushion and hold the cover onto the underlying cushion.
Once those two pieces of fabric were cut out, I folded and sewed all of the edges of the fabric under so there were no unfinished edges.
Then I pinned the cut-out tablecloth pieces together, with the right-sides inside.
And I sewed each side of the cushion cover and flipped the fabric right-side out.
The next thing I did was I inserted the 3-layers of batting inside of the cushion cover and sewed the top and bottom seams shut, holding in the batting.
Remember – the top and bottom flaps of the cushion cover are still open.
I wanted to keep the batting from getting all bunched up inside the cushion, so I quilted the cover with my machine — with straight lines across the cushion to attach the batting to the cushion cover.
Then I folded the open top and bottom fabric onto the back of the top and bottom of the cushion and sewed it down at the edges, creating a pocket at each end.
Then I put the NEW cover on top of the old, existing cover and tucked the top and bottom of the swing into the pockets, to hold the cover in place.
I also decided to make it even more secure by making a tie out of scraps of the fabric to attach to each of the bars that hold the swing seat onto the frame. I sewed those ties onto the back of the new cushion.

The Top:
I decided to use the existing top too. The fabric tablecloth was a little see-through and I wanted it to be shadier. So I took the canopy top and laid it on top of another tablecloth.
I cut the material out to the same size as the old canopy top, with an additional inch around the whole cover. Each of the edges of the canopy top are notched, so I did the same thing with the fabric. I folded the edges under so there were no exposed seams.
The original top also had scalloped edges, I decided to make the top square, so I didn’t cut those out.
The canopy top is held onto the top frame with sleeves that are sewn onto the underside of the top. I reinforced those with the same fabric as the new cover.
I pinned the new fabric onto the old cover. I cut off the scalloped edges of the original top and then I sewed around the whole outside of the old top, attaching it onto the new one. I folded the old material under, so there were no exposed seams.
Then I attached the canopy to the canopy frame.

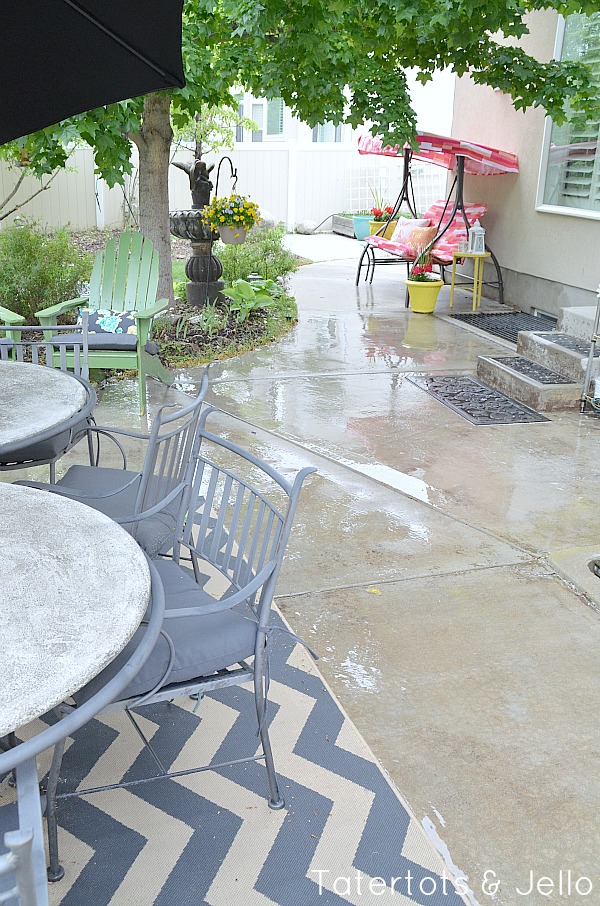
I really love my new little “old” swing. It really updates the swing and adds so much to the yard. This is my favorite place to eat lunch in the summer!
I still need to make a screen for the air conditioning unit that is right around the corner. Maybe I will tackle that project next week!!
What projects are YOU working on at your house?
Let me know in the comments – I would love to hear YOUR ideas!!
Have a Happy Day!
xox

PS — It’s Friday!
My favorite day of the week.
Why?? It’s the time when I can see YOUR great ideas!
I hope you can stop by for the Weekend Wrap Up Party!
I love to feature YOU!
The party starts tonight at 6 pm MST.


Been trying to get up the motivation to do this same project. This might be what gets me lined out and going. Thanks.
Great project. It looks lovely 🙂 Thanks for sharing 🙂
I have this exact swing and I’m dying to try to recover it. How did you get the cushion off of the frame? Just cut it off then sew it back on? I don’t want to completely mess it up before I get started! Thanks!
What measurements were your cushion? I have a swing that didn’t come with one, and want to make a pad for it. Thanks so much.
Dang girl that is quite the undertaking!
Great Job Jen! Love the new look, and your whole backyard is just dreamy. I want to come over. xo jen
Good for you for even taking that project on!! It turned out adorably… I would love to lounge and swing there:)
Krista
Jen that is absolutely the cutest swing I have ever seen… fantastic job! I love the pattern / colors. Gotta love Target! Pinning. I LOVE it. {that’s a lotta “love” in one comment – lol}.
xoxo, Claire
Awesome Jen! I love how it looks, it’s amazing that you made it with tablecloth, so clever and looks amazing really!. It would be so cool if you could join my Link Party on Sundays, it’s always so nice to see your creations!
Hope you are having a lovely weekend
Hugs
Cami @ TitiCrafty by Camila
JEN!!!!!!!!!!!!!!!!!!!
this is so brilliant & so amazing. i agree with cheryl, you can do anything!!!
xo
kellie
Love this Jen! It is so pretty! I love the combo of pink and yellow together and sometimes the fabric used on those swings when you buy them new can be very blah! Perfect fabric choice! Angie xo
CUTE….makes me wish I had an old swing to make over:)
That turned out SO cute! Great job Jen!
WOW Jen! I don’t think there’s anything you can’t do!! this is beautiful!!
This is FABULOUS! I really love your patio, so inviting and cheerful! I usually shy away from those swings because they usually are so plain, I love how you made it custom!!
This is such a great idea Jen! I know the elements can be really hard on fabric. So smart to replace it and get more use out of your swing 🙂
Love your new swing cover – I re-covered my swing with an outdoor tablecloth a couple of weeks ago – you can check it out here http://thecreativemeandmymcg.blogspot.ca/2013/05/re-vamping-garden-swing.html
I love the colours you chose!!
Horray! It turned out great!! So glad you persevered and found a way to make it work. It adds so much color to your yard. I love the yellow pots and all, but of course yellow IS my favorite color! Miss you already!
Cannot wait to try this with my swing. We lost the top in Hurricane Sandy last year and it was a replacement that was only a year old. It is too expensive to buy again so I’m going to give this makeover a try. Thanks for sharing.
I love how bright and cheerful it is! The whole space just looks so inviting. I’m gonna have to start searching KSL for an old porch swing. 🙂
OH my gosh this is so adorable!! I LOVE the idea of using outdoor tablecloths. How genius. Great job pushing through on this – it really turned out well!!
I LOVE our outdoor swing and it is only a matter of time until the top rips off…it is starting to look so worn. I am definitely pinning this so that I can make it like new once the time comes. Thanks!
~Sarah
This is SO beautiful and I love it! I really love the pop of color. Thanks for the DIY!
Ginny
Giveaway today at http://www.moderncommonplacebook.com!
I was wondering just the other day if I could make a new canopy for my swing. The cushions are still fine but the canopy is faded and torn. Even though mine will need to be replaced completely, I think this is something I can handle.
Thanks!
Love it, great colors! You can’t help but smile when you see it.
I’m not sure if you know this or not, but this is the first time I’ve been on your site in awhile, and when I came here, your blog had a pop-up (it jumped me to another tab right away), which contained a virus. One of those, “please click her to download shockwave” types of spam ads.
Hi Melanie –
Thanks for letting me know!! I am going to see if I can figure that out right now. I appreciate it!
xox
Looks great! I’ve always wanted a swing like that, but have been turned off by the colors/design of the fabric. Now looking for one that I can revamp! Thanks!
Looks great, Jen! It really brightens the space up and gives it a really fun vibe!
Oh man! I have an old (semi disgusting) swing that I would LOVE to use by our pool. I’m totally not crafty. Wonder if I could buy a new cover and spray paint the frame???
I am going to have my neighbor read this! She has this exact swing and has been talking about trying something like this! With her hands, this post and me helping walk her through it I think we can get this done! Thanks for the tutorial!