Hi everyone! My name is Ashley.
I blog over at mommy by day {crafter} by night. The name of my blog pretty much sums up my life at the moment (except I am a mommy by night too- of course!) I have 2 little girls that are 3 and under. As you can imagine, with a baby and a toddler, my life is pretty crazy- but I love every minute of it. To keep myself sane, I craft! I love to push myself to my creative limit and I am always dreaming up a million projects at once! When my kiddos go to sleep at night, I get to crafting and blog about it.
I am super excited to be guest posting on Tatertots and Jello! I love this blog- thanks for having me Jen!
Today I am going to share my Quilted Christmas Stocking Tutorial…
Supplies needed:
3-5 different fabrics for outside(if you have scraps leftover from other projects, this is the perfect time to use them since you don’t need much for each piece of the front side)
fabric for back piece and liner
fusible fleece
thread
4-6 inches of ribbon
(yardage for fabric and fusible fleece depend on how big your stocking are)
Step 1: Trace or freehand a stocking onto paper. (if you are tracing, be sure to add a little for seam allowances)
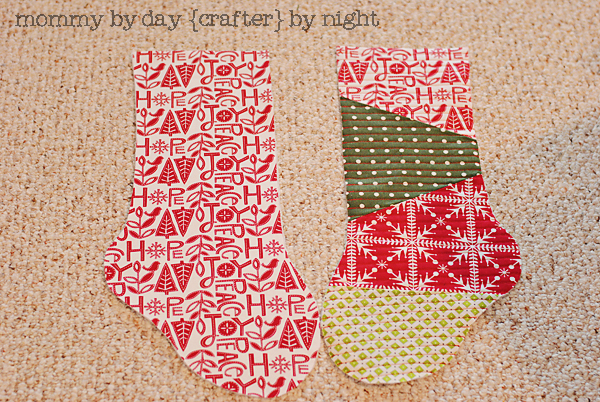
Step 2: Cut your stocking pattern into the design you would like. I cut 4 pieces, but you could do more or less pieces! It’s up to you:)
Step 3: Cut out your fabric (I used a different fabric for each of my 4 pieces) and then piece together your stocking by putting each piece right side together with the piece that it lines up with. After you are done piecing it together, press open the seams.
Step 5: Lay your stocking onto the fusible fleece and cut out a piece exactly the size of your stocking. (Make sure that when you do this step that you are laying the stocking on the correct side of the fleece so that the fusible side will fuse to the back side of the stocking) Iron the fusible fleece to the back side of the stocking.
Step 6: Now for the quilted part. I just sewed straight lines because I have never quilted anything before, but you could get really creative with this step if you are experienced or braver than I am!:) For mine, I just placed the needle as far to the left side as my machine would allow and then just lined up the right side of my presser foot to the line I previously sewed. Super easy and since it is such a small piece it isn’t too hard to get your lines straight! 🙂
Step 7: Trace the stocking onto a piece of paper to create a pattern for the back of the stocking and the liner pieces.
Step 8: Use the stocking pattern to cut out a piece of fabric for the back of the stocking as well as a piece of fusible fleece. (make sure when you do this step that you have the pattern flipped the right way so your pieces match up and you don’t create two fronts instead of a back) Iron the fusible fleece to the back piece. Once the fleece is ironed on, you can quilt the back piece if you would like. (I chose not to just because of time.)
Step 9: Use pattern and cut out the liner fabric. One front and one back.
Now- if you have ever made a zipper pouch, the rest of the tutorial pretty much follows how you would make a zipper pouch (minus the zipper of course)
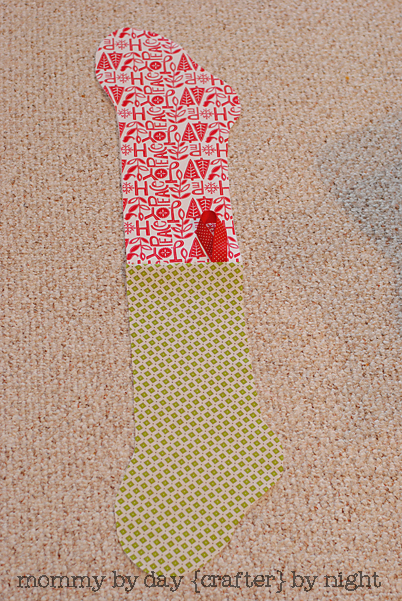
Step 10: Take the front piece of the stocking and the front piece of the liner and put them right sides together and sew along the top of the stocking. When you open it up, it should look like this.
Step 11: Take your piece of ribbon (I used about 4 inches of grosgrain ribbon) and create a loop and sew along the bottom edge of the ribbon to secure it.
Step 12: Take your back piece of the stocking and the back piece of the liner and put them right sides together, but pin your ribbon loop face down on the liner piece in the corner. (make sure to pin it on the side of the stocking that has the heel on it- not the toe side) Sew along the top edge of the stocking
When you open it up it should look like this.
Step 13: Pin your front and back piece of the stockings opened up right side together. (quilted pieces together right sides together and then liner pieces right sides together.) Sew all the way around the stocking but leave an opening big enough to fit your hand in on the side of the liner pieces. (This will be used to turn the stocking right side out.)
Step 14: Once you have sewn all the way around (except your side opening) turn the stocking right side out and then stitch the side opening closed by tucking the raw edges in and stitching as close to the edge as you can. Then tuck your liner down into the stocking.
That’s it! You are done! Ready to hang your homemade quilted stocking over the fireplace- or in a tree if you want a cool picture:)
Feel free to email me if you have any questions at mommybydaycrafterbynight{at}gmail{dot}com and be sure to stop by my blog and say hi!
Thanks so much for having me Jen!
xoxo, Ashley
Ashley — will you come over and make some for our family?? Great tutorial!!
So beautiful!! Ashley is an amazing seamstress — check out these projects:
And Ashley has a really fun contest – So You Think You Can Sew, with tons of fun prizes!!
Be sure to head over to mommy by day {crafter} by night and give Ashley a big TT&J hello!!
xoxo
PS — It’s Friday – my favorite day of the week!! Wow – last week we had 1,298 projects linked up. You guys amaze me!! I hope you can come and link up YOUR projects tonight. I love seeing YOUR ideas!!! The party starts at 6 pm MST.














Super cute! I have been thinking about ways to have matching stocking for me and my family and this may work. I could this and use the same fabric but put them in different locations each time. Great post! And now I’s to Ashley’s blog for some exploring!
That’s so cute!
Love it!
Hello Jen,
Thanks for introducing us to Ashley. I love the tutorial that Ashley put together for the quilted Christmas stocking her step by step instruction make it look super easy.
Smiles, Paula
What a cute stocking! I love it!
What a cute stocking, Ashley! And great tutorial. I do have some Christmas scraps lying around – I sense another project being added to my list. 🙂 thanks for sharing!!