Tatertots and Jello

COLORFUL HAPPY HOME -- Daily DIY, Decor, Craft and Recipe Tutorial

  • My Home
    • 1905 Cottage
    • Daybreak House
  • DIY
    • DIY Projects and Ideas
    • Organizing
    • Tutorials
    • Printables
  • Decor
    • Spring Projects
    • Summer Projects
    • Fall Projects
  • Crafts
    • Kids Crafts
    • Painting Projects
    • Paper Projects
    • Sewing
    • Wreaths
  • Holidays
    • Valentines Day
    • Easter
    • Halloween
    • Thanksgiving
    • Christmas
    • HAPPY Holidays Series!
  • Recipes

Explore

  • my home
  • diy
  • decor
  • crafts
  • holiday
  • printables
  • recipes

Connect

Home » decorating » Guest Project — Trash to Treasure Desk Transformation!

decorating, diy · October 20, 2010

Guest Project — Trash to Treasure Desk Transformation!

Tatertots & Jello is a participant in the Amazon Services LLC Associates Program, an affiliate advertising program designed to provide a means for sites to earn advertising fees by advertising and linking to amazon.com.
 Hi! I am Stacy from Not JUST A Housewife and I am so HaPpY to be here on Tatertots and Jello!!!
Photobucket

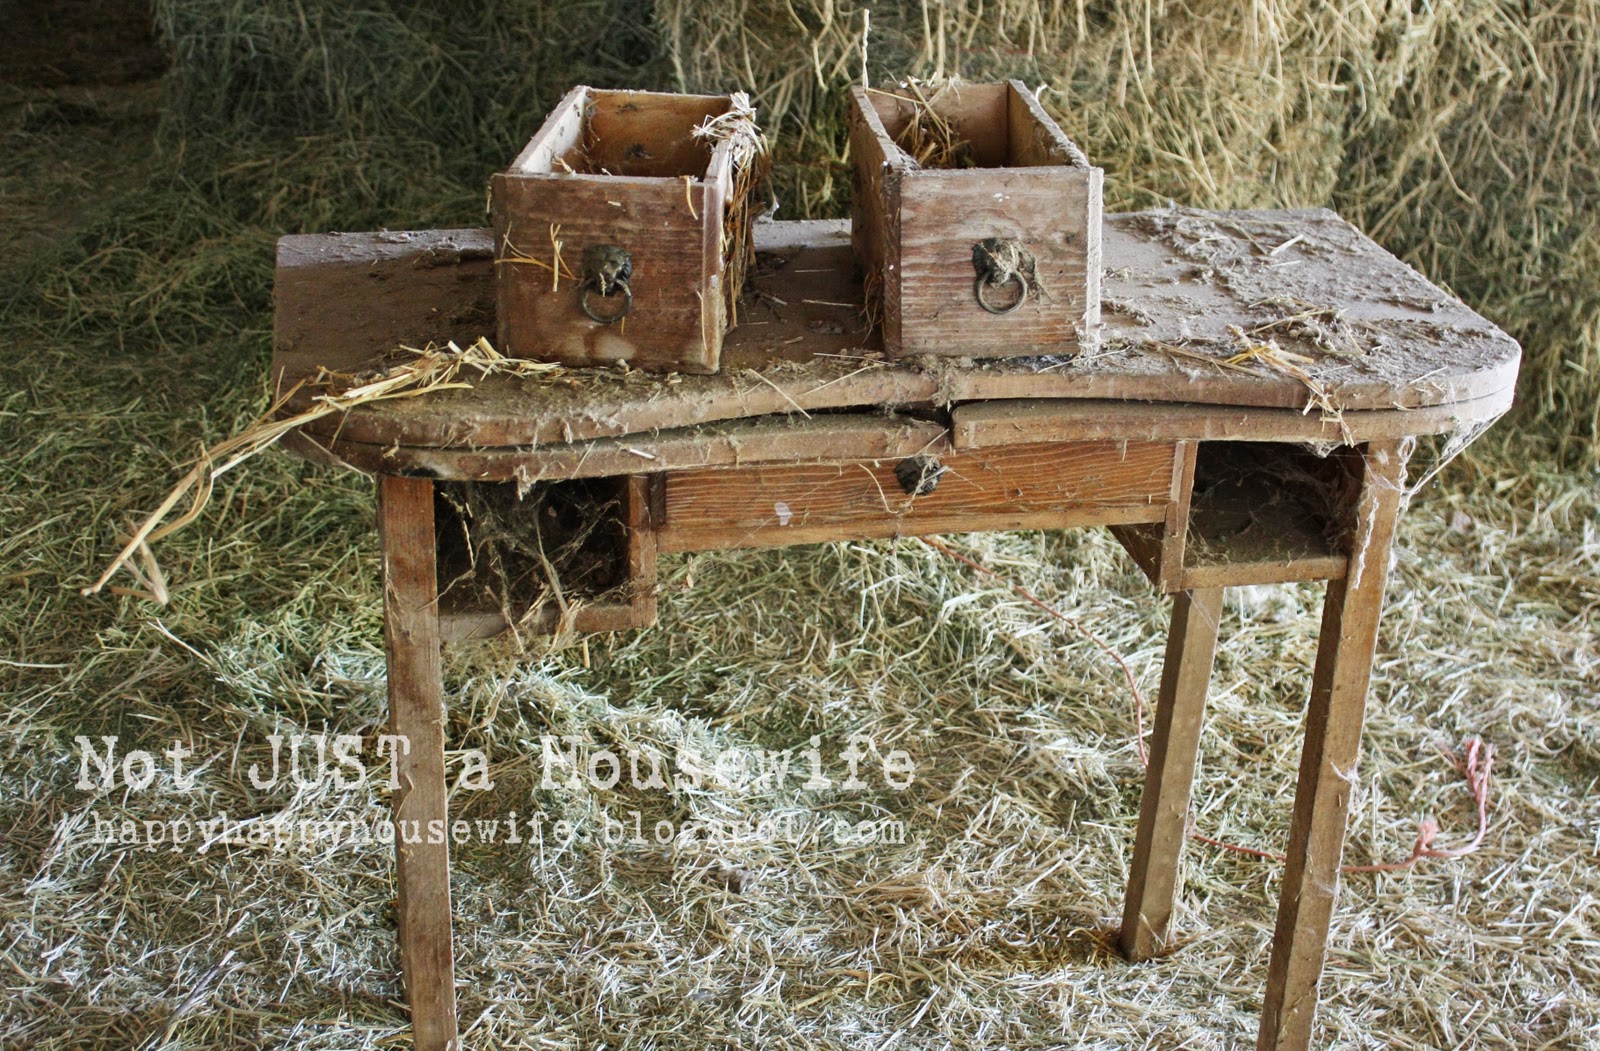
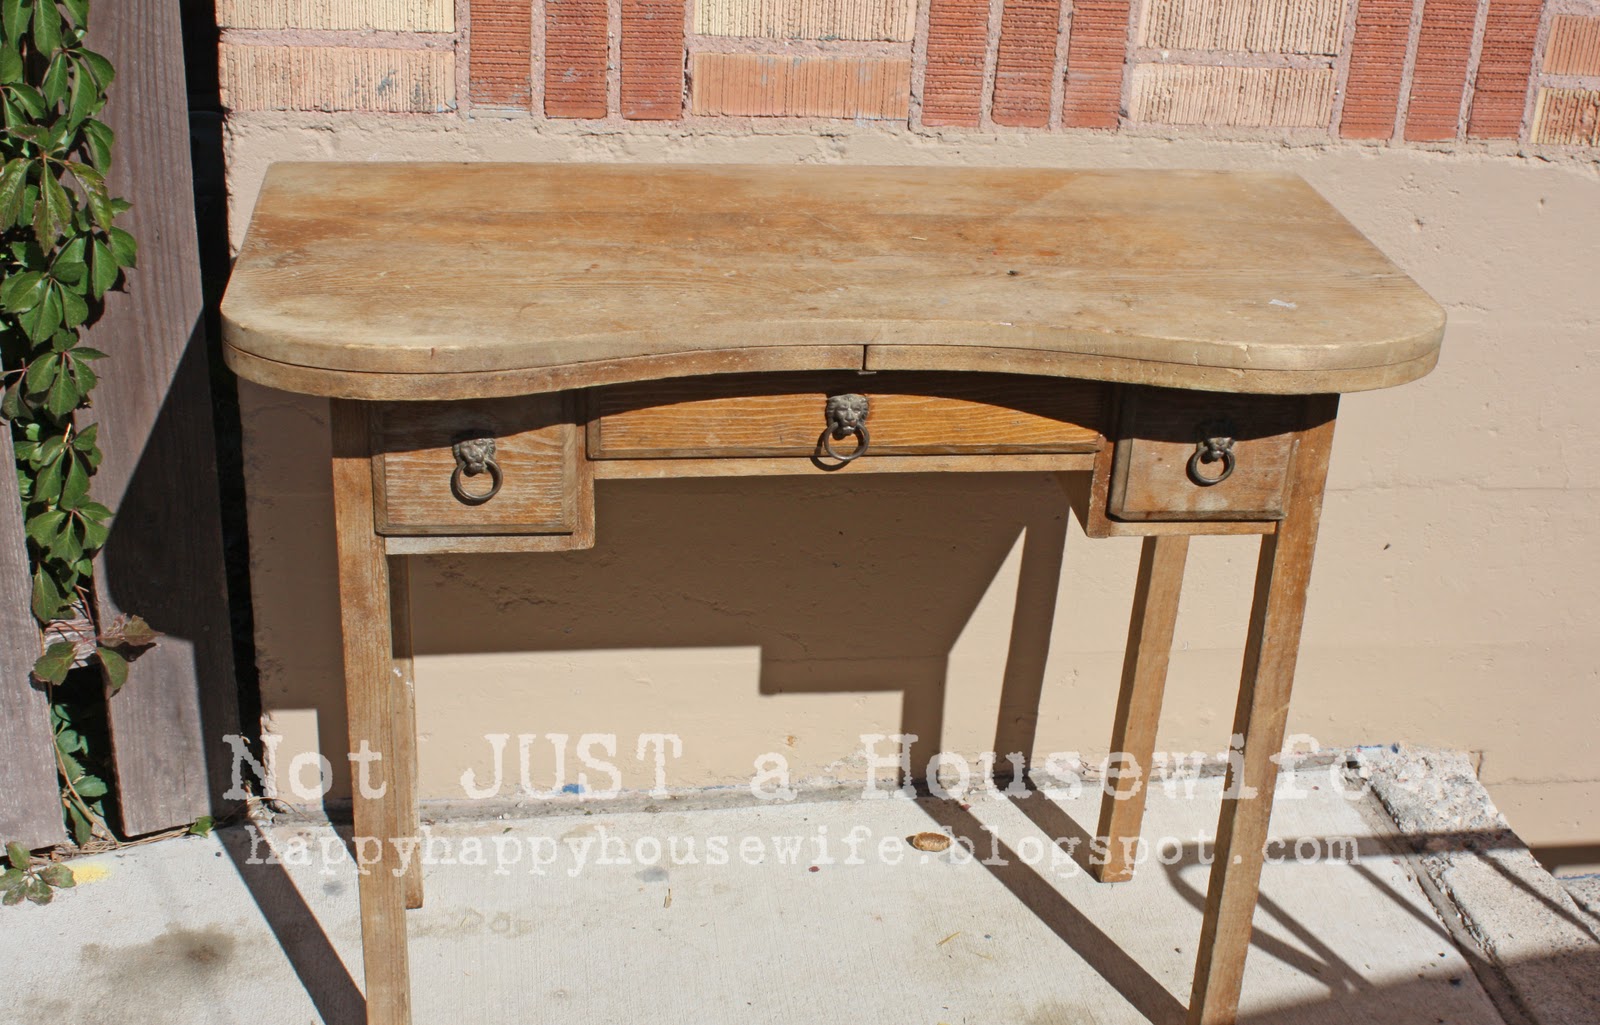
I love building and refinishing furniture! It all started when I was a newly wed and received a ton of hand-me-down furniture from family and friends. Most people probably would have left it “as is” until they could afford new things. But not me. I wanted them to look nice and match right then ( I don’t have a whole lot of patience). So I figured out how to fix them up. I still have almost all of that furniture and some are my favorite pieces even though I have lots of new things too.

Today I am going to show you how I refinished an old desk that has been collecting dust in my mom’s barn for years! The first picture is the before before.
And here it is all cleaned up. The before picture 🙂
 It needed a lot of TLC. It had a minor crack on the top, thumb tack holes along the front, and chunks missing. It also had a broken leg. I first addressed any repairs that needed to be made. I used Elmers stainable, paintable and sandable wood glue. I put glue along the crack and let it sink in. Then I wiped it off with a damp paper towel.
Putting the large clamp on caused some of the glue to squeeze out so I wiped it again. I glued and clamped the broken leg too. I used a small C clamp.
The desk wasn’t the best ever made. The drawers were held together with only 2 nails on each side. Needless to say, they weren’t very strong. I re-enforced them with my brad nail gun. I looked around the desk and found some other spots to re-enforce as well. Really I just like to find reasons to use it. It is my favorite tool!
 I let the glue dry for a day before I took the clamps off and sanded it. I was lucky because it was pretty much all flat. I did most of the sanding with my hand sander. There were only a few spots I did by hand. You need to remove the old finish so the wood will accept the new stain. If you have something that you want to refinish and it would be hard to sand, you can use gel stain. I have used that several times with very good results. I use Minwax’s gel stain. You can apply it over existing finishes. It is thick and sticky. It would be best to practice on something else first to get the hang of it. For an example, see my bathroom HERE.
 It is all naked and ready for a new look! I almost forgot to mention that I used putty to fill in any small cracks or nail holes. Putty, let dry, and then sand. I use Elmers stainable, paintable, sandable wood putty. I used the natural color because it was outside and so was I. I should have used the darker colored putty (it was ALL the way inside ). This putty is stainable, but to a point. That is why they have a darker color. I added more stain to the puttied parts and it worked out fine, but in retrospect I should have got off my big behind and got the darker putty!
 In a situation like this, I use oil based stains. This wood was old and dried out. The oil in the stain helps the wood. Plus it dries slower than waterbased stains and gives you more time to work at getting an even finish. Waterbased stains sink in fast, especially with dry or porous (soft) wood. You can also use a wood conditioner before applying the stain. It is sold in cans just like the stain and is milky white. I always use foam brushes too. There aren’t any brush marks and it makes for easy clean up. Just toss them in the garbage!
 I let the stain dry for a day and a half. It needs to be completely dry and not sticky at all.

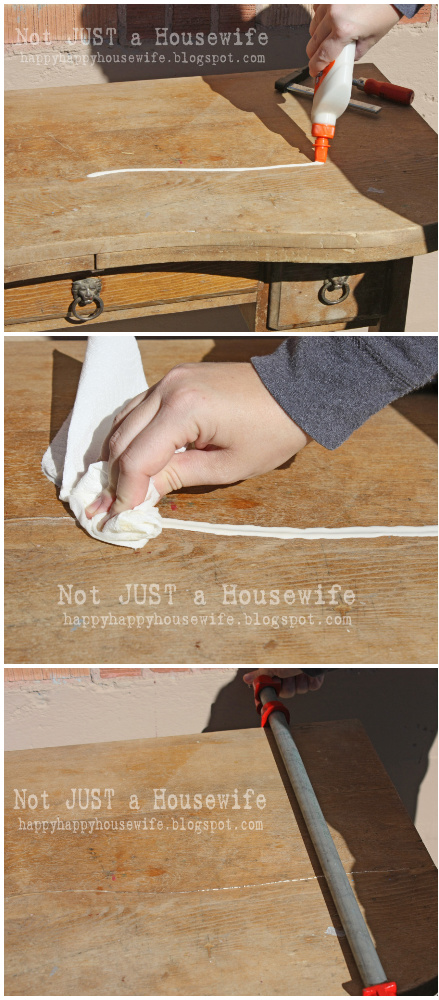
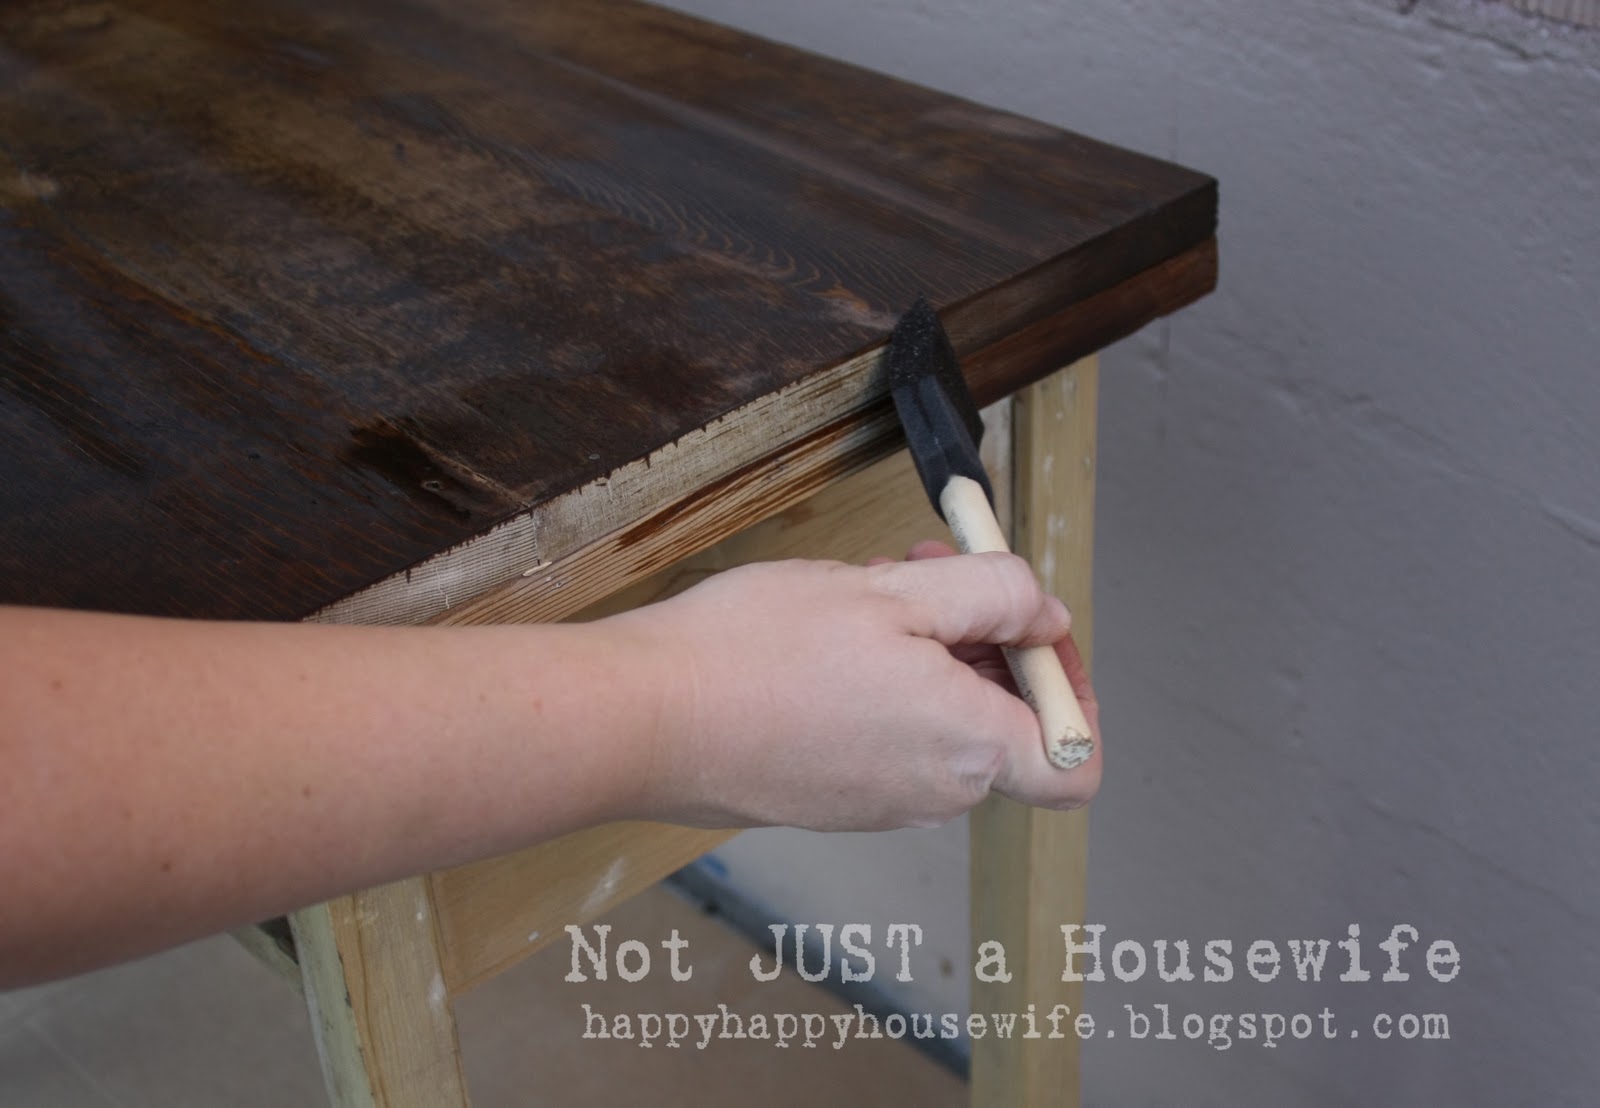
Then you can add the polyurethane. I love the smell of polyurethane! I know, I know, in the state of California it is known to cause cancer yadda yadda. . . But I love it. In a well ventilated area of course. It brings the wood to life and protects it. I use Minwax’s Fast Drying Clear Satin finsih.
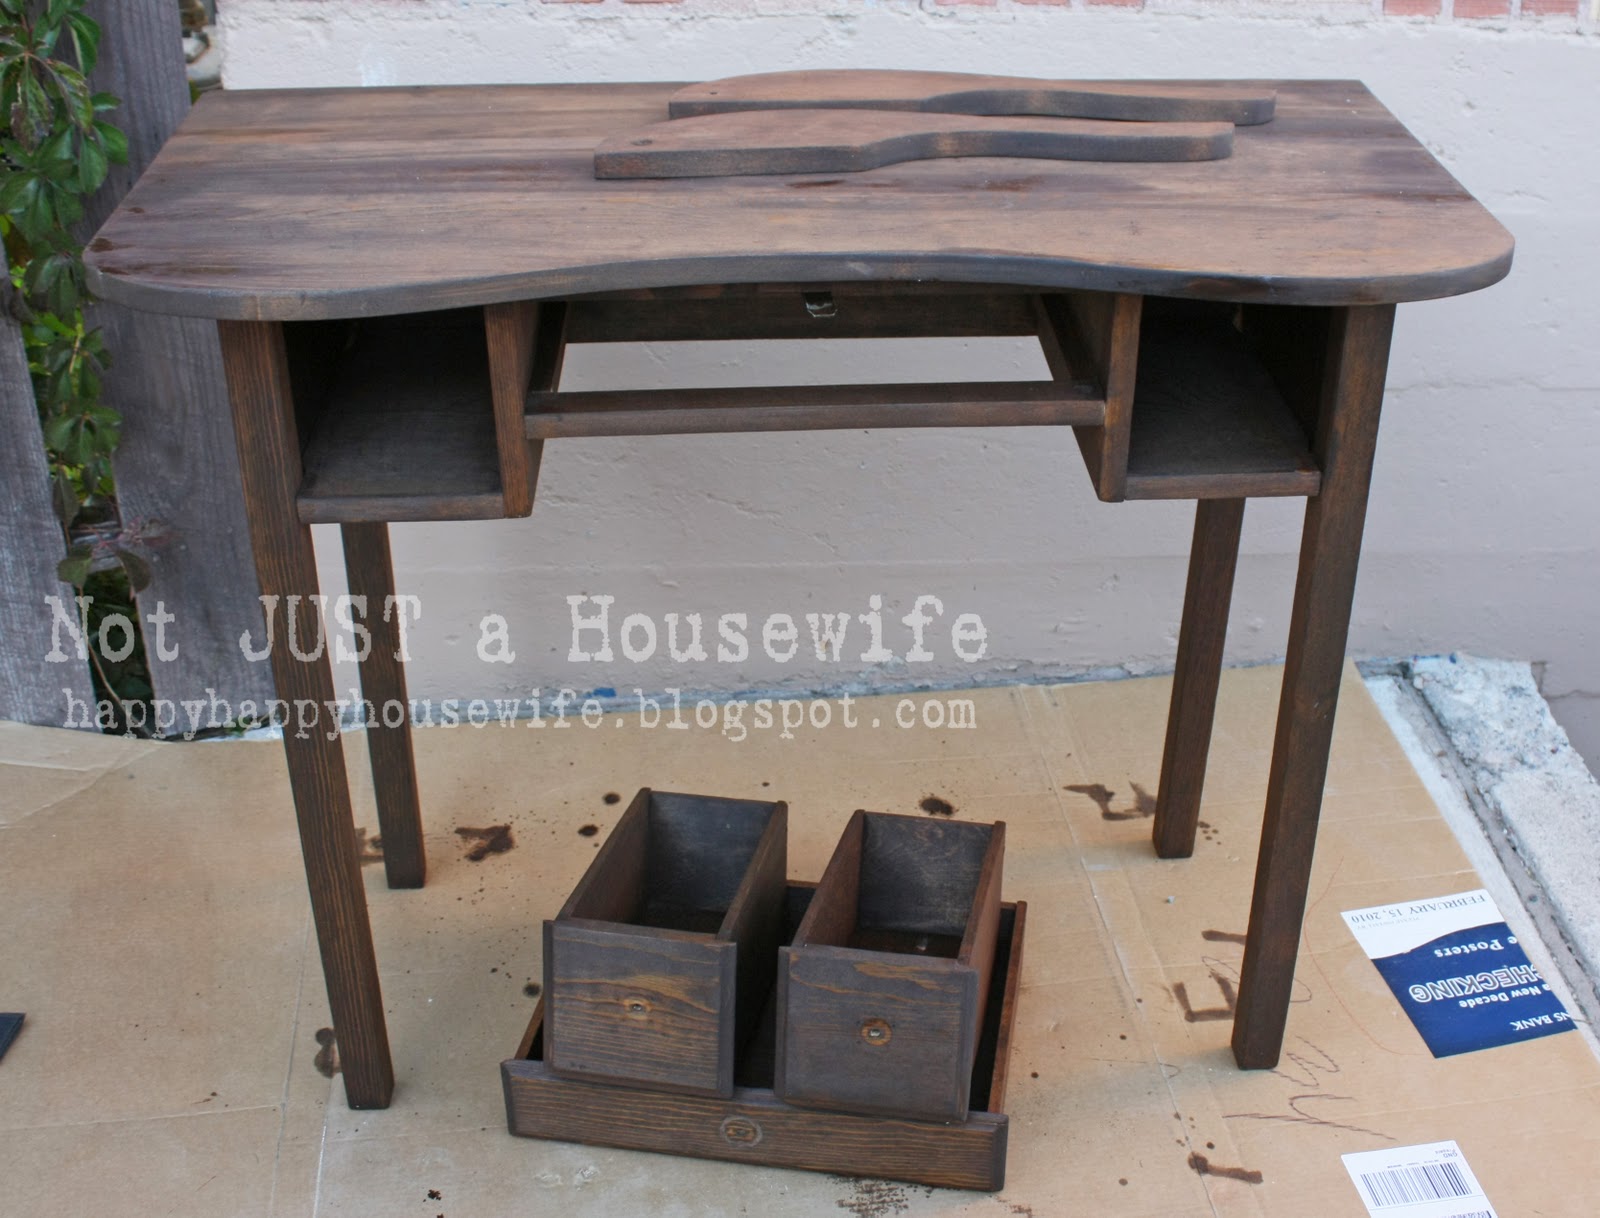
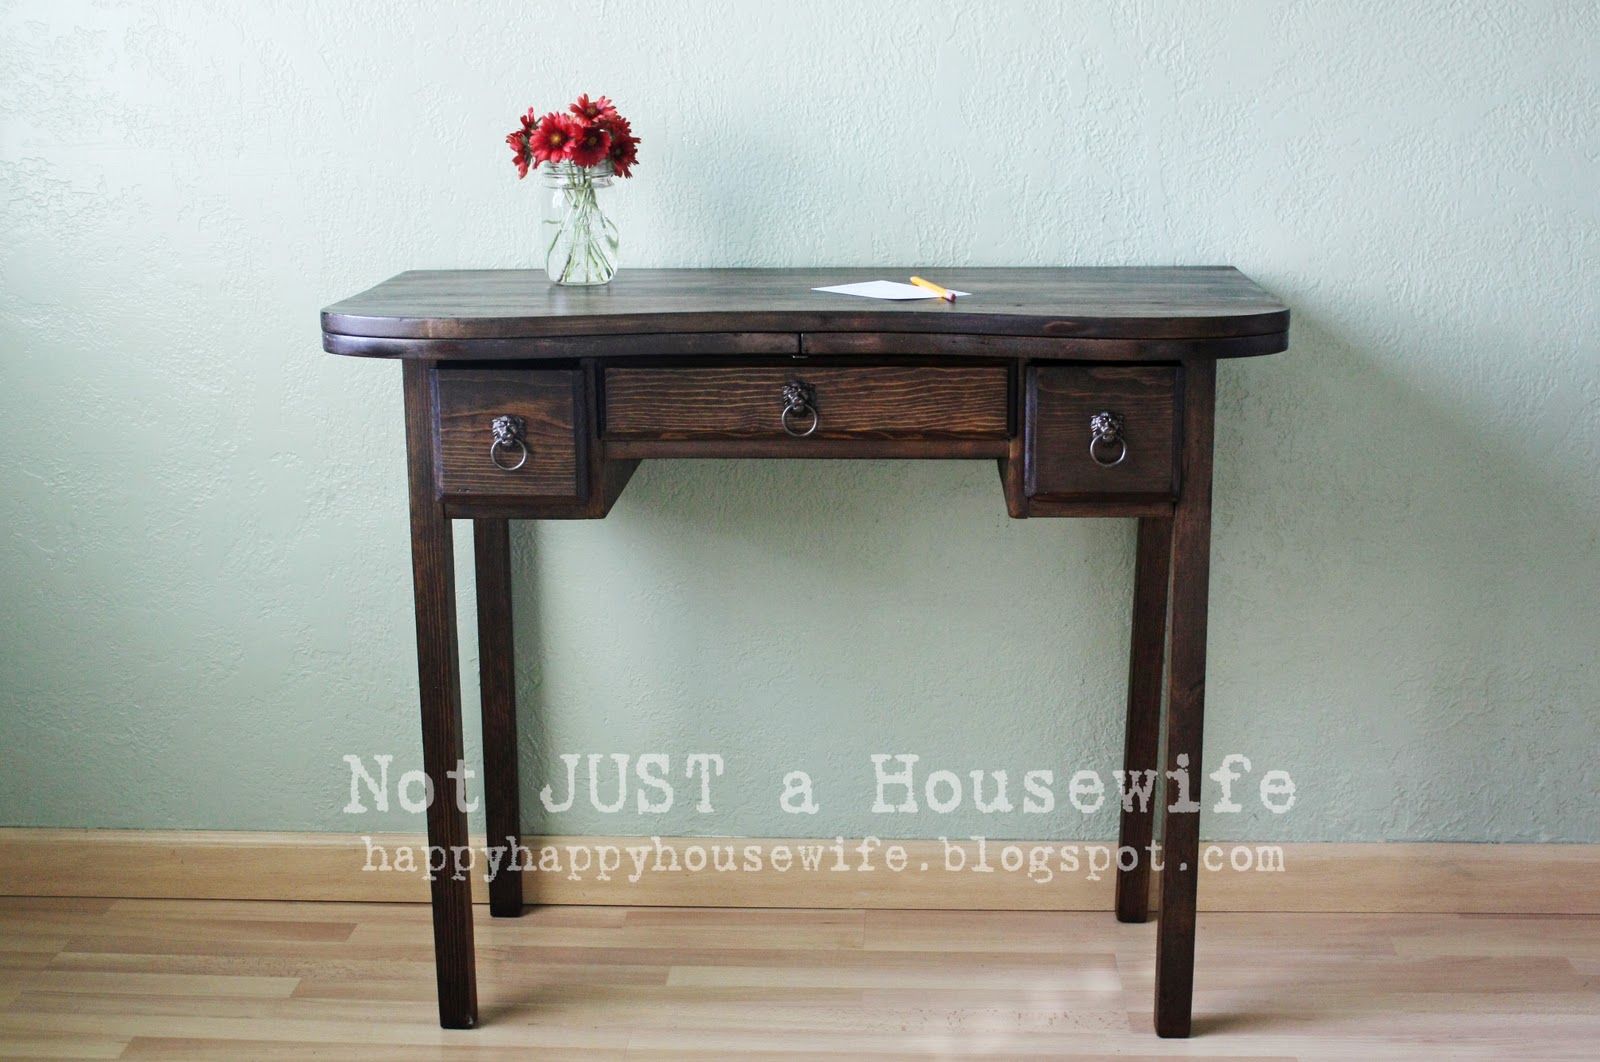
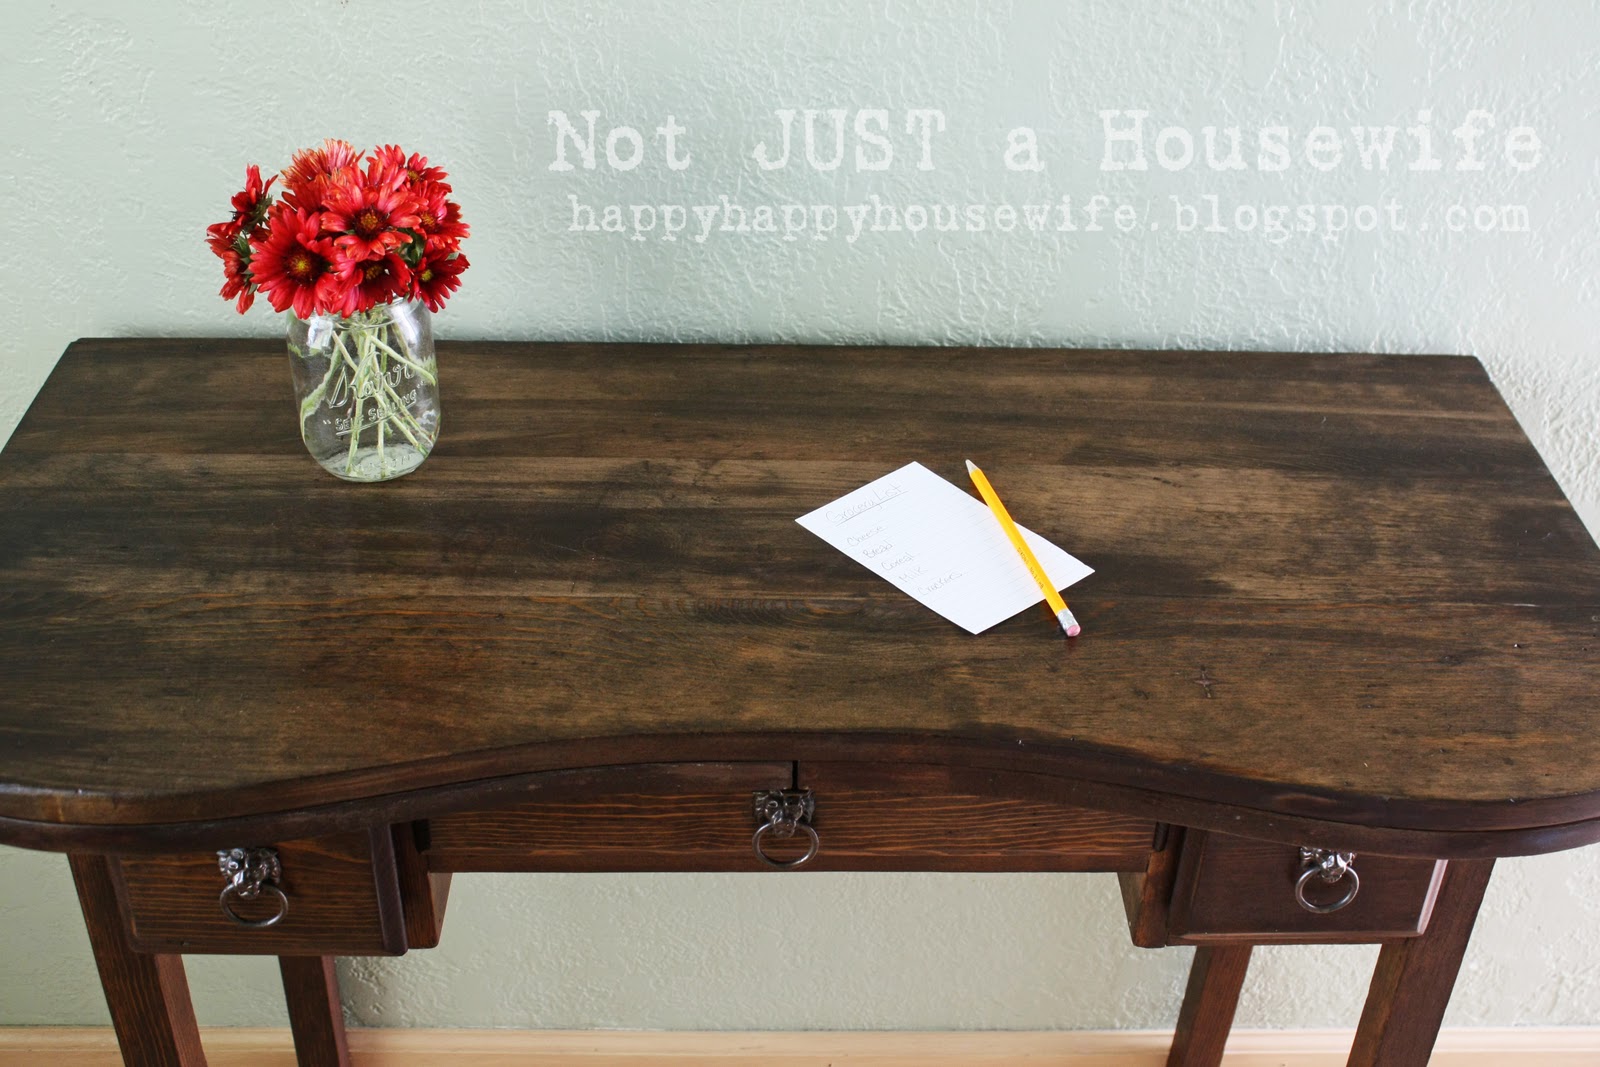
And drum roll please. . . . . .

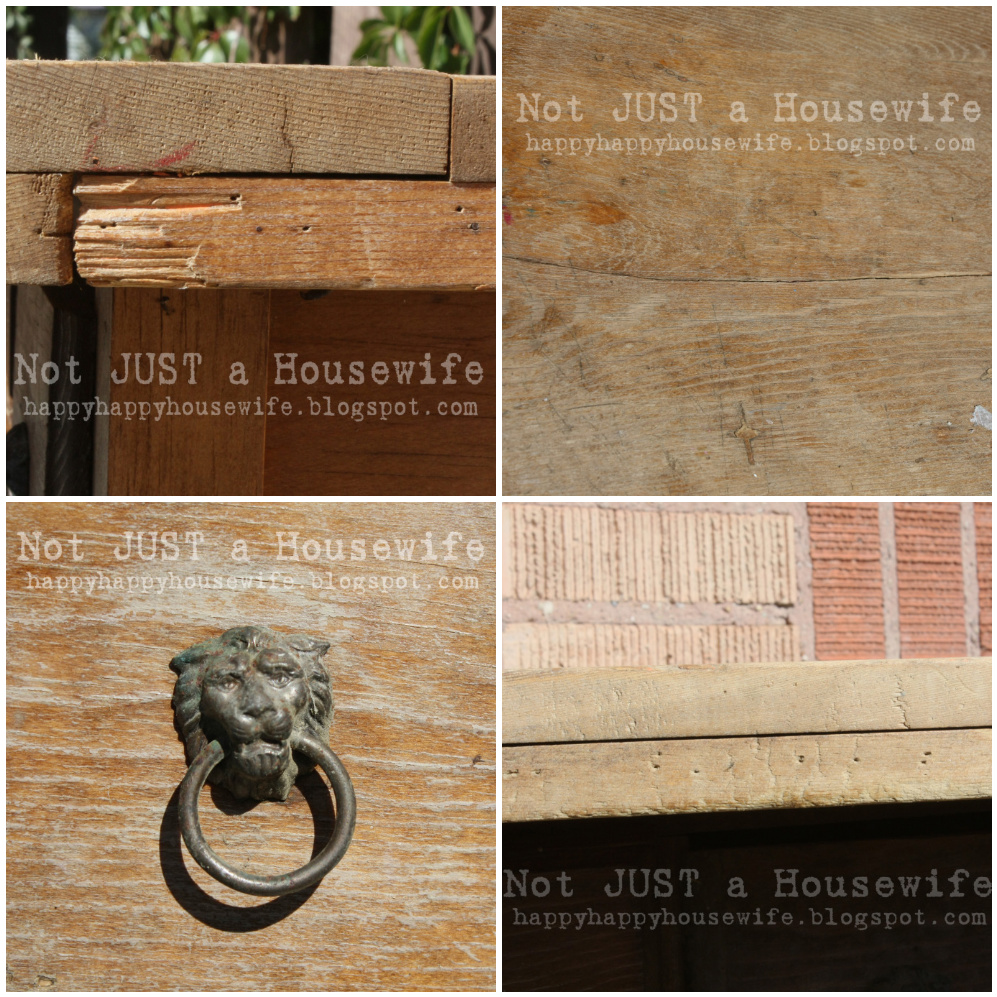
Taaadaaaa! Isn’t she a beaut??? All I did for the drawer pulls was scrub them in some soapy water. I love the patina on them. I think this will make a welcome addition to my office.

I don’t JUST do furniture. I love to craft, (attampt to ) sew, bake, cook, garden, paint, and do fun activites with my kids. Come and check out my blog sometime! Not JUST A Housewife
Wonderful project Stacy! It turned out so well!!
 Thank you so much for coming over and sharing your tutorial with us!! Not Just a Housewife is one of my new favorite blogs! Stacy has fantastic ideas!! Some of her recent projects I have loved have been:
 
{Pumpkin Topiary}
http://4.bp.blogspot.com/_9HtfDchJT5g/TKpR4pZuVrI/AAAAAAAAC4w/0R9etlPwwxw/s1600/papermachepumpkins.jpg
{Paper Mache Pumpkins}
 {Shadow Box Shelf Tutorial}
http://3.bp.blogspot.com/_9HtfDchJT5g/TGtHVbp0jLI/AAAAAAAACFw/zWad2RcD-kE/s400/laundrychute.jpg
{Laundry Shoot Tutorial — genius!!}
And. she also has another fabulous blog! I know – how does she do it??? Check out her Birthday Blog too!!
You will find all sorts of great party ideas and cakes, like one of my favorite cakes of all time!

http://2.bp.blogspot.com/_9HtfDchJT5g/TJog0N7h4xI/AAAAAAAACu8/aCHXowypzhM/s400/smore8.jpg

{Smore Cake}
http://4.bp.blogspot.com/_9HtfDchJT5g/THL5OGO_LgI/AAAAAAAACKY/zoSQrGBwDgo/s400/cake2_edited-1.jpg
{Campfire Cake}
So much fun!!!
Have a great day!
xoxo
Simply Modern Mom
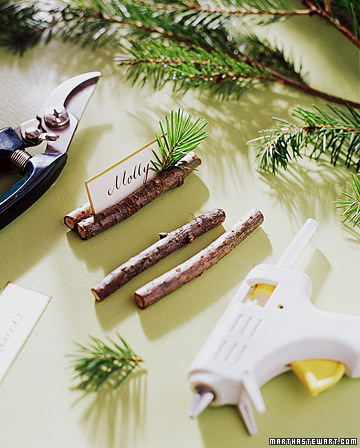
PS – come over and see me at Simply Modern Mom today. I am sharing my favorite picks for Holiday Place Settings 🙂

http://images.marthastewart.com/images/content/pub/ms_living/2003Q4/la100435_1203_placecardht_xl.jpg

Posted By: Jen · In: decorating, diy

Christmas Project — make Painted Ornament Pillows
Thanksgiving Project — make a Thankful Garland

You’ll Also Love

Make Your Home Cozier with Boucle!
One of my favorite things about Easter is setting a beautiful table! There are so many different colors and ways you can create a gorgeous Easter tablescape. And they aren't hard! Check out these 12 Beautiful Easter Tablescape Ideas!!12 Beautiful Easter Tablescape Ideas!
orange tulip carrot door hanging12 GORGEOUS Spring Wreath DIYs!

Comments

  1. [email protected] says

    November 1, 2010 at 10:29 PM

    What a transformation, it's gorgeous! Thanks for sharing the process, I'll be linking.

  2. Jensamom23 says

    October 21, 2010 at 12:55 PM

    Gorgeous!

  3. Sue (Someone's Mom) says

    October 21, 2010 at 2:17 AM

    This gives us hope that any piece of furniture can be saved! It was a mess and looks great now! Very nice tutorial.

  4. Brittny says

    October 21, 2010 at 1:32 AM

    those are the best tips on redoing wood furniture i have ever seen!!! my dad's hobby is woodworking, but he doesn't always do things the easiest way. thank you for showing me how! i am going to have to bookmark this post so i can find it again when i finally decide to redo my daughter's old dresser! thanks!!!!!!

  5. Connie W says

    October 20, 2010 at 11:48 PM

    What a great transformation!!

  6. MiMi says

    October 20, 2010 at 11:47 PM

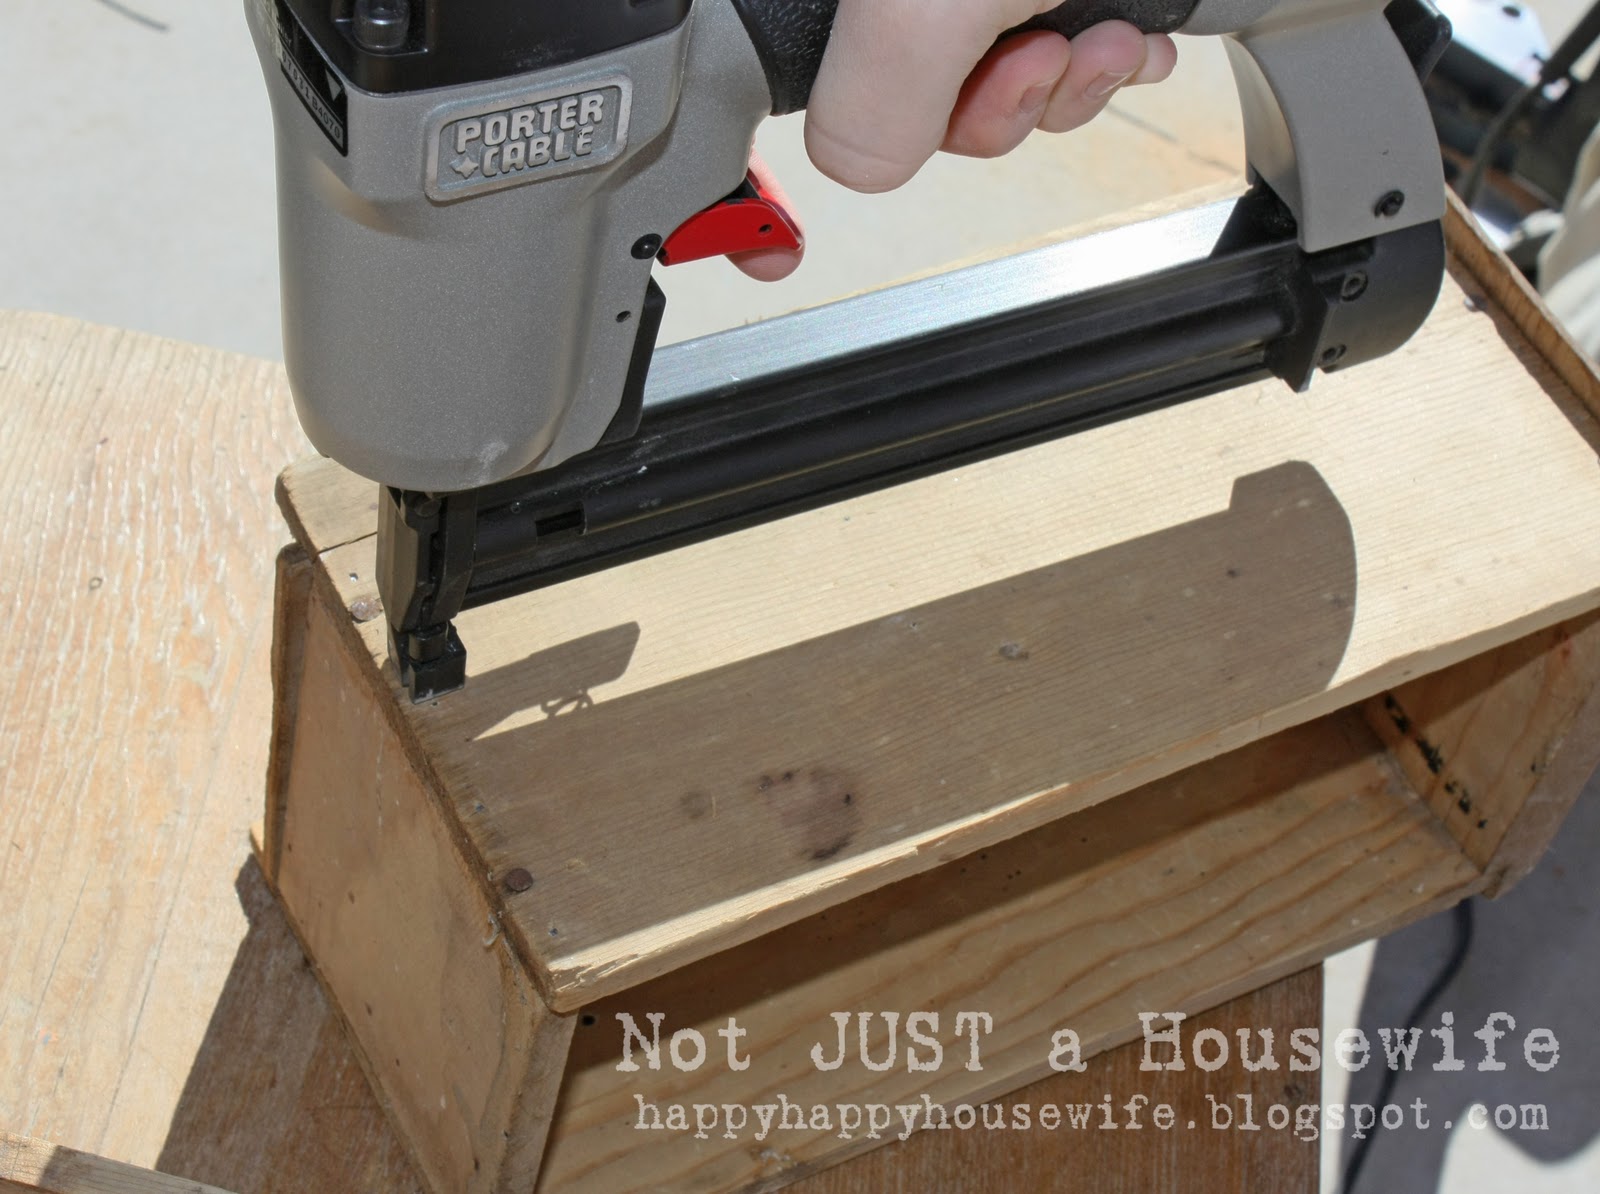
    That is AMAZING!! Gotta love a girl with a nail gun! 🙂

  7. Quilts and Cats says

    October 20, 2010 at 11:03 PM

    That was just gorgeous. I need to find something cool like that to re-furbish now! The pictures were wonderful and I'm very happy to be turned on to Stacy's blog. Thank you

  8. heidi says

    October 20, 2010 at 8:23 PM

    Very nice!
    I love my nail gun, too!
    ~Heidi

    PS I know it was very time consuming, but it was worth it!

  9. K-tribe says

    October 20, 2010 at 8:14 PM

    Thank you for this! My dresser had a plug-in spill and it took the stain right off down to the bare wood! OF course it would take forever to sand The whole thing!
    I am excited that I will be able to do this my self!
    Maybe a Christmas present to me!!
    I will post pics when I get to it!
    Thank you!
    Kelly K

  10. amycornwell says

    October 20, 2010 at 7:21 PM

    What a cute desk re-do! I love antique pieces like this. Great job!

  11. Brinkmeyer says

    October 20, 2010 at 6:54 PM

    Wow! Talk about trash to treasure! I will now keep an open mind about pieces I see at yard sales. Thanks for the inspiration!

    http://simplyweekends.blogspot.com

  12. Baker Family says

    October 20, 2010 at 6:37 PM

    Wow! It looks beautiful! Well worth the work!

    <3

    Risa

  13. Kristen Andrews says

    October 20, 2010 at 6:37 PM

    wow what a transformation!

  14. Three Points Vintage says

    October 20, 2010 at 4:38 PM

    wow… I can't even believe how great the desk turned out! Your hard work paid off.

  15. Tanya says

    October 20, 2010 at 4:18 PM

    That turned out really well. Great save!

  16. Little Treasures says

    October 20, 2010 at 4:17 PM

    Wow! What a fabulous transformation! Now you have an exquisite piece of furniture!

  17. Black and White {Side by Side} says

    October 20, 2010 at 4:15 PM

    TWO great blogs?? i love this post! that campfire cake is impressive!

  18. jen says

    October 20, 2010 at 4:09 PM

    the desk looks amazing!! (and so glad to be introduced to the tater tot blog now 🙂

  19. jennykate77 says

    October 20, 2010 at 4:03 PM

    I just checked out her blog and WOW. She has some great ideas and tutorials. I'm in love with that laundry chute!!! I'm kind of wishing I had an upstairs bathroom now!! I want one! 🙂 Reminds me of one my aunt and uncle had in their old farm house.

    Hope you're having a great week, Jen!! *MUAH*

  20. Beth Eaton says

    October 20, 2010 at 4:00 PM

    What a fantastic table! I am headed her way right now!!

  21. Dyche Designs says

    October 20, 2010 at 3:55 PM

    Loved seeing the transformation, it looks amazing.

  22. aPearantly sew says

    October 20, 2010 at 3:55 PM

    I love that table! She did a great job transforming it!

  23. Jessica says

    October 20, 2010 at 3:43 PM

    Wow! I love how it turned out. It's so fun to bring old things back to life with just a little tlc.

    justenoughstyle.blogspot.com

  24. hiyaluv says

    October 20, 2010 at 3:42 PM

    what a talent! thanks for introducing me to somebody so awesome:)
    smiles,
    gina

  25. Jenny says

    October 20, 2010 at 3:40 PM

    Gorgeous! You must have a lot of patience for a big project like that. Very inspiring.

  26. Michelle says

    October 20, 2010 at 3:35 PM

    It's beautiful! Thanks for the inspiration!

  27. Kelli @ RTSM says

    October 20, 2010 at 3:07 PM

    That is an awesome transformation! I probably would have been lazy and just spray painted it…but it looks great with the natural wood color!

Hi! I'm Jen Hadfield. I'm a mom of 5 restoring an 1891 home in the heart of Salt Lake City. I love being creative and sharing simple ideas to make your life easier and more beautiful!

Receive the Latest Crafts, DIY, Recipes and More in your INBOX!

Follow us on Pinterest! It's awesome!

Top Posts & Pages

Copycat Panera Spinach and Artichoke Egg Soufflés - SO good!
Spruce up Your Outdoor Space with a DIY Recirculating Fountain! (tutorial)
A New Deck in Under 30 Minutes!
12 Must-Have Items to Pack on an Alaskan Cruise!
How to Change a Recessed Can Light into a Pendant Light with No Remodeling!
DIY Fountains to Make Your Yard Amazing!


Popular Posts

  • Copycat Panera Spinach and Artichoke Egg Soufflés - SO good!
    Copycat Panera Spinach and Artichoke Egg Soufflés - SO good!
  • Spruce up Your Outdoor Space with a DIY Recirculating Fountain! (tutorial)
    Spruce up Your Outdoor Space with a DIY Recirculating Fountain! (tutorial)
  • A New Deck in Under 30 Minutes!
    A New Deck in Under 30 Minutes!
  • 12 Must-Have Items to Pack on an Alaskan Cruise!
    12 Must-Have Items to Pack on an Alaskan Cruise!
  • How to Change a Recessed Can Light into a Pendant Light with No Remodeling!
    How to Change a Recessed Can Light into a Pendant Light with No Remodeling!
  • DIY Fountains to Make Your Yard Amazing!
    DIY Fountains to Make Your Yard Amazing!
  • DIY Secret: How to Print on Post-It Notes (and Free Printable Template)
    DIY Secret: How to Print on Post-It Notes (and Free Printable Template)

As seen in


Amazon Affiliate

Tatertots & Jello is a participant in the Amazon Services LLC Associates Program, an affiliate advertising program designed to provide a means for sites to earn advertising fees by advertising and linking to amazon.com.
  • About Me
  • Advertising
  • Get Featured

Copyright © 2025 Tatertots and Jello · Privacy
This site is a place for positive discussion and ideas. Negative talk, comments that disparage others, and similar are not welcome and may be removed.