Tatertots and Jello

COLORFUL HAPPY HOME -- Daily DIY, Decor, Craft and Recipe Tutorial

  • My Home
    • 1905 Cottage
    • Daybreak House
  • DIY
    • DIY Projects and Ideas
    • Organizing
    • Tutorials
    • Printables
  • Decor
    • Spring Projects
    • Summer Projects
    • Fall Projects
  • Crafts
    • Kids Crafts
    • Painting Projects
    • Paper Projects
    • Sewing
    • Wreaths
  • Holidays
    • Valentines Day
    • Easter
    • Halloween
    • Thanksgiving
    • Christmas
    • HAPPY Holidays Series!
  • Recipes

Explore

  • my home
  • diy
  • decor
  • crafts
  • holiday
  • printables
  • recipes

Connect

Home » diy » Fall Project — Make a Tree Button Shirt! {with free pattern}

diy, Fall Craft, fashion, holiday, kids, kids crafts, sewing projects, Thanksgiving, tutorial · November 3, 2011

Fall Project — Make a Tree Button Shirt! {with free pattern}

Tatertots & Jello is a participant in the Amazon Services LLC Associates Program, an affiliate advertising program designed to provide a means for sites to earn advertising fees by advertising and linking to amazon.com.
43
43Shares
Hi there fellow TT and J’ers, I’m Jen from My Own Road, and I’m so excited to be guest posting on Tatertots and Jello today! Thank you for having me, Jen!

I’m a working mama of 2 who squeezes crafting in afterhours. My blog is a little of this and that, but you can usually find me making clothes for my two kids (who are growing out of clothes faster than I can make them lately!)

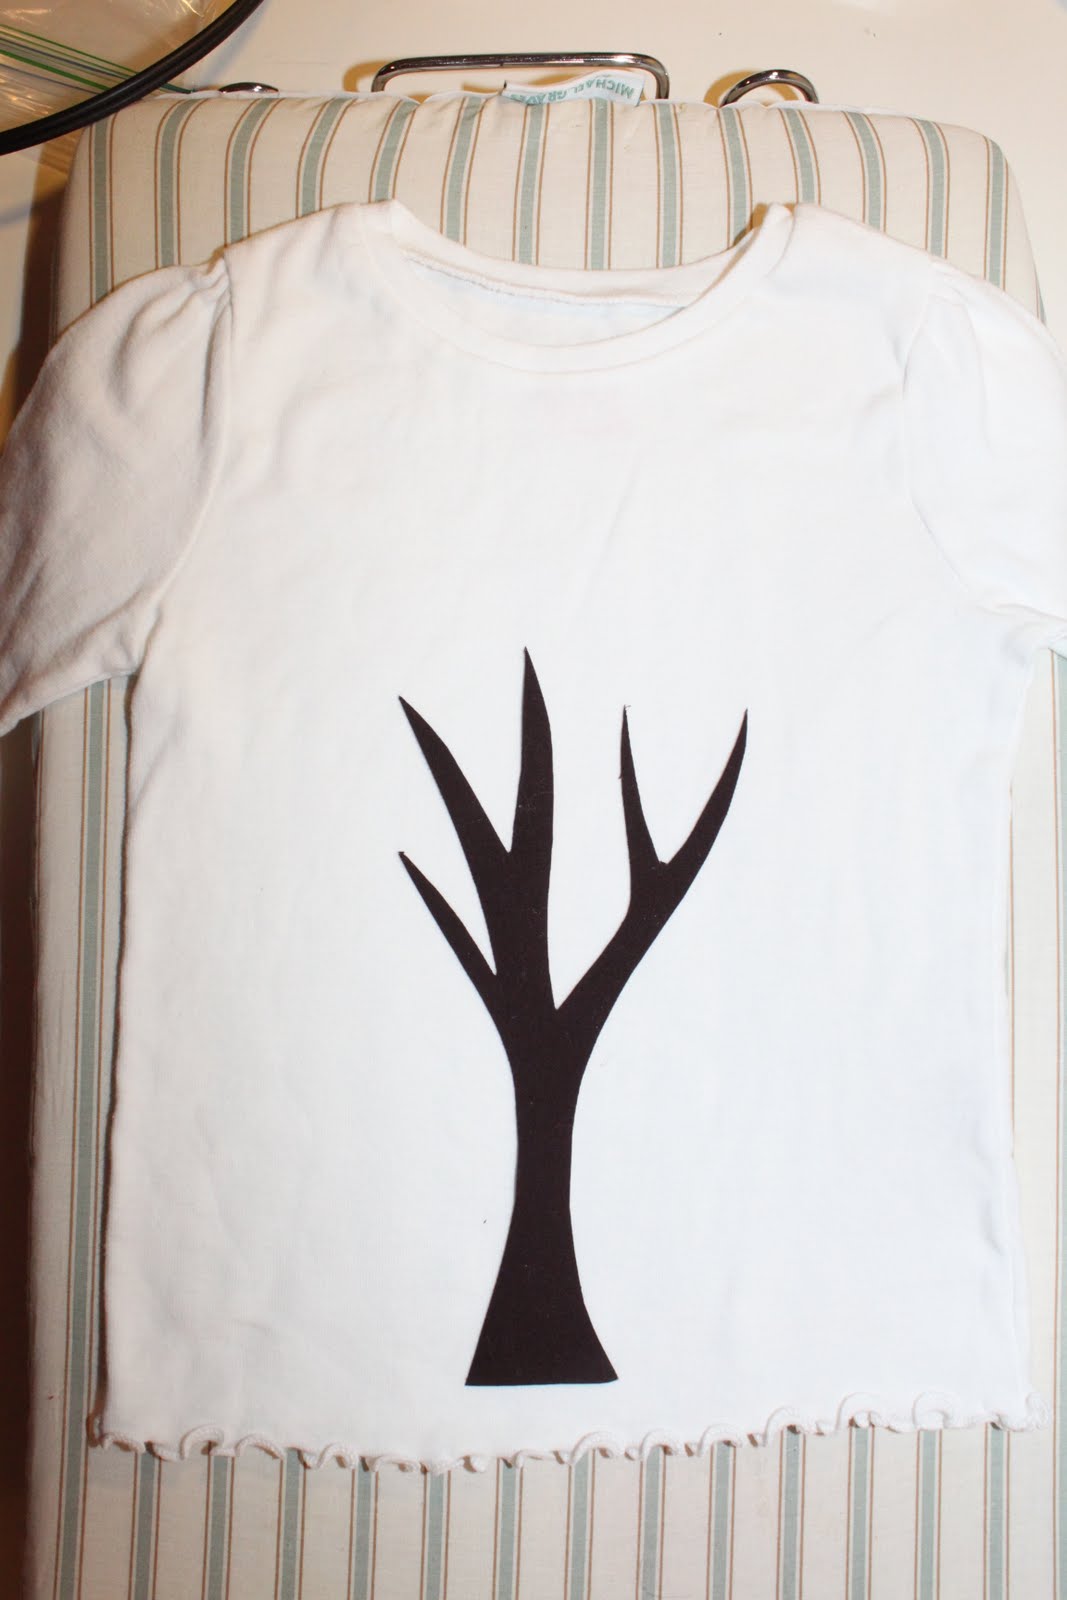
Today, I wanted to share a project with you inspired by my favorite season – fall! This fall button tree shirt is a really easy sew, perfect for beginners. You just have to have lots of patience to sit and hand sew all the button “leaves” on.

Here’s what you need:

  • Download my free tree pattern HERE
  • A shirt
  •  Brown fabric for the tree
  • Sewable interfacing, like Heat ‘N Bond Lite
  • Lots of buttons in fall colors
  • Basic sewing supplies

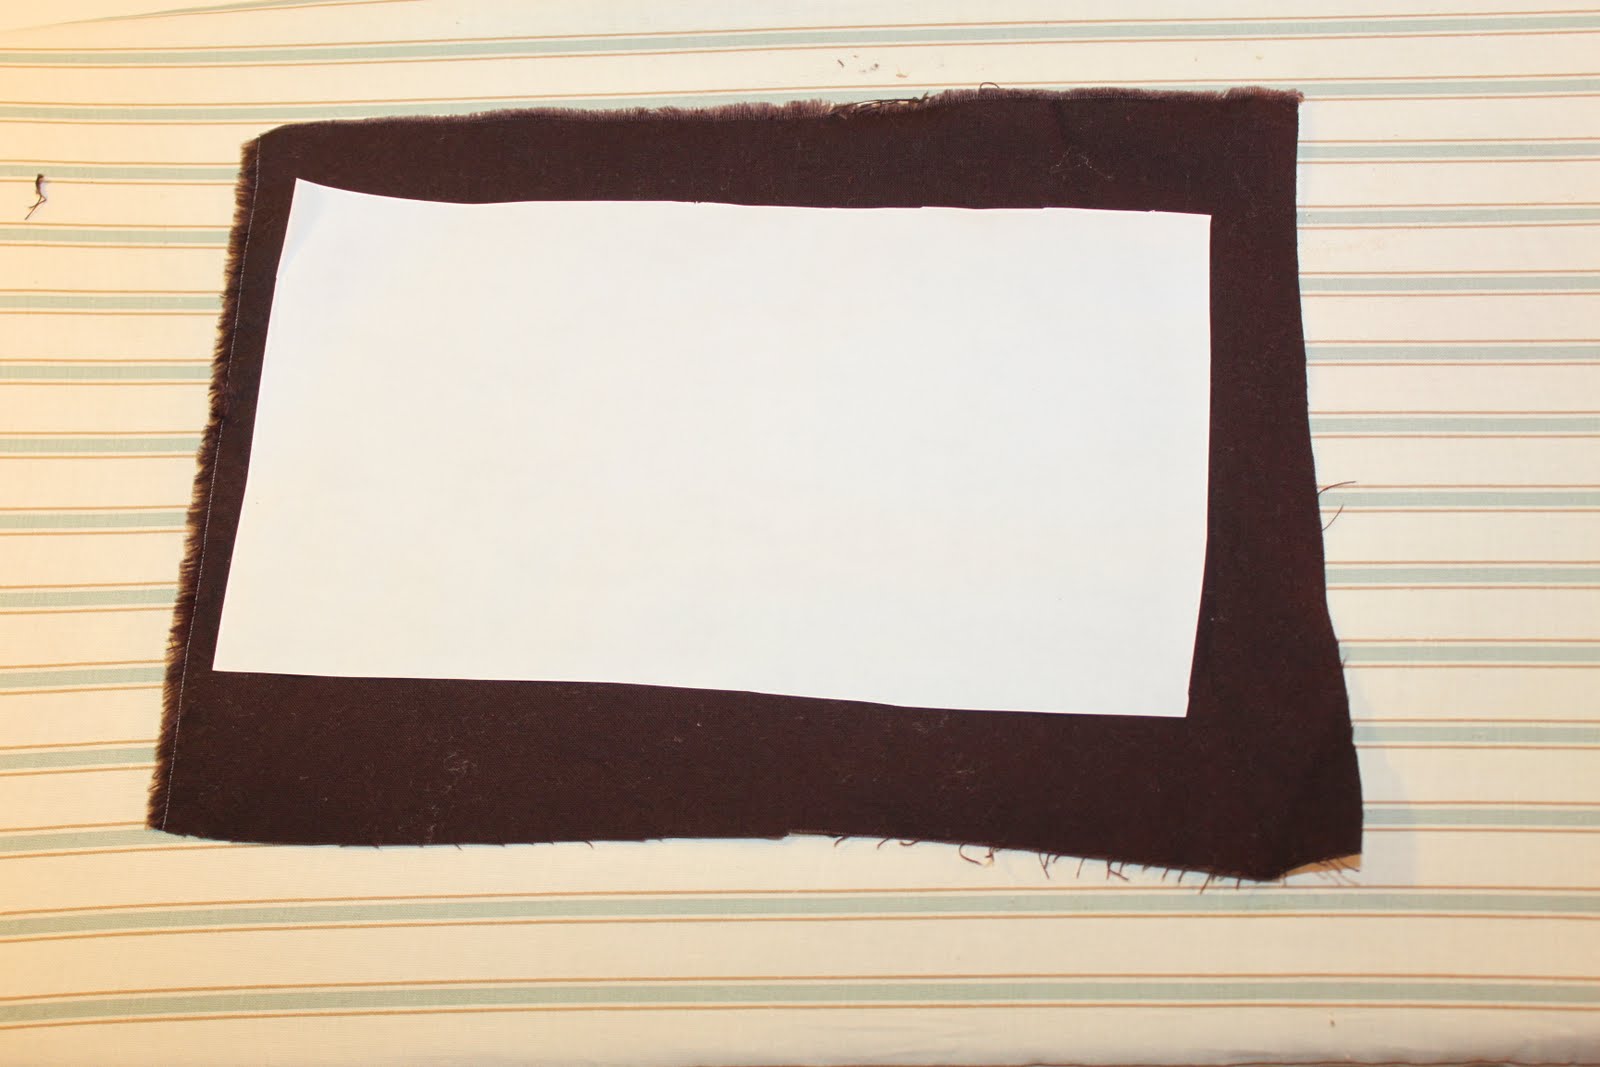
First, follow the directions on your interfacing to iron a piece of sewable interfacing larger than your tree image to the back of your fabric. Don’t peel the paper backing off yet.

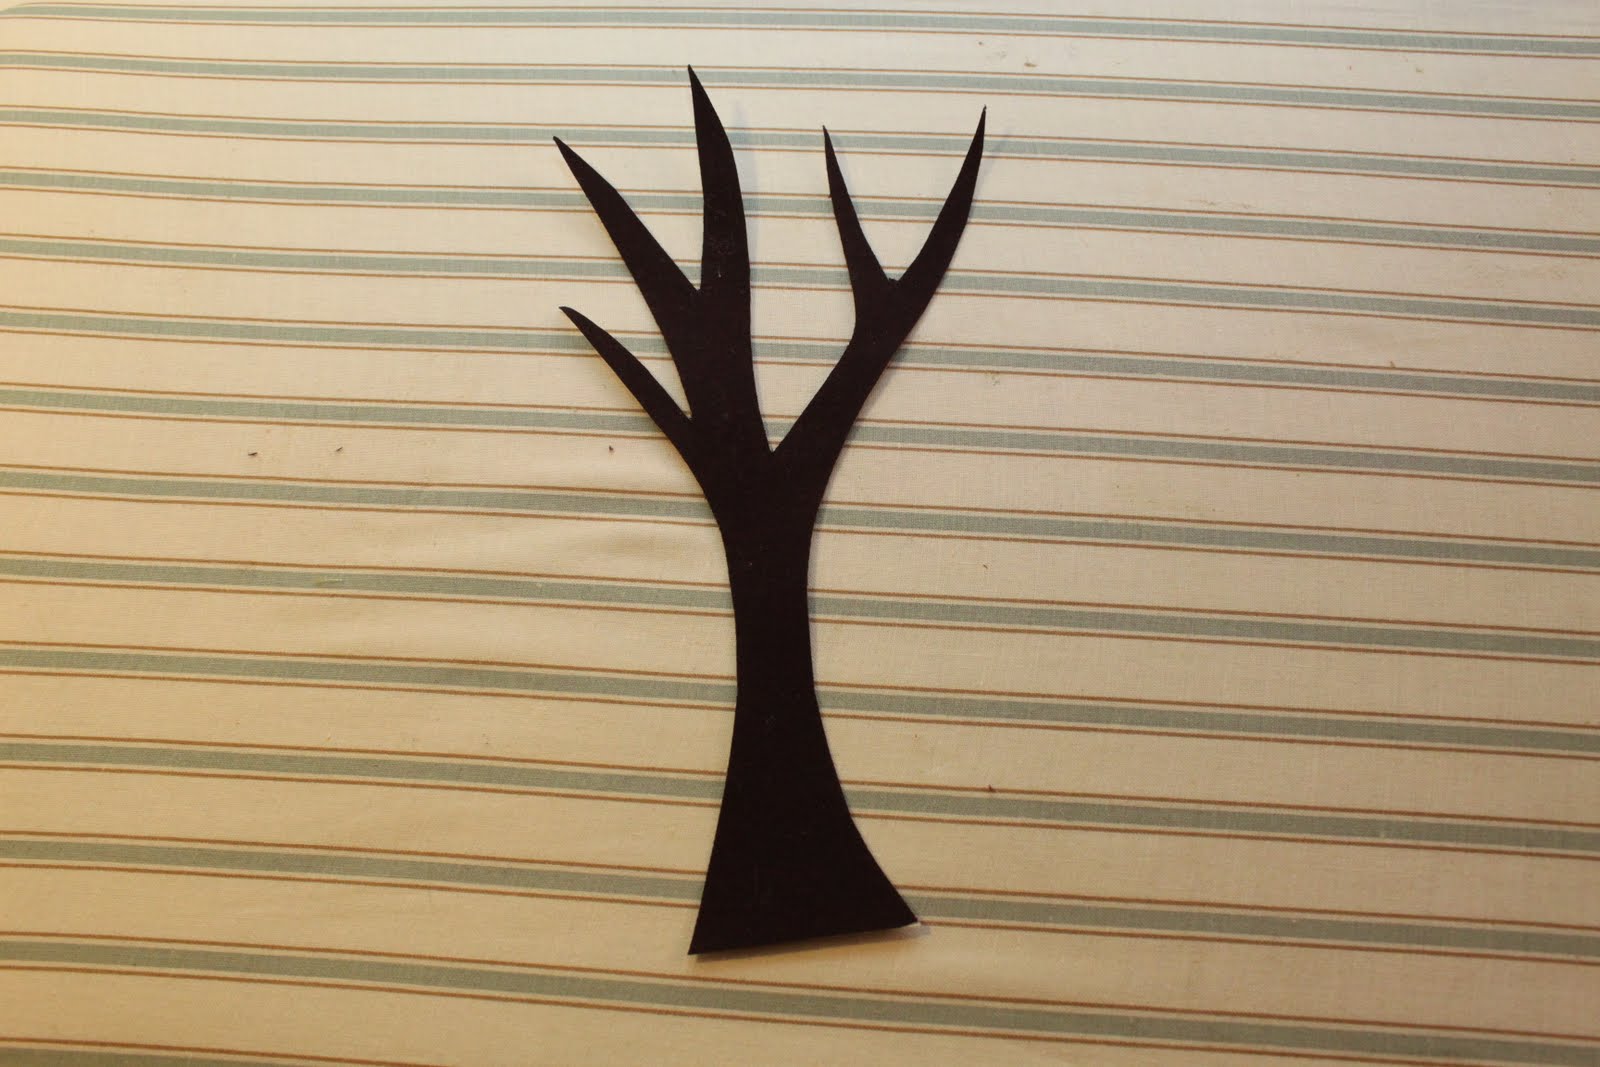
After your interfacing is ironed on, print and cut out my tree template, then trace it onto the paper backing of the interfacing.

Cut out your tree and remove the paper backing.

Using a hot iron, iron your tree onto your shirt following the interfacing instructions. Sew around the perimeter of your tree to secure (use stabilizer if needed, knits can be tricky sometimes.)
Now is where the patience part comes in! Dig into your button stash for some fall-colored buttons. Using a needle and thread, hand sew buttons around your tree until you’re satisfied with how it looks. You might want to grab a snack and put on some of your DVR’d TV shows for the next hour or so while you’re at it.
After lots of hand sewing, you should have a cute new fall shirt for your little one!


Now go find a big pile of leaves to jump in!
Thanks again for having me Jen!
I hope you’ll come visit me over at My Own Road to check out my other projects and say hi!

Jen – that is adorable!! I want to make one for ME 🙂

Jen is so sweet and so talented!!
Here are a few more awesome ideas from Jen’s blog:
I adore this Bow Cuff Bracelet — the stripes and colors. Awesomeness!
And check out this great idea — Jen made  a Hospital Survival Kit for a new mom. She’s also sharing the printable — so you can make one too!
Another one of my favorites, Painted Rain Boots — jazz up rain boots by painting them. The sky’s the limit with what you can create!!
I could go on and on. Be sure to hop over to My Own Road
and give Jen a big TT&J hello. You will love getting to know her!!
xoxo
PS —
I have Thanksgiving on my mind! I’m in charge of place cards this year, so I did a little research and I’m sharing 12 of my favorite Thanksgiving Place Card Ideas at The New Home Ec today. Make place cards for YOUR Thanksgiving table that are beautiful, PLUS they can be take-home gifts for your guests!!

I’m almost done with a fun Thanksgiving project. My sewing machine died last night, so if I can finish it I will post it late tonight 🙂

Have a Creative Day!!

43
43Shares

Posted By: Jen · In: diy, Fall Craft, fashion, holiday, kids, kids crafts, sewing projects, Thanksgiving, tutorial

Make a Thanksgiving Countdown Tree {holiday printable activity}!!
Thanksgiving Countdown Bunting Tutorial {and 28 grateful activities}

You’ll Also Love

14 Delightful Thanksgiving Desserts14 Delightful Thanksgiving Desserts!
Fall Centerpiece with Decoupage Pumpkins
DIY No-Carve Monogram Pumpkin

Comments

  1. Ruth says

    January 22, 2013 at 5:54 AM

    love the tree t shirt! saw it on 100 days of school at tip junkie. have pinned! thank you!

  2. Nádia Petraniwskyj Castanho says

    November 27, 2011 at 1:58 PM

    Adorei a idéia dos botões, e estive pensando que tambem daria certo fazer a aplicação em guar5da-napos.
    Vou fazer um para ver como irá ficar
    Grande abraço

    Nádia

  3. SallieA says

    November 8, 2011 at 8:12 AM

    Waaaaaay too cute. I have a neice named Sequoia. How perfect is this tee for her.

  4. Justine Abbitt says

    November 7, 2011 at 11:37 PM

    Im going to put this button tree on an orange corduroy dress I am working on for my 2 year old. Its the perfect addition. Thanks!

  5. Trinity says

    November 6, 2011 at 5:06 PM

    I love the button shirt! Now I just need to find a child to make it for!

  6. the Jackpot says

    November 5, 2011 at 5:11 AM

    Looks so festive! Great job and a printable too….perfect!

  7. Donna O'Neil says

    November 4, 2011 at 12:07 PM

    Wow, this is really great! Thanks for sharing.

  8. Shelly says

    November 4, 2011 at 10:08 AM

    I want one for me too! I really like all of the colors and placement of the buttons 🙂

  9. Heidi of Wonder Woman Wannabe says

    November 4, 2011 at 8:54 AM

    ohmygoodness! that is SO stink’n CUTE! 🙂 love it!!

  10. Mary says

    November 4, 2011 at 7:45 AM

    I like the button tree tee shirt; however, the area where the buttons are sewed on needs to have an interfacing over it. This will prevent the threads from irritating the child’s skin.

  11. Maysem says

    November 3, 2011 at 9:35 PM

    So cute! Gotta try this one:D

  12. Gwen @ Gwenny Penny says

    November 3, 2011 at 8:21 PM

    Perfect fall shirt and cute to boot!

  13. B Fryman says

    November 3, 2011 at 6:40 PM

    I made a very similar shirt last month (http://frymanfour.blogspot.com/2011/10/it-is-80-degrees-here.html) and I just hot glued all my buttons on. It has been washed twice now with no buttons lost! (Just in case any one needs a shortcut!)

    • Jennifer McCaffrey says

      November 3, 2011 at 7:44 PM

      Cute!! Good to know hot glue works, never thought to try that!

  14. Cinderella Becky says

    November 3, 2011 at 2:47 PM

    I LOVE this shirt like crazy. I’m so going to do this! Thank you!

  15. April says

    November 3, 2011 at 2:32 PM

    This is so cute-love it! I am saving this one since I’m having a girl in March. Maybe I can whip it back out in a couple of years.

  16. Jaime says

    November 3, 2011 at 1:49 PM

    so so cute!!!

  17. Tammy says

    November 3, 2011 at 11:34 AM

    LOVE this tutorial! I can’t wait to make this one for my cousin’s little girl 🙂

  18. Ashley @ Cute as a Fox says

    November 3, 2011 at 11:05 AM

    Love this idea! So cute. I have seen tutorials for how to sew buttons on using your sewing machine. I might just have to try that. That would save some serious time.
    Thanks for sharing a great idea!

  19. Lucy @ Charm About You says

    November 3, 2011 at 10:40 AM

    I adore this top, so cute and perfect for Autumn! 🙂

  20. Rebecca says

    November 3, 2011 at 9:06 AM

    Love this tee! Great use for spare buttons Jen. =]

  21. Heather says

    November 3, 2011 at 8:47 AM

    That’s awesome! I might just transfer it to the corner of a denim skirt that needs some purtyin’ up! Really cute, and buttons are the best!!!

  22. Angi says

    November 3, 2011 at 7:20 AM

    Thanks for the tutorial! This is a great idea–and something I can actually do!

  23. Christy says

    November 3, 2011 at 7:14 AM

    Simply adorable. Such a cute way to embelish a shirt.

  24. Kelli says

    November 3, 2011 at 7:03 AM

    That shirt is seriously adorable! And I love the painted boots too!

  25. Jennifer McCaffrey says

    November 3, 2011 at 6:42 AM

    Thanks for having me Jen!

  26. Paula Parrish says

    November 3, 2011 at 5:47 AM

    Thanks for the fun tutorial. I am going to making one for my granddaughter who is turning three in a few months.
    Smiles, Paula

  27. Tonya @ Love of Family & Home says

    November 3, 2011 at 4:22 AM

    This is too cute! If I had a little girl, I would totally be making one! Thanks for sharing!

  28. Lesley says

    November 3, 2011 at 1:32 AM

    Love this idea! I can’t wait to get started on matching shirts for me and my daughter!

Hi! I'm Jen Hadfield. I'm a mom of 5 restoring an 1891 home in the heart of Salt Lake City. I love being creative and sharing simple ideas to make your life easier and more beautiful!

Receive the Latest Crafts, DIY, Recipes and More in your INBOX!

Follow us on Pinterest! It's awesome!

Top Posts & Pages

Spruce up Your Outdoor Space with a DIY Recirculating Fountain! (tutorial)
A New Deck in Under 30 Minutes!
DIY Secret: How to Print on Post-It Notes (and Free Printable Template)
12 Must-Have Items to Pack on an Alaskan Cruise!
Copycat Panera Spinach and Artichoke Egg Soufflés - SO good!
How to Change a Recessed Can Light into a Pendant Light with No Remodeling!


Popular Posts

  • Spruce up Your Outdoor Space with a DIY Recirculating Fountain! (tutorial)
    Spruce up Your Outdoor Space with a DIY Recirculating Fountain! (tutorial)
  • A New Deck in Under 30 Minutes!
    A New Deck in Under 30 Minutes!
  • DIY Secret: How to Print on Post-It Notes (and Free Printable Template)
    DIY Secret: How to Print on Post-It Notes (and Free Printable Template)
  • 12 Must-Have Items to Pack on an Alaskan Cruise!
    12 Must-Have Items to Pack on an Alaskan Cruise!
  • Copycat Panera Spinach and Artichoke Egg Soufflés - SO good!
    Copycat Panera Spinach and Artichoke Egg Soufflés - SO good!
  • How to Change a Recessed Can Light into a Pendant Light with No Remodeling!
    How to Change a Recessed Can Light into a Pendant Light with No Remodeling!
  • Mother's Day Cup Holder Gift Basket
    Mother's Day Cup Holder Gift Basket

As seen in


Amazon Affiliate

Tatertots & Jello is a participant in the Amazon Services LLC Associates Program, an affiliate advertising program designed to provide a means for sites to earn advertising fees by advertising and linking to amazon.com.
  • About Me
  • Advertising
  • Get Featured

Copyright © 2025 Tatertots and Jello · Privacy
This site is a place for positive discussion and ideas. Negative talk, comments that disparage others, and similar are not welcome and may be removed.

43