Tatertots and Jello

COLORFUL HAPPY HOME -- Daily DIY, Decor, Craft and Recipe Tutorial

  • My Home
    • 1905 Cottage
    • Daybreak House
  • DIY
    • DIY Projects and Ideas
    • Organizing
    • Tutorials
    • Printables
  • Decor
    • Spring Projects
    • Summer Projects
    • Fall Projects
  • Crafts
    • Kids Crafts
    • Painting Projects
    • Paper Projects
    • Sewing
    • Wreaths
  • Holidays
    • Valentines Day
    • Easter
    • Halloween
    • Thanksgiving
    • Christmas
    • HAPPY Holidays Series!
  • Recipes

Explore

  • my home
  • diy
  • decor
  • crafts
  • holiday
  • printables
  • recipes

Connect

Home » decorating » DIY Dixie Cup String Party Lights – with cut file!

crafts, decorating, my home · June 18, 2024

DIY Dixie Cup String Party Lights – with cut file!

Tatertots & Jello is a participant in the Amazon Services LLC Associates Program, an affiliate advertising program designed to provide a means for sites to earn advertising fees by advertising and linking to amazon.com.

DIY Dixie Cup String Light Party Lights. Add light to ANY party, event or even a door or mantel with Scrapbook Paper Scalloped Dixie Cup Lights!

Add light to ANY party, event or even a door or mantel with DIY Dixie Cup String Party Lights. You can use any paper and it's such a cute way to celebrate! 

Don’t you love making a cute project that brightens up your home? These DIY Dixie Cup String Party Lights are so bright and happy! Make some to liven up a Spring party, use on your mantel this Summer, lighten up your porch or use in a kids room. There are so many possibilities!

Free Printable Scallop String Light Template

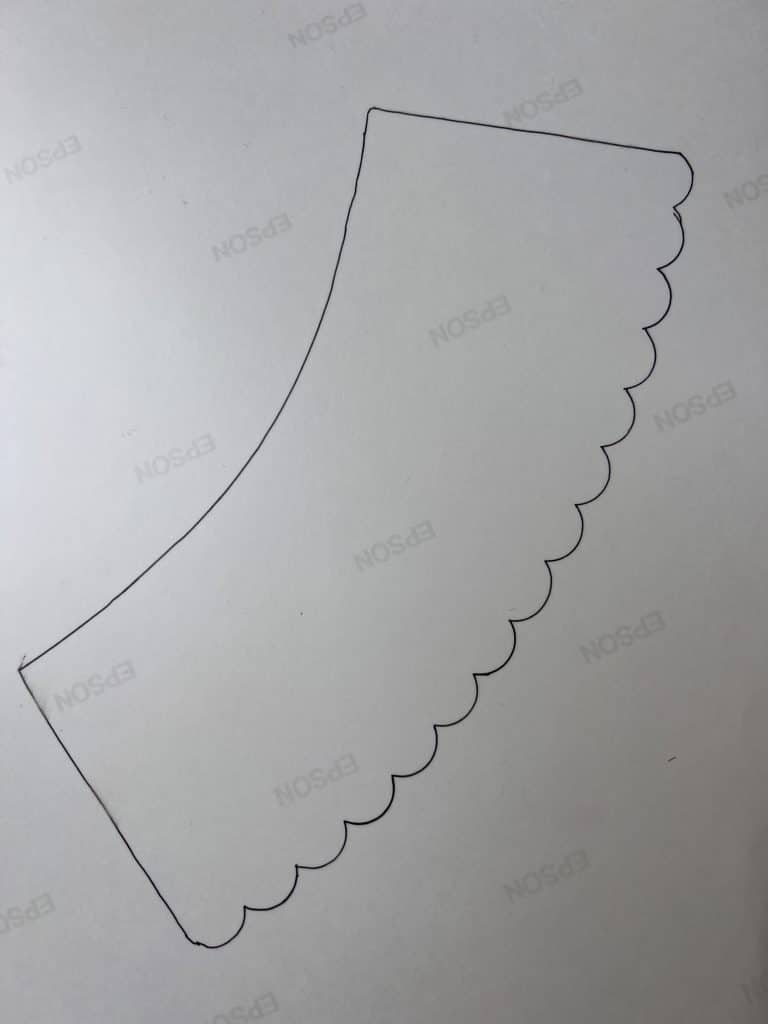
If you don’t have a craft cutting machine, don’t despair! I have created a free template! Just download this file and then print it out. Cut it out on card stock paper and trace the template onto scrapbook paper. I covered a new set of string lights with my NEW paper line – Groovy Darlin’ which is available at JoAnn Stores right now!!

Add light to ANY party, event or even a door or mantel with DIY Dixie Cup String Party Lights. You can use any paper and it's such a cute way to celebrate! 

My friend Brenda at Pebbles in My Pocket created lights like these for our Pebbles booth in January and as soon as I saw them I was in love! I love the little scallops at the bottom. I used my new Patio Party line of papers – which are FULL of bright happy colors and pretty patterns. I think they are the perfect papers to use with this project! You can buy them through Brenda’s Pebbles in My Pocket store online. And they are on sale right now.

Add light to ANY party, event or even a door or mantel with DIY Dixie Cup String Party Lights. You can use any paper and it's such a cute way to celebrate! 

Here’s how to make DIY Dixie Cup String Party Lights:

Supplies DIY Dixie Cup String Party Lights:

Coordinating scrapbook paper (I used my new Pebbles Patio Party line)

Scallop Cover Cut File

(just download this file to your computer and use it with your craft cutting machine)

Adhesive or a glue gun

Dixie Cups

String Lights (I used these battery-operated ones)

xacto knife

Craft Cutting Machine (optional. If you want to make the scallop ones I used they are a shape through the Cricut online store. But if you don’t have a craft cutting machine, you can trace your cups onto the back of your scrapbook paper with a pencil and roll the dixie cup as you trace until you have a shape that will cover the cup. Then just cut it out!)

Scissors

Add light to ANY party, event or even a door or mantel with DIY Dixie Cup String Party Lights. You can use any paper and it's such a cute way to celebrate! 

Directions DIY Dixie Cup String Party Lights:

Cut out the scallop cupcake liners on your craft cutting machine. Here is the link to the Scallop Cut File.

If you don’t have a craft cutting machine, you can trace your cups onto the back of your scrapbook paper with a pencil and roll the dixie cup as you trace until you have a shape that will cover the cup. Then just cut it out!

Cut an X into the bottom of each cup.

Turn each dixie cup over and cut a small X into the center of each cut cup with an xacto knife.

Cover the dixie cups with paper covers.

Put a dab of glue on the edge of the bottom of a cup, line up the edge of the paper cover and wrap it around the edge of the bottom of the cup until the back edge overlaps the front edge. Put a line of glue along the back edge of the wrapper and hold down until dry.

String the dixie cups onto the string lights.

If your cups fall off the string, just put a dap of glue or hot glue at the edge of the X and the lights to keep them attached.

Enjoy your new DIY Dixie Cup Party String Lights!

Dress up your marquee lightbox with paper flowers. You can change them out throughout the year. It's an easy way to make your lightbox the centerpiece of your home decor!

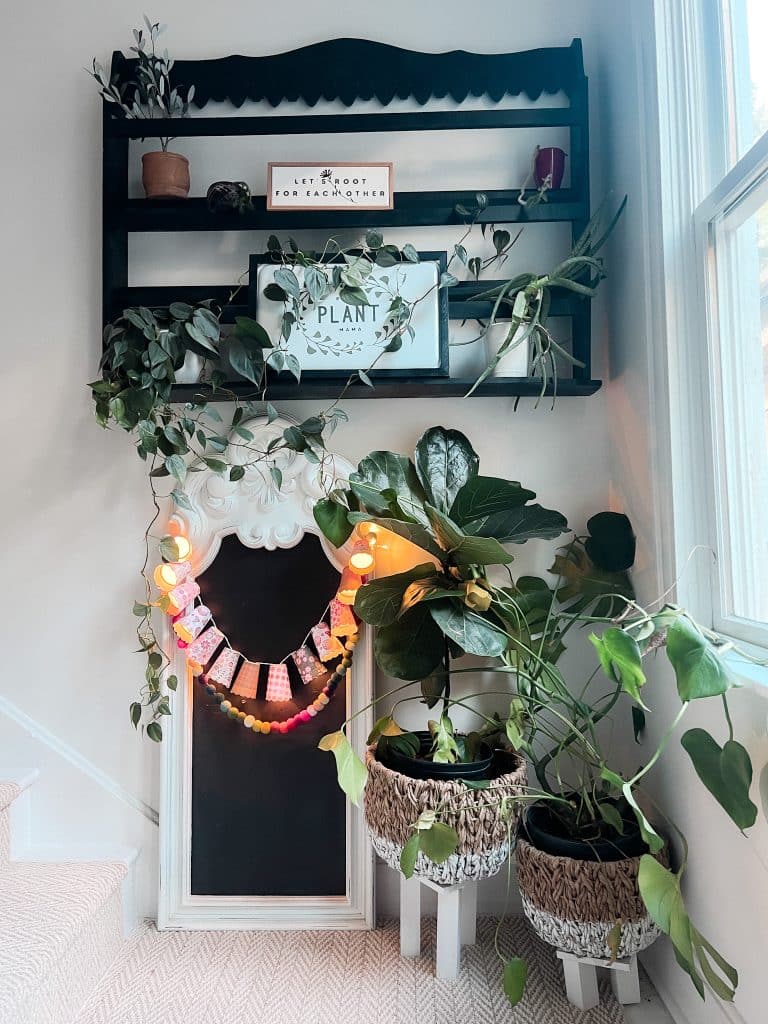
And I have the PERFECT thing that will look SO cute with your new dixie cup string lights, this spiffed up lightbox with paper flowers and a spray painted stand!

Seriously though, how CUTE are these together?? I want to throw a party JUST to show off these colorful projects I made!! You can get the paper for both of these projects here. 

Add light to ANY party, event or even a door or mantel with DIY Dixie Cup String Party Lights. You can use any paper and it's such a cute way to celebrate! 

What projects are YOU working on for Spring? 

Share them with ME in the comments!!!! 

Have a beautiful day! 

xoxo

I am a designer with Pebbles Inc. and American Crafts. I love working with them and it’s a dream come true!! 

Posted By: Jen · In: crafts, decorating, my home

Kids Craft: DIY Tassel Bookmarks
Fourth of July S’mores Cookie Cups

You’ll Also Love

DIY Daisy Paper Chain Banner – Easy Spring Decor Tutorial
DIY Spring Moss Bunny Topiary
DIY Spring Flower Lanterns

Comments

  1. Tracy says

    April 21, 2018 at 3:17 AM

    I csn’t wait to make these on my cricut!

    Also, I love the wood letterboard. Would you please share where you I can get one as well?

    Reply
  2. Hena Tayeb says

    April 20, 2018 at 10:38 AM

    oh these are so lovely. thank you for sharing.

    http://www.henatayeb.blogspot.com

    Reply
    • Jen says

      April 20, 2018 at 12:28 PM

      You are welcome! I hope you make some!

      xoxo

      Reply
  3. Windy Oglageo says

    April 20, 2018 at 6:37 AM

    Love the project! How long does it take to get permission for the cut file? Thanks!!

    Reply
    • Jen says

      April 20, 2018 at 9:52 AM

      Hi! You should be able to download it through Google Docs. What does it say when you try? Thanks!

      xxo

      Reply
      • Windy Oglageo says

        April 20, 2018 at 3:01 PM

        It keeps saying I need permission. I clearly don’t know what I’m doing. 🙁

        Reply
        • Jen says

          April 20, 2018 at 3:49 PM

          I emailed it to you. Let me know if it doesn’t come through and I will figure something else out!

          xoxo

          Reply
  4. Betsy Morris says

    April 19, 2018 at 9:13 AM

    What did you type in to get this image for the scallop shape?

    Reply
    • Jen says

      April 19, 2018 at 11:35 AM

      Hi Betsy!

      Let me check and I will give you a link and add it to the tutorial.

      xoxo

      Reply
    • Jen says

      April 19, 2018 at 1:55 PM

      Hi Betsy!!

      Here is a link to the scallop cover — https://drive.google.com/file/d/1cMeqNvsPd5Z0SrwDiWfFuulwCPxOUzju/view

      xoxo

      Reply

Liked it? Leave a comment! Thanks! xoxoCancel reply

Hi! I'm Jen Hadfield. I'm a mom of 5 restoring an 1891 home in the heart of Salt Lake City. I love being creative and sharing simple ideas to make your life easier and more beautiful!

Receive the Latest Crafts, DIY, Recipes and More in your INBOX!

Follow us on Pinterest! It's awesome!

Top Posts & Pages

A New Deck in Under 30 Minutes!
Copycat Panera Spinach and Artichoke Egg Soufflés - SO good!
Spruce up Your Outdoor Space with a DIY Recirculating Fountain! (tutorial)
DIY Secret: How to Print on Post-It Notes (and Free Printable Template)
Thrifted Bundt Pan to Patio Planter!
How to Change a Recessed Can Light into a Pendant Light with No Remodeling!


Popular Posts

  • A New Deck in Under 30 Minutes!
    A New Deck in Under 30 Minutes!
  • Copycat Panera Spinach and Artichoke Egg Soufflés - SO good!
    Copycat Panera Spinach and Artichoke Egg Soufflés - SO good!
  • Spruce up Your Outdoor Space with a DIY Recirculating Fountain! (tutorial)
    Spruce up Your Outdoor Space with a DIY Recirculating Fountain! (tutorial)
  • DIY Secret: How to Print on Post-It Notes (and Free Printable Template)
    DIY Secret: How to Print on Post-It Notes (and Free Printable Template)
  • Thrifted Bundt Pan to Patio Planter!
    Thrifted Bundt Pan to Patio Planter!
  • How to Change a Recessed Can Light into a Pendant Light with No Remodeling!
    How to Change a Recessed Can Light into a Pendant Light with No Remodeling!
  • 3-Ingredient SAFE Puffy Slime Recipe
    3-Ingredient SAFE Puffy Slime Recipe

As seen in


Amazon Affiliate

Tatertots & Jello is a participant in the Amazon Services LLC Associates Program, an affiliate advertising program designed to provide a means for sites to earn advertising fees by advertising and linking to amazon.com.
  • About Me
  • Advertising
  • Get Featured

Copyright © 2025 Tatertots and Jello · Privacy
This site is a place for positive discussion and ideas. Negative talk, comments that disparage others, and similar are not welcome and may be removed.