Update a Dated 90’s Kitchen on a Budget. Bring your kitchen into the new century with these classic ways to refresh!
Update a Dated 90’s Kitchen on a Budget

Hi, friends! If you have been following me for awhile you might know that I love old homes. I remodeled my 1905 cottage and it was a pure labor of love. I was heartbroken to sell it and although it was fun to move into a brand-new home, I always missed that quirky little cottage. So when I had a chance to buy a 1891 home in the middle of Salt Lake City’s Avenues neighborhood, I jumped at the chance. All of the stars aligned and it was a dream-come-true to find our historic home. Since then we have been slowly updating and remodeling the house from top to bottom. One of the first projects that we tackled was our main kitchen.
Adding Timeless Kitchen Features
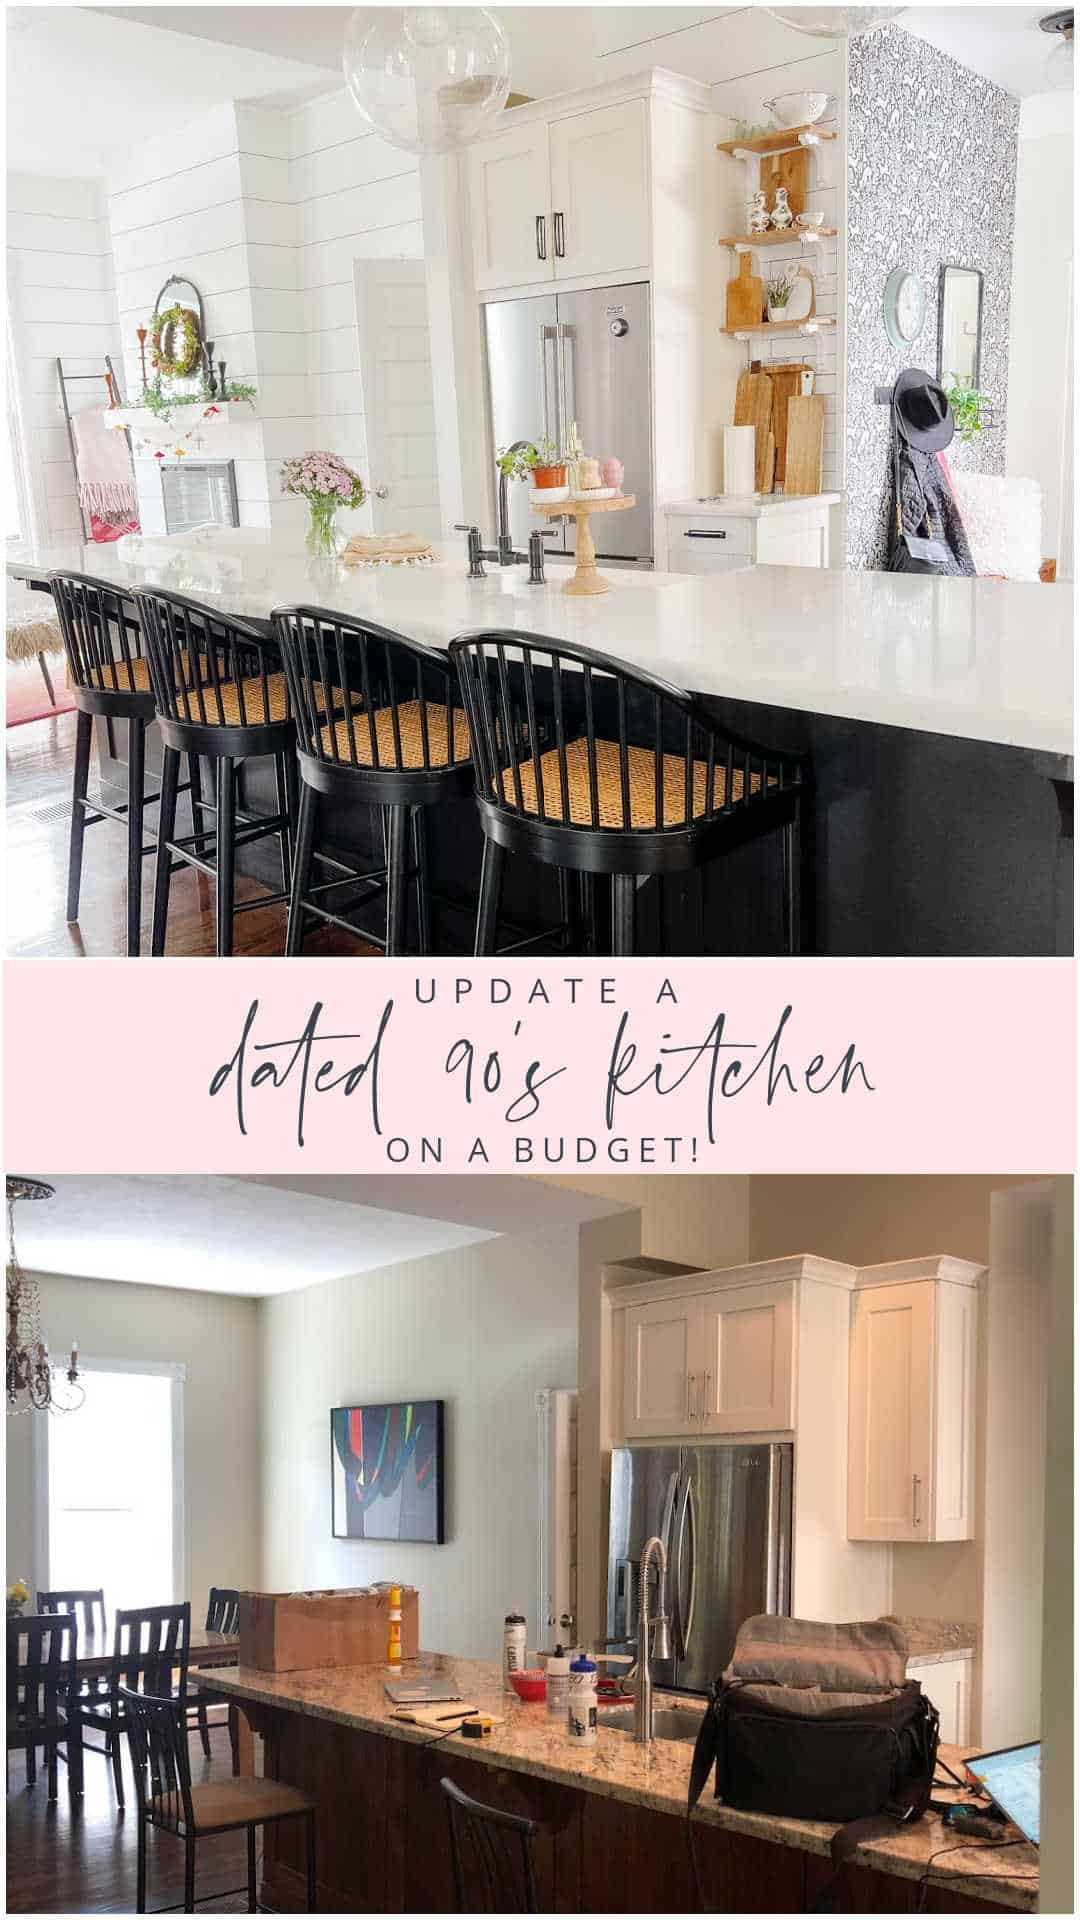
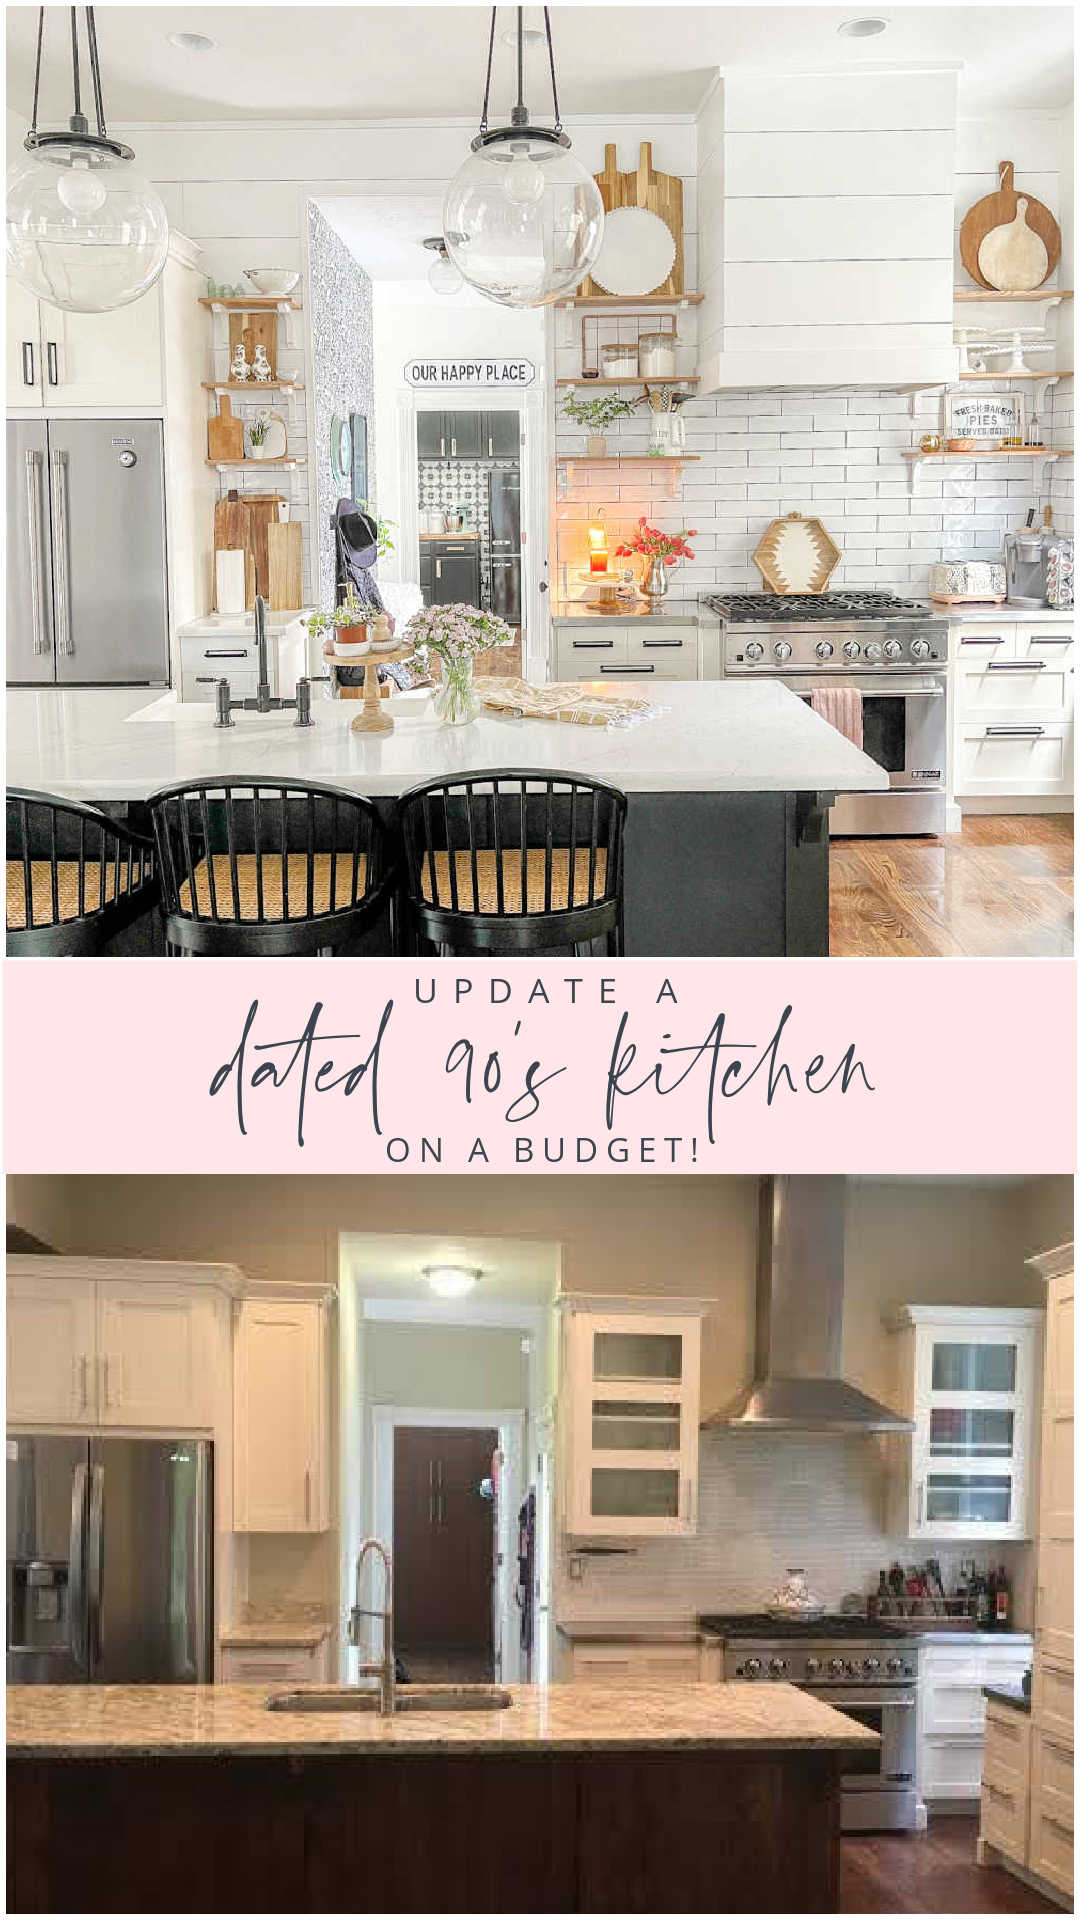
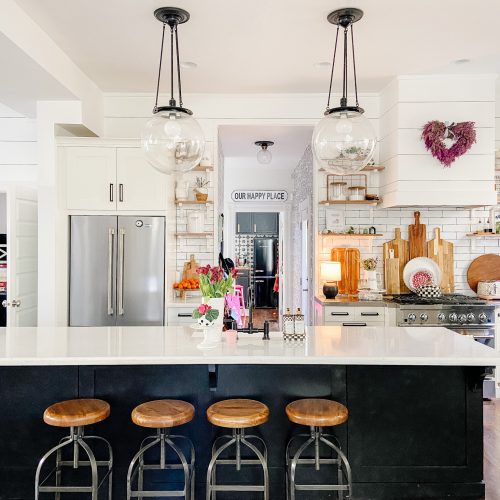
The last time the home and the kitchen had been remodeled was 1990. Before, the kitchen and the whole home was very dark with brown walls, busy brown granite counters and 90’s modern-ish cabinets. Since I was remodeling the whole home, including transforming the dark and scary basement into a separate apartment, my budget was limited. I’m sharing how I transformed the kitchen from 1990’s Ikea to a timeless home that nods to its 1891 history.
Reflect Your Homes Age in the Detail
I love a historic home, but I hate seeing homes that are stuck in an era. Does that make sense? On the one hand I love when a remodel reflects the home’s age in the materials used but I also think adding some modern elements is key to creating a space that feels fresh and modern but also has elements that could have been in the home when it was built.
Subway Tile is a Classic
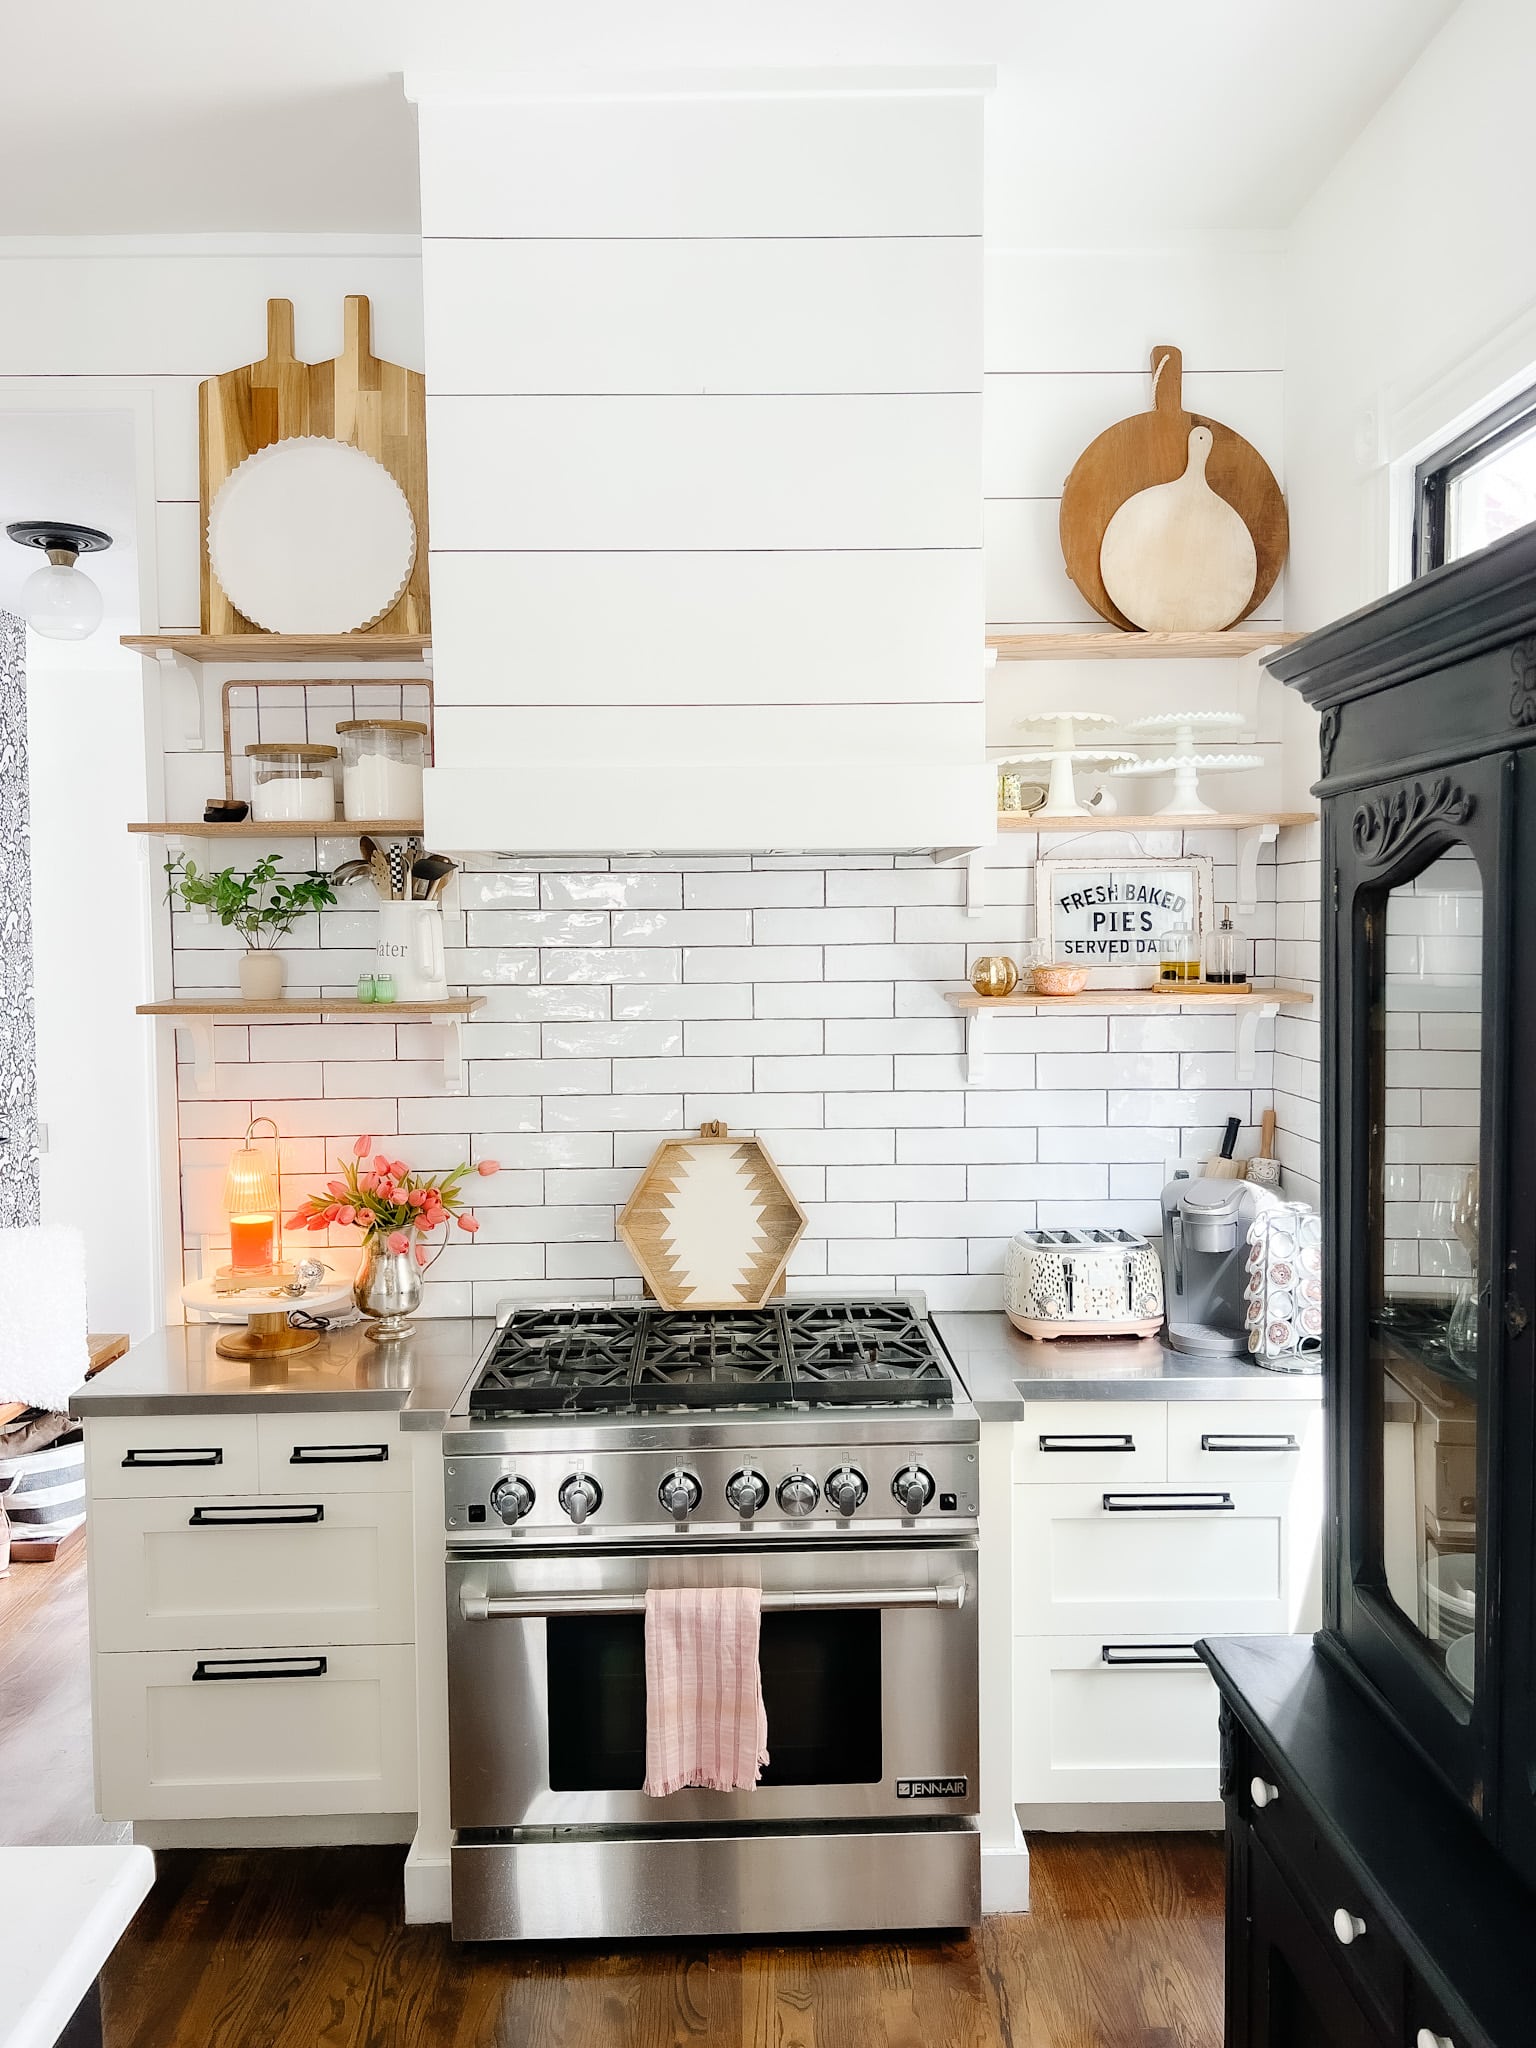
Subway tile is a classic element. Some people disagree I know, but subway tile was created around the turn of the century and continues to be a clean, inexpensive element in home design. I’ve written a blog post all about subway tile, its origins and different ways people have used it over the years if you want to give it a read. So when I was designing our 1891 kitchen remodel I knew subway tile would be a great way to bring the classic style of the time our home was built. I brought a little modern element in with a larger subway tile which has a bit of movement to update it.
Open Shelves Create a Sense of Space
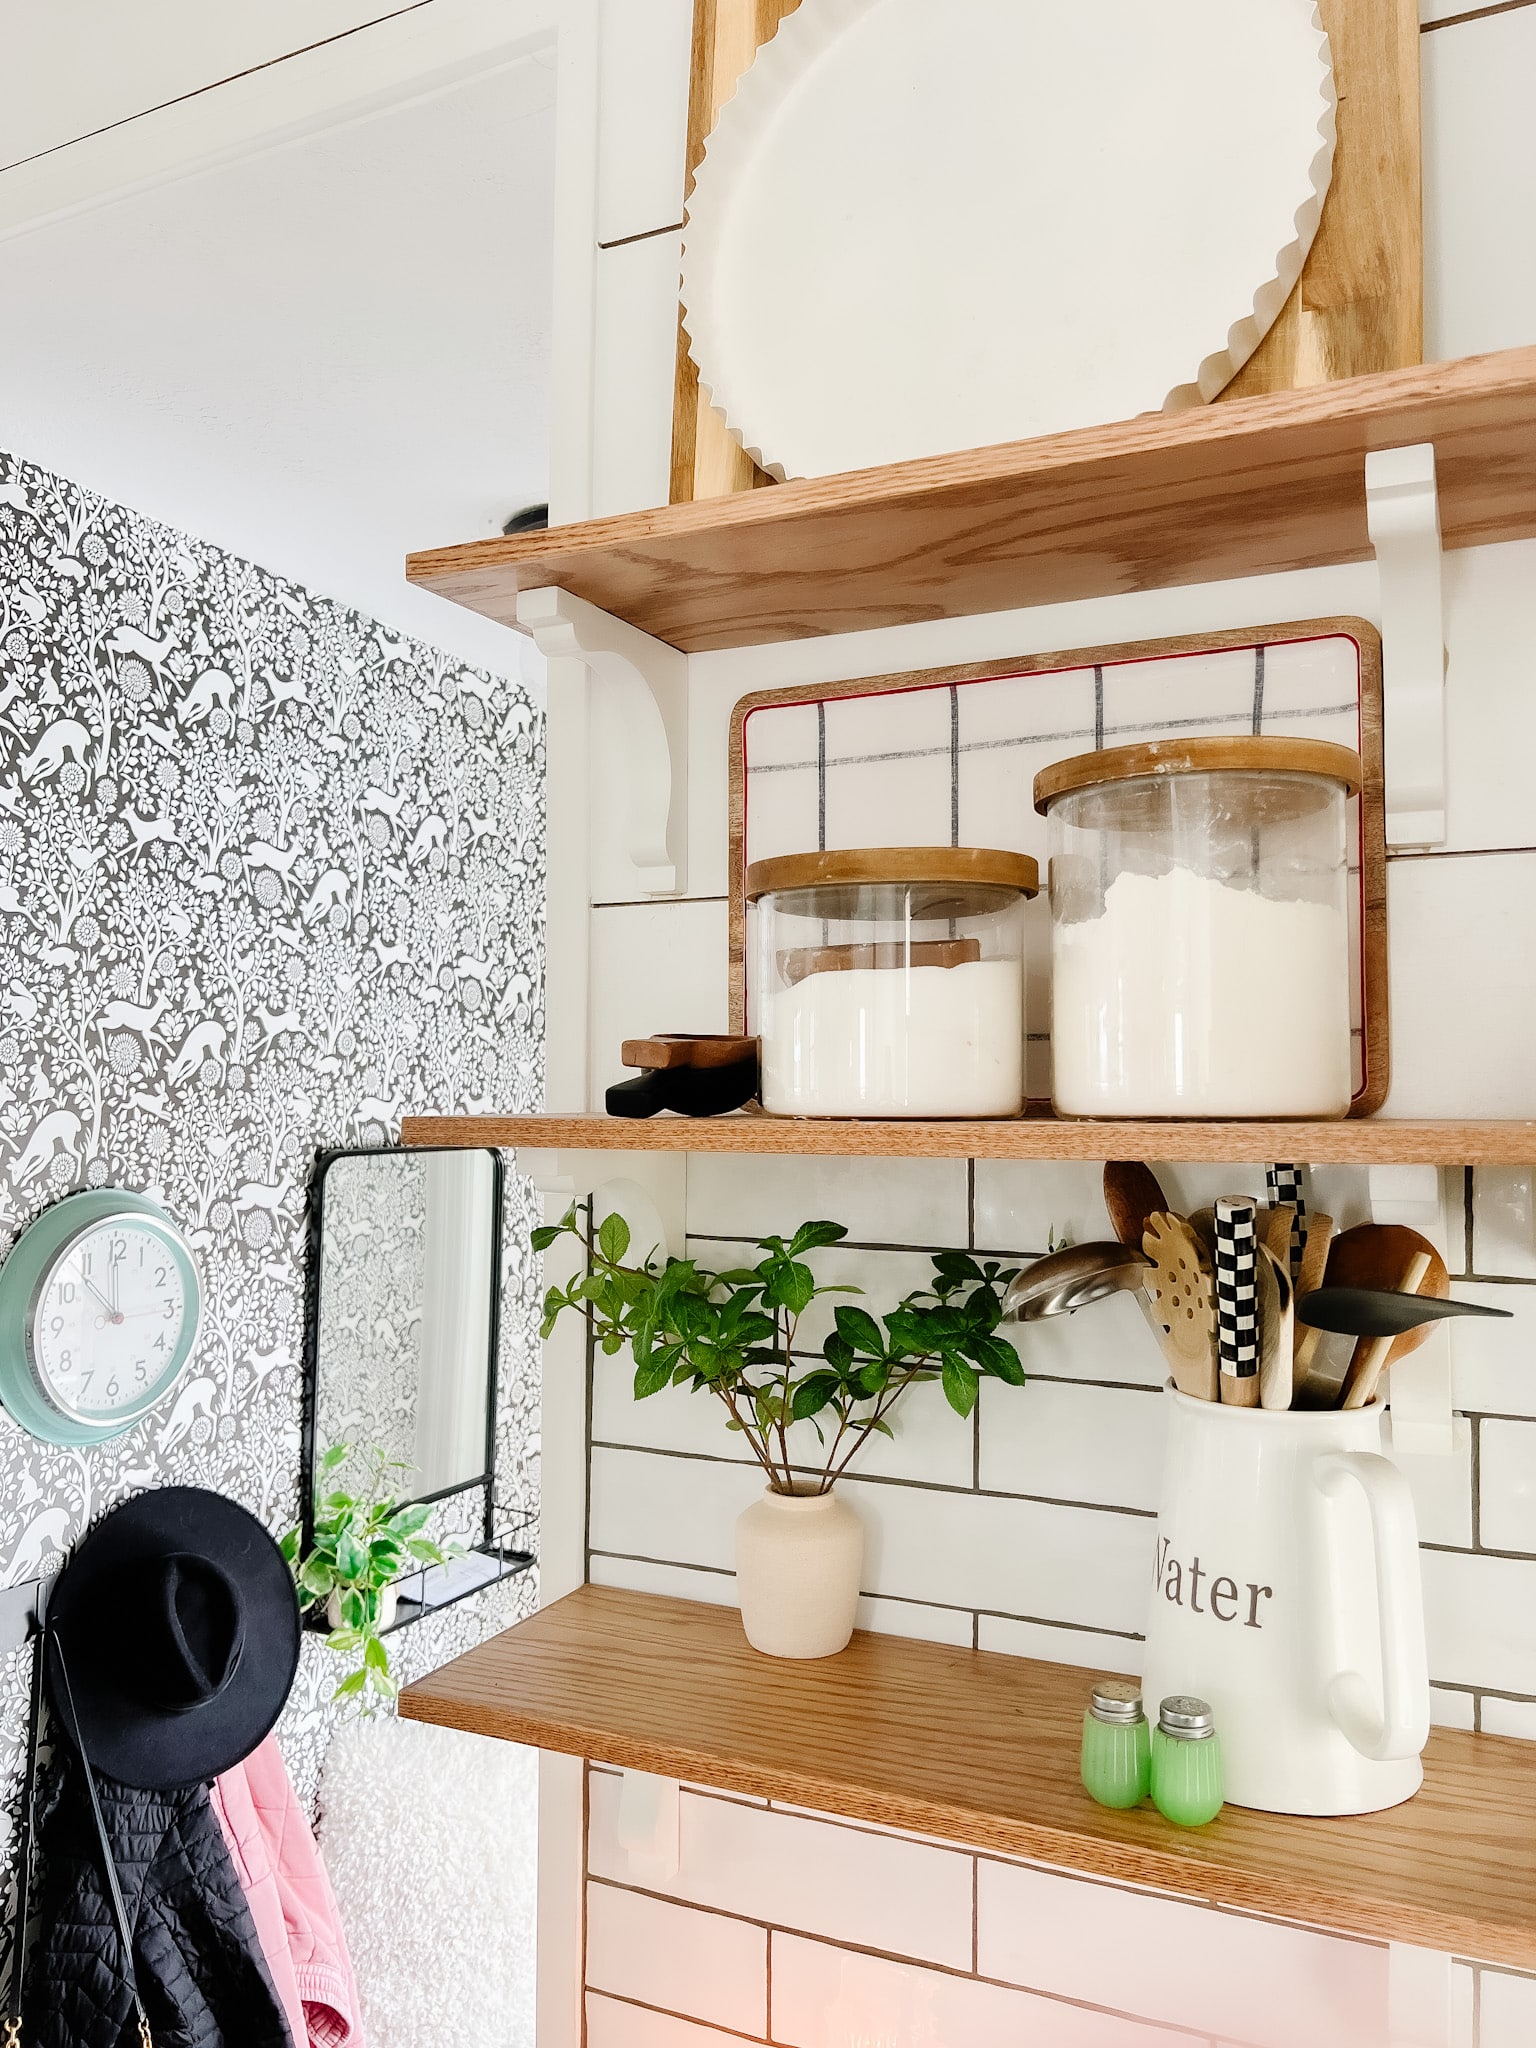
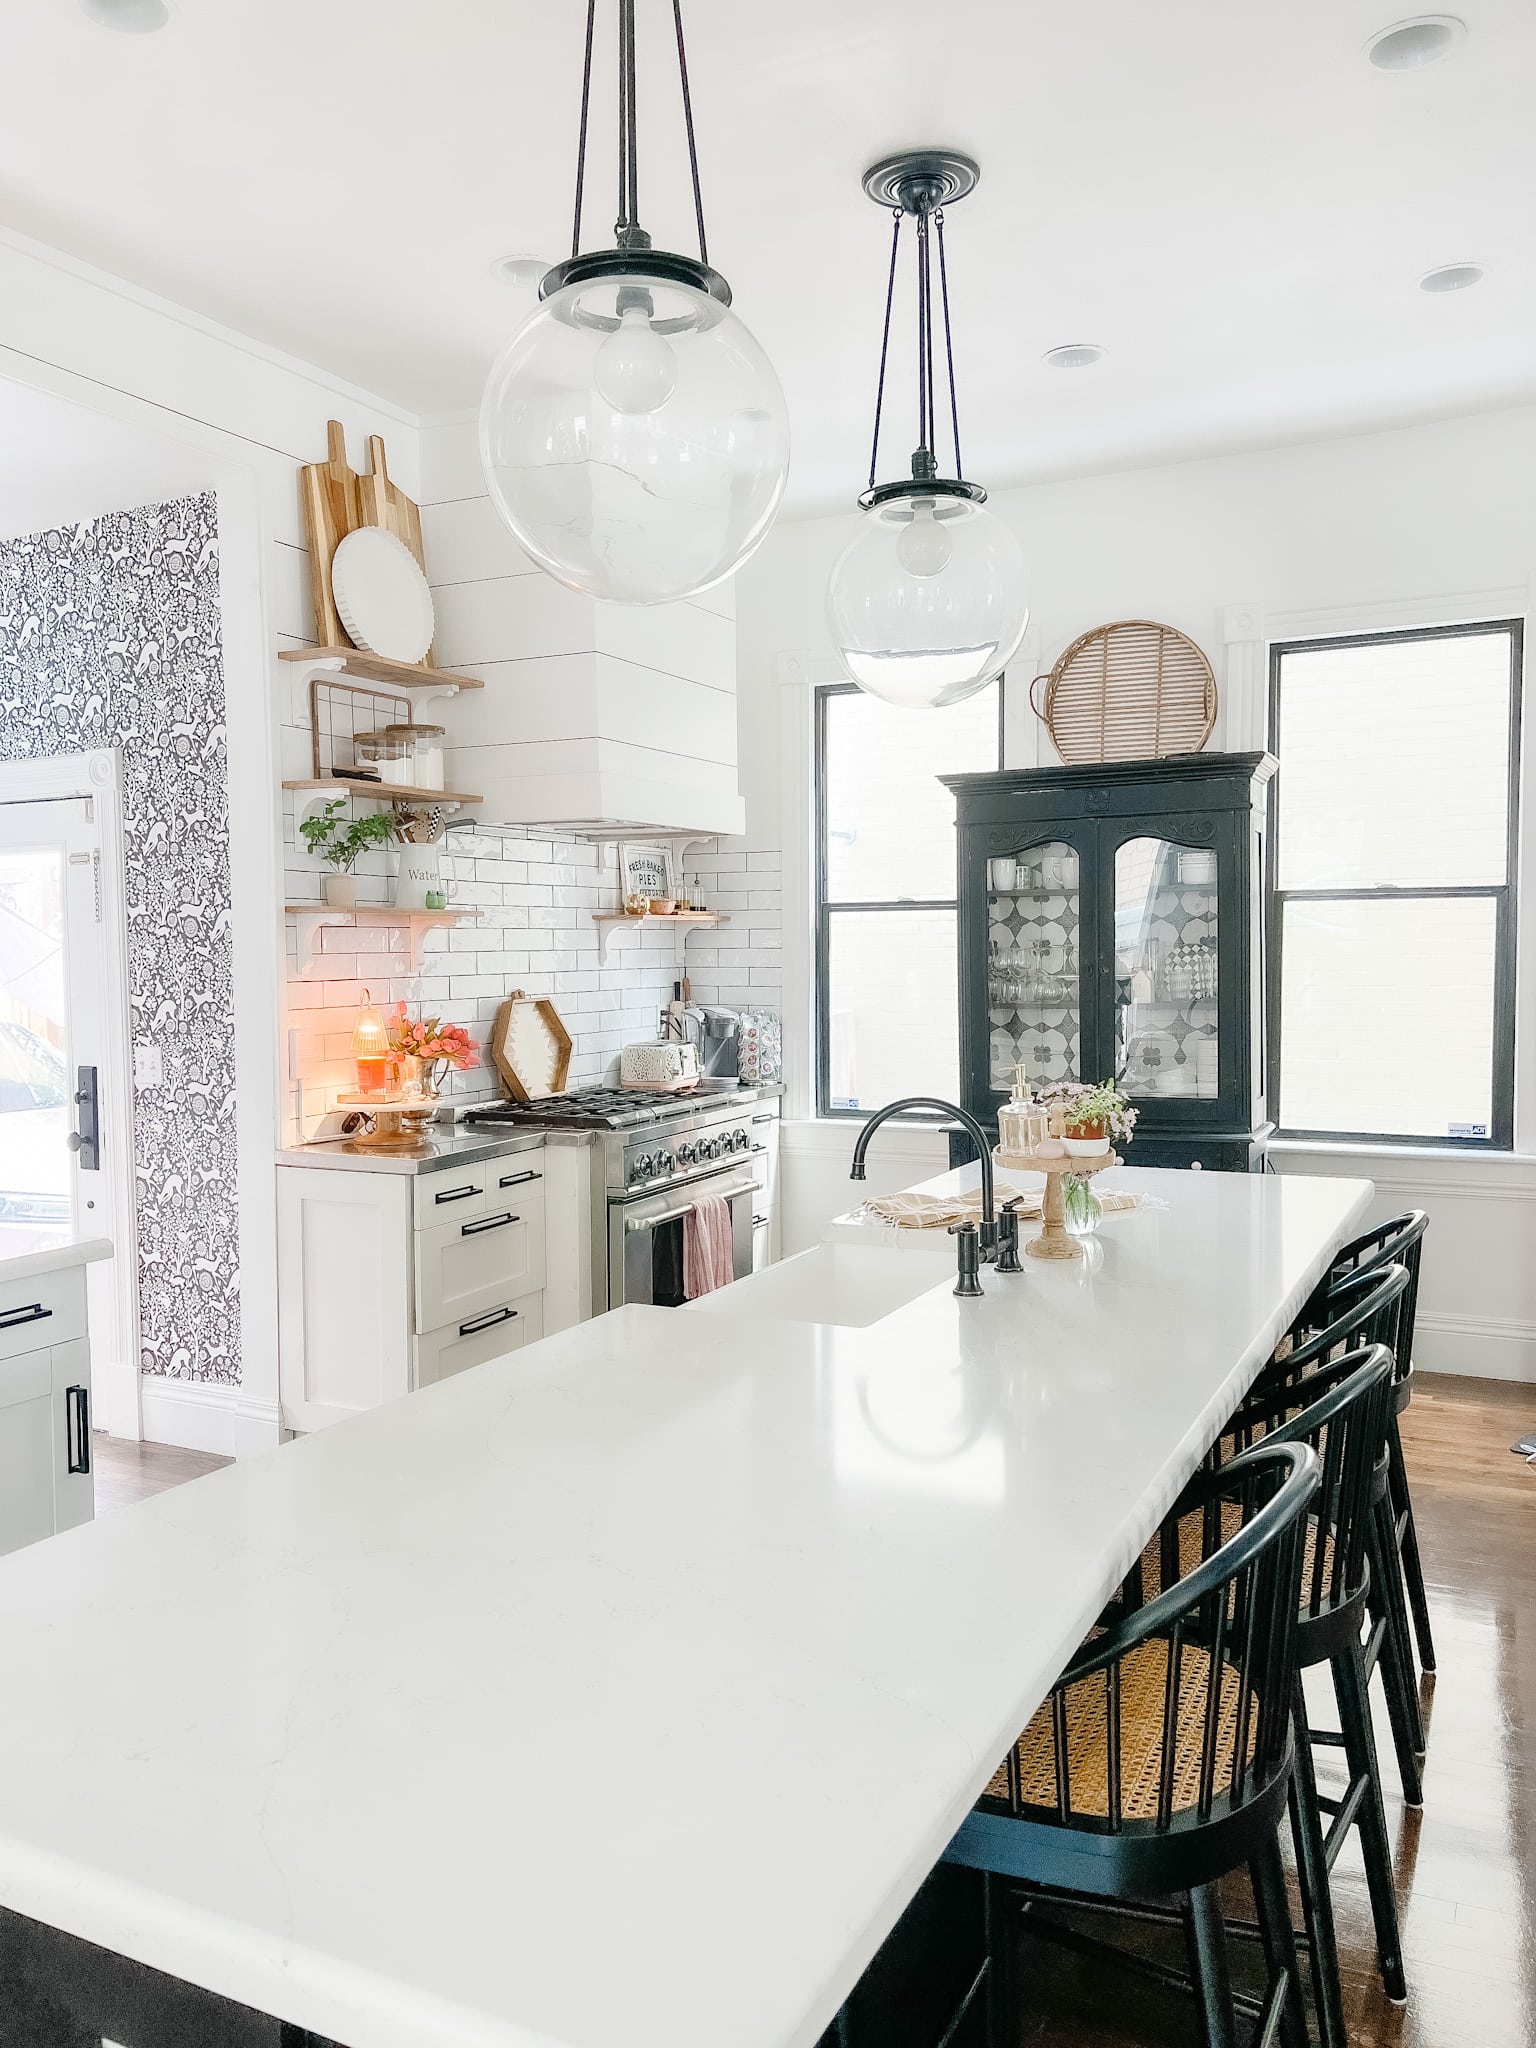
Open shelves are also a but of a controversial subject. As I was researching kitchens around the turn of the century I saw that at that time built-in cabinets weren’t very common. Most kitchens had cabinets with shelves. And I wanted to open the upper part of the kitchen up. We took the top kitchen cabinets off completely and replace them with a big planked hood and open shelves. The sweetest wood brackets support the shelves. The arched shape is classic and beautiful. They look like they could have been in the home from the beginning.
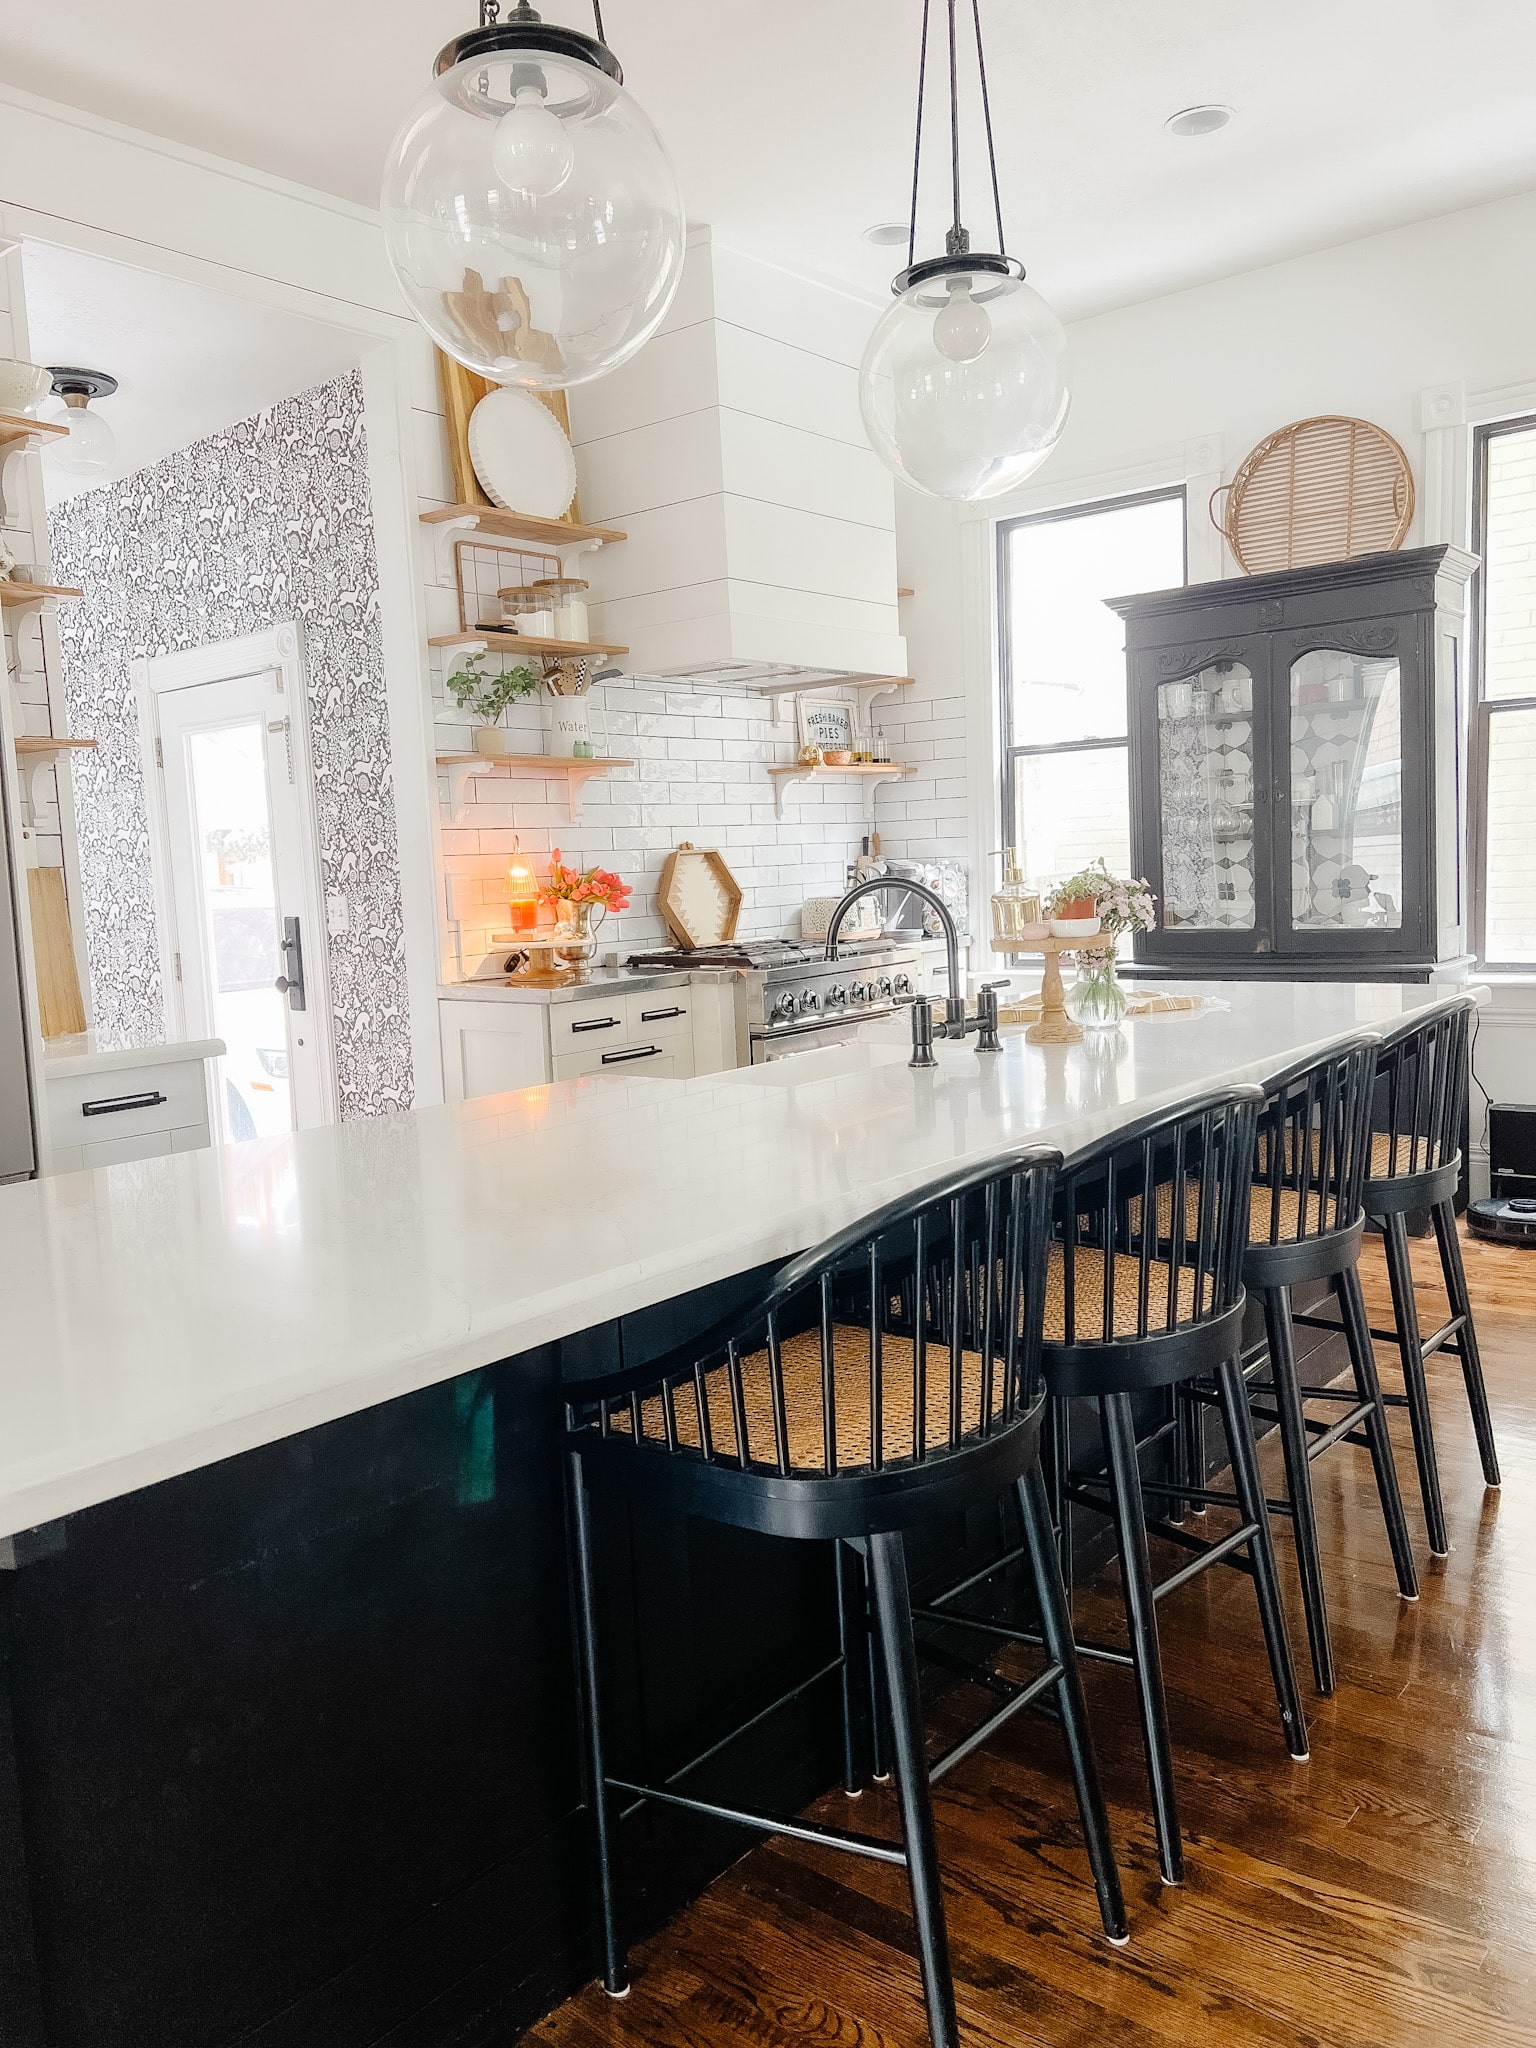
Timeless Overhead Pendant Lights Create a Focal Point
In the 90’s remodel, the kitchen was fitted with recessed lights, which is great. Bringing in some pendant lights to ground the island and creates a statement. Oversized globe lights have a classic shape and I only had to add two lights since they are so big and stately. We saved money with the installation by using a kit that let’s you add a pendant light to an existing recessed light. Here’s the article sharing exactly how to do it on this post – How to Add a Pendant Light to a Recessed Light with no Remodeling.
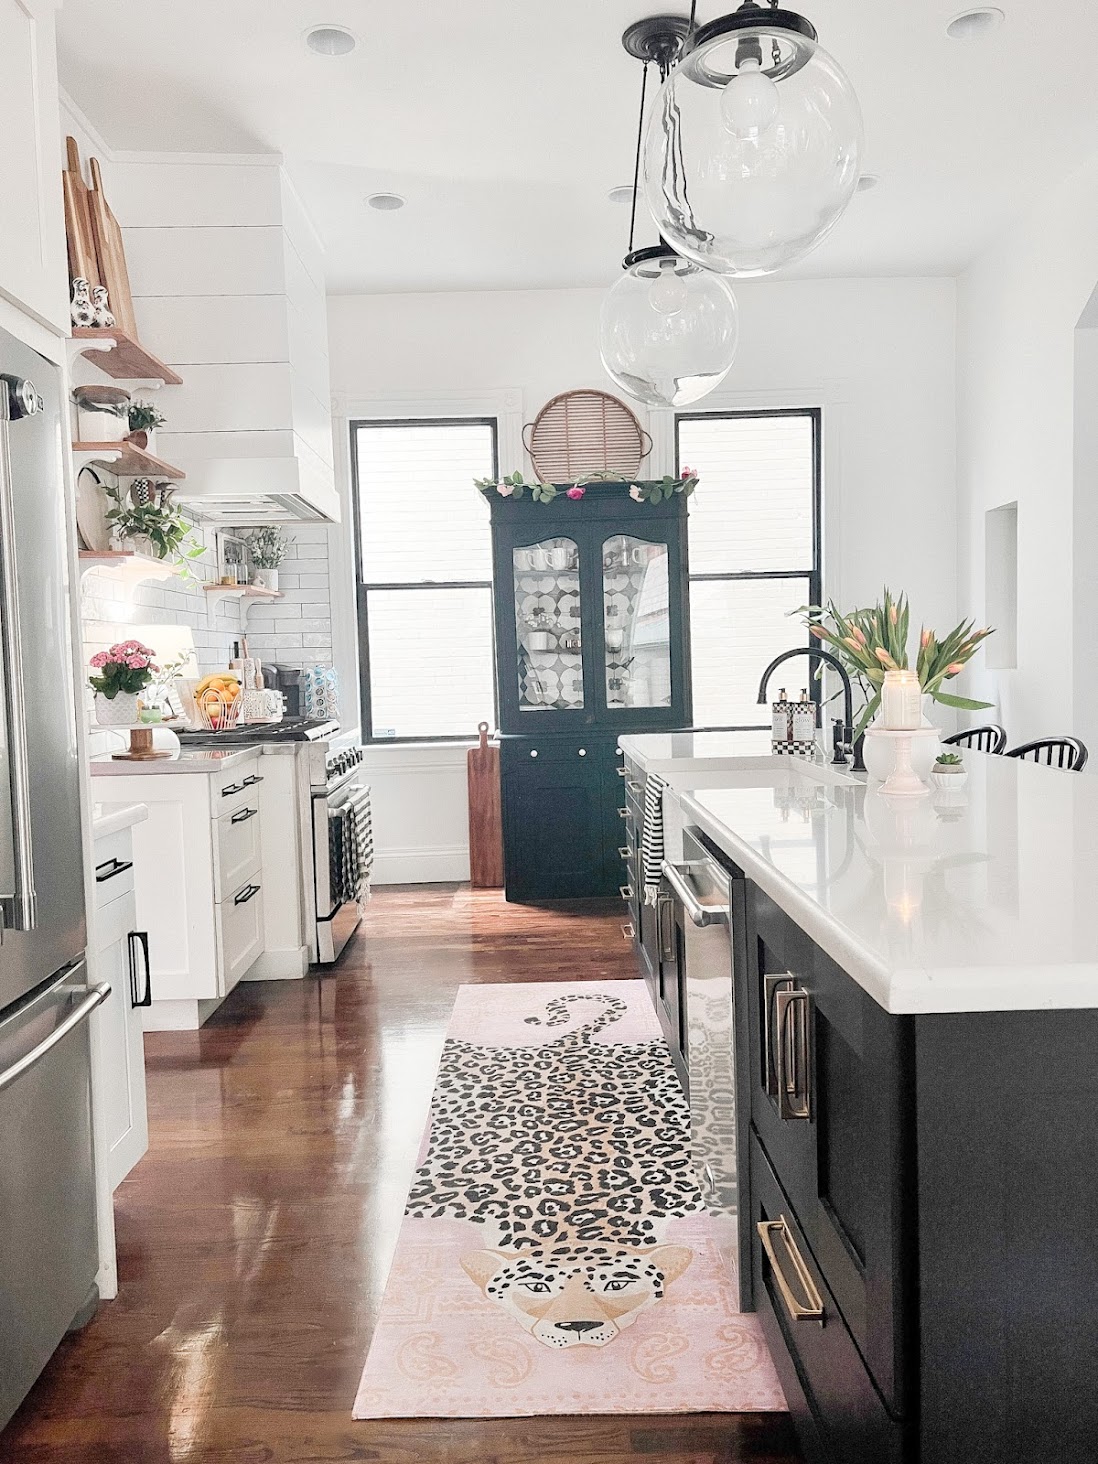
Update an Island With Paint
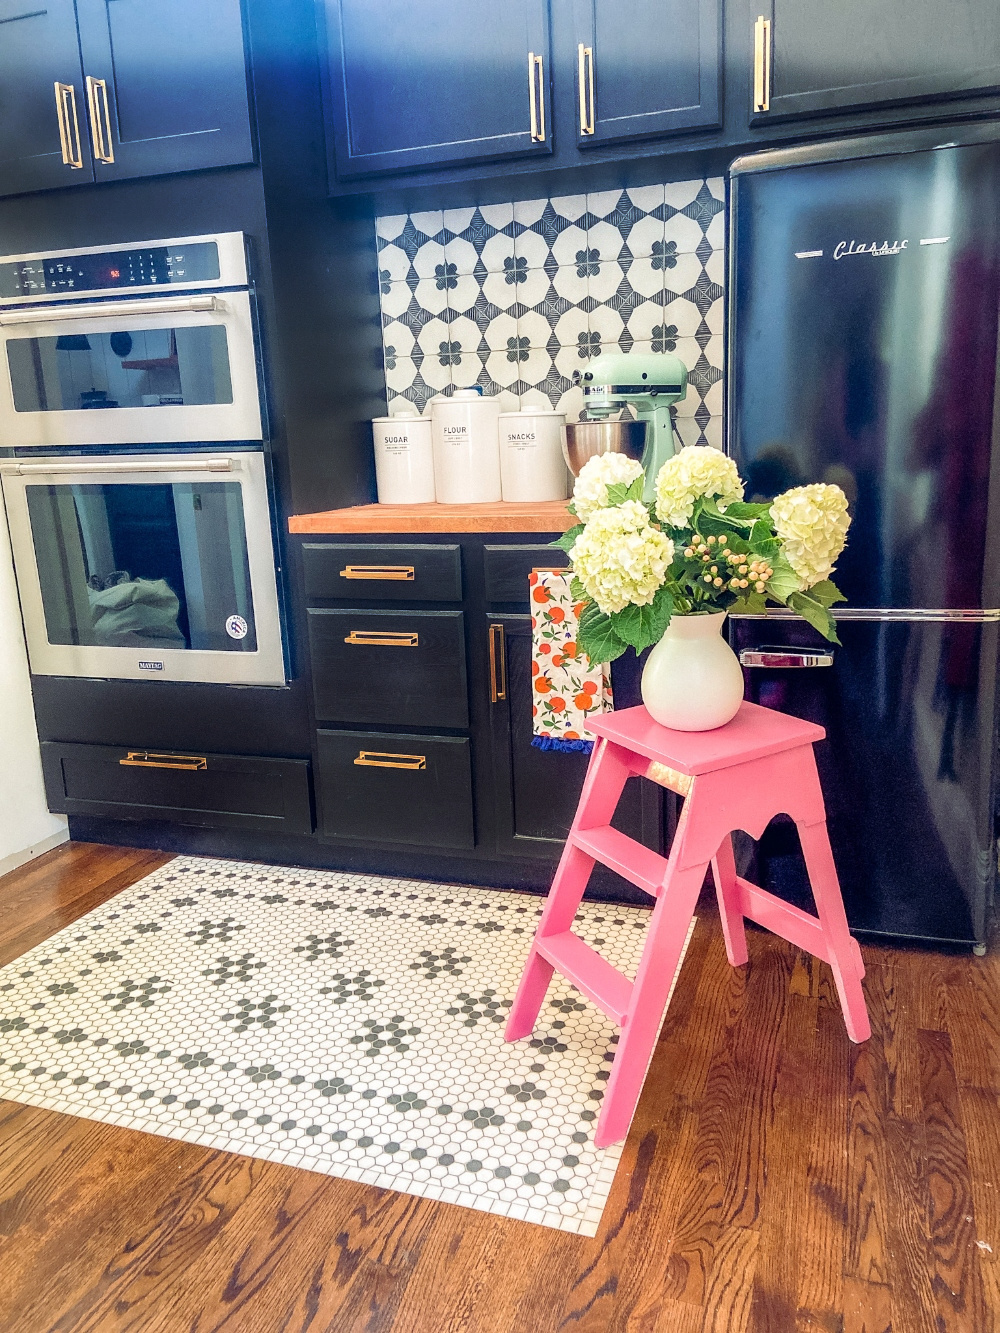
The wood island had been around since the 1990 remodel and the stain had faded, plus it had a lot of chips and worn parts. I decided to paint the island black to match the finish of the globe pendants. I sanded the small chips and used wood filler to fill in the larger chips. Then I sanded everything down evenly and primed the island with two coats of primer. Then I painted the island, the island cupboard doors and drawers black. The black color grounds the island and contrasts with the wood floors. This summer we plane to refinish the wood floors a much lighter color, which will make the contrast even greater. I think it is going to be beautiful! I will update this blog post with new pictures once that project is done.
Classic Hardware is Timeless
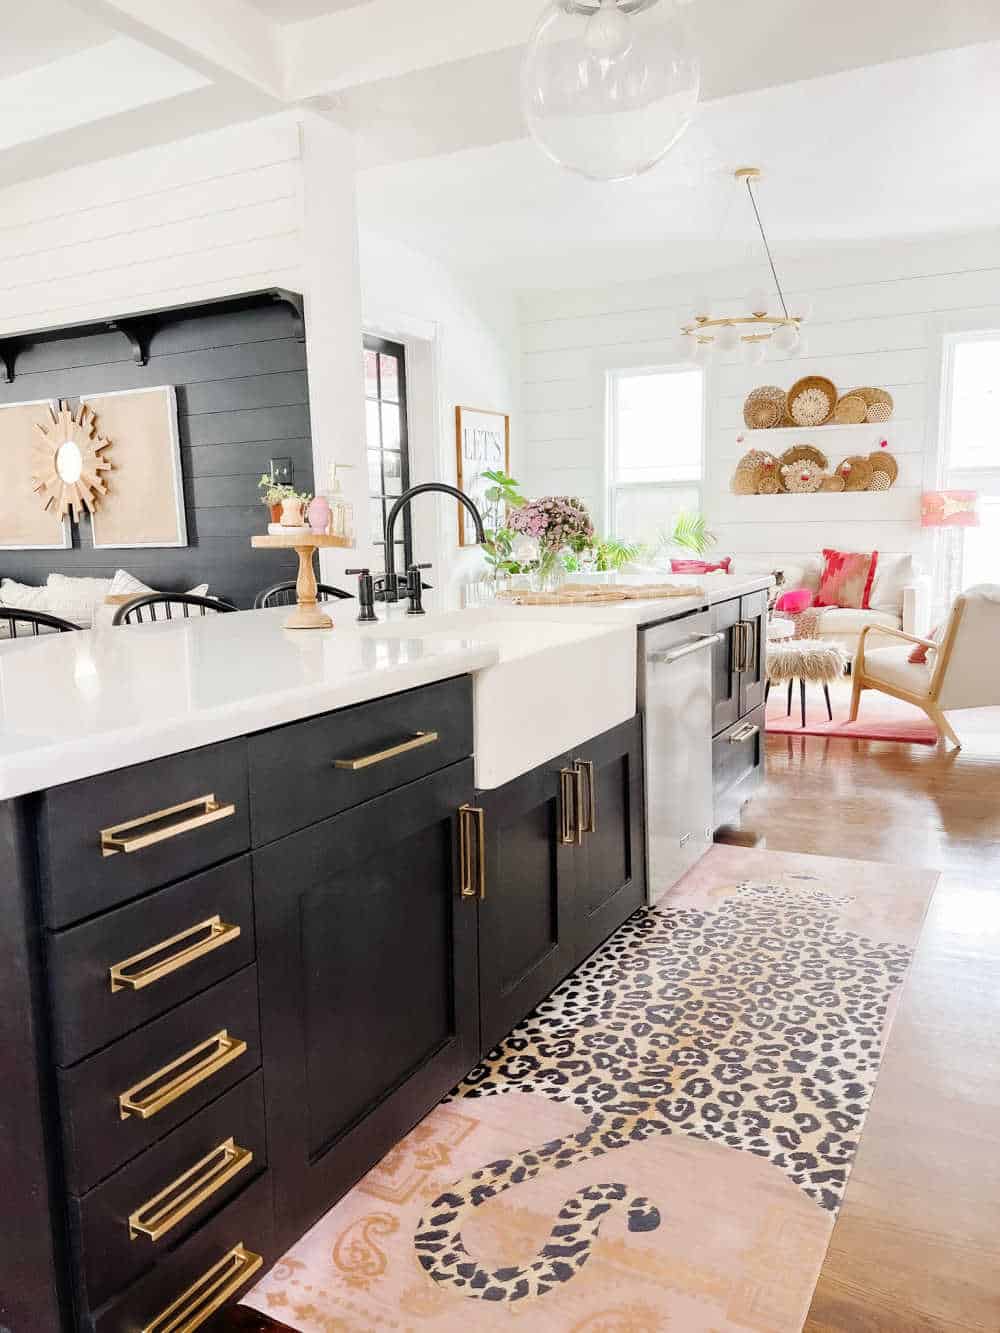
Another way I made the kitchen remodel seem more high-end that the budget was is through adding really high-end hardware. The hardware really elevates the remodel and doesn’t break the bank. I used a beautiful, heavy gold handle with a backplate from Rejuvenation. When you pull the drawers and cabinets you can feel how sturdy and well made the handles are. I kept the original lower drawers and even though I plan to reface those cabinet doors eventually, the handles on those old drawer and cabinet front look great and help gloss over the fact that they are original. For now.
Planking Adds Character

Another element that I brought in was super wide planks that we installed above the subway tile. Planking is an element that people did use at the turn of the century before drywall was invented. And given the age of our home, I thought it was a great way to bring in some character to the upper walls. We saved money by using plywood which we ripped into 10 inch widths, mitered the corners and painted white.
Boxing in Existing Stove Hood

Another way we saved money was building a box that fits over the existing range hood. The range hood was in good shape so we decided to create a box to create a focal point. The planking above the subway tile ties in with the hood so the planks continue all the way across the kitchen wall. We actually kept going past the kitchen with the planking to tie the new family room to the kitchen and planked that whole side of the house. We added a new fireplace in the family room which the planking goes over. I think having the planking go from the kitchen, over the hood, into the family room and over the new fireplace really ties the two rooms together. Originally the family room was the dining room and as I reconfigured all of the rooms, turning the dining room into the family really made more sense. This way the two rooms are joined and it feels like it flows so much better.
Adding a Back Pantry
Another project that we tackled in the kitchen remodel was adding a pantry behind the kitchen. When we bought the home, the room behind the kitchen was a sauna. The people we bought the home from took the sauna out and we had a blank room there. They had a laundry room in the basement, but since we turned the basement into a separate apartment, we needed to bring the laundry room back upstairs. So I separated that room into two sections. One is a new laundry room and the other is a pantry with a little baking station, a retro fridge and a farmhouse sink on a thrifted 1900 bread cabinet. I divided the room into two parts with antique french doors I found online and spent the summer stripping to expose the walnut wood. I love that we can shut the doors when we are doing laundry to keep the pantry quiet, but the sun comes into both sides of the room through the french doors.
Adding a Sense of Continuity to the Pantry
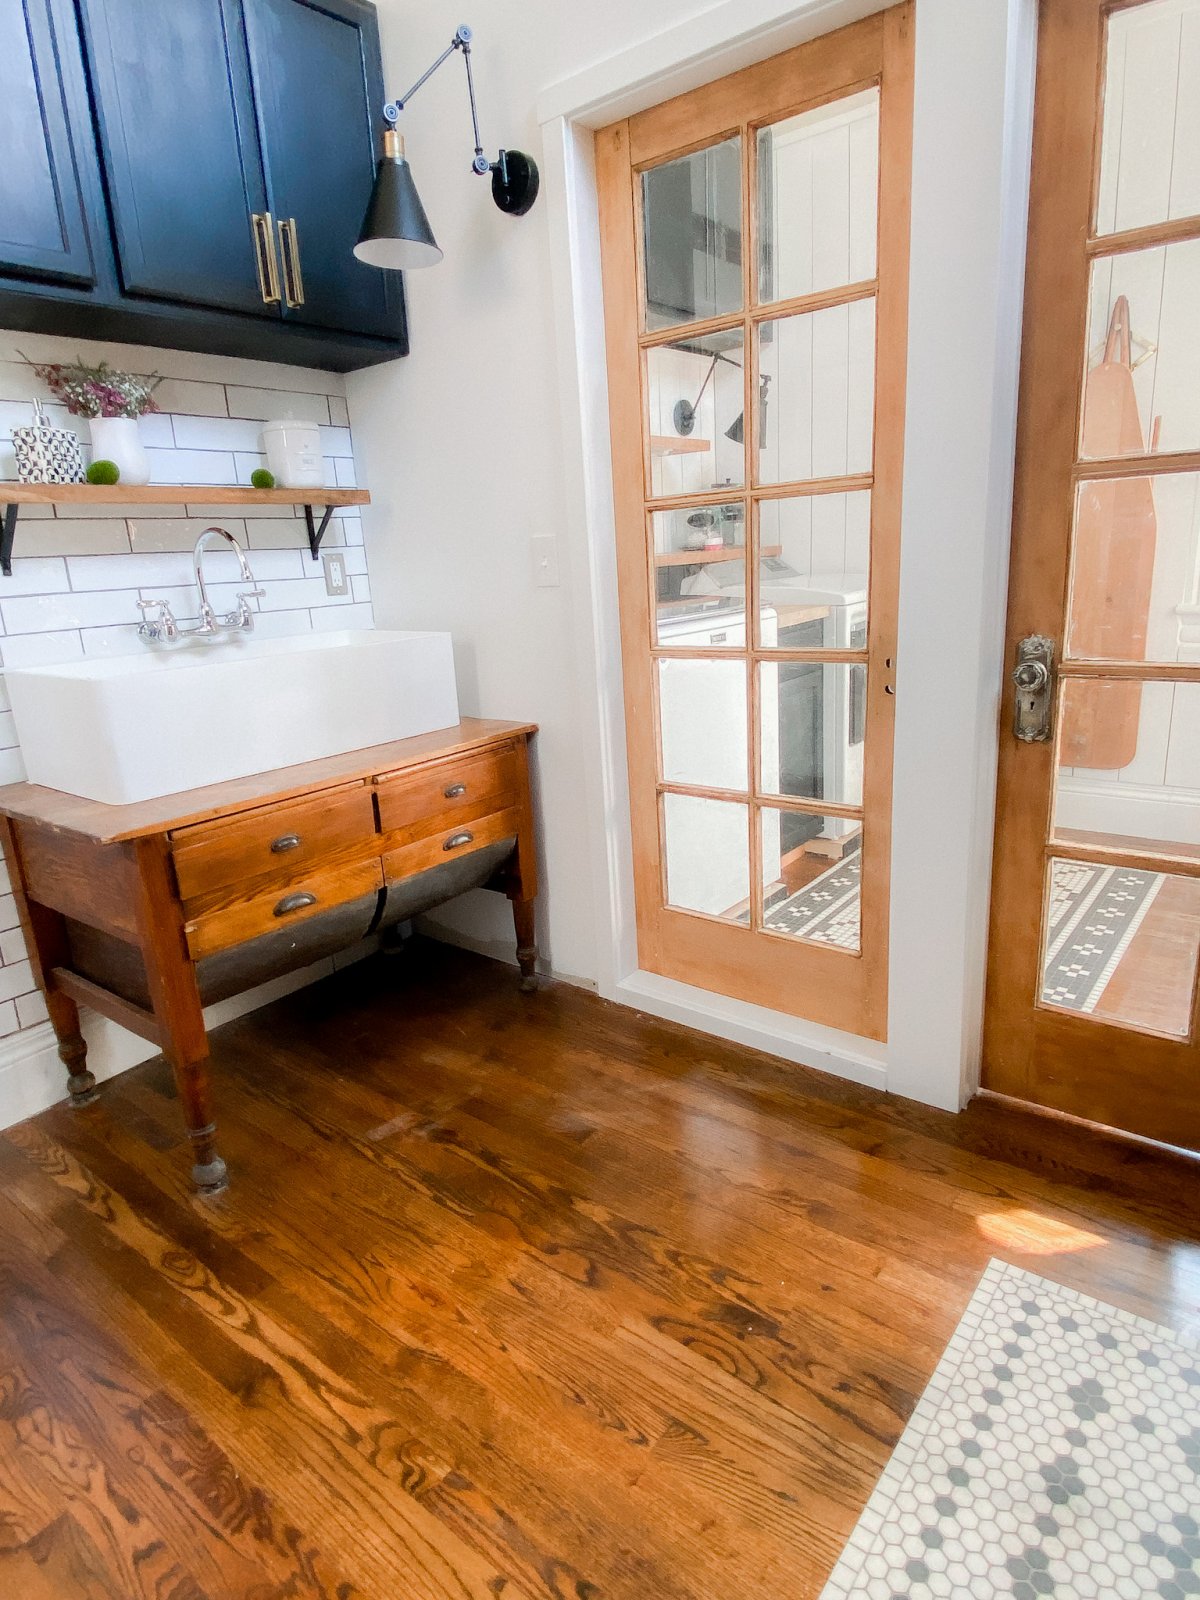
I tied the pantry to the kitchen by painting the pantry cabinets the same color black and using the same hardware.
Adding a Dish Cabinet
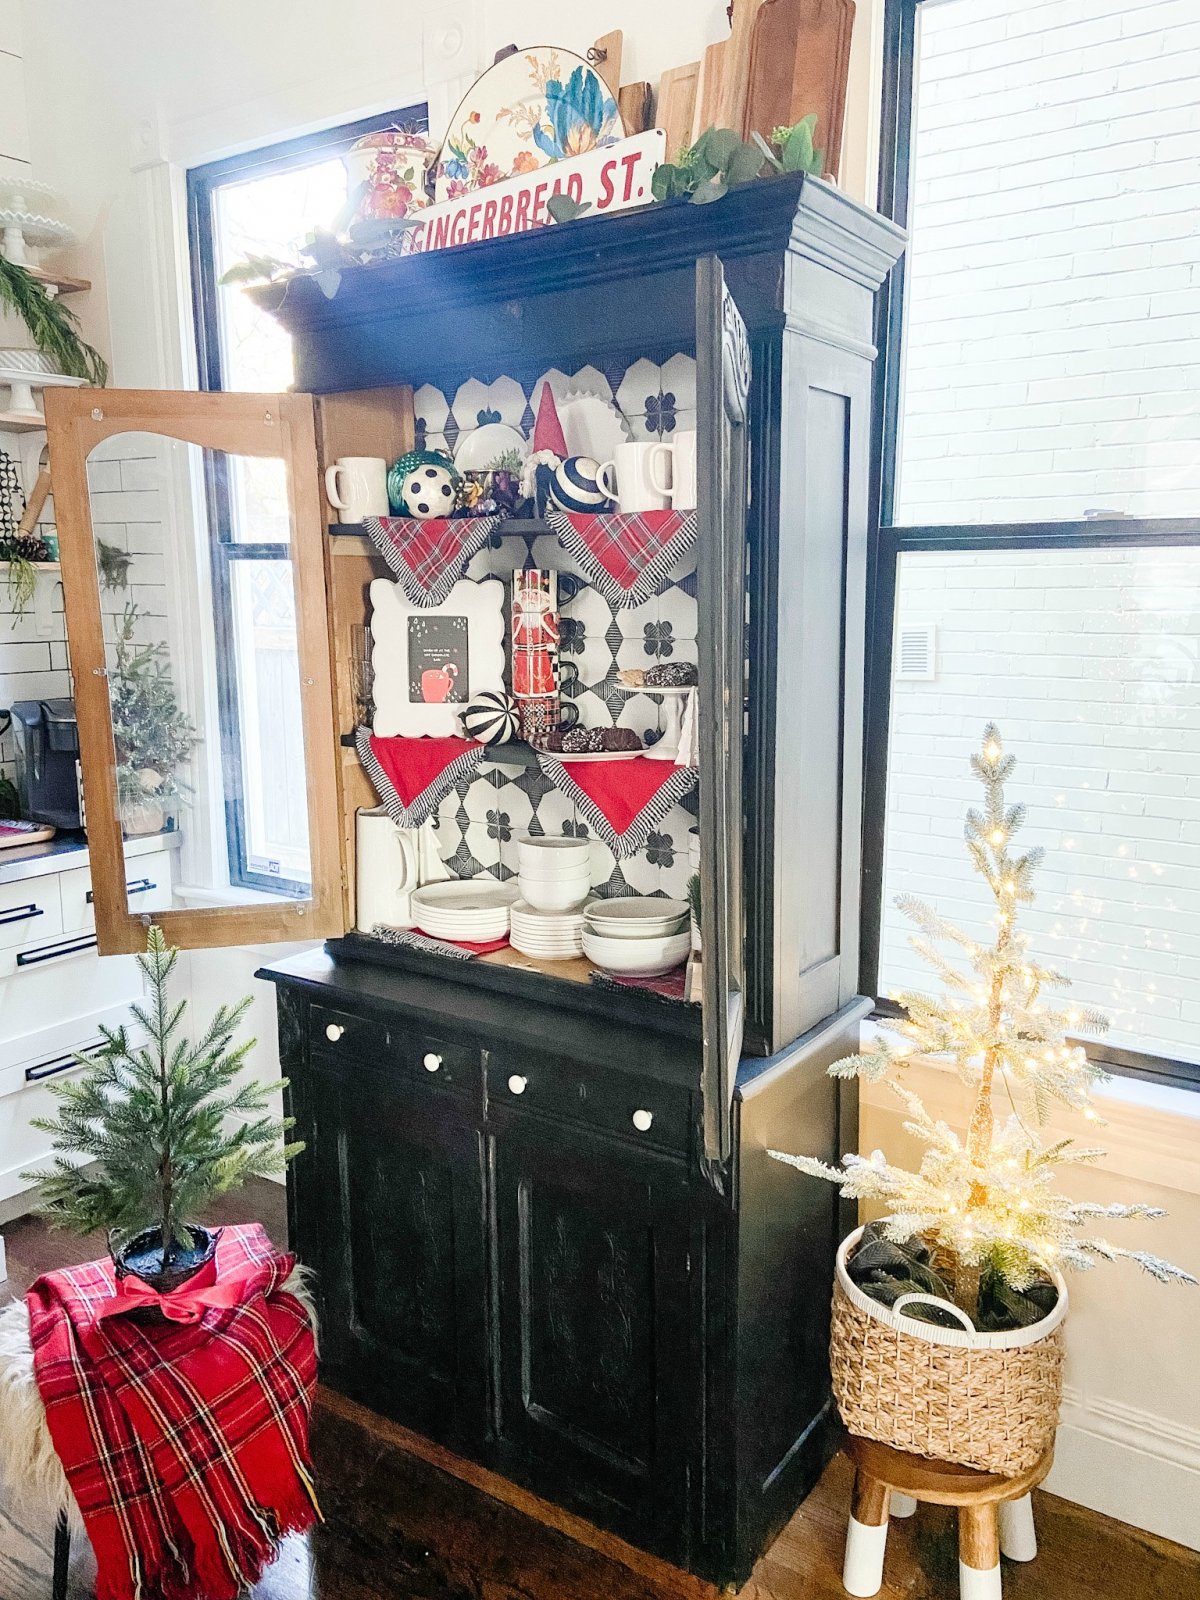
Another element that a lot of kitchens had was a dish cabinet. When we bought the house there was an awkward pantry cabinet in-between the two kitchen windows. It was quite deep and it really made the kitchen layout strained because it made working at the stove cramped. We took that cabinet out and replaced it with a much less deep antique cabinet. The cabinet was originally a gun cabinet around 1900. It is painted the same black color as the kitchen cabinets. The top part of the cabinet has open doors. Black and white graphic cement tiles give it a modern update. Being able to see the pretty glass-wear and dishes inside the cabinet is so nice. I keep serving ware and pots on the bottom shelves which are covered by wood doors. I also used the same cement tiles in the pantry to tie the kitchen and pantry together.
A Classic Timeless Kitchen
We love our new classic kitchen! I love how we incorporated classic elements with a modern twist for a kitchen that reflects our love of our 1891 home. We still have some projects that we are working on to make our kitchen even better and more beautiful. Come connect with my on Instagram at @tatertotsandjello, where I share DIY home projects and behind-the-scenes inspiration. I am also a realtor with City Home Collective in downtown Salt Lake City. I help people find their homes and remodel them to make them come to life!
More Remodeling Ideas
Here are a few more projects we have tackled at the 1891 cottage!
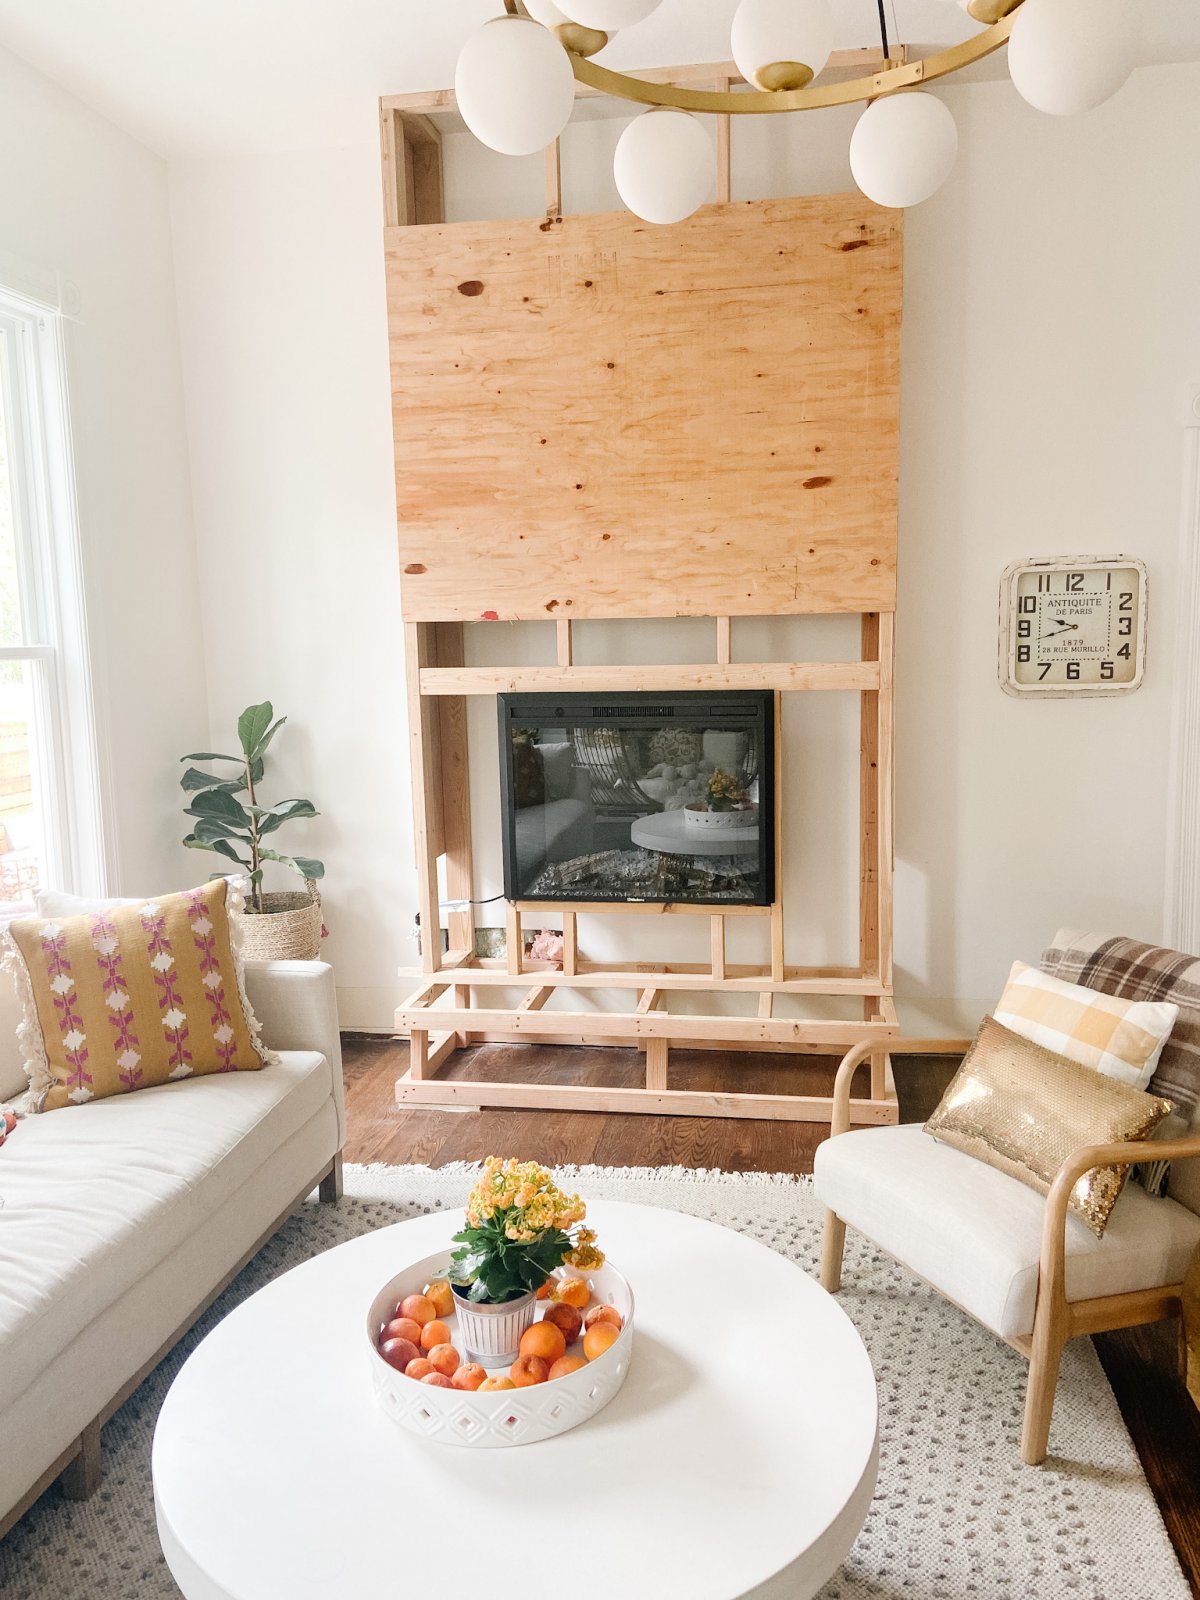
How to add a new electric fireplace to your home
How to Add a New Electric Fireplace to Your Home. Fireplaces provide a cozy focal point and heat to your home. How to choose an Electric Fireplace for Your Home.
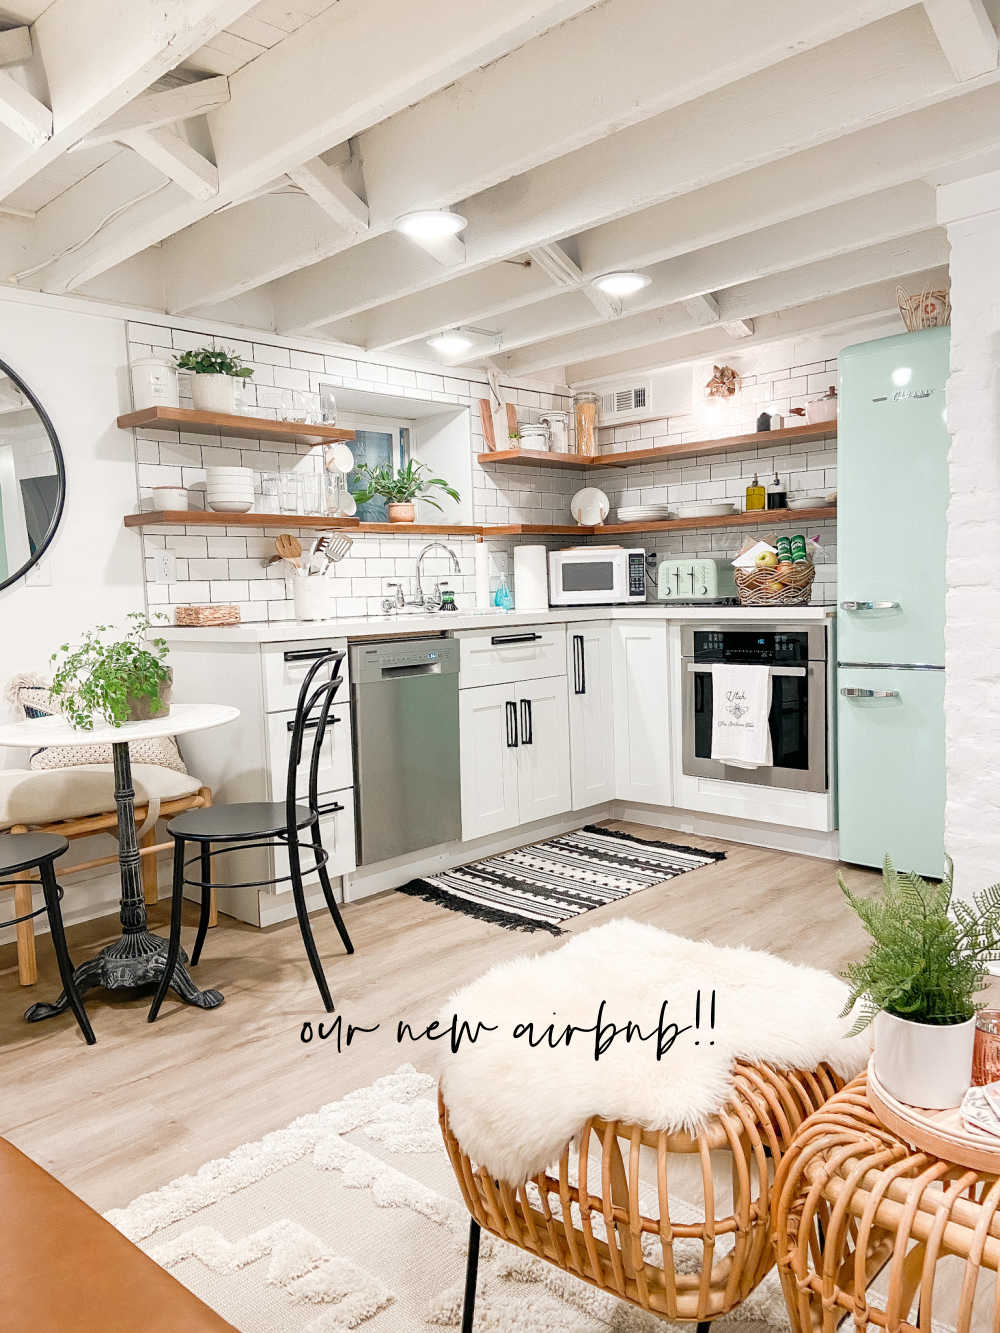
Our 1891 Airbnb Apartment
Here’s our new airbnb apartment! I love meeting new people and running this little side business!
Have a Beautiful Day!
xoxo


Jen! Your kitchen is stunning!
Your kitchen is absolutely gorgeous Jen. Your island is so stunning and the open shelving is styled so beautifully. Thanks for all the inspiration.
Two words, well done!! And, three words you used, timeless and subway tile. Truth in decor 😄!
Jen, there are so many things that I love about your kitchen. The hardware is elegant on the black island. Love the tile inset in the floor. That beautiful playful runner gives the room an unexpected surprise. The shiplap walls keeping with the era of the home. So many great ideas here!
Wow! What a great transformation. I love it.
That transition is amazing! The space really brightened and opened up so much, I love it so much! Thanks for sharing!
Thanks Anne! It’s coming along. I am so happy with it so far 🙂
xoxo
So many great suggestions Jen to update a kitchen. Love the pendant lights and your beautiful kitchen hardware.
Thanks Wendy!! They are two of my favorite things!!
xoxo
Jen,
I love these ideas and can’t wait to share this on Tuesday.
Thank you! I’m so excited to share everyone’s kitchen posts!!
xoxo
Love! Great idea to cover the stainless steel hood! Can you share source of your kitchen grub?
Hi Vicky! Thanks!! Which source are you looking for?
xoox