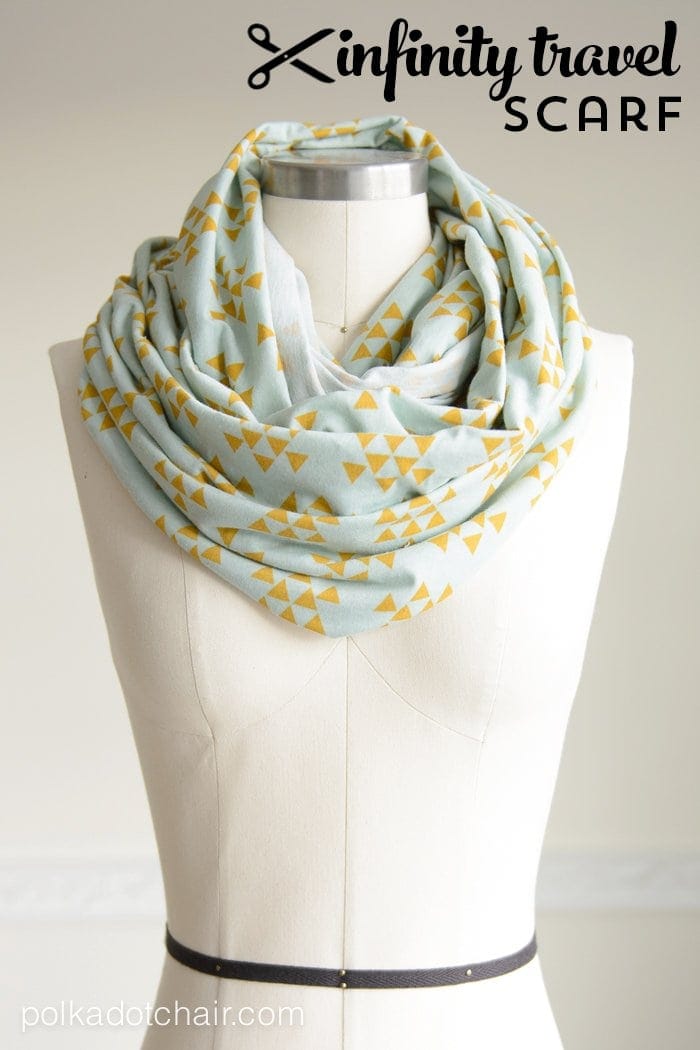
Hello Tatertots and Jello readers! It’s me, Melissa from the Polka Dot Chair. Today I’m going to share with you a tutorial on how to make one of my “go-to” travel items, a snap-up infinity scarf.
I purchased a similar scarf at a very popular athletics store a few years ago and drug it around everywhere with me. When it was time for a new scarf I decided that instead of purchasing a new one, that I would just make one instead.
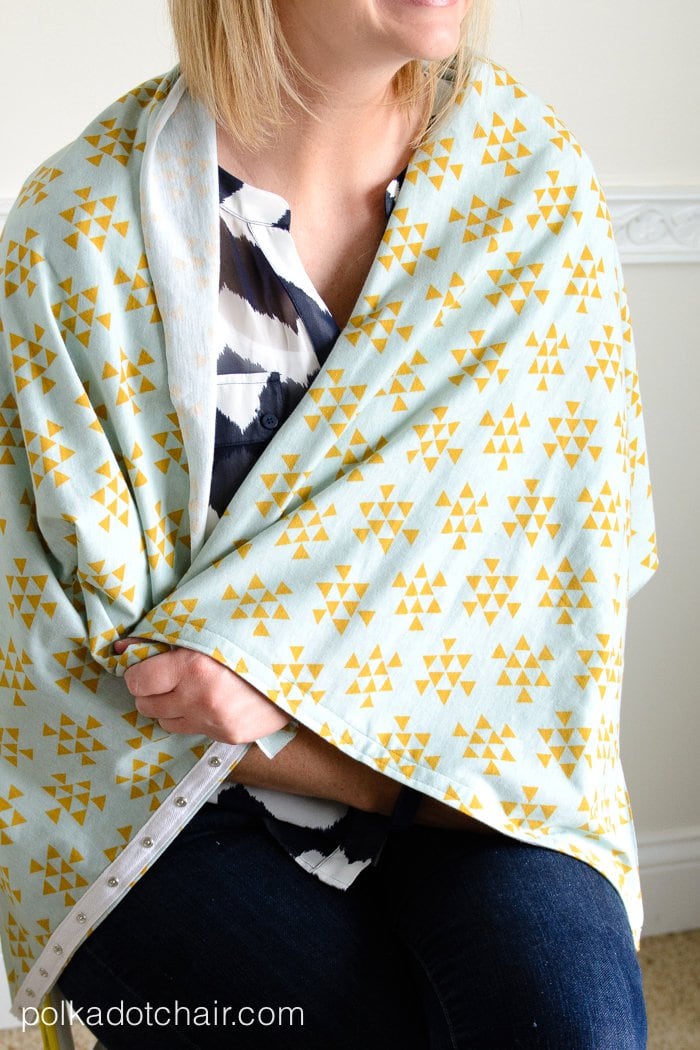
I love this infinity travel scarf because it is perfect for road trips and airplane rides. When snapped up the scarf just looks like a normal infinity scarf, but unsnap it and you have blanket for an airplane or a shawl for long car rides. Mine goes with me every time I travel. I especially love it when I’m traveling during the summer and it’s too warm to take a blanket or coat on an airplane. Those planes can get very cold! You can even adjust the snaps so that it doesn’t fall off of you when you move around on the plane.

This scarf is made from Jersey Knit fabric, you could also you a Ponte Knit or a Cotton Lycra Knit. Not sure what I’m talking about? Check out this post on my blog that explains what the different types of knit fabrics are, and what they are used for. With all of the cute knit fabrics on the market now it should be easy for you to find one that you love to make this scarf. In fact, it’s so quick to stitch up that you could make few if you like.

Okay are you ready to make one? You’re going to need:
1 yard of 58-60″ wide knit fabric
1 yard snap tape
Thread
Needle
Zipper foot for Sewing Machine
Step One:
Wash and dry your fabric. Knit fabrics are a bit different than quilting cottons in that they need to be pre washed and dried before you use them.

Step Two:
Cut your knit fabric into a rectangle that is 28″ wide by 58″ (or the width of your fabric). Cut the selvage edges off of your fabric.
(tip: use a rotary cutter when cutting knit fabrics to get a clean edge)
Cut your snap tape to 28″ long
Step Three:
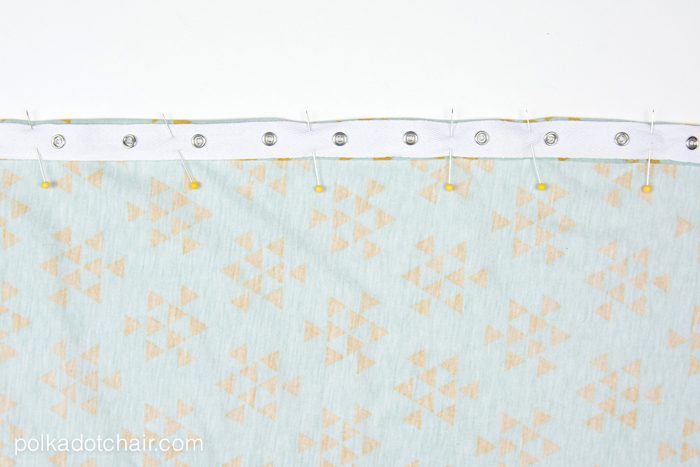
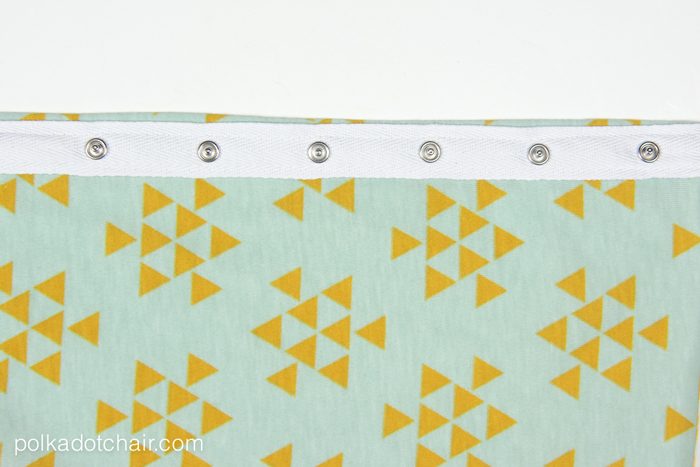
Fold under one of the 28″ sides of the fabric 1″. The wrong sides of the fabric should be facing. Separate the snap tape.
Pin one side of the snap tape to the fabric on top of fold. Double check that you have the correct side of the snap tape facing up. Have the tape about 1/16″ from the fold of the fabric. Pin well.
Install the zipper foot on your sewing machine.
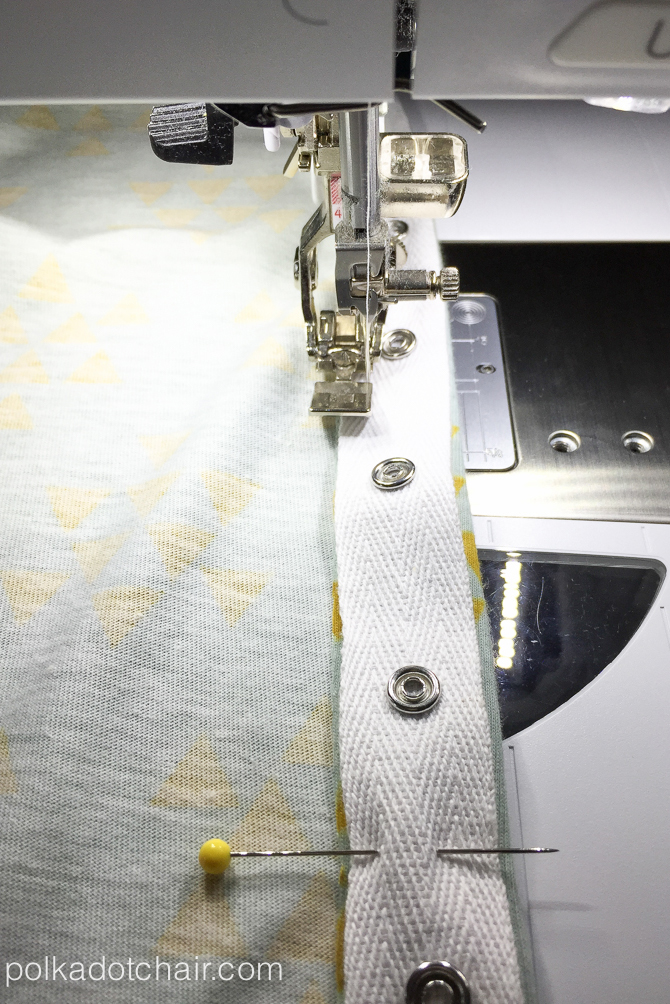
Stitch the snap tape in place along one edge of the tape. You’ll need your zipper foot so that you can keep the foot of the sewing machine out of the way of the snaps.
Repeat for the other edge of the snap tape (you may need to move your needle or readjust your foot depending on your sewing machine).
Step Four:
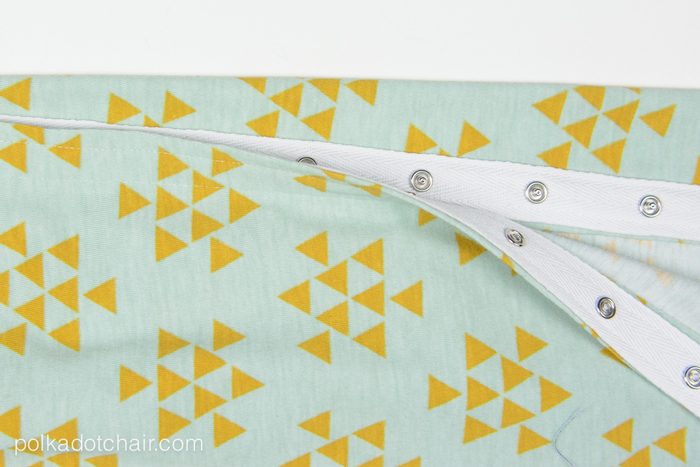
Fold the other 28″ side of the fabric down 1″ . With the wrong sides of the fabric facing. Pin the other half of the snap tape to the RIGHT side of the scarf on top of the fold. Make sure the correct side of the snap tape is facing up and that it lines up with the snap tape you stitched to the other side.
Stitch in place the same way you did in step 3.
Step Five:
Trim edges even. Clip strings and you’re done! Since knit fabric does not fray there is no need to hem the long edges of the scarf!
Thanks for having me today Jen!!
*********
Thanks Melissa! Isn’t she amazing? I just love this idea and it looks so great too! Melissa has tons of inspiring ideas on her blog. Here are a few I think you’ll love:
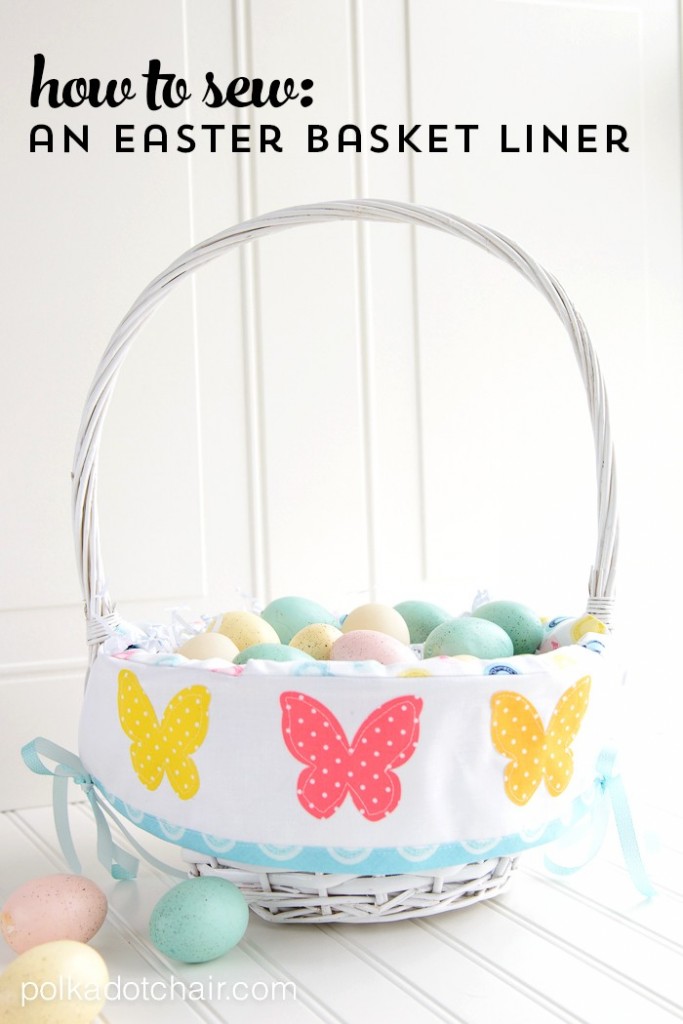
I love her easy tutorial for an Easter Basket Liner! So perfect to make your Easter baskets extra special!
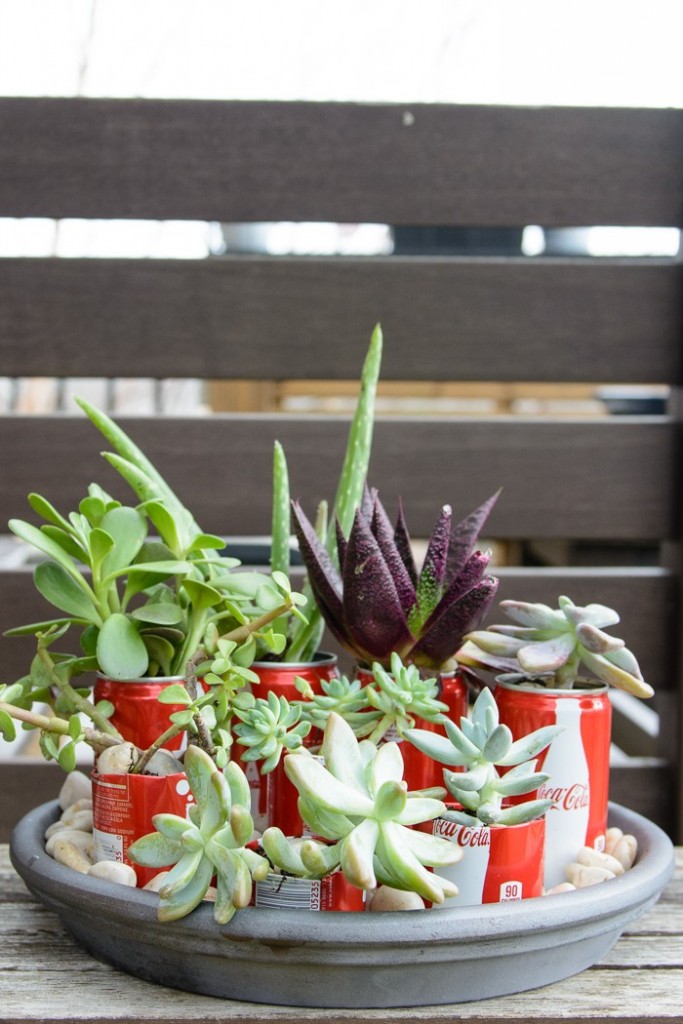
And if you’re looking for an outdoor project, I love this cool idea for a DIY Coke Can Succulent Planter!
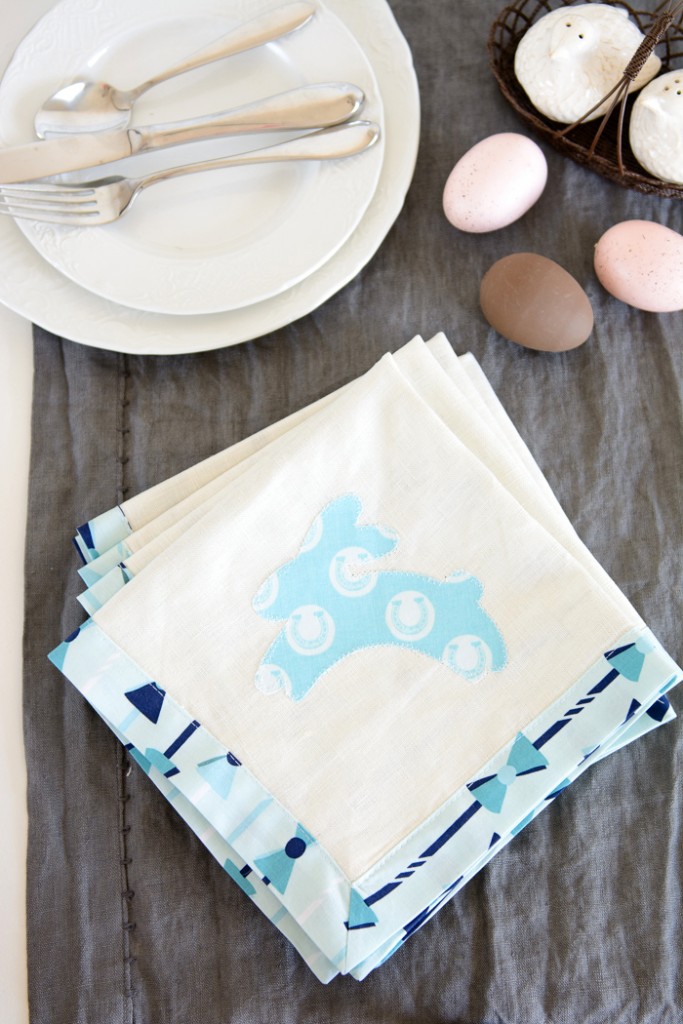
And, if you can’t find the perfect Easter napkins for your Easter meal, she’s got you covered with this tutorial on How to Sew Easter Napkins!
Visit Polka Dot Chair and


Twitter
gqqrbsdgrg http://www.ghxv57xa63u7c8cs0t46928n52pwh9i4s.org/
agqqrbsdgrg
[url=http://www.ghxv57xa63u7c8cs0t46928n52pwh9i4s.org/]ugqqrbsdgrg[/url]
I used snaps instead of snap tape on one of these but I’m finding it very hard to pull apart the snaps. The fabric is part spandex so maybe it’s too stretchy? I just folded over the fabric once and applied the snaps. Do you know how I can fix this so that it’s easier to pull apart the snaps?
Thanks!
I absolutely love this idea!! I find it so hard to find patterns I love and when I do the scarf is like $30. Such a cheap and fun alternative! Is it possible to hand sew the snap tape rather than using a sewing machine?
This is such a good idea! Hopefully come September we will be flying with two babies under two and this would be perfect for me to make & wear so that I don’t have to pack bulky blankets in a carry on for them! So excited to try this!
i really like the idea of using the “snap” ribbon to make it into an infinity scarve! I never thought of that before. Thanks!
XO
Dawn
http://www.BrilliantOrchid.com
Love to make crafty things!! Help any ideas?
THESE would be great for NURSING HOME RESIDENTS…WHO are often chilly or cold!
These would be great for nursing homes…where pple are almost always cold! I’m going to try one…
So the snap tape goes on the back of both sides? I’m wondering if there is a reason it doesn’t go wrong side on one and right side on the other so that it lies flat when snapped? Am I missed something logical in the way it snaps?
Bev, I just reread the directions and step 3 and 4 have you put the snap tape on the right side of one end and wrong side of the other end. I also agree that buying 28″ of fabric makes more sense than a full yard if you don’t need it all.
Ah, yes! I failed to read that closely enough. A bad habit of mine. Thank you. As for the 28″, I found that my knit shrunk so much that after trimming the ends even, I had very minimal waste. I needed the whole 36″, but I guess this would depend on the knit. Love this tutorial. Thanks for sharing it. I’m going to make my daughter and DIL’s all one off these!
Where did you purchase that fabric??
I need to make one for myself! I’m always cold on airplanes!! I’ve got a Craft Gossip post scheduled for this morning that links to your tutorial:
http://sewing.craftgossip.com/tutorial-infinity-travel-scarf-thats-also-a-lightweight-blanket/2015/03/27/
–Anne
Love this idea! I would just purchase 28 inches if that’s all that’s needed.
My thought exactly. Why purchase a yard for 28 inches?
OMG, your scarf idea is genius!
Wow. So interesting idea.Thanks !
love the scarf and your haircut!
Love the scarf idea. Thx for sharing!