![]()
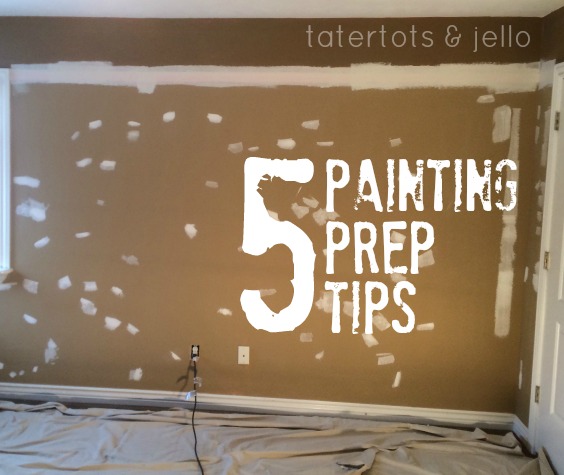
When you’re undertaking a major painting project, spending a little extra time on paint prep goes a long way. Today I’m going to share not only 5 great tips for paint prep, but I’ll also show you my tips for making straight stripes on a wall – every time! (Well, nothing’s ever perfect, but these tips help your walls look their best!)
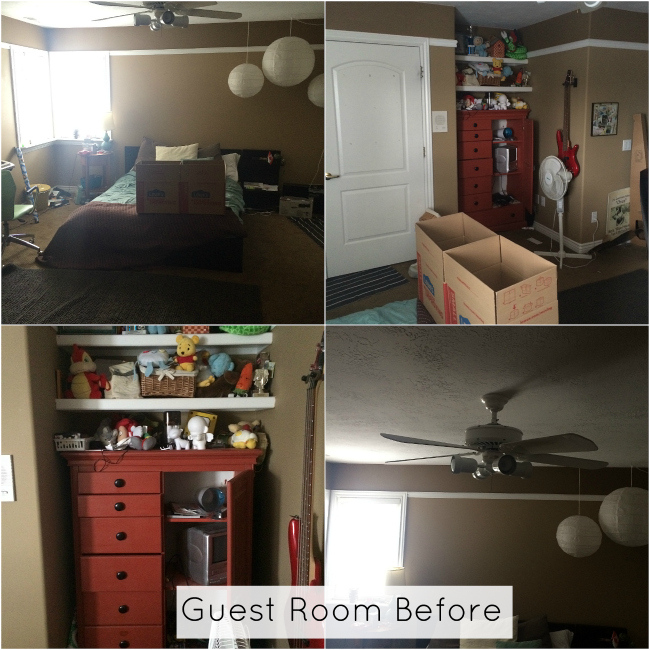
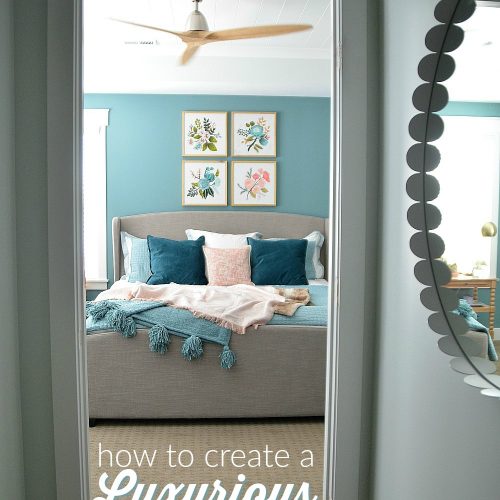
Thanks to Valspar Paint, I’ve been working on some room remodels in my home! My oldest is in his second year at college (no, I can’t believe it either), and so he gave permission to turn his former room into a guest room. As the only boy, his bedroom has its own, adjacent bathroom — a luxury he enjoyed with three sisters jockeying for bathroom time. I spent some time on the Valspar Paint web site with two super cool features: the Color Selector, which helped me find just the right shades, and the Virtual Painter, where I could fill in the walls of my room just by uploading a photo — getting a good sense as to how the paint would work in the space.
Once I chose my color(s), I felt comfortable choosing them because of the Valspar Love Your Color Guarantee — if I got the walls painted and didn’t love it, Valspar Paint would offer me a complimentary replacement. That’s pretty awesome. I’ve painted more than one wall — or room — and discovered that the color just did not work for me — and now I can feel even more comfortable decorating with color! (Not that I’ve ever been shy about that!)
I’m going to share the full reveal with you next week, along with some project how-to’s to follow. But as I planned this room remodel, I realized that in the almost 12 years we’ve lived here, we’ve put some wear and tear on the house. So before I could paint this guest suite (sounds fancier when I say it that way), I had to do some cleaning and prep work. So today I’m previewing this bedroom remodel and sharing 5 painting prep tips AND how to paint perfect wall stripes!
As you can see by the image above, we had some work to do! We had to remove a tall chair rail along the top of the wall. We had to clean up about 4 different paint jobs as well as clean up some poster adhesive. And then we were able to get down to the serious prep — tips that can help your walls look their best!
PLUS Valspar Paint is giving away FREE 8 oz sample kits to 10 TT&J readers! Learn more below.
Let’s get started:

Painting Prep Tip 1: Remove all the Switch and Outlet Plates, Then Tape Them Off
This might seem obvious, but it’s amazing how many rooms I see where this hasn’t been done. Grab a flat-blade and a Phillips screwdriver and remove all of the switchplates and outlet covers. As you can see in the photo above, we did NOT remove the entire faceplate from the coaxial cable plugs – we just unscrewed them and pulled them away from the wall. Take some masking tape and cover the plugs and switches. No, really, do it. You will thank me later. And be careful not to touch the sides of the switches or plugs. And once you’ve removed the switch plates, take a good look at them. Are they cracked? Broken? Grimy? You can wash away grime — even putting them in the dishwasher — but these wall plates are inexpensive. Don’t hesitate to replace any that look worn. And if you could see a bit of drywall around the edges of one of the switchplates, go buy one in a slightly different size. You can buy them oversized (sometimes called “jumbo”) to hide any flaws.
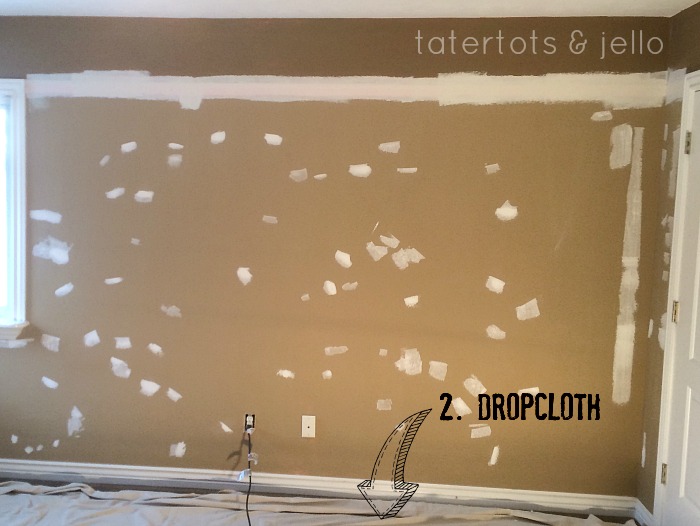
Painting Prep Tip 2: Use A Dropcloth — The Right Dropcloth
For years, we used plastic dropcloths. They were cheap and disposable. Finally, a few years ago, we spent a little extra money and bought some large canvas dropcloths. They are SO much better. They don’t move around under your feet like plastic ones and they absorb the paint more so you don’t track it as much. There’s a reason professional painters use this kind — follow their example! I’m still using the ones I bought 18 months ago for the big cottage remodel and they’re in great shape, although they’re certainly multicolored by now.
Make sure your dropcloths are tucked up neatly against the walls you’re going to paint. And if you’re doing the ceiling, be sure to cover every inch of the room. If you’re planning to walk in and out while painting a lot, you should also cover where you plan to walk, or at least be sure to take your shoes off just in case.
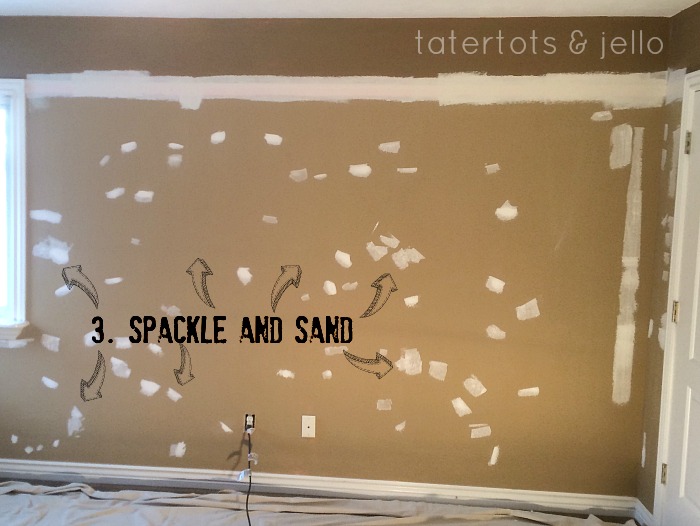
Painting Prep Tip 3: Spackle and Spackle Again
It is so hard for me to be patient with painting projects. I just want them done! However, I’ve learned that I have to be patient … and it makes a huge difference in how good my walls look! Here’s what you’ll need to do. Get some of the cool spackling that is pink when wet and turns white when dry — then you know it’s safe to sand! You’ll also need a flexible putty knife (like a spatula) and sandpaper or a sanding block (my favorite). Sand or trim away any rough edges on nail holes or any other wall damage — the paper in the drywall will stick up and make it harder for you to smooth. Then, apply your spackle, allowing it to be a tiny bit thicker than the wall. Once it’s dry, sand it smooth and do as many additional spackle coats as you need. Take your time sanding … the more you sand the better your painted wall will look. (You can find additional wall prep tips from Valspar Paint here.)

Painting Prep Tip 4: Test Your Paint Color
It is TOTALLY worth the small extra cost to buy the small sample jars if you’re not sure exactly what color you like. You can get them at your local Valspar Paint retailer (I get mine at Lowe’s) or order them directly from Valspar Paint. Even when you’re a serial remodeler like me (I can quit anytime), you are still likely to be living with this color for at least a few years. It’s worth a few dollars to pick up a small sample jar and paint a section of the wall. Let it dry for a day and see what you think. Does it work in the room? Does it work with the existing trim, woodwork and furniture? When you’re sure you have the color you want, here’s my bonus tip: Spring for the top-of-the-line stuff (I love Valspar Signature). It will paint more smoothly and cover in fewer coats. I choose the Valspar Signature because it’s paint and primer in one, saving me a lot of time.
Painting Prep Tip 5: Use GOOD Masking Tape, and Plenty of It
I have used a lot of masking tape, and I’ve finally learned that buying a good brand (I use Scotch Blue Edge-Lock Paint Line Protector) and taking my time to apply it makes a world of difference. I used to be less fastidious about putting it on. But take your time with taping your molding, ceiling, and anything else you don’t want painted. Run your fingernail along the edge and make sure it’s straight, and then go back over all of it again before you get ready to paint. It is tons easier to get the masking tape right than have to go back and correct your accidents — I know from experience!
* * * * *
How to Paint Perfect Wall Stripes
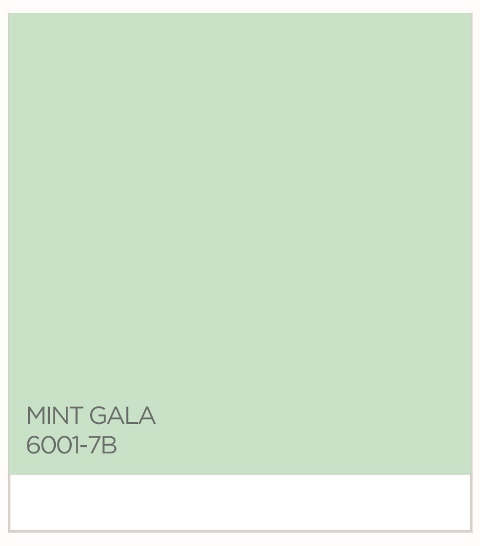
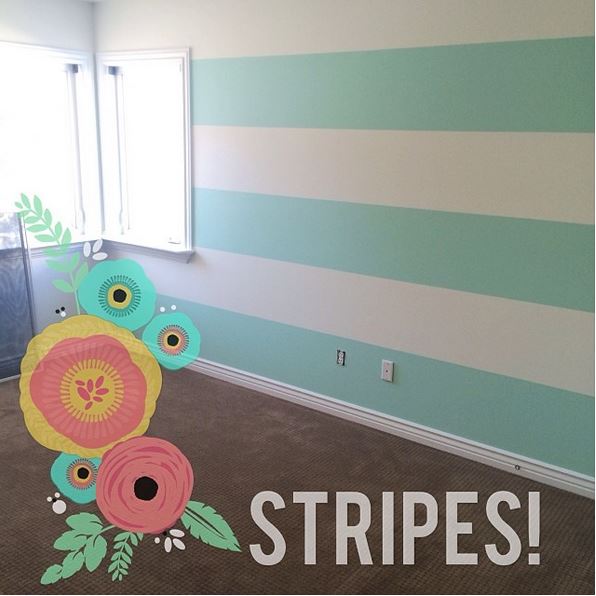
I knew that I needed a focal wall in this guest bedroom, and I was in love with the Valspar Mint Gala color. So I planned to paint wide, horizontal stripes on the wall facing the door. As you might have seen on Instagram (above), I love the way they turned out!
Here’s how I paint perfect wall stripes. (Well, nothing’s perfect, but these are the best I can do!)
These steps assume you’ve already painted the wall the lighter color … we’ll paint the darker color last. (It’s easier to paint dark over light than vice versa!)
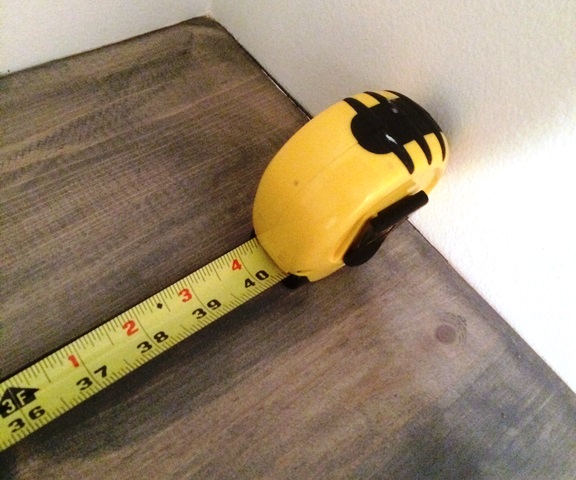
(above: measuring width)
1. Measure and Do Math
I measure the height of the wall from the top of the baseboard to the ceiling if I’m painting horizontal stripes; the width of the wall from left to right if I’m painting vertical stripes. Because I can’t do math in my head, I sketch the stripes on a piece of scratch paper. If I know, for example, that I want three mint stripes and three white stripes, I know there will be six stripes total. Or if I want three mint stripes with two white stripes in the middle, I’d have five stripes total. So I take my original measurement and divide by the number of stripes. Usually it comes out to some insane fraction, so I fudge a bit until it comes out to be something with a reasonable fraction that exists on my measuring tape, like something and 1/8 or 1/4 (.125 or .25). How do I fudge a bit? I just subtract an inch or so until it works out to be a decent number. I can’t measure something that ends in .317 :). I then add that inch back to the bottom stripe, since optical center is usually a bit higher than measured center and it won’t even be noticeable. The final number is your stripe width.
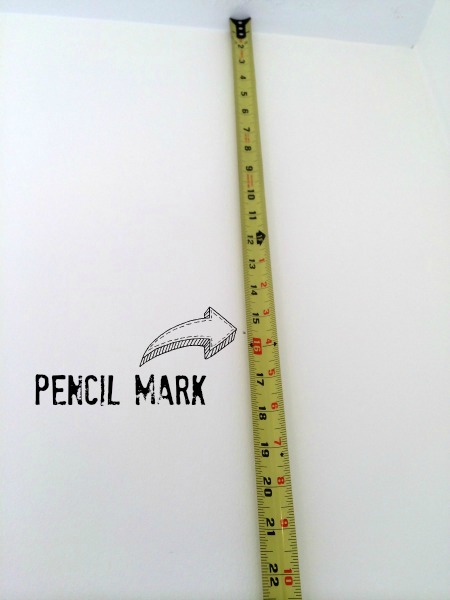
2. Mark the Top Stripe (or Start at One Side)
Take your stripe width and measure it from the ceiling, starting from one side to the other. Measure and use a pencil to mark the proper measurement about every 12 inches. It seems like a lot but it’s worth the extra time.

3. Double-check your Line with a Level
No room is perfectly straight, especially in an older house. So although you measured consistently from your ceiling, the ceiling itself might not be straight. Take a level and check between each pair of marks you made in step 2 to make sure the line is level. Adjust your marks as needed. (See, this is why we measured only the top stripe to start — we’ll base the rest of the stripes from this leveled measurement, which will make the rest go faster.) Some prefer to draw a line along the leveled marks — others are OK with just the marks.
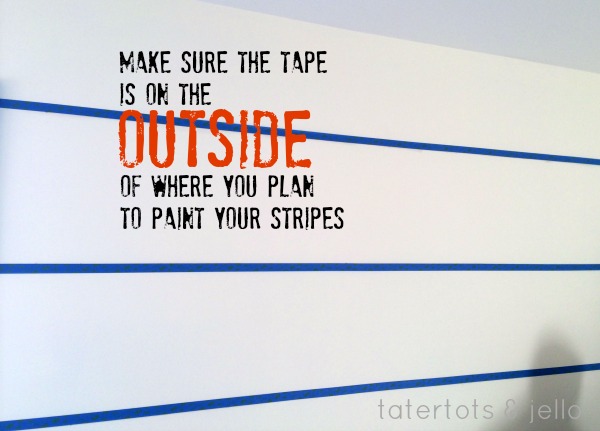
4. Place the tape OUTSIDE the Line
I have to double-check this every single time. Make sure you’re remembering to place the tape on the side of the line where you DON’T want the paint to go.
5. Repeat For Each Stripe
Base your measurement for the following stripes from the first stripe you’ve already made level. You can just do a quick check on each line of stripe marks with your level to make sure you didn’t accidentally mark incorrectly. Remember to place the tape where you DON’T want to paint. When you’re all done the stripes won’t look like they’re the same width because the tape is on the inside of half of them. It will look like every other stripe is thicker than its neighbors — that’s correct!
6. Double-check before you Paint
Double-check all of your measurements and tape placements one more time before you paint. It’s faster to check again now than fix any errors.
7. Paint!
I have always found best results if I remove the masking tape after the paint has dried only a few minutes — so it’s not drippy, but it’s not fully dried, either.
Bonus: Tips For Painting Small Vertical Stripes
I built a floating desk and shelves in a niche in the room (see the picture above). I’ll publish a tutorial soon, but I wanted a little more detail in this niche than just a plain wall. So I created narrow vertical stripes between the desktop and the bottom of the first shelf. Here’s how I did it.
Of course, I followed many of the steps above: I did math, I measured. But instead of worrying too much about equal stripes, I just used masking tape (the ScotchBlue again) that was the width I wanted for my stripes — 1 and 3/8 inches in this case. I marked the center of the wall on the top and bottom and placed one piece of tape centered over that mark. The tape went onto the desktop and the bottom of the shelf — it needs to be longer than the spot you’re painting. I checked to make sure this first piece was level (see first picture below), and checked my lines with the level periodically.
I then placed another tape to the right of this piece, lined up perfectly alongside it. I repeated this until I reached the wall on the right. I then removed the second piece of tape I had put on the wall, then the fourth, and so on, removing every other piece of tape. This ensured that I had equally spaced stripes. (See center picture below). (I saved the tape I removed to use on the other side as spacers.)
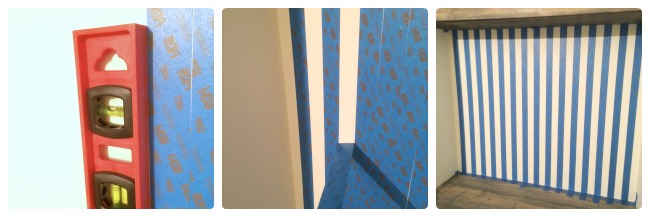
I then repeated the process on the left side of the center piece, and then repeated the every-other-strip removal process (see the right picture above). Before I painted it, I also masked the walls on the left and right, and also ran a couple of wider strips of masking tape along the desk and the bottom of the shelf.
* * * * *
I can’t wait to show you the whole guest room remodel next week!
In the meantime, Valspar Paint has graciously offered a FREE 8 oz sample kit of my favorite color, Mint Gala, to 10 lucky TT&J readers!
* * * * *
Find out more about Valspar Paint at the Valspar Paint site (special offers, help, and more!).
Check out the Valspar Love Your Color Guarantee
And
Follow Valspar Paint on YouTube
Visit, follow and like Valspar Paint on Facebook
Follow Valspar Paint on Pinterest
Follow Valspar Paint on Twitter
Follow Valspar Paint on Instagram
xoxo

This post sponsored by Valspar Paint. I received materials and compensation for this post. However, the contents, project and ideas are all mine. See my disclosures.


Just purchased a nest of tables as a cool little set for the sofa,
and think they are very practical as well as quite trendy
No matter if some one searches for his essential thing,
thus he/she desires to be available that in detail, so that
thing is maintained over here.
I like paint #2008-1A, “Monarch Wing.”
http://www.pinterest.com/pin/42221315231028268/ shared!!!
I actually LOVE the mint gala as well! Gorgeous!
Wouldn’t mind getting a paint sample… LOVE to paint new designs!
I like “Oh So Pink”
shared on google+
https://plus.google.com/111794927739601421357/posts/LTVC6XdEKU1
I pinned the giveaway!
I like the color mineral blue.
Shared on Pinterest!
Am loving the color sea wave!
I have painted stripes before, great tips!
Tweeted @Distracteddebra
Virtual painter w/ability to use your own room via photo upload is my fave feature.
I retweeted! https://twitter.com/ANDYASHLEIGH/status/429843101088088064
I love Sea Wave!
I like the color Metropolis. It’s a dark gray with a touch of blue.
I shared on Pinterest
I love Tantalizing Teal
I can’t wait to see your floating desk and shelves tutorial! The stripes look great!
My favorite color is Sea Wave!
I loved the whole truely yours palette!
I love Wave
The color selector is pretty awesome! We just moved and I’m anxious to get some fun color in our white house.
Love the Stripes and the colors. Can’t wait to try this in my daughters room.
LOVE the color! We just did one wall of stripes for my son’s room- love it!
I really love the mint too! 🙂
Love it! Great tips
I shared on my facebook page, Melle Eldridge 🙂
I like the 2014 color trends. I do better when I have a whole series of colors that look nice together.
we’re actually in the final stages of our renovation. flooring, paint, and trim work. YAY!! It’s been a LONG LONG year… LOL
needless to say, winning paint would be HUGE for us. 🙂
My favorite part of the site? I can upload my freshly sheetrocked and primed plaster walls (some of each in our 100+ year old farmhouse. we saved what we could of the old horsehair backed plaster and lathe) and see what my room will look like.
Thanks for sharing all the great painting advise. I’m getting ready for 3 room redo which include painting this year.
teatime
I need to paint our living room!
I love patina blue! It’s so dreamy!
I like the Virtual Painter paint selector tool
Definitely love the Woodlawn Silver!
Beach Sparkle or Playful pool!
I love the way they show different trends and colors you wouldn’t think about putting together!
Thanks for the tips! Can’t wait to see the finished room!
Love the stripes! So is this painters tape with edge lock like the frog tape? I have switched to frog tape, because it’s edge lock was superior. It is more expensive though. I haven’t tried regular painters tape for a while. Thanks!
I love the color selector!! I picked out one shade of green for our nursery and have to find the coordinating shades of the other colors we want to use 🙂
I really love the Virtual Painter. That is so cool! Also, I really enjoyed your tutorial on painting stripes and can’t wait to see the finished room. Very cute stripes!
loved the warm whites and think the bubbly ar315 would work so very well in my home.
Ahhh nice tips! Thanks for posting and for the giveaway! I love paint! I’m a spray painter with my house things! would be nice to get a gallon to try out different techniques in painting things! I do have a cute vintage record table that needs another coat of paint. 🙂
oh my goodness, the Virtual Painter! Now I just need to actually take the photos to load and give it a try 🙂
Love the color oceanic mist!
Definitely Cherry Pickin’ with the center palette. I need to update my kitchen, and this would be bright, cheery, and incorporate colors I love!
Love your color choice!!!
Loving the blue color called sailboat
Thanks or the chance to win
Just starting a kitchen remodel so this would be great!
I also love Mint Hint!
Thanks so much for the giveaway. My favorite color is Voyage. The perfect shade of grey!
I really want to do my bathroom in Mint Hint. Soft & so pretty!
I love your tip about the vertical stripes – moving the tape over after you’ve placed your next one. Genius!
I shared on facebook.:) Thank you for the chance.
I really like coastal blues tones, but i could see myself using “Enchanted green” in my living room.
It looks wonderful and I love the colors. We painted wide stripes like that but they were black and white. We grew really tired of them within the year and repainted. Maybe we should have tried different colors.
I like the Mineral Blue paint color
I love the tutorials and videos especially how to’s on decorative finishes such as: Dragging and Linen Weave
Favorite Valspar color? “Fiddlehead Fern 6003-6B” Yep!
Hematite
Great info, thanks! Love the color SPRING SPIRITS
I loved the blue burst !
The Valspar virtual painter is a great feature to settle paint disputes between spouses!
Shared on Facebook ! https://www.facebook.com/SkyannMarie/posts/723116641046694?stream_ref=10
So hard to choose a fav color now that Valspar has given me so many to choose on their site!
Mint Gala would be perfect for a project or two!
Oh and I shared on FB
shared on facebook
I plan on painting my daughter room soon! These tips are great!
I love the hematite color the best
I tweeted about this giveaway https://twitter.com/jessrwarfield/status/428989812800884737
I would love to do my nursery in this color.
flower girl or iced berry are two really pretty pinks……looking at the greys it was too hard to pick one lol
I love the “virtual paint” option on Valspar’s site!
I tweeted! https://twitter.com/ShellyBooBoo2/status/428987799446880256
Shared on face book
I love the mint gala. Great color
My favorite pain color is Rocker Girl! I’m not sure what I’d use it on, but possibly a piece of furniture to use as an accent color.
love the tutorial on stripes. shared on facebook. thank you for the chance
My favorite color is FROSTY….and I like the paint calculator….I never know how much paint to buy!!!!
Horizontal stripes have always been so daunting to me. No more! 🙂
I am loving the Filoli dark iris Valspar paint color!
I love the virtual painter! No way could I pick just ONE favorite color! 😉
I line either pantone string or rugged suede (as my faves for my own walls)
Cute! I need to do this in my house. We just bought an old outdated house and have lots of projects on the list to update it. This is one of them!
Tweet: https://twitter.com/collifornia/status/428971888568594432
Shared on FB!
Just moved into new bouse with daughter and her family. They are painting every room. This would be wonderful for them to use to really make things beautiful!
Love this, thanks! I want stripes somewhere in my house, once it has drywall up!
I like the Chickery Chick color.
I’m ready to tackle my two year olds room and am planning stripes!!
I like the color Rocker Girl for my daughters room. I’m thinking purple/off white stripes on one wall.
Nocturnal Sea 251-6
I love the Valspar site! I play with the virtual painter tool more often than I probably should. 😉 My favorite at the moment would be splish splash.
Love the BLUE ARROW 🙂
Love it
<3 it!
I shared on Facebook 🙂
Love the paint color! We bought our first house a year ago and I am a painting virgin. All the walls are white and in desperate need of color. The living room will be first but I am torn between a greige, light buttery yellow or a light blue grey. The Valspar tool will be very helpful, thank you!
the Homestead Resort Spa Aqua is great.
Dusty violets. All are super pretty and blend well. I would use several of those. I like those lines or maybe several blocks in different sizes.
I love their paint color called Hang Ten. I want to do my laundry room, pantry door, & guest room!
I shared on facebook!
I pinned it here- http://www.pinterest.com/pin/37647346859312163/
I LOVE the color Perfect Storm, so pretty!
I’m LOVING Mint Gala and Night Scape!
Cathedral Stone Grey
I just painted stripes in my sons bedroom yesterday and I have to say the edgelock painters tape from scotch was amazing!! I love the color you chose for your guest room!!
Tweeted here: https://twitter.com/DistractedDebra/status/428952177353048065
I am working on updating my living room right now. I would love help with the paint!
I would love to try striped in my laundry room. It’s begging for an update!
The virtual painter is amazing!
I have always been a lover of the color aqua. ..Any shade of it so the mint color is perfect.
I like the frappe color.
I shared on facebook from your facebook post, maybe it’s just my computer/internet/lack of skills lol but I do not see any buttons below this post to share by.
Just found them! shared again on google +
Oh there are way too many colors to choose from! But I do have a favorite that I bought several years ago and not sure if it is still on the site but it is called Seaweed Wrap CI179. I carry around the sample card in my wallet! But I have to say that I LOVE the Mint Gala! It will come in a close second to my Seaweed Wrap!
Churchill hotel maple
I absolutely love Plum Burst (4002-10B) which is the same color as my craft studio.
I shared the giveaway on Google +
I’d love to paint stripes but I’m scared to try… Maybe this will give me the courage!
Great advise on painting. I really want to paint my craft room this year. Looks like I need to make a trip to Lowes to get some samples.
The virtual painter is really cool!!
Oh my mother wants to do this to her room, she just moved in to her house.
I am loving blue gray lately!
I love Valspar paint. I love how thick it is and the coverage that it offers. At this point I can’t pick a favorite color. I want to makeover my teen boys room soon so I am looking at “industrial” type colors. Thanks for the giveaway.
Such a refreshing color! Love the stripes.
Love Woodlawn Salsa 2003-3A
Amazing tutorial! I love the Valspar website, it is my favorite brand of paint as well. Right now I am LOVING Blueberry Pie. Will be the perfect shade of blue for my daughters Doctor Who themed bathroom 🙂
Stripes always seemed too hard, but now you’ve shown me otherwise. Thanks!
Love Sun Glow! I’ve been wanting to repaint my kitchen and that color would be perfect with a chevron accent wall!
I love the aspen gray color. I’m going to order a sample and see if it will work in my space.
I love quarry pond
Stripes are on my to do list! I’ve used Valspar and have no complaints.
Very cool! Love the colors and stripes. Cannot wait to see the finished product
Very interesting horizontal stripes and colors. I cannot wait to see the full remodel
Wow! The new paint really brightened up the room. So pretty.
You make it look so easy! Thanks for the tutorial! I am partial to the color Sea Wave
We love Valspar Signatures! We just repainted all three of our upstairs bedrooms. Our current favorite colors are:Betsy Ross House Moss, for the guest room, Frappe, for the Master bedroom, and March Ice for the trim in the craft room with Bistro White on the trim in the other two rooms. It looks amazing! Thank you for a great product and lovely colors!
I love Roman Ornament. I’m into golden yellow at the moment.
Nice tutorial. And great use of space with the floating desk/shelves.
I love the color purple whisper and would love to do my bedroom in that. I like the explore colors option and creating a mood, gives you some great ideas!
What a great tutorial Jen. Those are lovely stripes. Great job!
Love that mint and the Pantone Turkish Tile.
My favorite color is Sea Air.
love the virtual painter
I love those stripes! I am really into Pantone Beach Glass- I’m hoping to use a color like that as an accent when we redo our kitchen!
i have never been brave enough to do strips cause of how they may turn out, these tips are great.
Great Tutorial! I dig the virtual painter on the valspar paint website! I am moving tomorrow and now I just want to paint everything! Thanks so much!