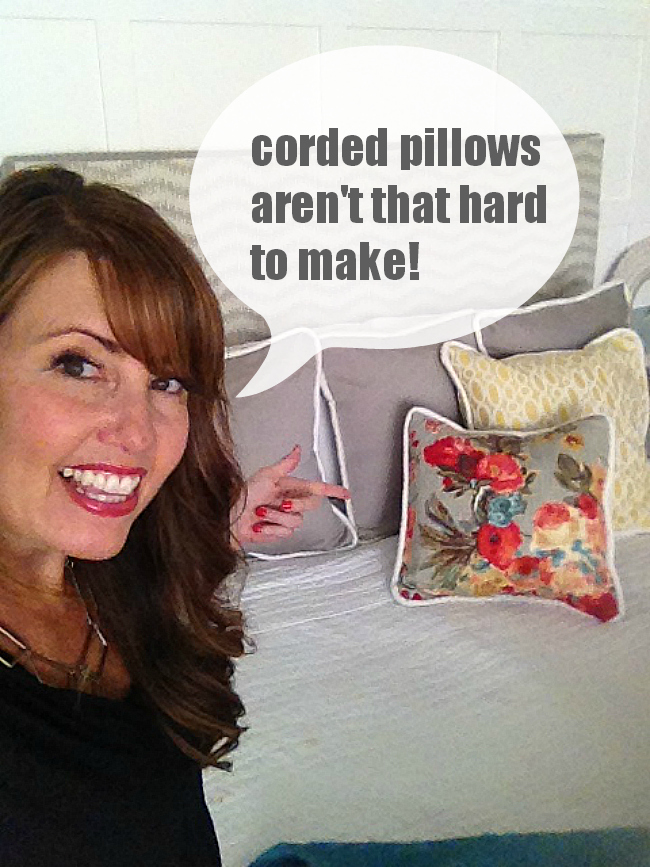
This is easy sewing — if I can do it, you can do it!
I have always loved the look of corded pillows, but as a beginning sewer I’ve been afraid to make them because they seemed so out of my skill range.
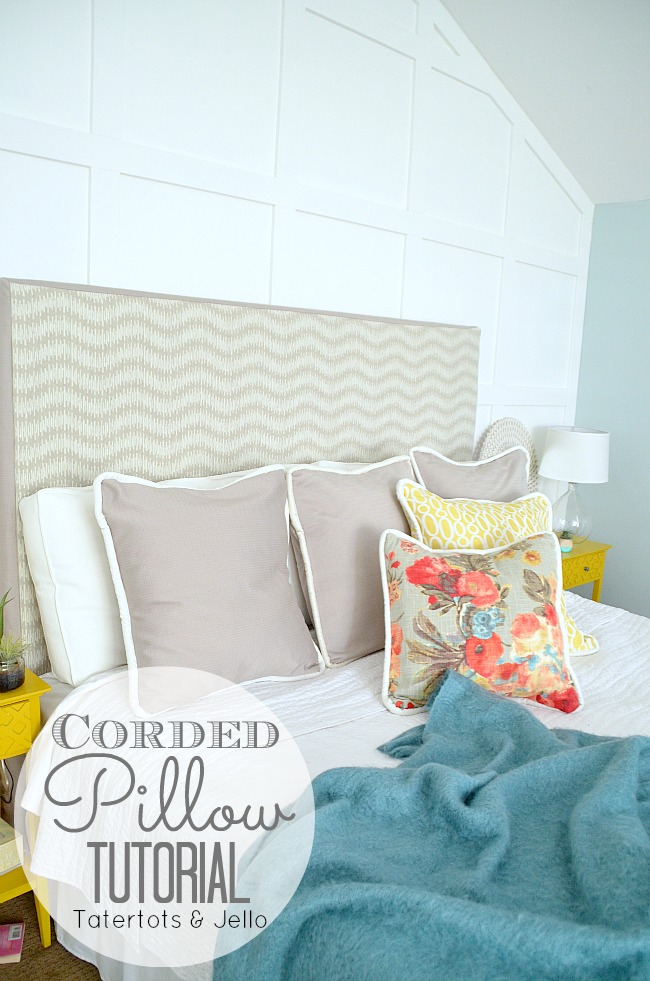
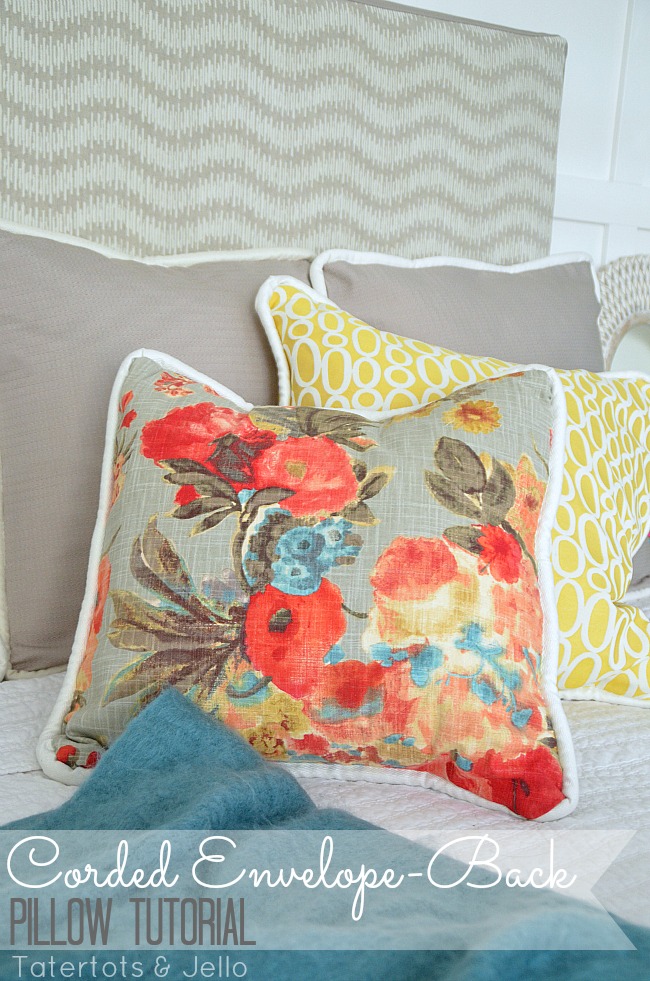
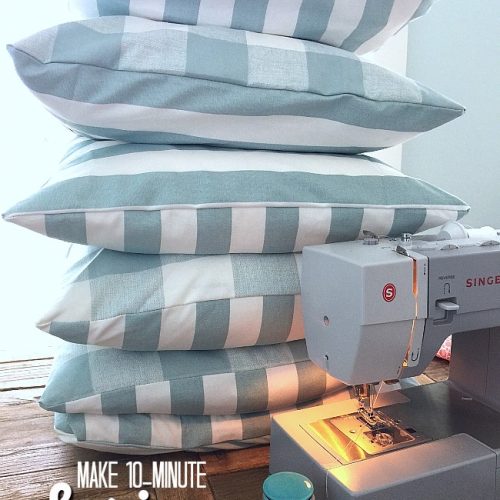
As part of our bedroom redo for the HGTV Home™ fabric and trim Challenge, I knew I wanted to make some pretty corded pillow covers for our bed. So I worked up my nerve and made a few. And you know what?? They really aren’t that hard to make! Here is a tutorial on how to make Envelope-Backed Corded Pillows in 6 easy steps! I made 5 corded pillow covers in an afternoon and I love the way they look on our bed!
Here’s how to make the Corded Pillow Covers in SIX easy steps!
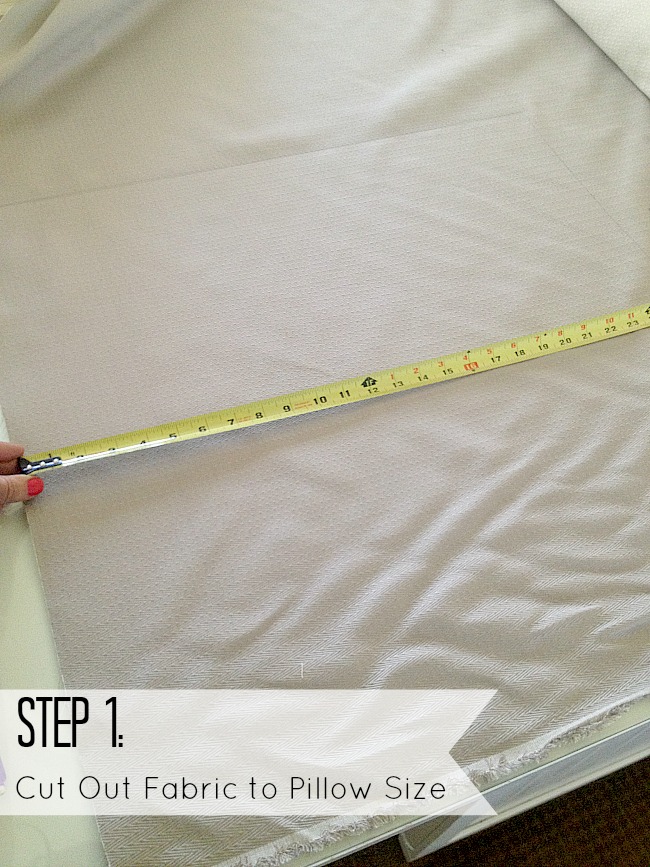
Step One — Decide what size pillow you want and cut out the fabric for the front of the pillow. I like my pillows fuller, so I cut my material to be the same size as my pillow insert – and add half an inch on all sides for the seam allowance.
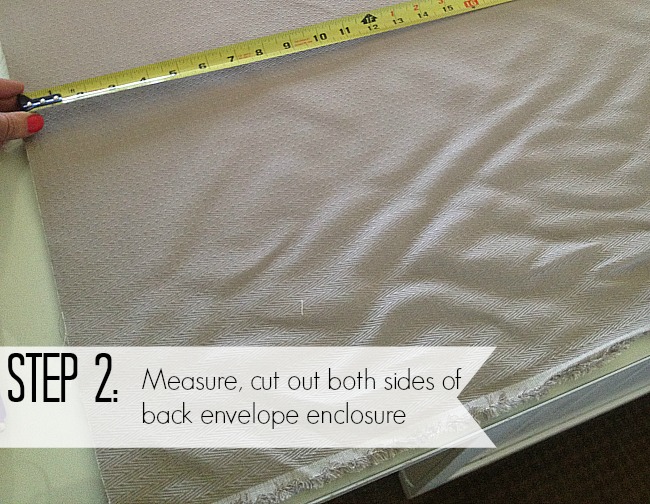
Step 2: Measure and Cut Out the back of the pillow. This is an envelope-enclosure pillow so there will be two panels that overlap so it’s easy to insert the pillow cover in between. The overlap keeps the pillow inside the cover. Cut the top of the back the same height as the front pillow cover and then for the width — add 6 inches to the total width. So my pillow insert is 26×26 – so the front of my pillow cover is 26.5x 26.5 and the back was cut to 26.5 high and 32.5 wide. One the back panel is cut, fold it in half and cut it in half. So you will have TWO identical pieces of material that are 26.5 high and 16.25 wide.
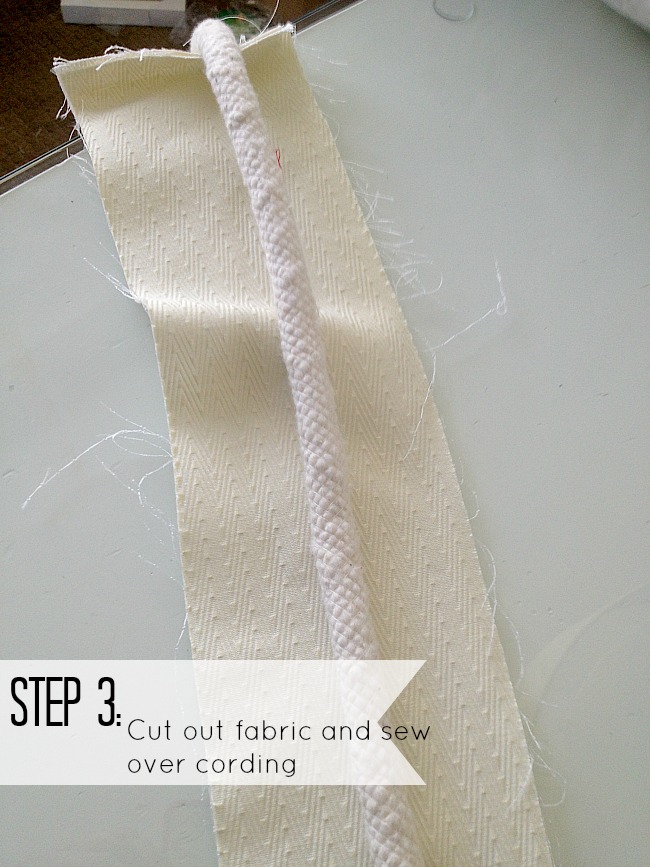
Step 3: Your cording isn’t very pretty on its own. You will want to cover it. I used a contrasting material. To measure how much cording you will need, take the heighth of one side of the pillow cover and add 4x to that. Then add 2 inches for safe measure. To cover the cording, cut material the same length as the cording. You might have to cut a few strips of material and sew the edges together to get enough length. Then use a zipper foot to sew the material around the cording. A zipper foot will let you get closer to the cording for a closer fit. Every machine should come with a zipper foot.
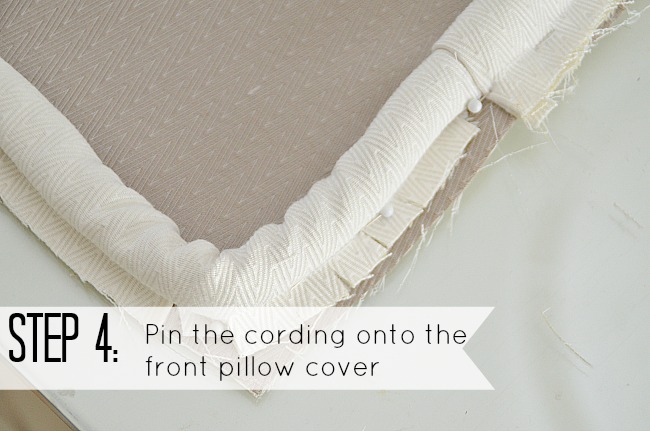
Step 4: Once the fabric has been sewn around the cording, pin it onto the front of the pillow cover. You will want to have the cording facing inwards on the pillow cover — with the edges lining up with the edges of the pillow cover. TIP — to get a closer fit on the edges, use some small scissors and cut small cuts on the cording fabric at the edges, this will let the cording bend around the edges. Pin it all in place. This may seem like a tedious step, but time spent on this step will save you time picking out bad seams later on if you rush things.
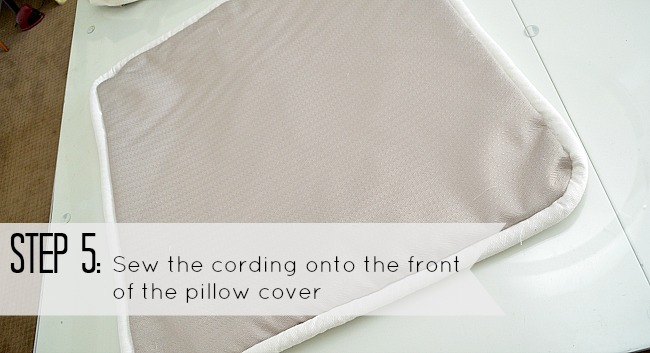
Step 5: Sew the cording onto the front of the pillow cover. Use the zipper foot to get as close to the cording as you can. TIP — There’s a trick to finishing off the cording.
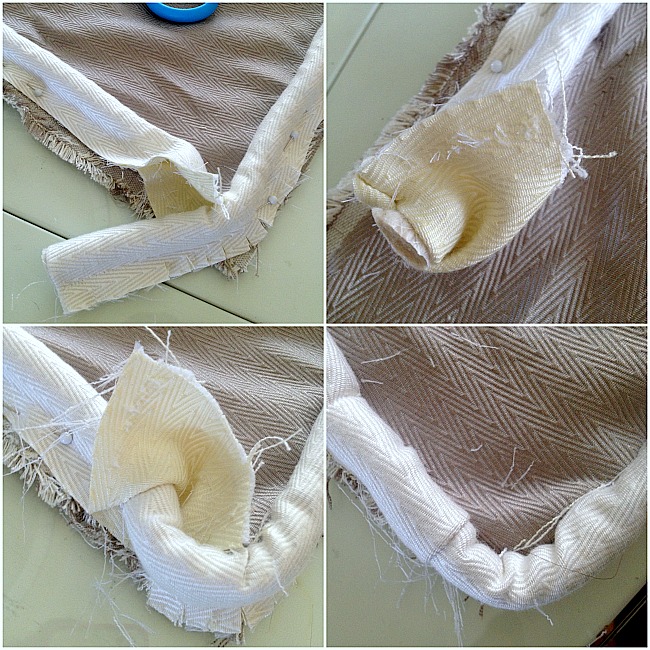
What you do is pin the whole pillow cover and then when you are ready to finish, open a seam on one end of the cording, cut 2 inches off the cording inside so the cording is empty there. Then with the other end of the cording, trim the edges of the cording fabric to the sewn seam and then insert the trimmed cording edge into the open seam so it matches up with the cut edge of the cording inside. Fold the edges of the cording cover that is facing up — fold it under and pin in place. This provides a continuous cording edge.
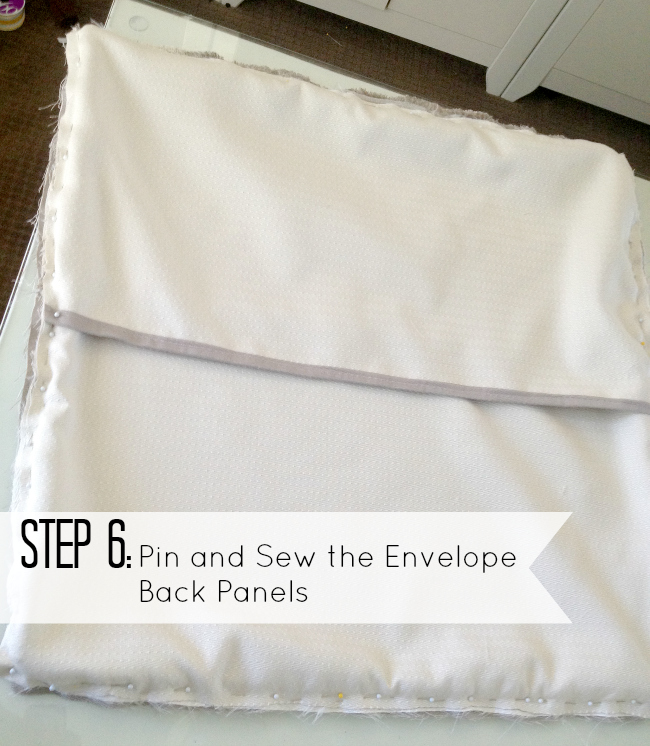
Step 6: The last thing you will do is hem the edges of the two panels for the back of the pillow enclosure. Then pin those panels onto your pillow front. These two panels should overlap. This overlap will hold the pillow inside once you put your insert in. Again – this step is tedious but doing a good job will save you time and frustration later. Once you have pinned it all, sew the top to the bottom layer of the pillow cover, the cording is inside. And you want the right-sides of the fabric to be facing each other inside the middle.
I made a video tutorial and I am still editing that – but I will share it soon! I find that it’s sometimes easier to see things on video than a written tutorial is.
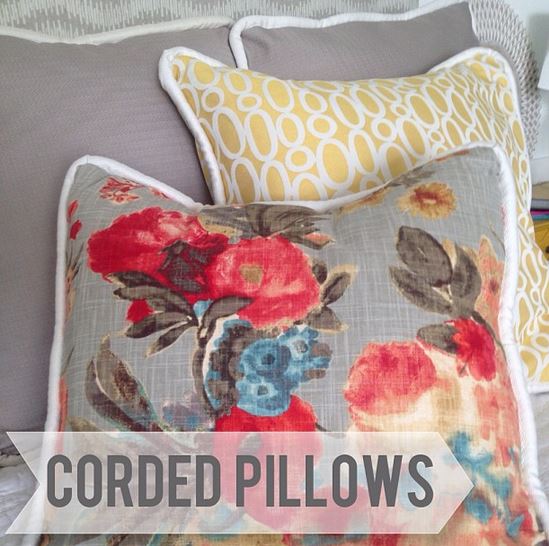
Then all you need to do is flip the pillow cover over, insert your pillow insert and ENJOY!!

Be sure to check out more about the #HGTVHomeMagic challenge at the Jo-Ann HGTV Home Website. Thank you so much JoAnn Stores for inviting me to be part of this challenge. I can’t wait to show you the whole room!!! Only one more week until the big room reveal on August 22!
(Fabric for the pillows – HGTV Home™ fabric and trim from Jo-Ann Fabric and Craft Stores (provided for this project))
Have a Creative Day!!
xoxo

This post and the challenge are sponsored by Jo-Ann Fabric & Craft Stores, who provided the fabric … but the opinions and projects are all mine! Regardless of sponsorship or product provided, I only post about products or companies I love. For more information, see my disclosures.


Thank you!! Great instructions and the photographs made it easy to follow!
Your way of telling all in this piece of writing
is actually nice, all can effortlessly understand it, Thanks a lot.
wonderful idea,and very easy to do,,,,,,,,,thanks for share
I have been sewing for over 47 years…since I was 8 years old making all my own clothes and I wanted to let you in on a trick. When cutting the strips of fabric for making the cording, always cut it on the bias because bias will stretch more and be so much more forgiving. You will no longer get that puckering in your cording as you turn corners when sewing on pillows.
Haha, I love the captioned photo. I wouldn’t have believed you if I hadn’t seen you say it 😉
This tutorial is PERFECT! And just when I needed it. Thank you so much!!
That last picture is absolutely fabulous! 🙂
I am also an apprehensive sewer! It seems that once I finally convince myself to do a project I feel so silly about how worked up I got about it.
Your pillows turned out lovely! Thank you for the inspiration!
I love the pillows. We just bought a new couch and I need some new pillows on it. I guess it is time to undust my sewing machine :).
I know I’m supposed to be looking at the pillows but that board & batten is GORGEOUS! My goodness that is stunning! So jealous right now.
Jen! I have been wanting to sew up some pillows with corded edges for SO long now but I have been deathly afraid to. You’re giving me hope! (Although I still don’t know what a zipper foot looks like…)
Jen these pillows are just beautiful! Can’t wait to see the room reveal!
Thank you for this great tutorial, Jen! That colorful fabric is beautiful..I’m off to Joannes today.
I love the way you made a hard thing easy with the step by step directions. I will definitely be making some of these in the coming weeks.
Thanks again, and I love your blog!
Kelli Girsch – buybabydeals.com
They turned out great!! I’ve linked to your tutorial over at Craft Gossip:
http://sewing.craftgossip.com/tutorial-easy-corded-pillow-cover-in-just-6-steps/2013/08/13/
–Anne
LOVE that colourful fabric! but the cording is way to ambitious for me…
Looks fabulous, though.
xox
These look fantastic! I too am very keen to make my own cushion covers but have been a bit apprehensive. You make it look so easy, I will have to bite the bullet and give it a shot!