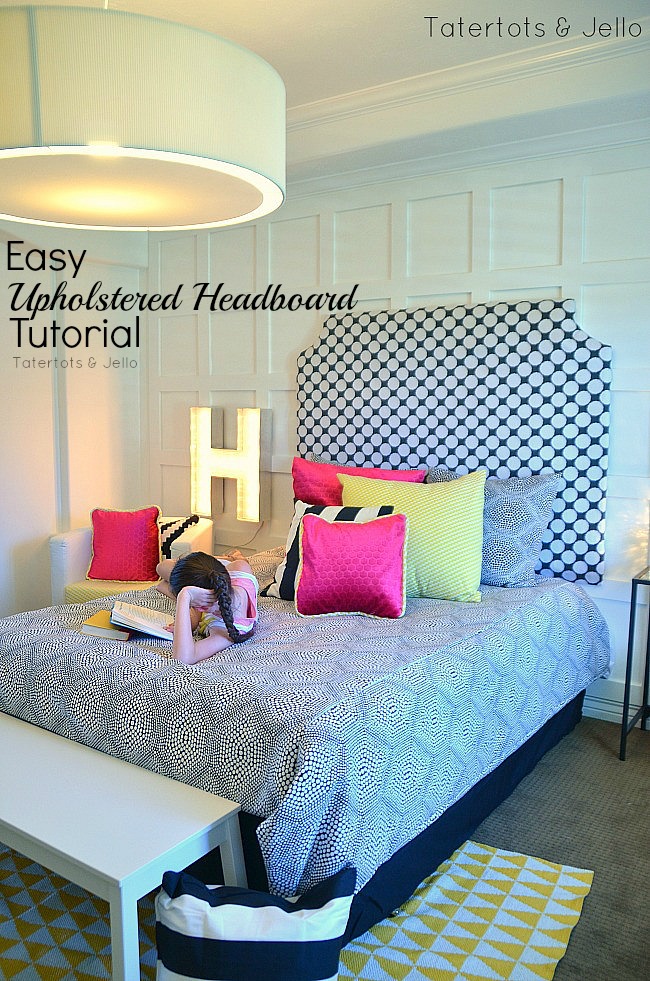
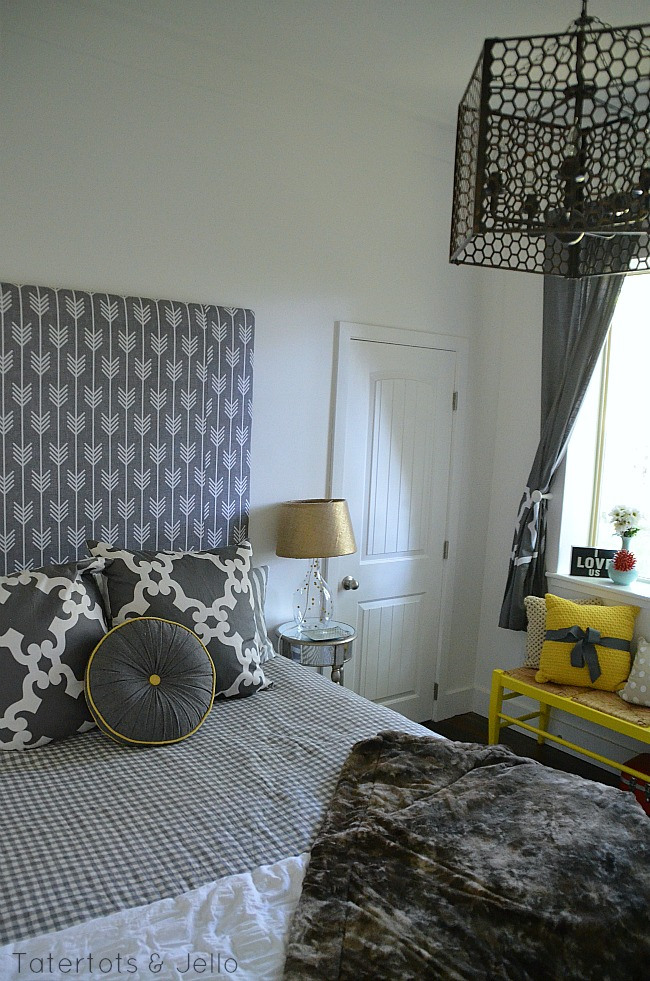
This is one of my favorite projects. It’s an easy way to make a HUGE statement in a bedroom for hardly any money. And I love that you can use whatever fabric you want to coordinate with your room! This is a ONE hour project. Yay!
What you need:
- Fabric (you’ll need to buy enough to wrap around the edges of the board)
- Large piece of particle board: you’ll be cutting down a 4 x 8-foot piece. I chose 7/16″ thick because it’s thick enough not to warp but not so thick it’s difficult to handle. Should be around $10. See notes below.
- Batting, approximately the same amount as for the fabric
- Power stapler or “Sure Shot”
- Hammer (to pound in stubborn staples)
- Jigsaw
- Pen/pencil
- Large dinner plate
What to do:
1. Head to your local home improvement store and choose a 4×8 sheet of 7/16-inch plywood. At mine it was under $10.
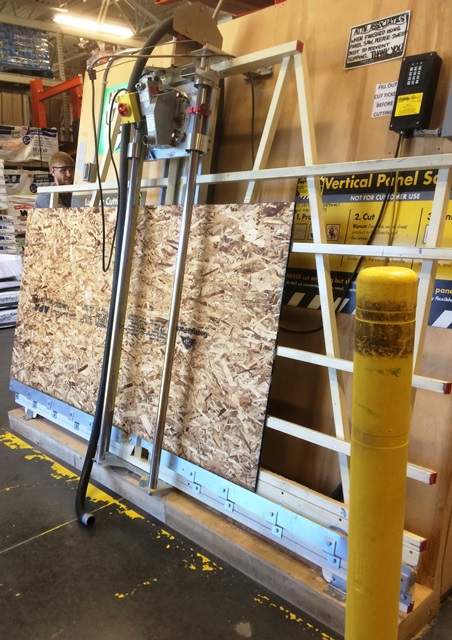
2. Take it to the cutting station and ask the friendly employee to use the wall saw to cut it to 65″ wide. This will (a) make your headboard about four feet high and 65″ tall, (b) make it so you don’t have to put a seam in the fabric, and (c) save you the pain of cutting that big piece of wood at home. Plus, at most home improvement stores, the first cut is free! You can save the remainder of the wood or leave it there.
3. Assemble your tools, the board and the plates. Lay the board horizontally on sawhorses or similar. Place the plates so the centers are about 6 inches from the corners of the headboard – like this:
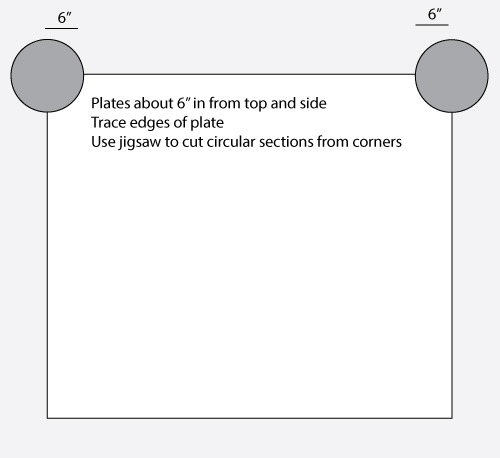
4. Trace the edges of the plate with a pen — if you’re using a permanent marker, be sure not to get it on the edge of the plate (you can cover the edge of the plate with masking tape).
5. Using all prudent safety measures, use your jigsaw to cut along where you’ve just marked the edges. If there are any splinters or jagged edges, sand them a bit so they won’t wear through your fabric.
6. Now you’re ready to upholster! Spread the fabric flat on the floor and then spread the batting on top of it.
7. Lay the board on top of the fabric, leaving at least 6-8 inches of extra fabric along each side. Trim any excess fabric.
(note: I wanted my headboard to be a bit thicker, so I also trimmed a foam mattress pad to fit between the board and the batting.)
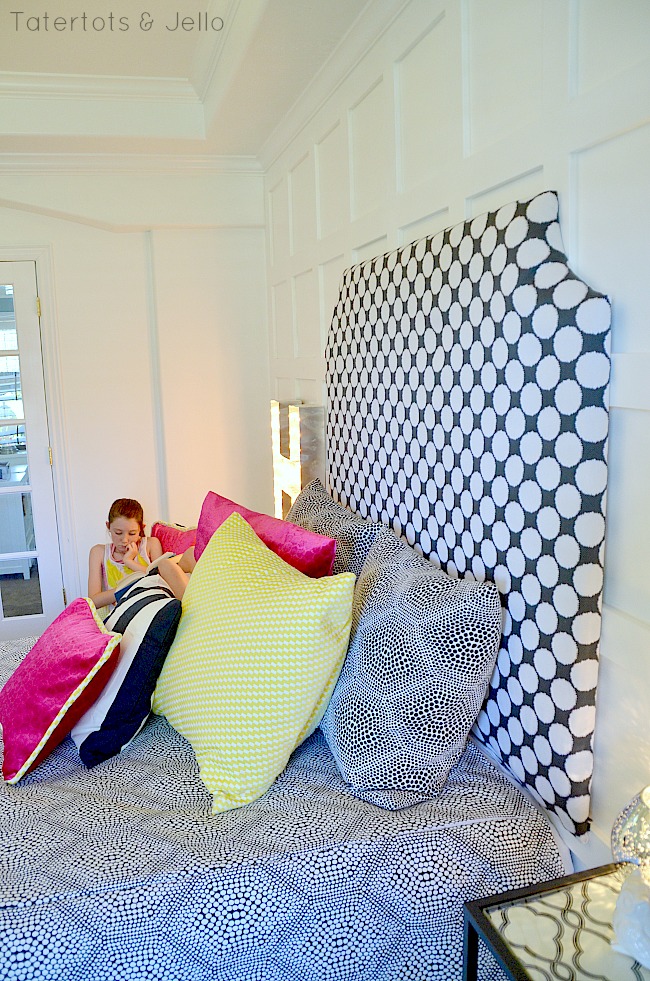
8. Using your staple gun, and starting from the top edge, pull the fabric straight and snug to the back of the board and secure with staples. Try to make fabric folds as flat as possible along curves and corners.
9. Once you’ve completed that, you’re done!
To mount the headboard, you can use heavy-duty picture hangers to secure the headboard on the wall. Be sure to use wall anchors, or, even better, put the mounting screws into the wall studs.
(I used hangers like these🙂

This is such a fun project. And it’s inexpensive and I also love that you can use whatever fabric you want to make a HUGE statement in a bedroom. I made a similar headboard for the bedroom at my #1905Cottage. And I love how it looks!!
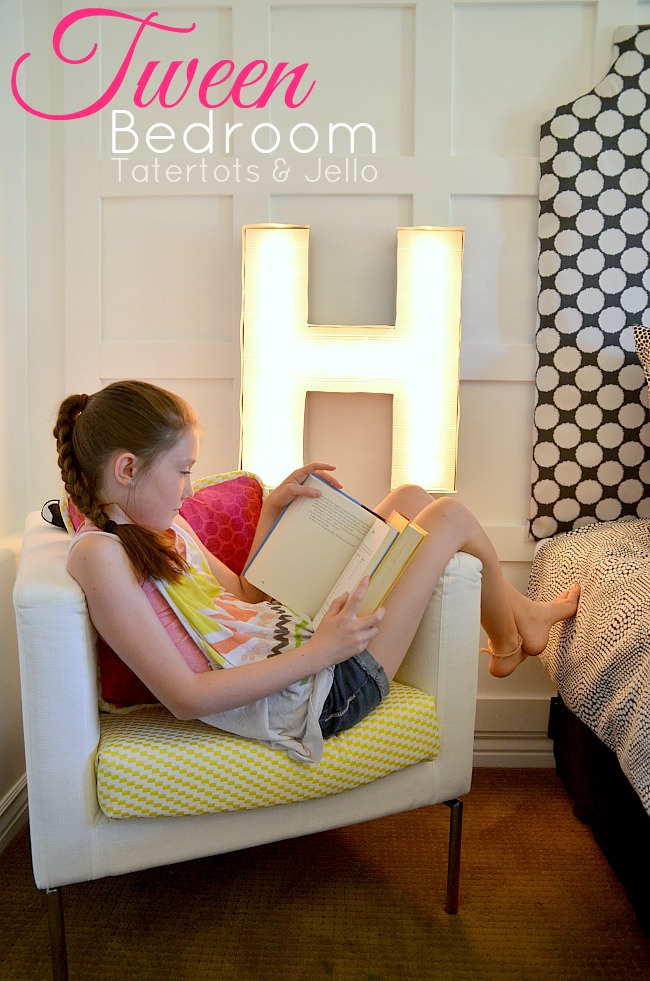
You can find out more about my Tween Bedroom I created using Waverly Fabrics here.
Have a HAPPY Day!
xoxo

PS: I’ve linked up this post to these fabulous blogs this week!


I love how this turned out! I have been wanting something like this for my bed forever. I will be sure to pin this to try later!
This tutorial came at a great time as I’m about to make my boys matching headboards for their shared room. I had priced out plywood and only saw it at $35 for a 4×8 ft piece. I will look again to get the better deal! Thanks, Jen!
Awesome share a must save for sure thanks!!! xo
Love it! Is this measured for a queen size bed?
I love the colors that you have used. That is such a darling bed.
Just discovered your cool DIY projects – whatgreat ideas! I saw your crafting area in creative spaces v3 and then found your site. I noticed you mention where you picked things up, and I wondered about your low cabinets under the peg board display/storage area. I have the perfect spot for this idea, but all the cabinets I find are too deep. Any ideas? Remember where yours came from?
Great idea! Our beds have no headboards here and the pillows and junk just fall out the side. Worse, we keep bumping our heads on the walls. Bleh.
Yours is lovely! Will give it a try! Not too crafty although I should be since I’m a teacher and all the other teachers I know are so creative!!!
You said one hour project. I’m picturing my first attempt at that, 3 hours in. LOL
One day I WILL attempt this especially since I’m getting a little bored with our current one. (Don’t tell the Mr, it took forever to pick that thing out! HA!)