I think Mod Podge might be the reason that I started blogging – LOL. I was on a mod podge kick and needed a place to keep my ideas. Over the years, I think I have tried decoupaging just about everything from frames and magnet boards to tables and trays to bar stools. I just can’t get enough of the stuff!
In honor of one of my favorite crafting mediums, I came up with a little project — my take on a Modern 3-D Fall Wreath.
I don’t know if you ever saw the Mary Engelbreit Home Companion Christmas magazine a couple of years ago that featured Amy Butler standing in front of her front door?
Well there is this incredible wreath there and you can just barely see it but it’s very modern with round spheres. Ever since I saw that wreath I have been thinking about making something similar with circles.
Here’s what you need:
A round wreath form — mine is 12 inches with a flat top and sides. I found it at Hobby Lobby.
Ribbon (about 9 yards for a 12 inch wreath)
Gorilla Glue
Paint that matches your ribbon
Small Dowels or wooden beads.
Round Wooden Craft Circles (also found at Hobby Lobby) I used 2 packages – approximately 30 circles of different sizes
4 different patterns of decorative paper
Glue gun and sticks OR Superglue
Decoupage medium (I used Outdoor Mod Podge since my wreath is going to be outside – this stuff rocks!)
Here’s what you do:
- Put a dab of Gorilla Glue on the back side of your wreath form. Put one end of your ribbon on top of the glue and pin. Then wrap the wreath form with your ribbon tightly, overlapping the edges until the entire wreath is wrapped. End the ribbon in the same way you started – by applying a dab of Gorilla Glue and pinning it until it dries.
- Take your circles divide the circles into four equal piles with the same sizes of circles in each pile. Trace the circles from each pile onto your four different papers. So you end up with the same number of circles and sizes for each of your four papers.
- Cut out all of your circles.
- Cut your dowels to three different sizes — 1/2 inch, 1 inch and 1 1/2 inch. You only need about 5 of the 1 1/2 inch sizes, then evenly split the 1/2 inch and 1 inch sizes to match the number of circles you are going to make. I used about 30 circles on my wreath. **note — you do not have to use dowels, you can use small wooden beads too. I used two different sizes of wooden bead – one was 1/2 inch and the other was 1 inch. I then cut a dowel for the 5 taller circles using a chop saw.
- Glue the beads or dowels onto the back of the wooden circle. Once dry, paint the backs of the circles and beads the color that coordinates with your paper. let dry.
- Mod Podge your paper onto each of the circles. I applied a thin layer of Mod Podge to each of the circles and then to the back side of the paper. When I had done all of the circles, then I put a top layer over all of the circles. Let dry. **Let me just say that I love the Outdoor Mod Podge! It is thicker and very durable.
- Then lay your circles out on the wreath to see what you want your placement to look like.
- Glue your circles onto the wreath. When gluing, hold the dowel straight onto the wreath for a few seconds until it is cooled or dry (depending on whether you are using Superglue or hot glue).
- Cut 2 different coordinating ribbon and wrap it through the wreath and tie at the top.
 It’s the Mod Podge/Decoupage Challenge over at The CSI Project this week. Go over and link up YOUR decoupage projects and you can win!
The adorable Amy from Mod Podge Rocks is the guest judge this week!
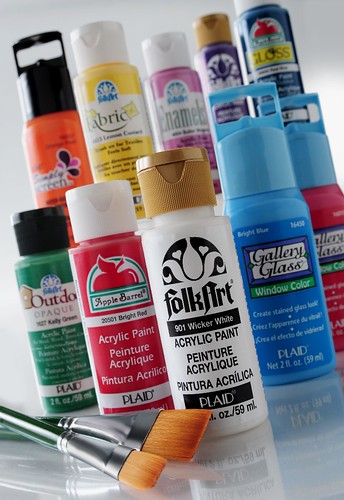
And Plaid is giving away a package of their products to the winner!
Have a Great Night!
XOXO
Go over and check this out:
Go over and check this out:





This is superb easy and cool. I will try this at home..
Great idea thanks can’t wait to make one!
I’ve been searching for a cool and funky wreath to make and I believe this is it; I’m thinking of making a spring version with white, black and purple (our house is green with black shutters, black door and white trim and I want to add purple flowers in black planters) and a fall version like you have here. Thank you for the great idea and instructions.
This is brilliant. I think that I’m going to do something like it in 2D. Why? Then I can have a range of decorations like this for different occasions that will be easily storable in my small flat.
How would this hold up in the rain I wonder? I live in the pacific northwest!
try clear coating it…get a can of clear coat and spray on both sides and let dry..I recommend a few coats
This project totally caught my eye. Love it!
Fell in love with this wreath months ago. I saved the idea and recently had the nerve to try my own version of it. Thanks for always inspiring others with your crafts. I love my new wreath! you are so GREAT!!!
http://ladeedacreations.com/2011/02/finally-a-wreath-completed/
Hi Jen! I've been thinking about this wreath for months!! I used hearts and followed your tips to create a Valentine's Day wreath. Thank you SO much for inspiring!!
http://oopsey-daisy.blogspot.com/2011/02/3-dimensional-heart-wreath.html
~Alison
My friends and I fell in love with this, so I was brave and decided to make it first, then teach them my mistakes and successes. One problem I have is that it's super delicate! I know yours isn't because it's on a door. My tallest circles are just so tipsey, and I don't know what I need to change for the next ones I make. Thicker dowel? Glue the ribbon all the way around? Use only small circles on the tallest dowels? Gorilla glue works better than hot glue?
Thanks for your extra tips! It's an absolutely stunning wreath. 🙂
I absolutely love this wreath! I'm going to have to try one like this for Christmas! Modge Podge is probably my best friend!
Thanks for sharing your great ideas! You are so talented!
I saw this and just knew I needed to try something like this . I started a wreath this weekend in gray, cream and lime green!
I found your blog by way of Anna at Stitch Bitch. I think your wreath is a clever and gorgeous thing — and it's inspired me to do something like it for our front doors.
ModPodge! I haven't thought about that in years! How very fun. Thanks very much for showing us your wreath.
How cool! I love it.
I think I rememebr that issue. Her house was decorated for the holidays in greens, blues, and white. It was amazing..I probably have it somewhere in my magazine piles.
jen , you are so creative. you've inspired me so much over the last year I've been blogging. Have a great day!
🙂 Erin
I love how this came out! So much that I featured it in my Friday Fave 5 post, you should check it out!
So fun and unique. 🙂
I love all the circles! I am sort of obsessed with polka dots… especially when it is not the ordinary expected kind of polka dots. I love it!
WAY cute, Jen! You make this stuff look so easy…but I think I MIGHT be able to pull something like that off. I hope so, because I REALLY want one of those wreaths! I love playing with mod podge too. 🙂
DARLING!
even though i've never met you in person, for some reason this looks just like your style! fun, colorful & whimsy.
i don't know which i like best the color & paper you used of just the fun circles.
too too cute!
thank you so much for linking up at the FALL FESTIVAL! you are one amazing person!
HAPPY FALL!
kellie
I love this!!! I can totally do this one! YAY!
OK. That is adorable. Adorable I tell you!
Jen that is way too adorable! I love that it is fall/halloweenish without being scary!
so so cute!! I can't wait to try this.
i think i'm gonna try this one!
That looks amazing!! love love love it!!
This is fantastic! So cute!
Super cool. I think it would be fun to do something similar with hearts for Valentine's Day. Cute.
I just love your wreath Jen!! You are so wonderfully creative. You have a great eye for colour! Well done! xxoo
I love this. I can't tell you how perfect it would be for my house. I might have to move this one up my craft project list … you know the one that keeps growing? *sigh* Or maybe I can just buy one from you instead. 🙂
Hi Jen~
{Love it!} Your wreath is so cute, and the colors and patterns you used are so fun! I will definitely have to give this a try sometime soon! 🙂 Thanks for sharing this!
Have a great night!
I love the wreath! I wonder if Mod Podge comes in a five gallon bucket???
I like this wreath! What a great idea. Mod Podge is so much fun to work with.
Very cute! I love that its different and non-traditional!
I love it! My front door needs another makeover, thanks for the inspiration! It's so cute!
outstanding!
Did I mention I love this? I think I did. In a completely over the top way. Not kidding. I LOVE IT!! I love circles. I love orange. I love Mod Podge.
Previously…I DID NOT love wreaths. But I am willing to pursue a new love. Ahhhh….Those little butterflies in my tummy. I love new relationships!!
I absolutely LOVE it!
This is super cute…like everything you make!
Love, Laura
This turned out cute. I can imagine it in Christmas colors…Easter…
That wreath is DARLING!!! I just love everything about it! Especially the fall colors.
SO funky and fun!!! Love that palette. 🙂
oooh-how cute is that!! I too am a lover of all thing mod podge!! Just wondering-does your head hurt with all of your ideas that you have swimming around in there? 🙂
stop it Jen. I saw you put this on CSI the other day. Seriously, when do you find the time?! You're amazing. I WANT this. NOW. I mean how did you get the paper cut just right?! I can't take it. hi-ho, hi-ho, it's on a perfectionism hunt i go!
Very cute! I love the colors!
O man, this is super cute!! And so many possibilities with using wood on a wreath! I am already dreaming up a Fourth of July wreath!! This is so you, Jen! I love it!
Good grief that's cute!!
Oh! That is cute!
Wow, is that cute. Really well done, start to finish. And the colors are gorgeous!
Really so cute! I love the colors and patterns. You are so creative. Thank you for being ever-inpiring! P.S. Thanks for your visit.:)
very cute!
It looks amazing JUST like you. LOVE it jen, its so darling and so creative. Hugs, Jen
oh wow that is super cute! Love the colors 🙂
~Emily N. from "too Blessed to Stress"