Ruched Rosette Belt

 Hi Tatertots and Jello Readers. My name is Jennifer and I have this little blog called A Happy Circus. I blog about life (with four kid’s), crafts, prettiness and stuff that makes me happy. Stop by for a visit. I’m so excited to be here today and wanted to thank Jen for having me. Today, I’ll be showing you how to make one of these trendy little leather belts. It’s actually quite simple, so stick around and give it a try.
First let’s gather our supplies. Here’s a list of what you’ll need.
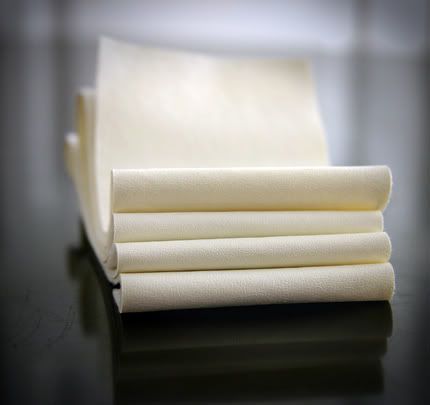
* leather (look-alike: I used pleather) 7 inches.
* elastic 1.5 inches wide (length= your waist minus 3 inches)
* elastic 1.5 inches wide (length= your waist minus 3 inches)
* kit of snaps
* coordinating thread
* coordinating thread
 Let’s get started!
First you will need to cut your strip of leather 3 inches in length. I left mine the full width of the fabric.
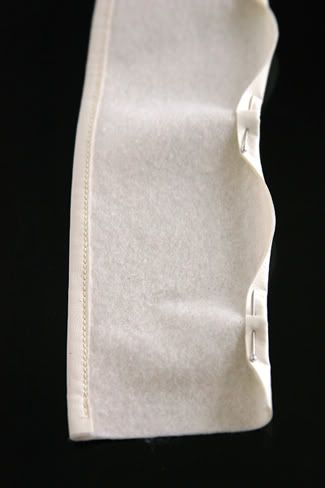 Next, you will fold each side 1/4 inch and sew as shown in the picture.
 Once both sides of leather are sewn, you will fold each end over 1/2 inch and sew.
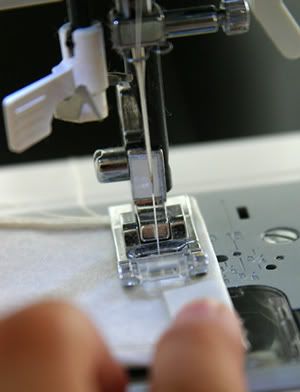
 Now pin your elastic to the wrong side of the fabric just like in the photo. (you will only use one pin at the top) If you are right handed, you will stretch the elastic with your left hand bit by bit as far as you can while your right hand is behind the machine grabing the fabric and helping to pull it through. Just sit back and relax while you put the pedal to the medal.
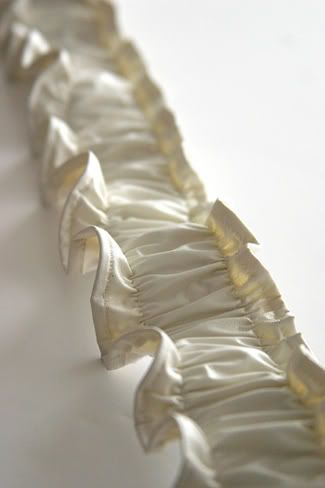 When you are finished, you will end up with this.
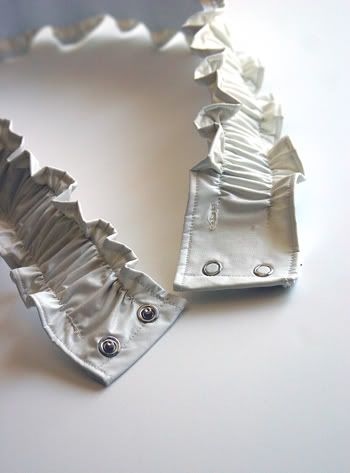 Now you will attach the snaps as shown on the manufacturers instructions. (Don’t let this scare you. This was my first time and it was super easy. And looks kind of professional. After I finished, I was walking around the house looking for more stuff to put snaps on.)
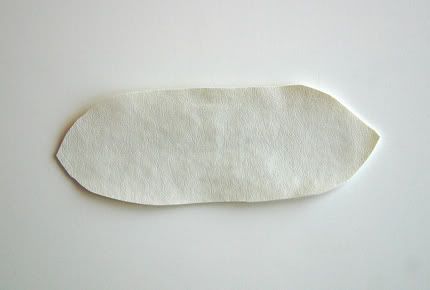 And the belt could be finished now; however, I thought a rosette would be cute. (Plus it helps to cover up any mishaps.) First cut a shape out like this.
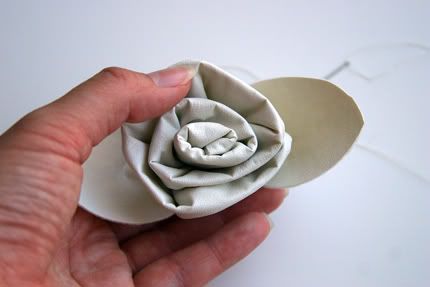
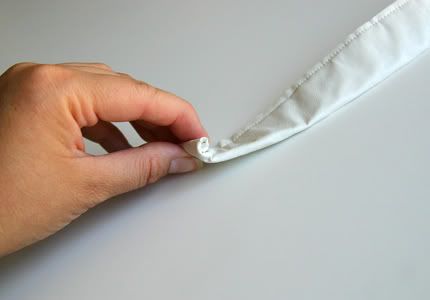 Next, cut out 1 1/2 inches of pleather by 16-18 inches long. Fold in half and sew as shown, then start to roll the strip up a bit and secure at the bottom with a few stitches.
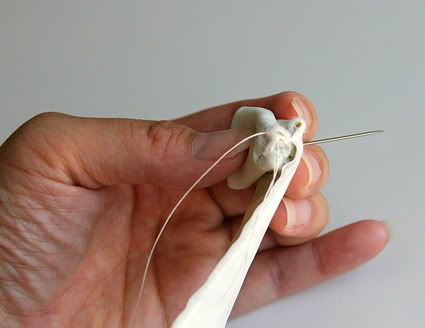 Keep wrapping and stitching the bottom as you go. You’ll get in a groove and find what works best for you. I like pinching the fabric as I go and then tacking it to add dimension.
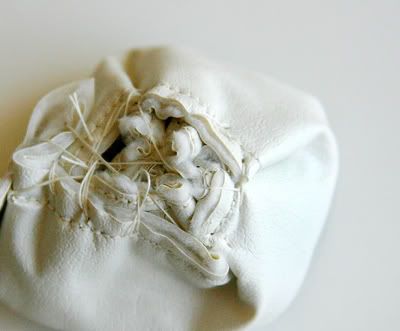 When you are finished the back will look like a hot mess.
 But the front will be sooo pretty!
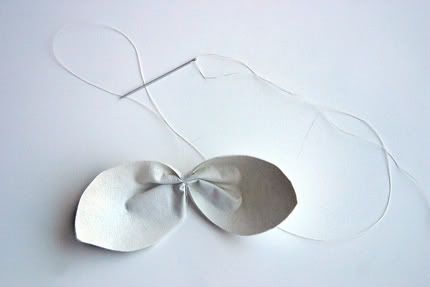 So now you’ll want to take that funky little shape I had you cut out earlier and pinch it in the middle. Now stitch through and wrap the thread around to secure it. Then tie it in a knot and cut the string.
 Tack the flower to the leaf. Now take this and hand sew it onto the belt in your desired position.
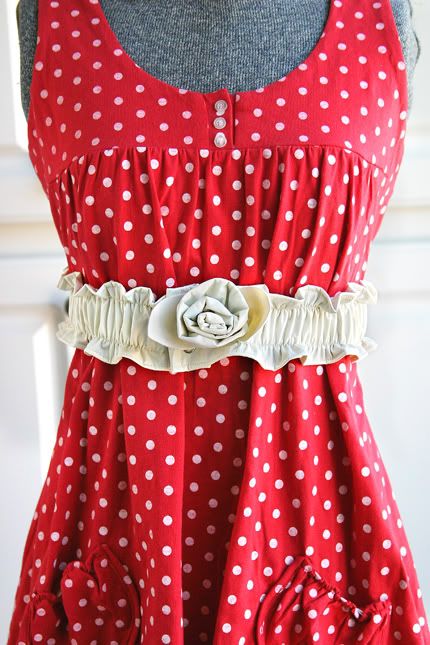 And voila! The ruched rosette belt. Have fun with it. Make them in different colors and fabrics, then sit back and enjoy some chocolate for all your hard work (the calories don’t count if your rewarding yourself for hard work)!
Ok – I WANT one of those belts! So cute!!! Thanks so much for sharing the tutorial with us!! Here’s a little button as my way of saying thank you! You really MUST check out Jennifer’s blog. It is chock full of deliciousness!


Have a Fabulous Friday!
XOXO
PS – The Weekend Wrap Up Party starts tonight at 8 pm (MST). Come show off YOUR ideas and be featured!


I just love Jennifer's blog!!
This is adorable! I am confused, though, at what you mean by 7 inches of leather?????
[email protected]
Thanks!
Glad you all liked it! Thanks again for having me Jen! And the dress/tunic was a recent GoodWill (thrift store) find for $2.50.
B-E-A-U-tiful! I can't wait to try this. Thanks for sharing this tutorial.
Awesome tute! Thank you! Time to head BACK to the Fabric store 🙂 I've been toying with the idea of learning to use those snaps…you are right, they look professional!
OK, the polka dot red dress – SWOON!!!
Cute belt and a great tutorial!!!
Thank you for the comment! Love your blog! I need to dust off my sewing machine and get to work! 🙂
Jen, just wanted to let you know that I mentioned you and your ruffled table runner on my most recent post on ruffles! : )
awww i LOVE that dress with the cute belt! great post! have a great weekend!
Oh my gosh I love this! 🙂
LOVE, LOVE, LOVE this belt!!.. I have GOT to go get myself some pleather!! Thanks for the tutorial Jen! ~tina