Tatertots and Jello

COLORFUL HAPPY HOME -- Daily DIY, Decor, Craft and Recipe Tutorial

  • My Home
    • 1905 Cottage
    • Daybreak House
  • DIY
    • DIY Projects and Ideas
    • Organizing
    • Tutorials
    • Printables
  • Decor
    • Spring Projects
    • Summer Projects
    • Fall Projects
  • Crafts
    • Kids Crafts
    • Painting Projects
    • Paper Projects
    • Sewing
    • Wreaths
  • Holidays
    • Valentines Day
    • Easter
    • Halloween
    • Thanksgiving
    • Christmas
    • HAPPY Holidays Series!
  • Recipes

Explore

  • my home
  • diy
  • decor
  • crafts
  • holiday
  • printables
  • recipes

Connect

Home » guest tutorials » Guest Project — Granddad’s Tractor Applique

guest tutorials, summer projects, tutorial · July 15, 2010

Guest Project — Granddad’s Tractor Applique

Tatertots & Jello is a participant in the Amazon Services LLC Associates Program, an affiliate advertising program designed to provide a means for sites to earn advertising fees by advertising and linking to amazon.com.

Hi, I’m Polly from Helping Little Hands. I’m a chemistry and math teacher turned stay-at-home mom to 3 wonderful kids. I super excited to be sharing a tutorial here today on Tatertots and Jello! Thanks, Jen!


I’ve done a lot of different kinds of projects on my blog, but lately I’ve been addicted to experimenting with clothes refashioning, especially for my kiddos. One of my favorite techniques to dress-up a T-shirt or pants is with applique. I’ve liked applique for a long time, but have recently really fallen in love with appliquing knits onto knits. Since jersey knits (like T-shirts) don’t fray, there is more flexibility in how you finish the edges, and they are SO easy. Today I’m going to share…

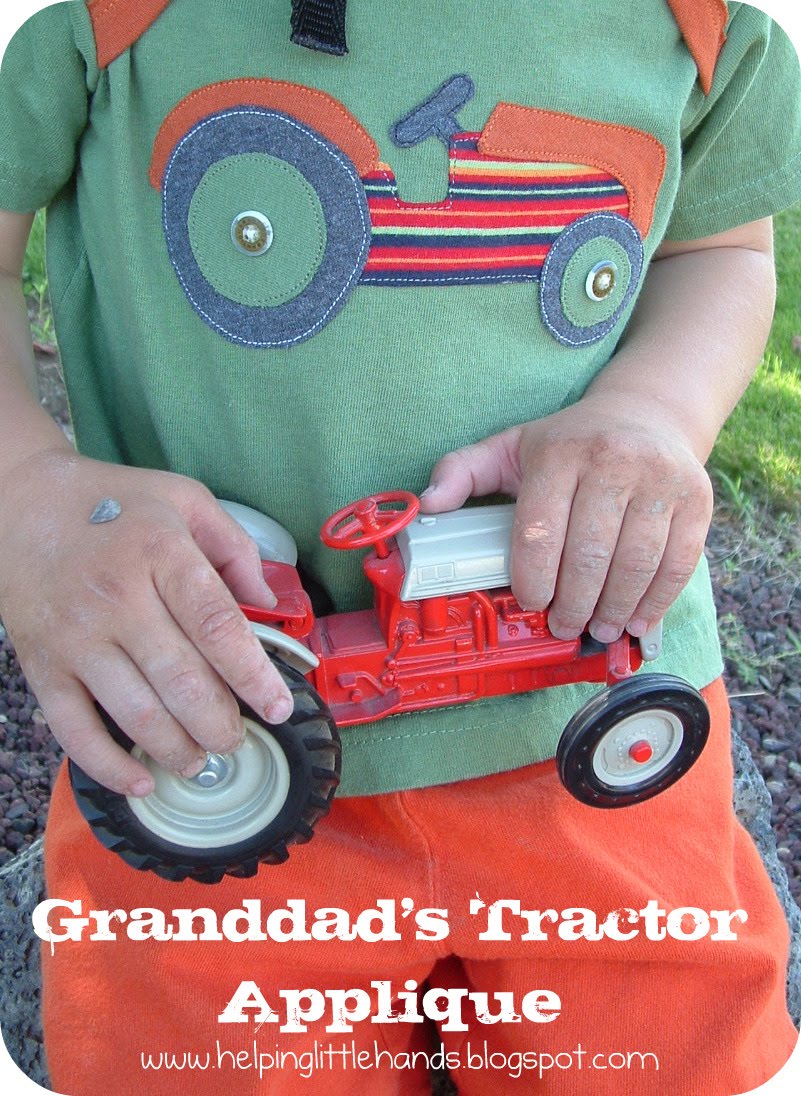
We’re moving soon to a very rural farming town in central Washington for Hubby’s new teaching job, and I thought some tractor shirts inspired by a vintage tractor from my Granddad would be a fun celebration.

Of course, our daughter needed her own girly version of Granddad’s Tractor too…after all she has told us she wants to be a tractors driver (as well as about 10 other things) when she grows up. Both kids were thrilled with them (even though not all the pictures would make you think that…he was anxious to get to the park)!

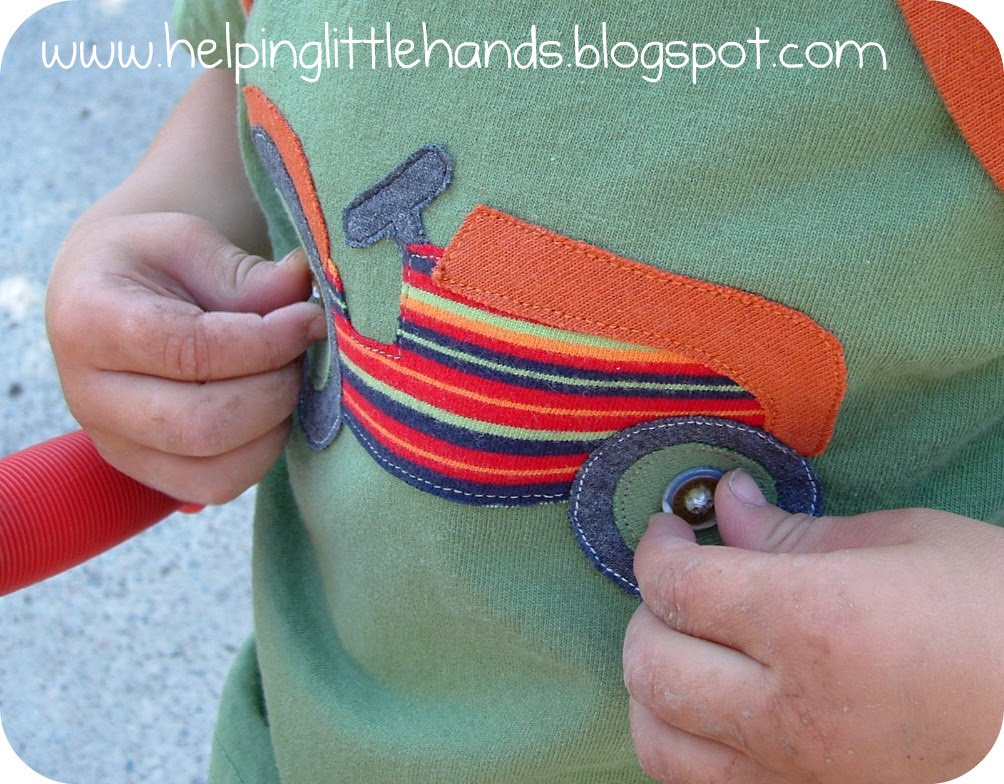
My son loves to play with the buttons on his shirt to make the tractor “drive.”

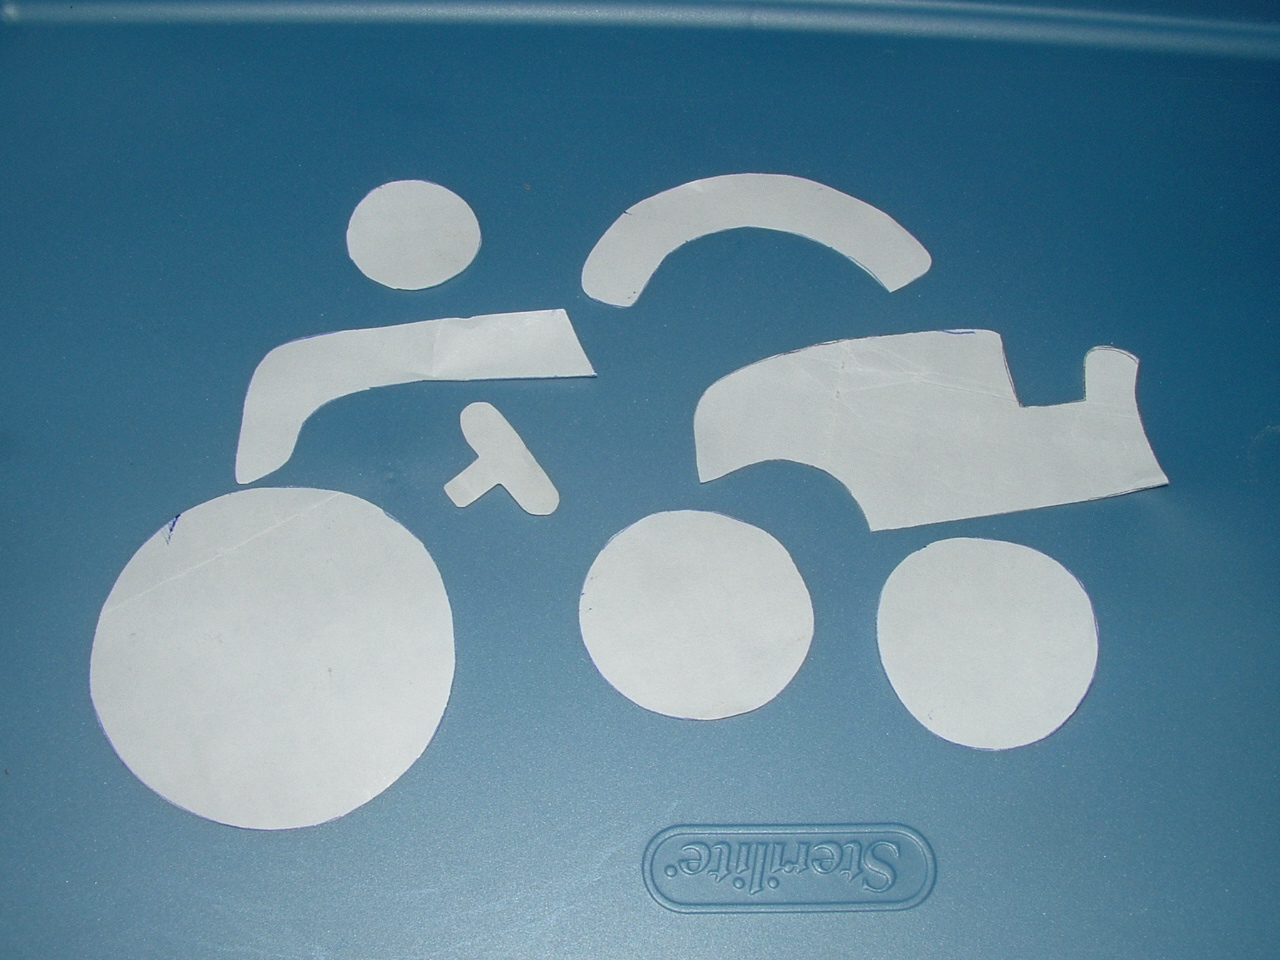
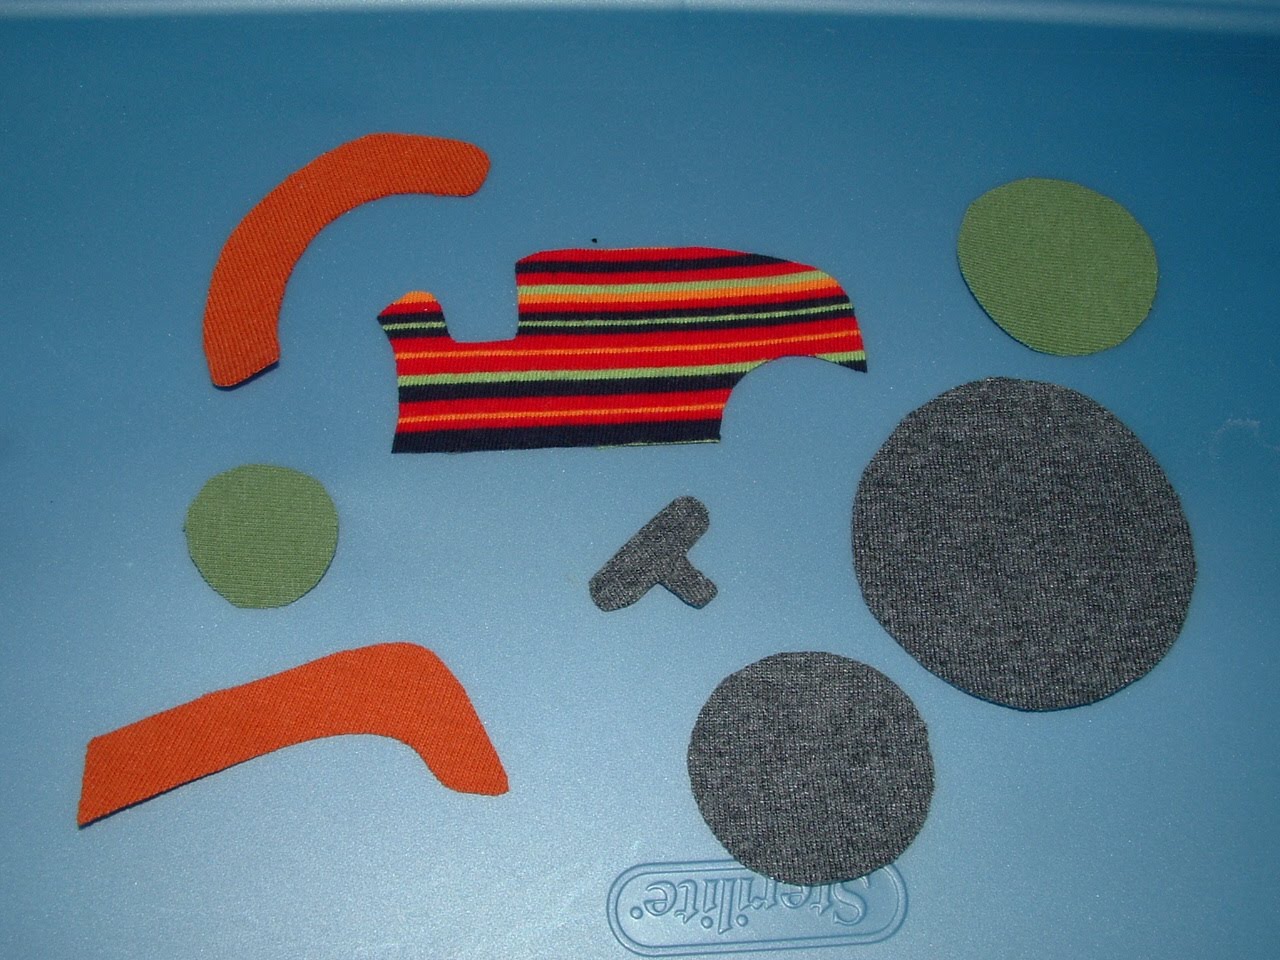
This technique will work for any design. Simple clip art or coloring pages are great starting places for designing your own appliques as well. For this project, I simply took a photograph of Granddad’s tractor and simplified and traced the picture onto a piece of paper.

Once you have your design, trace it onto some Heat’n Bond Lite or similar adhesive product. (REMEMBER that your final applique will be FLIPPED so if you want it facing a certain direction or there are letters or numbers involved, that you need to trace your design in reverse.)
Cut your pieces out.
Iron your pieces onto your fabric scraps, and cut them out again. Also don’t be afraid to try different combinations. There have been a lot of times, a combination just didn’t quite work, and I cut some new Heat’n Bond so I could use a different fabric.
Peel off the paper backing.
Arrange your pieces onto your T-shirt. Make sure any adjacent pieces are overlapped.
I highly recommend measuring to make sure it’s centered. There have been times when I’ve skipped measuring, only to notice it is off center once I had finished. Iron well. Then iron well again. Then iron the backside from inside the shirt. Then check all the edges to make sure they’re stuck down and iron any places that are a bit loose.
Now you’re ready for the fun part…the sewing! You can use matching thread or contrasting thread. I used a little of each in my tractors. I try to stitch about 1/8 of an inch away from the edge. If you stitch too far from the edge, sometimes the edges will roll back a little funny after it’s been worn and washed a bunch of times.
Here’s the real secret to really clean looking machine applique…You want to be sure to leave a long tail at the beginning and ends of your stitching and DON’T secure the ends by sewing back and forth. Instead, pull the thread on the front of the shirt, through to the inside. Then tie both threads together in a square knot several times. Then I leave about 1/2 an inch when I cut the threads, so they’re less likely to come untied.

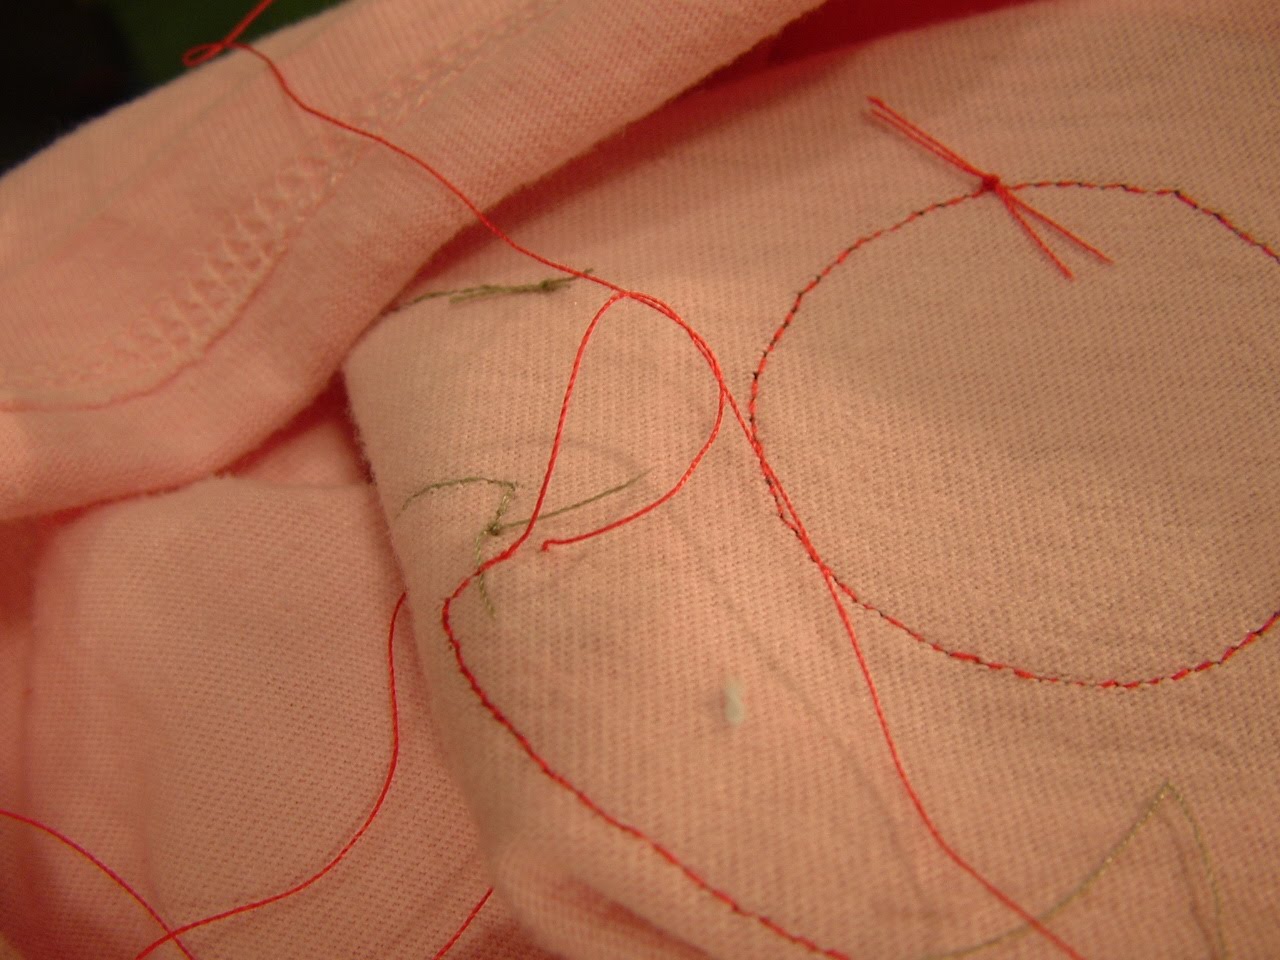
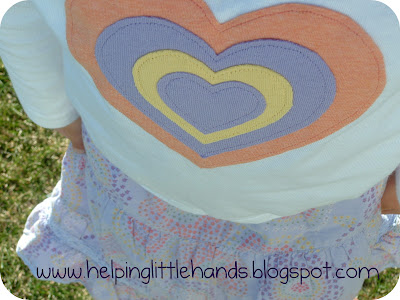
When I was finished, the back looked like this.

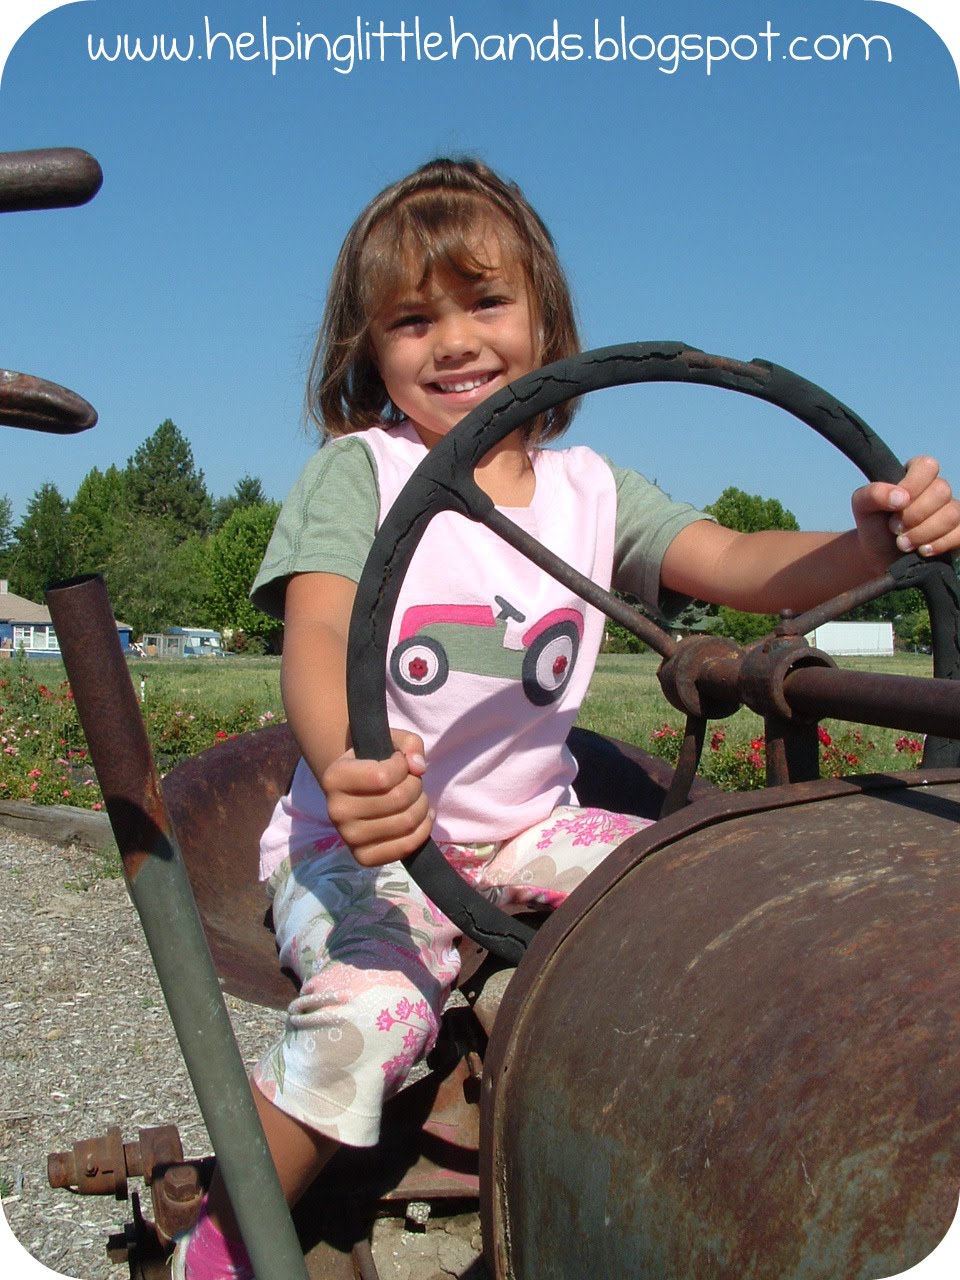
Then for a final touch, I sewed on some buttons for the center of the wheels. And you’re done! I’ll have a pattern up on my blog soon for how I resized my daughter’s shirt. (I like to resize slightly larger ones for her so they have more length and we see fewer belly buttons.) My son’s shirt was an early attempt at one of Dana’s 90-Minute shirts. The tutorial for the capris my daughter is wearing is here. Here’s the printable pattern for the tractor. (Pardon the chocolate smudges! Yikes!) If anyone ends up making one, I’d love to see it!

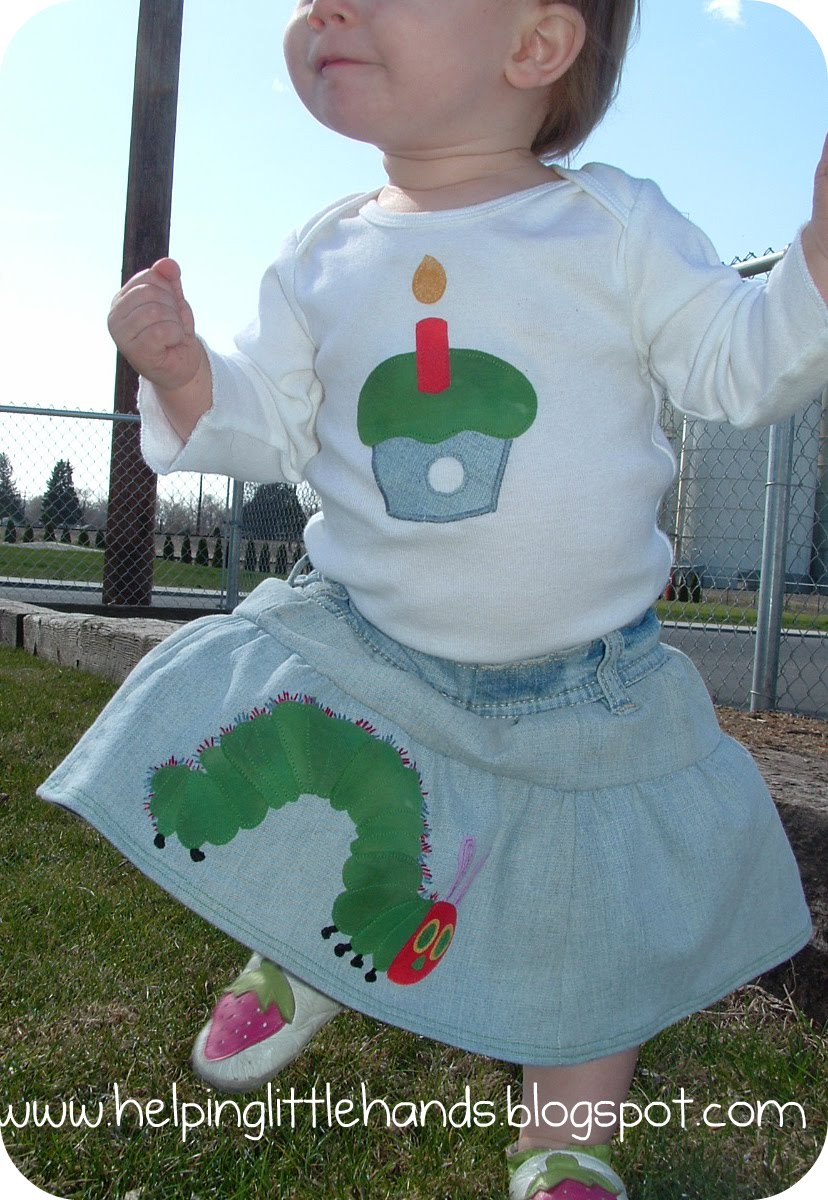
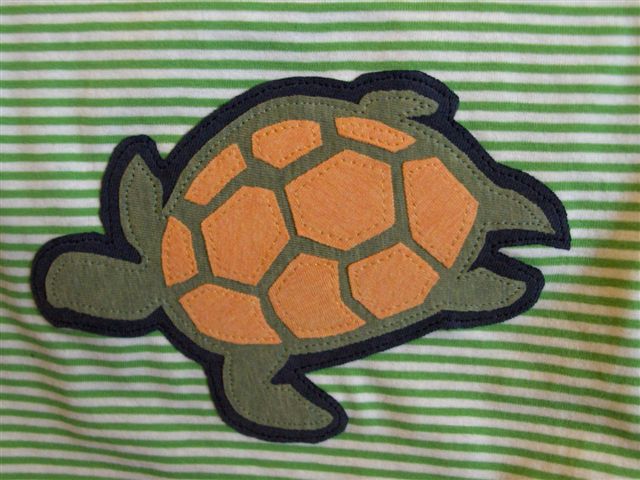
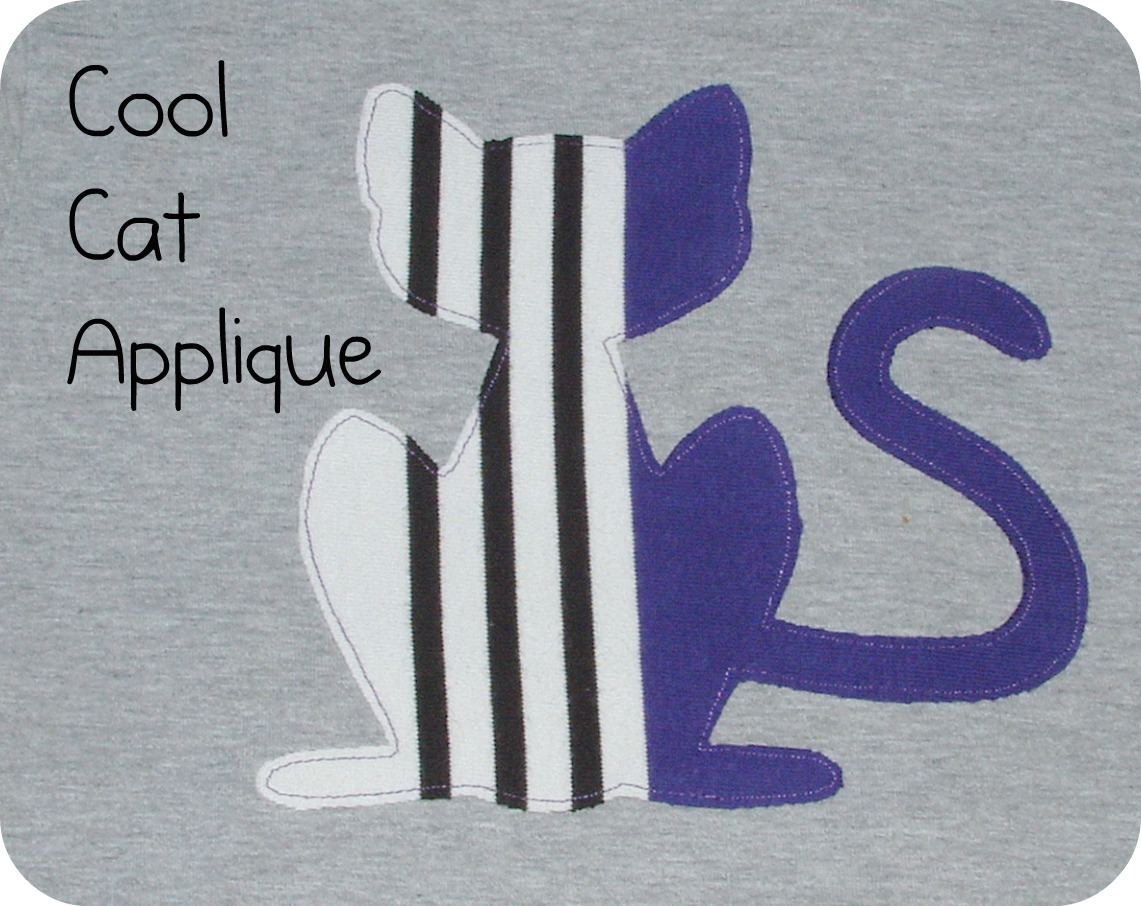
Granddad’s Tractor If tractors aren’t your thing, here are a few examples of other applique patterns available on my blog. 1st Birthday Cupcake Onesie Applique and Very Hungry Caterpillar Applique

Sea Turtle Applique

Jet Plane Applique

Cat Applique

And I’ll have a cute butterfly applique pattern on my blog soon.
So cute Polly! Thanks for sharing it with us and here is a little something as a thank you! Polly is a sewing whiz and makes so many other creative projects like:
http://2.bp.blogspot.com/_TR5Z3vVPzEY/TCIRIBGRitI/AAAAAAAACYE/s0Wx19eGzEU/s1600/T-ShirtDress.jpg
http://3.bp.blogspot.com/_TR5Z3vVPzEY/TA-hRS94WgI/AAAAAAAACNk/3LponshbDvk/s1600/June+059.jpg
http://3.bp.blogspot.com/_TR5Z3vVPzEY/S8KhKRYhmPI/AAAAAAAABsY/whWYMPqiWlE/s1600/252withwebsite.jpg
You will love her blog — Helping Little Hands!
XOXO

Posted By: Jen · In: guest tutorials, summer projects, tutorial

Guest Project — Mod Podged Giggle Chair
Guest Project — Summertime Lounge Chair Cover & Tote {no sew}

You’ll Also Love

Free Printable Patriotic BannerFree Printable Patriotic Banner
Paint Candy Corn Treat Jars – an Inexpensive Fall Gift Idea
Here is a list of 10 Must-Have Supplies for Learning to Sew.10 Must-Have Supplies When You’re Learning to Sew

Comments

  1. mrssherbert says

    September 1, 2010 at 7:14 PM

    So cute! Love all your ideas!

  2. mrssherbert says

    September 1, 2010 at 7:14 PM

    So cute! Love all your ideas!

  3. Bethany @ The Paper Pony says

    July 16, 2010 at 6:35 PM

    Your tractor is so cute! I love applique but have never considered TYING the ends in the back! What a great tip. Thanks!

  4. Connie W says

    July 16, 2010 at 3:06 PM

    I've been wanting to make something like this! Thanks for the tutorial!

  5. Amy @ Positively Splendid says

    July 16, 2010 at 12:46 PM

    The cutest little applique project I have seen in a long time!

  6. Kari @ Ucreate says

    July 16, 2010 at 6:24 AM

    Love this!!!

  7. theUngourmet says

    July 16, 2010 at 4:37 AM

    These are all so darling! If only my babies weren't so big now! 😉

  8. Kasey Hunt says

    July 16, 2010 at 12:15 AM

    So cute!!

  9. Sue (Someone's Mom) says

    July 15, 2010 at 7:45 PM

    Well, I don't sew or do much of anything with fabric…but, that doesn't mean that I can't appreciate a great project when I see it. Very cute!

  10. Katie says

    July 15, 2010 at 7:13 PM

    Awesome!

  11. Heather - Dollarstorecrafts.com says

    July 15, 2010 at 6:49 PM

    So cute! My kids love tractors!

    Your clothing tutorials are always cute, Polly!

  12. Mine for the Making says

    July 15, 2010 at 5:49 PM

    Never thought of using coloring books for applique!! Love that!

  13. casey. says

    July 15, 2010 at 5:27 PM

    Cute, cute, cute! :]

  14. Kathy Haynie says

    July 15, 2010 at 5:19 PM

    Great ideas, Polly. I like the way you showed how to make the different pieces all fit together, and I like the way you took a photo and simplified it for your pattern.

  15. becca says

    July 15, 2010 at 4:34 PM

    those appliques are really cool. i can't wait to make cute clothes for my future kiddos. i have a ton of felt and embroidery floss just waiting to decorate onesies. 🙂

  16. Kelli @ RTSM says

    July 15, 2010 at 4:22 PM

    Your appliques are amazing! Mine never turn out that neatly…probably because I am so impatient! Thanks so much for the tip on making them neater thought. I never thought to tie the threads off in the back! Such a great idea!

  17. 倫惟倫惟 says

    July 15, 2010 at 3:49 PM

    More haste, less speed.......................................................................

  18. amycornwell says

    July 15, 2010 at 3:38 PM

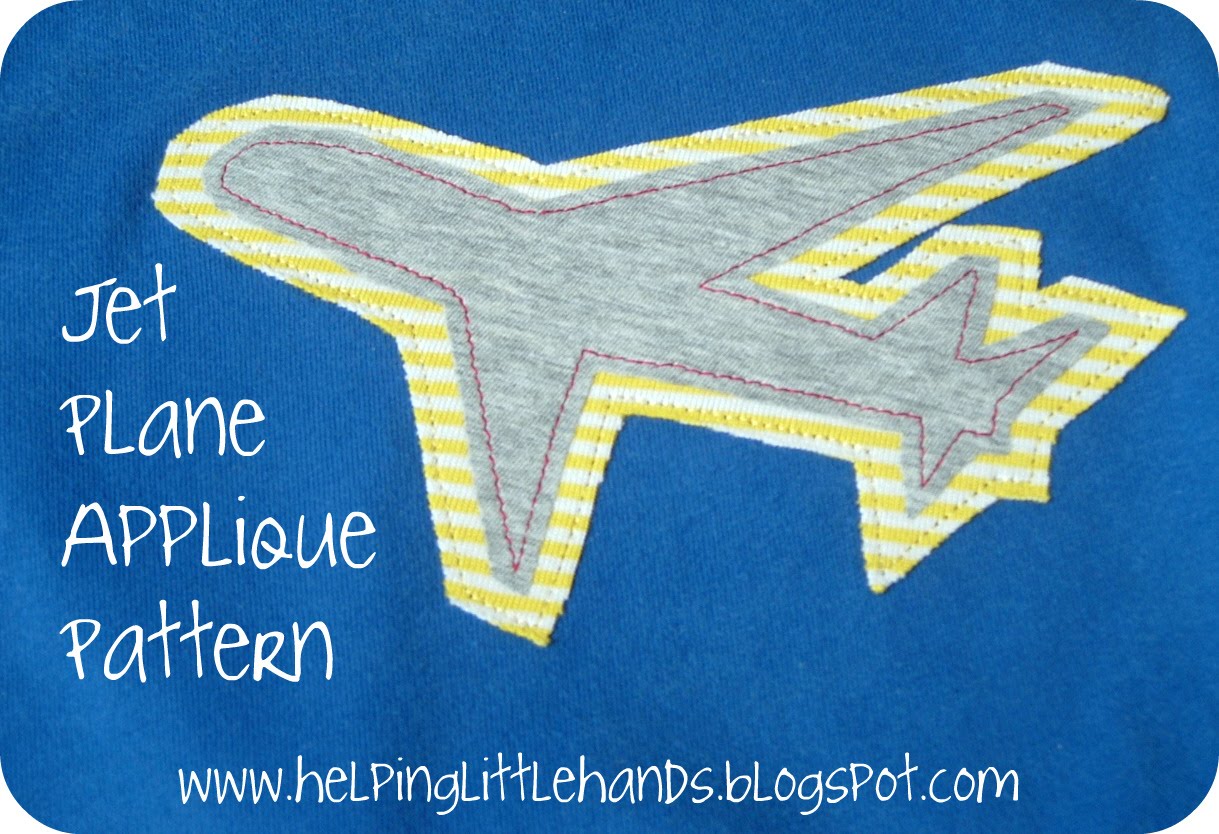
    I LOVE this! Thanks for posting the airplane too. My husband is a pilot and we're always looking for airplane things for our son.

Hi! I'm Jen Hadfield. I'm a mom of 5 restoring an 1891 home in the heart of Salt Lake City. I love being creative and sharing simple ideas to make your life easier and more beautiful!

Receive the Latest Crafts, DIY, Recipes and More in your INBOX!

Follow us on Pinterest! It's awesome!

Top Posts & Pages

A New Deck in Under 30 Minutes!
Copycat Panera Spinach and Artichoke Egg Soufflés - SO good!
Spruce up Your Outdoor Space with a DIY Recirculating Fountain! (tutorial)
5-Minute T-Shirt Neckline Refashion
How to Change a Recessed Can Light into a Pendant Light with No Remodeling!
12 Must-Have Items to Pack on an Alaskan Cruise!


Popular Posts

  • A New Deck in Under 30 Minutes!
    A New Deck in Under 30 Minutes!
  • Copycat Panera Spinach and Artichoke Egg Soufflés - SO good!
    Copycat Panera Spinach and Artichoke Egg Soufflés - SO good!
  • Spruce up Your Outdoor Space with a DIY Recirculating Fountain! (tutorial)
    Spruce up Your Outdoor Space with a DIY Recirculating Fountain! (tutorial)
  • 5-Minute T-Shirt Neckline Refashion
    5-Minute T-Shirt Neckline Refashion
  • How to Change a Recessed Can Light into a Pendant Light with No Remodeling!
    How to Change a Recessed Can Light into a Pendant Light with No Remodeling!
  • 12 Must-Have Items to Pack on an Alaskan Cruise!
    12 Must-Have Items to Pack on an Alaskan Cruise!
  • 21 Delicious Weight Watchers Recipes!
    21 Delicious Weight Watchers Recipes!

As seen in


Amazon Affiliate

Tatertots & Jello is a participant in the Amazon Services LLC Associates Program, an affiliate advertising program designed to provide a means for sites to earn advertising fees by advertising and linking to amazon.com.
  • About Me
  • Advertising
  • Get Featured

Copyright © 2025 Tatertots and Jello · Privacy
This site is a place for positive discussion and ideas. Negative talk, comments that disparage others, and similar are not welcome and may be removed.