This post sponsored by Lowe’s.
I was in Crate and Barrel last month and really liked this industrial shelving — but it was $1499!
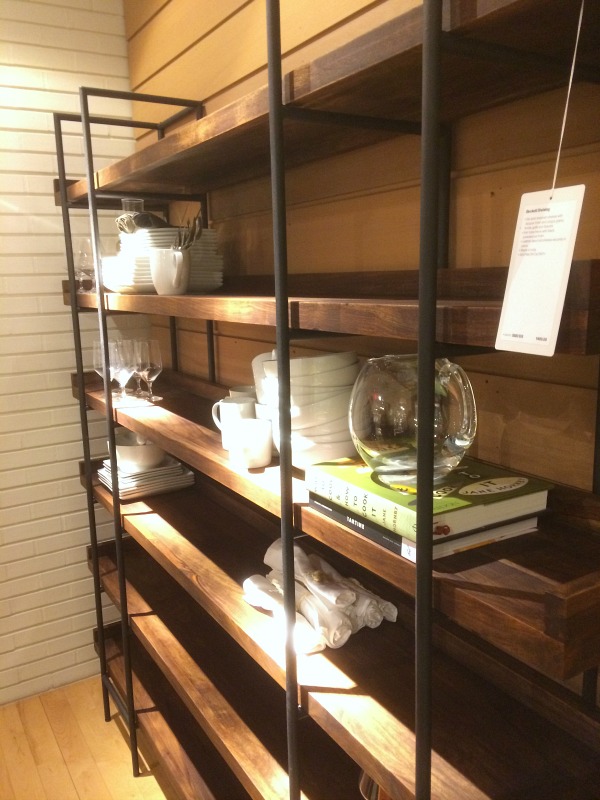
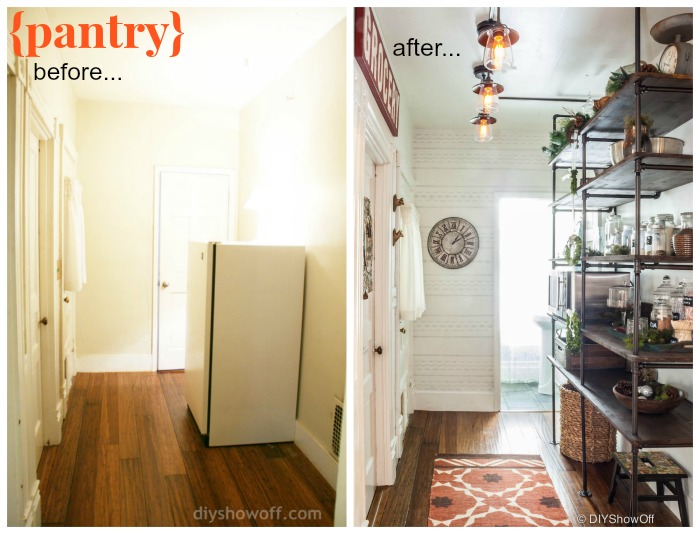
But I didn’t have time to learn to weld, and I knew I wanted to put my own spin on the project for the #1905Cottage pantry:
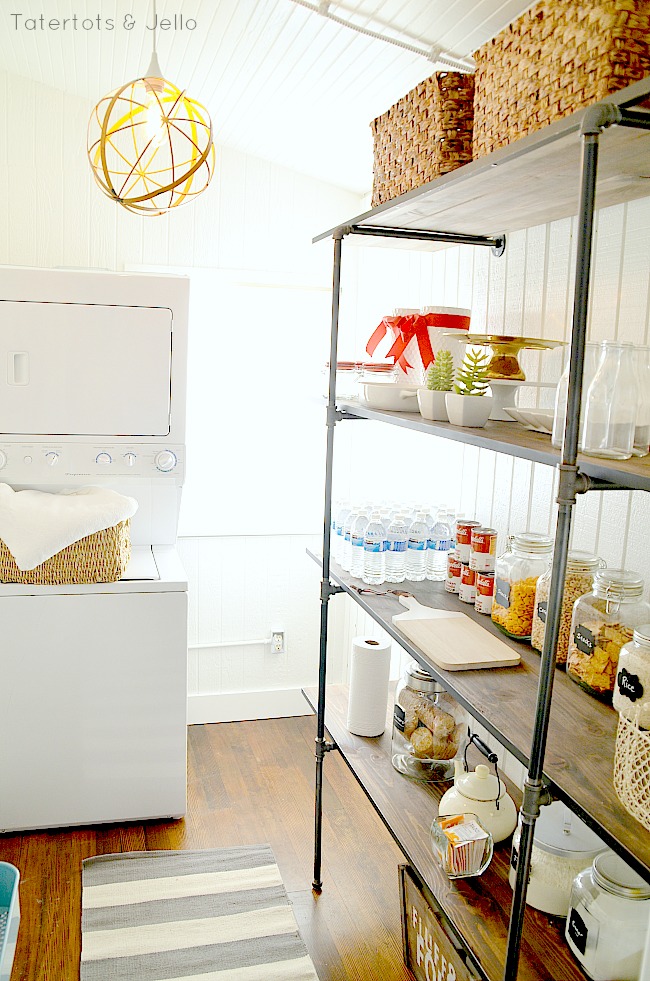
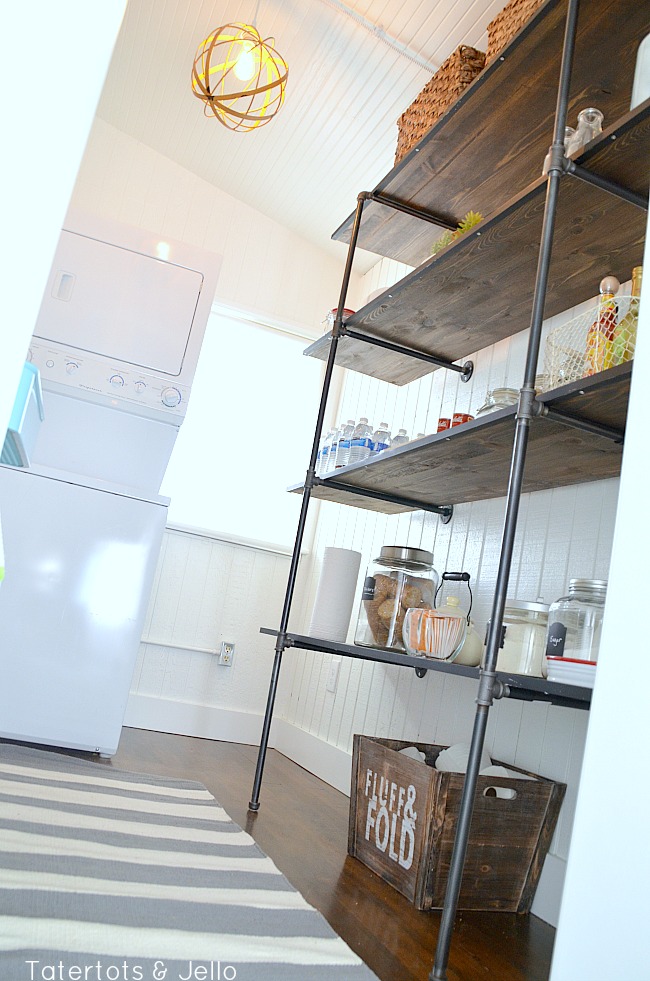
You’ll love this easy to assemble industrial shelving project. There are slightly less expensive options, to be sure, but I chose this way because it makes a very sturdy shelf unit and it’s super easy to assemble with pre-cut and pre-threaded pipe segments. No cutting!
I told a little of the background of this project on Monday … and then I’ll show you how I made it and how you can adapt this to your project, too! (And check out the 14 inspirational industrial shelving projects I featured on Monday!) When we bought the #1905Cottage, the only way to access the laundry room was from the front porch. Sometime in the 1950’s or 1960’s the then-owners had taken part of the porch and turned it into a laundry room. So it had no heat and the floor was the concrete cement porch. When we remodeled the house, we cut a hole in the west wall of the kitchen and opened up an entrance to the laundry room. We also closed the doorway on the front porch and replaced the door with a window. 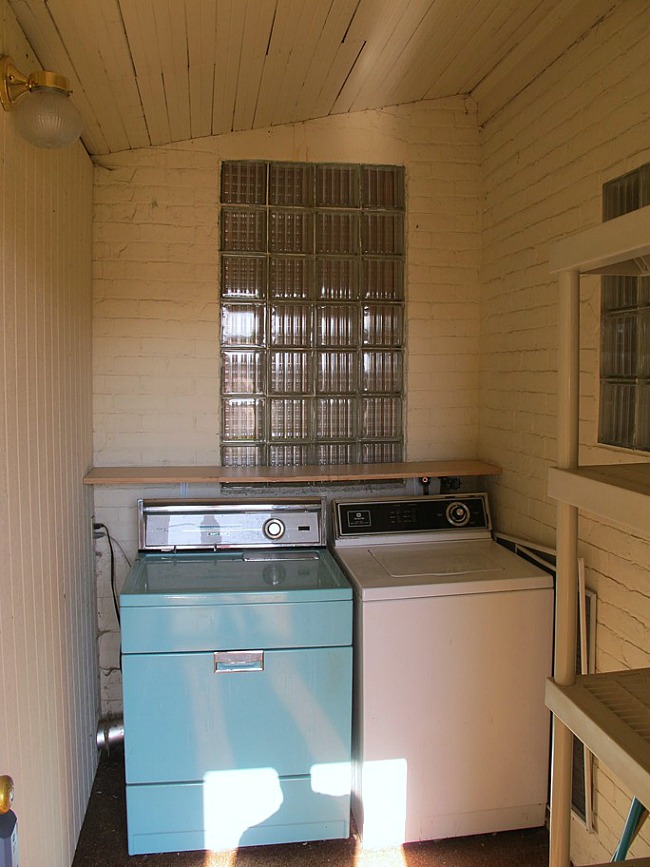
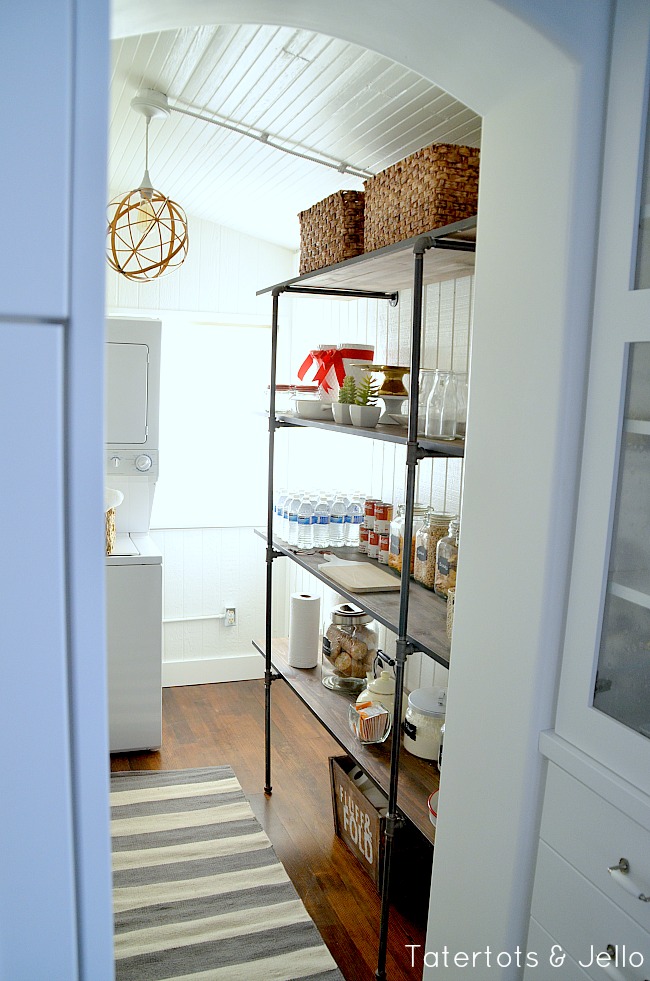
I love the large pantry/laundry room that is acessed directly from the kitchen now. And in my mind I always envisioned a row of shelves on the right-hand side of the room for a large pantry area. I had seen industrial pipe shelving projects and I thought it would be perfect to compliment the beadboard walls in the laundry/pantry room.
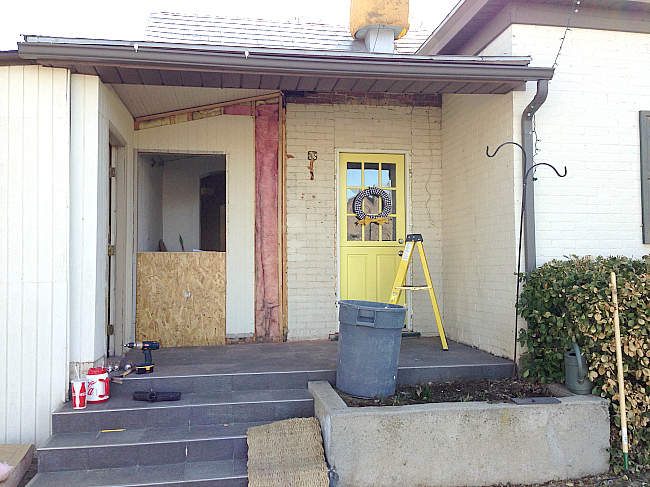
(Image above: former door being turned into a window — you can see the former window cut into an arched door inside.)
So when Lowe’s gave us the option of creating an “Organization” post for January, I knew it was time to tackle this project. Here’s how I built it: Before I bought supplies, I carefully measured my wall. I knew I wanted deep shelves and I wanted them to be fairly tall so that I can use them for serving pieces, vases, and so on. I also knew that I was putting the shelving against a wood-paneled wall — so I could depend on anything I screwed into the wall staying screwed in.
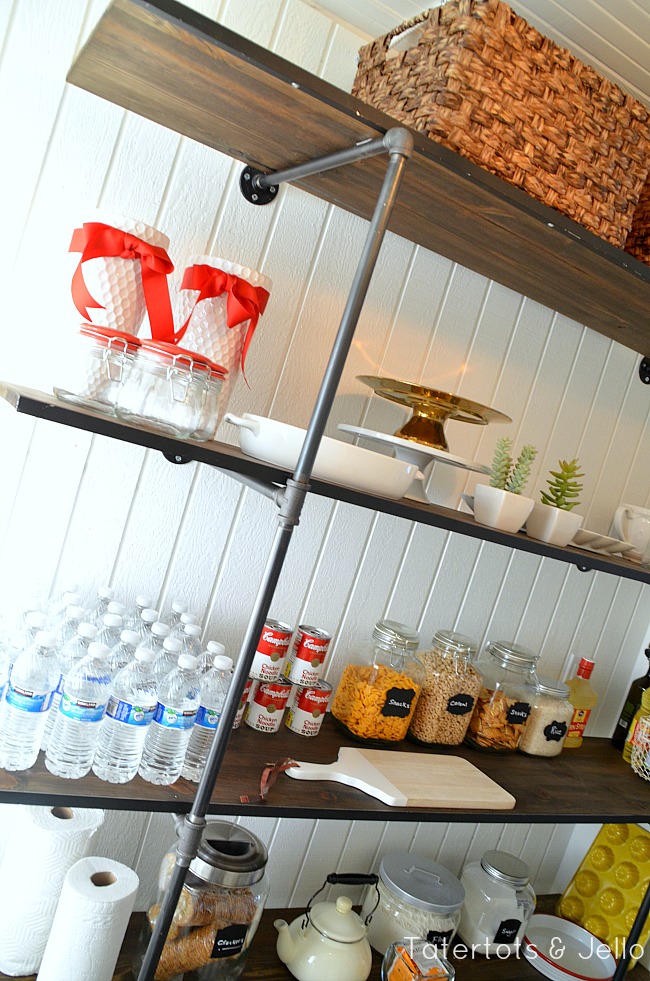
With that in mind I drew a sketch of my shelves, and I could see that I had just enough room to make about four shelves between the floor and the ceiling. I have to sketch these out so I can keep track of what I have in mind — it’s OK to sketch! I realized I wanted shelves that were 4 feet long and as deep as I could get them — like 16 inches or so. I knew that I wanted two supports per shelf because I was going to buy the sturdiest wood I could find (and I solved this problem in away I’ll show you in a minute). So I sketched two supports, each with four cross pieces. From the floor, I used four sections, the bottom three pipes joined with Ts and the top one with an L connector (yes, look at the picture and it will make sense).
So, for this project I bought
- 16 x 18″ sections of 1/2″ black iron, threaded pipe (Southland Pipe 1/2-in x 18-in 150-PSI Black Iron Pipe, $4.92 each)
- 6 x T connectors, threaded, 1/2″ black iron pipe (Mueller Proline 1/2-in Black Iron Tee Fitting, $2.06 each)
- 2 x L connectors, threaded, 1/2″ black iron pipe (Mueller Proline 1/2″ 90° Black Iron Elbow, $1.62 each)
- 2 x end caps, threaded, 1/2″ black iron pipe (Mueller Proline 1/2-in Black Iron Cap Fitting, $1.40 each)
for the frames. To attach the frames to the wall, I also bought
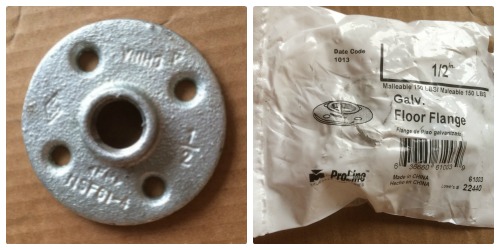
- 8 x 1/2 galvanized floor flanges (I couldn’t find them in black iron) (Mueller Proline 1/2-in Dia Galvanized Floor Flange Fitting, $6.61 each)
 I wanted to buy a thick sheet of wood, but had hoped that I had remembered wrong: that I could buy a board that was more than about 12″ wide. Unfortunately, those don’t exist, but I found some cool “panel” sections that were exactly 72″ (6 feet) long and about 16″ wide. So to my cart, I added:
- 4 16″ x 72″ x 1″ shelf panels (1-in x 16-in x 72-in Paint Kiln-Dried Kiln-Dried Elliotis Pine Panel, $15.95 each)
And just to hold the shelves in place so they did not move around, I also bought:
- 1 package 3/4″ two-screw pipe straps (see pic below) (AMERICAN VALVE 3/4-in Dia x 2-1/2-in L Galvanized 2-Hole Pipe Strap, $2.17 for package of 10)
Even when I chose the best panels, they were still not 100% straight … so I knew I wanted one more thing to make the shelves stay rigid. By the galvanized metal sheets, I found cool, L-shaped trim pieces (you’ll see them below) that I decided to use on the front edge of the shelves, so I bought:
- 4 3/4″ x 3/4″ x 72″ aluminum pieces (Steelworks 6-ft x 3/4-in Aluminum Solid Angle, $6.63 each)
For my finish work, I also bought:
- 1 can Valspar black matte spray paint ($3.98)
- 1 can dark walnut stain (Minwax Quart Wood Finish Dark Walnut, $7.77)
I had plenty of screws, rags, and so forth from other projects. Total cost: $220.92, assuming I can actually add.
How to assemble it:
First, about two days before I was ready to assemble it, I stained the shelves and let them dry for a couple of days. This is the most time consuming part of the whole project! The day before I was ready to assemble the shelves, I took the metal edges, the floor flanges and the galvanized pipe straps and took them outside to paint them. In the snow. 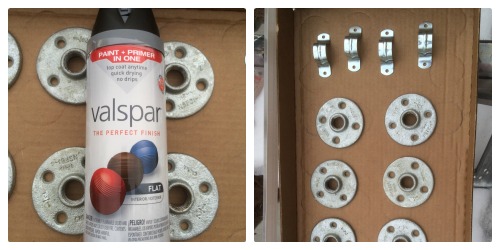
I painted all of these black to match the black iron. While they were drying, I took a rag and cleaned off as much of the excess black stuff from the black iron as possible. It got all over my hands! Each of the pipes also had a price sticker attached with packing tape on it. While this is an acceptable aesthetic choice for a plumbing project, it would not do for me. I used a utility knife to get off the tape and then the blade, sideways, to scrape off the adhesive from the price stickers. I then used acetone and a rag to clean off the remaining gooey stuff. This was the second most time-consuming part of the project.
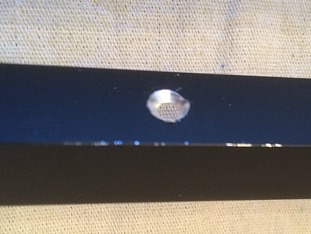
Early one Saturday morning, I gathered all of the pieces at the cottage to assemble them. First, I took the four metal edges and used my chop saw (miter saw) to trim them to match the board length. They were a bit longer than the boards, and I needed to put a new blade in that saw anyway :). Then I marked three spots on one side of each metal edge with the first about 14″ in from each side and the other in the middle. I used my trusty chamfer bit after I drilled a tiny pilot hole in each to taper the holes so that the screws would sit flush with the edge of the metal:
I used short, 1/2″ screws and attached each to a wood shelf.
Next, I assembled the pipe supports.
Pro tip: put a few drops of machine oil on the threads of each end before you screw them in. They’ll be tons easier to screw in, and, since you will likely be adjusting the length of each section a bit to match the other sections, you will appreciate your foresight later when you’re making everything nice and square. 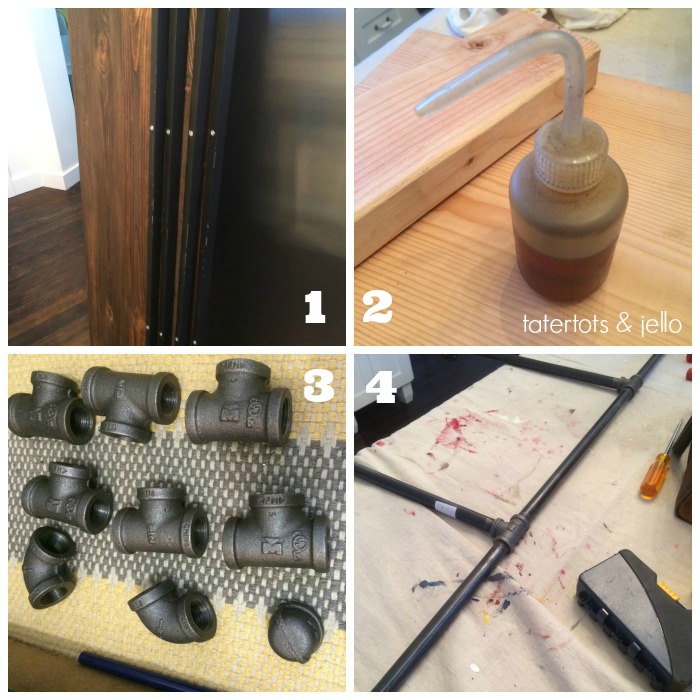 Above: 1. Shelves with metal edges ready to go. 2. Oil, ready to be oily. 3. Tees, “els,” and caps. 4. Assembly station on the kitchen island, covered with a cloth dropcloth.
I assembled each shelf section using the 18″ metal pipe sections, the tees, the “els,” and the caps. To protect my wood floor I put a felt furniture protector dot on the end of each of the two caps – the bottoms of the legs. For a last step, I attached the painted, galvanized floor flanges to the back of each shelf. I then estimated how far in I wanted each support – I ended up putting them in about 18″ from each end.
Because the wall I attached them to was siding/paneling, it was easy to make sure they were level – -they just had to line up with the paneling. I attached the first support to the wall using the floor flanges and 3/4″ screws. See below: 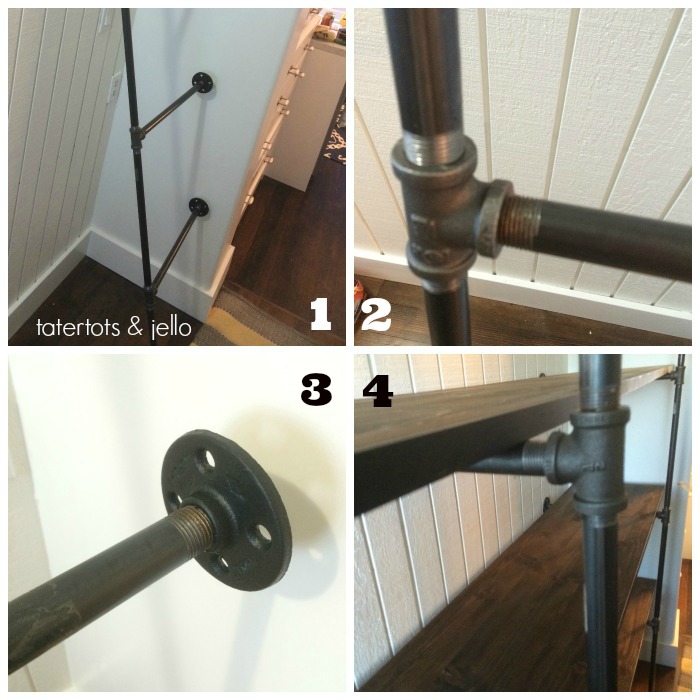 Above: 1. An assembled support piece, 2. My camera failing to focus on the tee junction — note how you can adjust the length of the section by screwing or unscrewing the pipe? 3. The floor flanges ready to go. Note the slight rust and wear — I wanted the supports to look a bit worn, so I left them this way. 4. Shelves under way.
Next, I measured down the wall and put the second support in place in the same way.
Note: make sure you have room to put your shelves in — don’t get the supports screwed into the wall and then find out you don’t have enough space to get the shelves put in — if you have to, screw in the supports after you’ve laid the shelves across them. If you have to do that, you will definitely need a minion lackey helper.
Then, I just put the shelves in place and secured them underneath on just one support with the painted, galvanized pipe straps and short, 1/2″ screws.
That’s it! Total time — about 30 minutes to stain the shelves (and a day or so to dry, although I allowed extra time because of cold weather), about 10 minutes to paint the galvanized metal pieces black, about 30 minutes to get the regrettable price stickers off of the pipes. (Confession: in these directions I am telling you to take the price stickers off before you assemble the shelves. I did mine after, which was harder, I think.) And finally, about an hour to assemble and affix the shelves. Total time: a little over two hours.
*****
You can also follow Lowe’s on Facebook for more great ideas and sign up for their FREE Creative Ideas Magazine with TONS of great DIY ideas and instructions!!
Be sure to check out my friend Rochelle’s Industrial Pantry too! It’s amazing!!
++++
How might you use industrial shelving? What’s your spin on the trend?
xoxo

Thanks to Lowe’s for providing materials for this post; the opinions and content are mine. See my disclosures.
PS: I’ve linked up this post to these fabulous blogs this week!



LOVE these shelves! They look so great in the pantry and fit the time period and style of the home. I made shelves for my son’s room using galvanized pipe, but I love this design too! I may have to do something similar for our basement.
Nice Work! How did you secure the pipe straps to the wood? Did you use a clamp to hold the wood in place?
Hi Jen, I wanted to let you know I featured your gorgeous pantry shelves today on my blog post about DIY industrial pipe furniture, I just love this! Have a great day! Sharon @ lilikoijoy.com
Nice shelves, rustique just as I like it. It would be great for my office space. Certainty I’m going to try this and maybe make a tutorial.
Again nice work !!
Good stuff…
I love this project! Do you think it is possible to make the shelves 12″ deep? Also I can’t see where you attached the pipe straps.
Wendy » Hi Wendy!
You could make the shelves 12″ deep. You’d just buy different boards and horizontal pipes. However, it’s much harder to find 12″ boards: at that size, the boards are usually pieced together and slightly thicker. They’re also more expensive.
And if you can’t see where I attached the pipe straps then we did them right! 🙂 They’re supposed to be somewhat subtle. But you actually can’t see them in these pictures because they’re attached on the right-hand pipe underneath each shelf, about a third of the way from the back wall. The camera angles don’t show the pipe straps, and I put the pipe straps there on purpose so they’d be invisible from the kitchen.
Thanks for commenting!
Thanks for the info – I am going to try making this.
Hello,
I love the look of these pipe shelves. I’m trying to make my own, but I feel some pipes in your description are missing. I could be wrong. Did you use all 18″ pipe for the supports? Meaning you needed (16) 18″ threaded pipe rather than only 8?
You’re absolutely right — it should be 16. I’ve corrected the post. I think I must have been counting *one* shelf support!
Love these!! I love open shelving like this, especially in a smaller space, as it still leaves the room feeling open. Instead of bookcases or shelving units that take up so much room and make the space feel smaller. Great job!! Oh and I know it’s not the highlight of this post but I absolutely LOVE your kitchen! It’s gorgeous and the white makes it feel/look so open and airy!
What an awesome makeover! brilliant idea to use pipe. Congrats on a job well done!
Seriously!! That is beautiful!! Now I am trying to think of a place in my house I can replicate it just because it is so amazing!!
could you please share the source of your striped rug? love it! (& the shelves too!)
Awesome-sauce, Jen!! xo
Love this! I’ve been thinking about doing something similar as a free standing bookcase in my son’s room but I’ve been too afraid to try. You gave me the courage to tackle it!
I love me some industrial shelves!!! We made some awhile back with angle iron and wood that I adore. But I’ve always drooled just a little over the ones made with pipe. Gorgeous job!
xo, S
Jen I LOOOOVE it!! That little cottage is turning into one adorable little place!!
LOVE IT… I am featuring it tomorrow 🙂
Jen — These are perfect! I love this idea so much I am going to borrow it for my home office. I too have a home built around 1900 (I have the same wood panel walls 🙂 ) and this will work perfectly in my laundry room / home office.
I saw a similar unit for a great deal of money. So glad I can build one myself — and it’s more fun.
Tammi 🙂
Absolutely rockstar – LOVE. I can tell you my husband will love this addition to his to-do list as well… 😉
You’re a genius! This is so amazing, now I just have to figure out where/how I can use it in my home. 🙂
Anna
Oh my goodness. Oh my goodness. I have been wanting some industrial shelving in my kitchen since we moved in, but have not been wanting to pay the big bucks that I was seeing online. This is PERFECT. You did such a great job! I will definitely be pestering my hubs to start this project with me the ENTIRE WEEKEND. 🙂
Those are cool. I really like the look. I know me and those shelves would not look so neat and clean
No matter how much I try to organize it still tends to look like a cluttered mess.
;o/
Thanks for sharing
I love your shelves and the cost surprised me {much less than I thought it would be}. You definitely have my gears turning as to where I could put something like this in my house. I’m short on space but I have a few ideas.
I absolute love your shelves and your pantry! It is the nicest pantry I have ever seen! I have shared this on my facebook page. Thanks for all of your inspiring posts! Kari
Your SWEET little cottage never ceases to AMAZE me! The transformation it has undergone is simply STUNNING!!! This Pantry is just another Amazing project! You did an Awesome job and I LOVE that you tailored made it to fit your space. There is just so much more LOVE when you look and see and know that’s not something you bought but your HARD WORK!!! LOVE IT!
xoxo
Love this so much! It looks awesome!
What a great project Jen… Love it!
Very cute!! I love the industrial look and pipe is the easiest way to go! I adore that cottage…SUCH a good job. I want you to come to my new house someday and help me decorate. 🙂
It’s FABULOUS Jen!!!!!!!!!!!!!!!!!!!!!!!!!!! I have a feeling I may be needing this in the future- pinning & creating my own soon. 🙂 Thank you!
Absolutely love this! I’ve been seriously thinking about some industrial shelving in our house. Love what you did!
Wow Jen! I love this! I really want to do industrial shelving my boys room, I had no idea how to start though so this post is awesome. Thank you!
Wow Jen. AMAZING! I’m with Anele- the cottage brings tears to my eyes. It looks fabulous!! xoxo
Oh! I was too busy admiring your awesome shelves that I forgot to say thank you so much for the shout out on my pantry shelves! Thank you!!! xo
I love your construction, Jen! The metal sheeting is brilliant! What an awesome storage space! Perfect location…so much hard work and creativity went into making it functional. You did an amazing job, as always!
I love your version! AMAZING!
I LOOOOOOOOOOOOOOOVE your version and love the price even more! Can I just say that your cottage seriously brings tears to my eyes with each new pic. Please enjoy it for those of us who don’t have quite as awesome an abode! 😉