Tatertots and Jello

COLORFUL HAPPY HOME -- Daily DIY, Decor, Craft and Recipe Tutorial

  • My Home
    • 1905 Cottage
    • Daybreak House
  • DIY
    • DIY Projects and Ideas
    • Organizing
    • Tutorials
    • Printables
  • Decor
    • Spring Projects
    • Summer Projects
    • Fall Projects
  • Crafts
    • Kids Crafts
    • Painting Projects
    • Paper Projects
    • Sewing
    • Wreaths
  • Holidays
    • Valentines Day
    • Easter
    • Halloween
    • Thanksgiving
    • Christmas
    • HAPPY Holidays Series!
  • Recipes

Explore

  • my home
  • diy
  • decor
  • crafts
  • holiday
  • printables
  • recipes

Connect

Home » tutorial » Stenciled Napkin Pillows for my banquette — with Royal Design Studios!! {tutorial}!!

tutorial · September 9, 2011

Stenciled Napkin Pillows for my banquette — with Royal Design Studios!! {tutorial}!!

Tatertots & Jello is a participant in the Amazon Services LLC Associates Program, an affiliate advertising program designed to provide a means for sites to earn advertising fees by advertising and linking to amazon.com.
 I have been on a bit of a stenciling kick this summer…
stenciled projects
I stenciled a Chevron rug,  a Spray Painted Circle Rug, and then I tackled my kitchen window with some Faux Roman Shades and some painted pillows for my kitchen banquette.

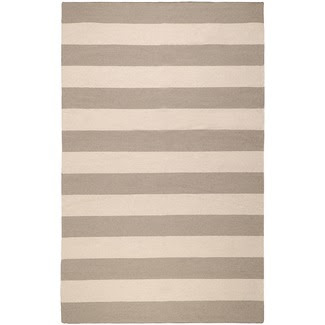
And yesterday I stenciled this rug for my family room — only with thicker stripes!! It turned out SOOO good!! I’ll be sharing that soon. 

I thought it might be fun to make some pillows for my Kitchen Banquette with Royal Design Studio stencils and some white and patterned napkins I found at Target. {these are the Chain Link and Lattice Endless Circle Stencils}

Super easy!!
stenciled napkin pillows header
Here’s how to make them — 

Stenciled Napkin Pillows

stenciled napkin pillows collage
  1. The first thing I did was I mixed up some paint and Martha Stewart’s paint medium. This makes the paint softer and washable.
  2. Then I laid the napkin on my work surface and taped the Royal Design Studio – Chain Link Stencil and Endless Circles Stencil over the top with some painter’s tape.
  3. I used this really cool roller top that fits on top a container and it makes stenciling a breeze. It’s also from Martha Stewart’s new decorative paint line.
  4. Once it was painted, I laid the napkins out to dry.
  5. Then I sewed another napkin to the stenciled side and added a zipper.
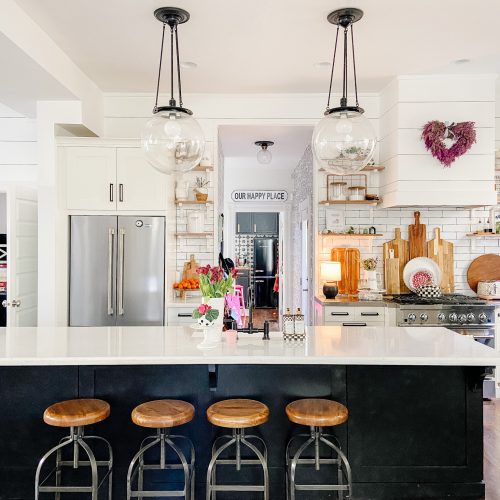
So now I have some fun pillows that go with my new kitchen décor AND they were super easy to make!!
stenciled napkin pillows from the side
I love Royal Design Studio because they have amazing, modern design AND their stencils are made out of the highest quality materials and they have guide marks that make lining up the stencils on a wall a breeze.
three stenciled napkin pillows
Have a Fantastic Friday!!!
xoxo

 PS— Do you love Chevron as much as I do?? Check out the 22 Chevron DIY Ideas I shared on Babble’s New Home Ec today 🙂
 
PPS — Did I say FRIDAY??? It’s my favorite day of the week. Why??? It’s almost time for the Weekend Wrap Up Party!! It’s YOUR time to show off what YOU have been doing. I love featuring YOU!!! The party starts at 6 pm MST.


See you then!!! 

Posted By: Jen · In: tutorial

Halloween Chevron Wreath {tutorial}!!
Great Ideas — 25 Fall Wreaths!!

You’ll Also Love

Make Your Home Cozier with Boucle!
15 Best Kitchen Ideas for 2023!
Update a Dated 90’s Kitchen on a Budget

Comments

  1. Jeremiah says

    April 22, 2014 at 9:52 PM

    Thank you for another wonderful post. Where else may anyone get that type of info in such an ideal means of writing?
    I have a presentation subsequent week, and I am at the look for such information.

Hi! I'm Jen Hadfield. I'm a mom of 5 restoring an 1891 home in the heart of Salt Lake City. I love being creative and sharing simple ideas to make your life easier and more beautiful!

Receive the Latest Crafts, DIY, Recipes and More in your INBOX!

Follow us on Pinterest! It's awesome!

Top Posts & Pages

Copycat Panera Spinach and Artichoke Egg Soufflés - SO good!
Spruce up Your Outdoor Space with a DIY Recirculating Fountain! (tutorial)
12 Must-Have Items to Pack on an Alaskan Cruise!
A New Deck in Under 30 Minutes!
DIY Fountains to Make Your Yard Amazing!
How to Change a Recessed Can Light into a Pendant Light with No Remodeling!


Popular Posts

  • Copycat Panera Spinach and Artichoke Egg Soufflés - SO good!
    Copycat Panera Spinach and Artichoke Egg Soufflés - SO good!
  • Spruce up Your Outdoor Space with a DIY Recirculating Fountain! (tutorial)
    Spruce up Your Outdoor Space with a DIY Recirculating Fountain! (tutorial)
  • 12 Must-Have Items to Pack on an Alaskan Cruise!
    12 Must-Have Items to Pack on an Alaskan Cruise!
  • A New Deck in Under 30 Minutes!
    A New Deck in Under 30 Minutes!
  • DIY Fountains to Make Your Yard Amazing!
    DIY Fountains to Make Your Yard Amazing!
  • How to Change a Recessed Can Light into a Pendant Light with No Remodeling!
    How to Change a Recessed Can Light into a Pendant Light with No Remodeling!
  • DIY Secret: How to Print on Post-It Notes (and Free Printable Template)
    DIY Secret: How to Print on Post-It Notes (and Free Printable Template)

As seen in


Amazon Affiliate

Tatertots & Jello is a participant in the Amazon Services LLC Associates Program, an affiliate advertising program designed to provide a means for sites to earn advertising fees by advertising and linking to amazon.com.
  • About Me
  • Advertising
  • Get Featured

Copyright © 2025 Tatertots and Jello · Privacy
This site is a place for positive discussion and ideas. Negative talk, comments that disparage others, and similar are not welcome and may be removed.