
I may end up with chandeliers in EVERY room in my house — I love them so much!!
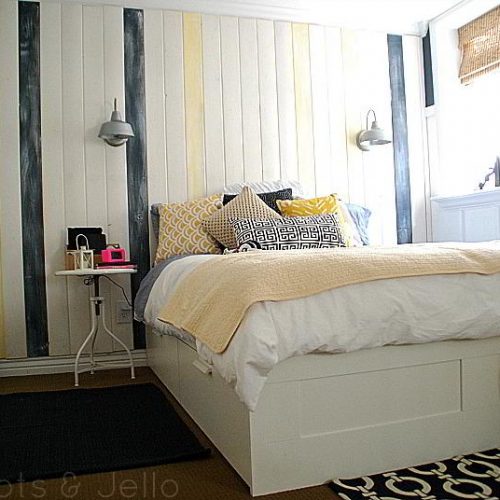
So when I was working on my Guest Room Redo — I knew I wanted to change the dreaded nipple light fixture with something a little more fun. PLUS, that light fixture hardly let in any light. I also knew that I didn’t have a big budget for the room, so I needed to come up with something that was inexpensive but also went with the overall beachy/modern vibe I was going for in the room!

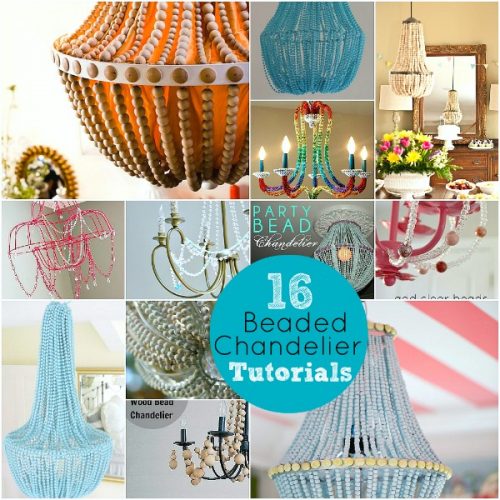
I had seen a lot of wooden bead chandeliers. I loved the way they looked, but NOT the price tags!

Ball Chandelier — Cottage Chic Store $2,189.00
I saw a great idea on Better Homes and Gardens. They attached hooks in each of the wooden balls to attach them to each other.

I liked the idea, I thought it might be easier to string the beads instead of screwing in hooks in each of the beads. I spray painted an inexpensive chandelier from Lowe’s a dark grey. And instead of attaching hooks, I drilled holes in all of the wood balls. I bought the wood balls at Hobby Lobby. I bought two different sizes.
The small balls are 1 inch balls
The larger balls are 2 inch balls

They sell them in packages. And some of them are sold pre-drilled. Others have no holes and a third type had a hole drilled in one end of the ball. So I took the undrilled and partially drilled balls to my FABULOUS father-in-law for help with drilling. He luckily has a drill press and he came up with a ingenious way to drill the holes. He drilled a indentation in a piece of wood the size of the beads and that made it easy to drill holes in the beads.

If you don’t have access to a drill press, you can use a clamp to hold each bead in place for drilling. Another option is to buy the beads online pre-drilled. Here are 200 beads for $1.50. Here’s a list of wooden beads you can buy online from Craft Parts.

And for a little extra sparkle and to tie in with the grey chandelier and color scheme — I used hemalite beads also from hobby lobby.
I strung the beads on beading cord. Don’t get the STRETCHY cord, you don’t want the cord to stretch.

I drilled four holes in each arm of the chandelier. Then once I strung each of the strings for the sides, I tied an end to the ring on top of the chandelier and another end to a jump ring that I threaded through the closest hole to the inside of the chandelier.

I did this with with each arm of the chandelier. Then I took a section of cord and strung beads between each of the arms of the chandelier.
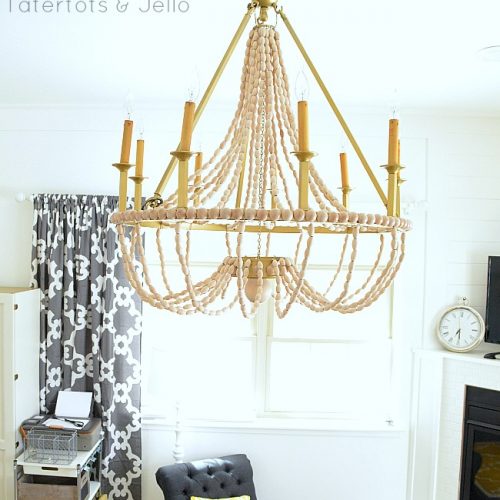
Then I attached a length of the longer wood beads and hemalite beads between each of the arms, hanging down. And then I added a beaded length to the front of each arm. And then I took some super glue and added a dot to each of the knots. I swagged the light fixture over so it hangs over the center of the bed.
I was going to add a swag to the bottom of the chandelier with a 3-inch ball but I decided that it would hang too low and people might bang their heads on it lol.


And now I have a focal point of the room that is beachy and a little sparkly. Plus, it’s so much brighter than the old light fixture. The new one has six 60-watt bulbs. We even put a dimmer on the light fixture so our guests can decide how bright they want it to be!!

I am so pleased with how the room has turned out. And instead of a 2,000+ light fixure, you can make one for less than $100 AND love it even more because YOU made it!!
My mom stayed in it this weekend and she loved it!! I am so excited to share more tutorials on different elements of the room AND the room reveal soon!!

xoxo
Have a Beautiful Day!!


hi! quick question! you mention you used 2 sizes of beads: 2″ and 1″. it looks to me though that there are three, with an even small size, like .5″? are my eyes playing tricks with me?! also, do you have an average of how many wooden beads and how many hematite beads (did you use both oval and round??) one would need? thanks!
So so so happy I found your tutorial. We just bought a house and I saw a beaded chandelier for $3,600 from Horchow. Dying, drooling, wanting this so bad but knowing it is not a priority, I searched on line. There you were with this great idea and beautiful website.
Thank you!!
Love, love, love it! And I have to ask … Is your gray medallion fabric in the headboard from Spoonflower? If so, I’m almost POSITIVE that its the fabric a friend of mine designed for me. So glad to see other people like it as well!!!
Awesome light fixture! I used your project as an inspiration for a chandelier in my guest bedroom. I ended up spray painting the wooden balls a cream color, which was tedious, but the end project looks pretty nice.
Great job! I’ve been saving for ever to get the chandelier from pottery barn now I’m working fallowing your idea thanks I’m working on my way to hobby lobby
Ha…boudoir not bourdeaux. Remnants of ladies night out I guess!
Thanks Jen! I’m not using wooden balls but your step-by-step directions were perfect for my chandelier project. It will be for my soon-to-be neice’s french bourdeaux styled nursery and I can’t wait for it to be finished!!! Thanks again…and btw, this is my first post/comment on the internet ever =)
Hi Jen, this is gorgeous and I’m trying to recreate something similar. You mentioned 1 inch and 2 inch balls, but it looks like you have one more size that you used? Can you advise? Also, do you remember what size hole you drilled – maybe 1/8 inch? Thank you for the tutuorial and guidance.
Very cute!
This is fantastic! So inspiring.
You did a wonderful job-beautiful! I have been trying to duplicate a coral chandelier I saw online for over $3,000. It is simple like yours with what looks like coral, it is a deep coral color. Any suggestions?
Thanks
Cute chandelier! On a side note, I LOVE that headboard fabric. Can you tell me what it is or where you purchased it?
Thanks Lesley!! I love the fabric too — I bought it from Spoonflower. I haven’t posted about it yet, but its’ Medallions in Mushroom — http://www.spoonflower.com/fabric/584817.
xoxoxo
It looks amazing! I LOVE LOVE it!
xx
Thanks so much Jesse!!!
xoxoxoxo
Love this Jen. It looks awesome.
Cheri
Simply Gorgeous!! Great job Jen
Inspiration:
Years ago, before I discovered the joys of beading, I embellished a candelabra with woven wire and small turquoise beads, I always felt it needed tassels. That part of the project was never finished because I didn’t find anything that seemed ‘right’. Looking at it has been a silent rebuke. Wood beads tassels are just the thing; I can’t wait to get started (finished lol).
As a beader, I have LOTS of jewelry and never found an affordable jewelry box with sufficient storage. At the time, the jewelry boxes available were not my to my liking and expensive. To solve this I created my own using two paper organizers from The Container Store. I stacked them and secured the together with industrial strength glue. Wallpaper was used added to the sides and draw fronts for decoration. As added storage I glued thin strips of wood around three sides and inserted cups hooks. The whole thing was then spray painted black. The crystal draw pulls I wanted were too expensive. Instead I used inexpensive silver colored thumb screws from the hardware store. The silver of the thumb screws are a beautiful contrast to the black of the jewelry box. For the cost of about $50 I have a very functional, attractive jewelry box.
Good Morning! I wanted to let you know that I featured this fabulous creation on my “What I Bookmarked This Week” post today. Stop by and see!
Posts like this are exactly why I LOVE Tatertots and Jello. Amazing DIY Jen! Thanks for sharing!
amazing. you are so talented.:)
jen!
you are so smart! it looks fabulous! but i don’t think i would have ever thought to do this!
your guest room looks wonderful. if you ever need anyone to do a “test stay” of the room, i’ll be glad to volunteer! 😉
miss you!
xo
kellie
Wow..weee!! Simply stunning and oh so affordable! I want to make a couple of these. Thanks Jen, you are inspiring!!
Jen, this is FABULOUS
So amazing! You have so inspired me to try this someday! I was like you…loved the look but not the price! Fabulous job!
FANTASTIC! I ADORE IT, I MEAN LOVE IT! WOW! winks, jen
Fan-0Freaking-Tastic idea! Love, love, love it! I can’t wait to try it myself- and of course, I pinned it!
xo Becca
So beautiful!!! Love it so much!!!
The wood beads look so chic!
This is such a cool idea, and the result is beautiful!
OMG I LOOOOOOVE IT! I just walked around my house and decided the perfect spot is in my dining room where I don’t like the light anyway! Off to lowes TODAY! Thanks for the great inspiration and tutorial!
Love love love love! Not only is it totes cute but it could work with so many different styles of decor. I am imagining painting chandelier white, the wood beads teal, and adding coral beads in between…. Thanks for the tut! xoxo
Amazing amazing! I love how you have balanced the different sized balls. This is just the loveliest creation – thanks for the wonderful tute! And your FIL’s idea to drill the balls: I am soooo happy to have that tip.
Jen this is gorgeous–way better than the mucho expensive one!!!
This turned out SO great! I’m trying to figure out where I could possibly put it in my home… 😉
Gosh I really love this!! What a fantastic idea!! 🙂