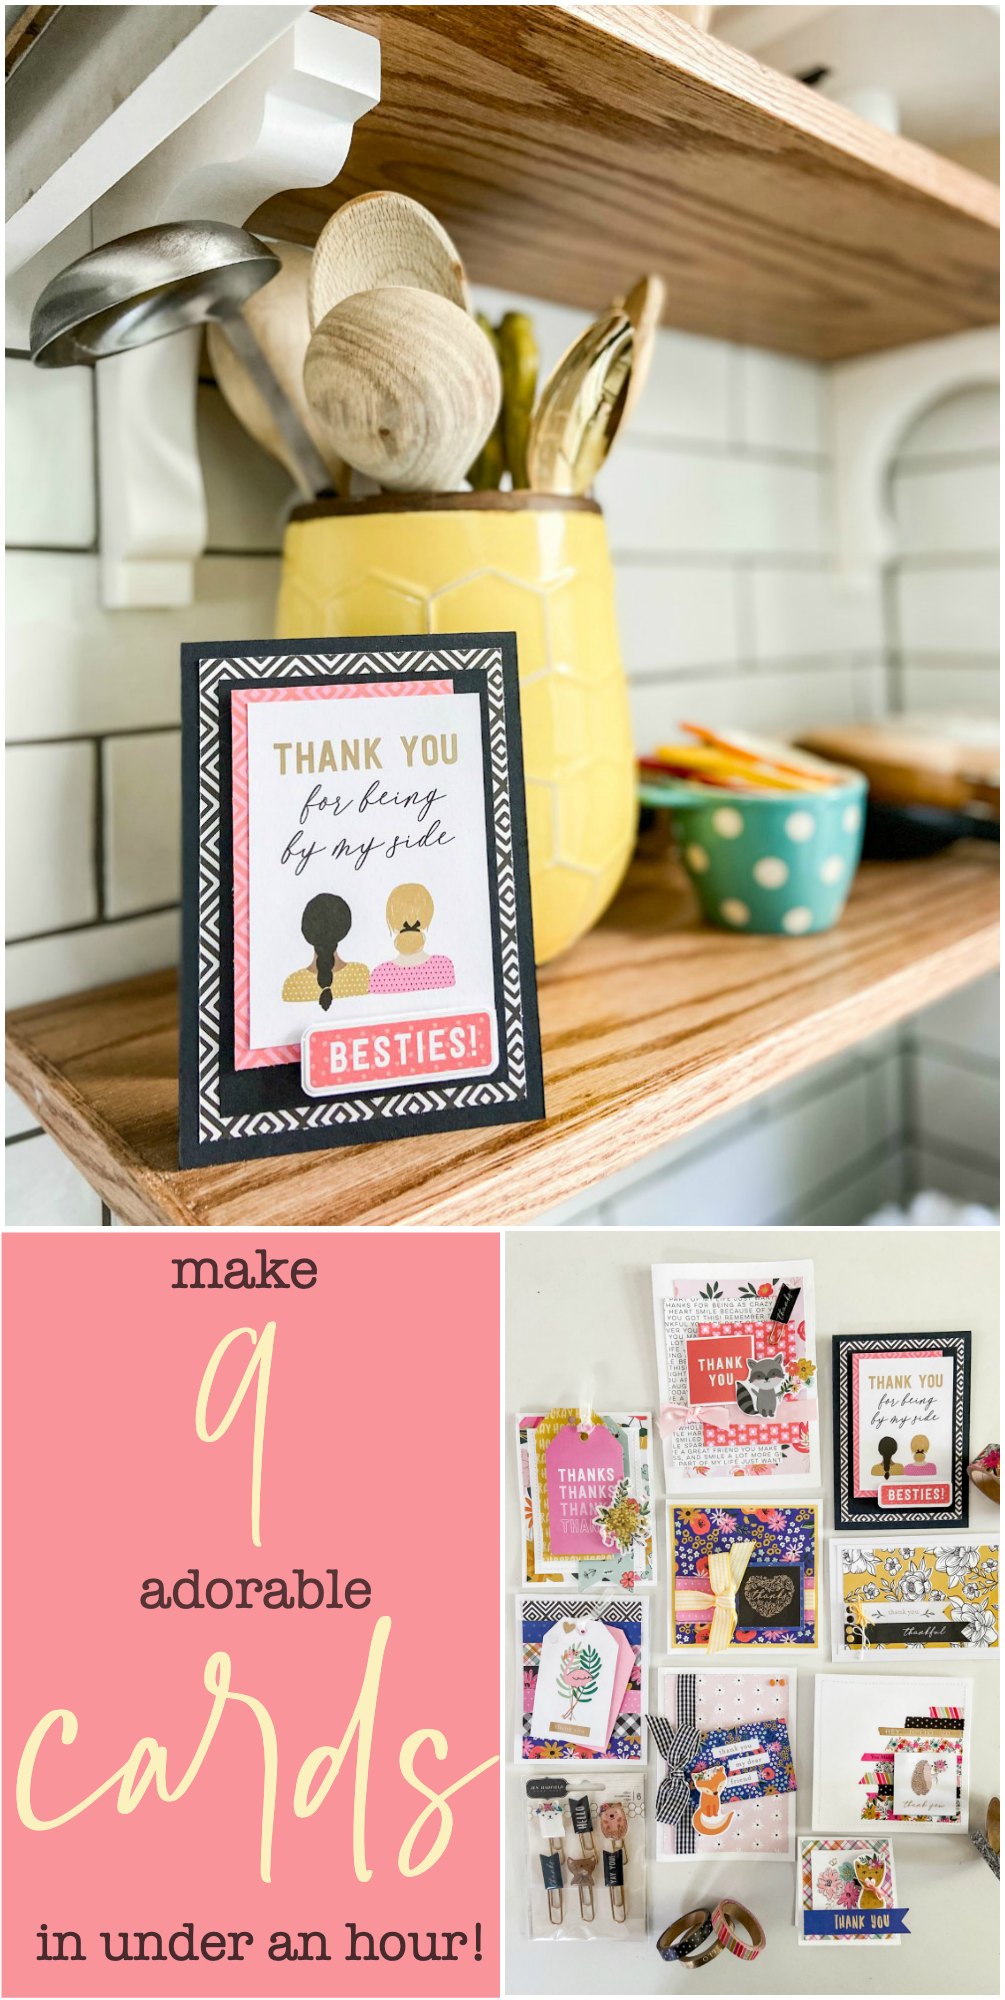
Make 9 adorable cards in under an hour! 9 cute cards with full instructions using the Hey! Hello! line now at JoAnn Stores!
Make 9 Adorable Cards in Under an Hour

There’s something special about a handmade card. When I receive one I feel loved that someone took the time to handmade a card for ME! I always save a handmade card because it’s a one-of-a-kind treasure.
Handmade Cards Can Be Easily Made
You might think making a handmade card is too time consuming. But the fact is that you can make a batch of handmade cards in less than an hour.
The Hey! Hello! was Developed to Make Handmade Cards Easy to Create
When we were designing the Hey! Hello! line I asked my readers what craft they use scrapbook paper for most and the overwhelming response was CARDS!
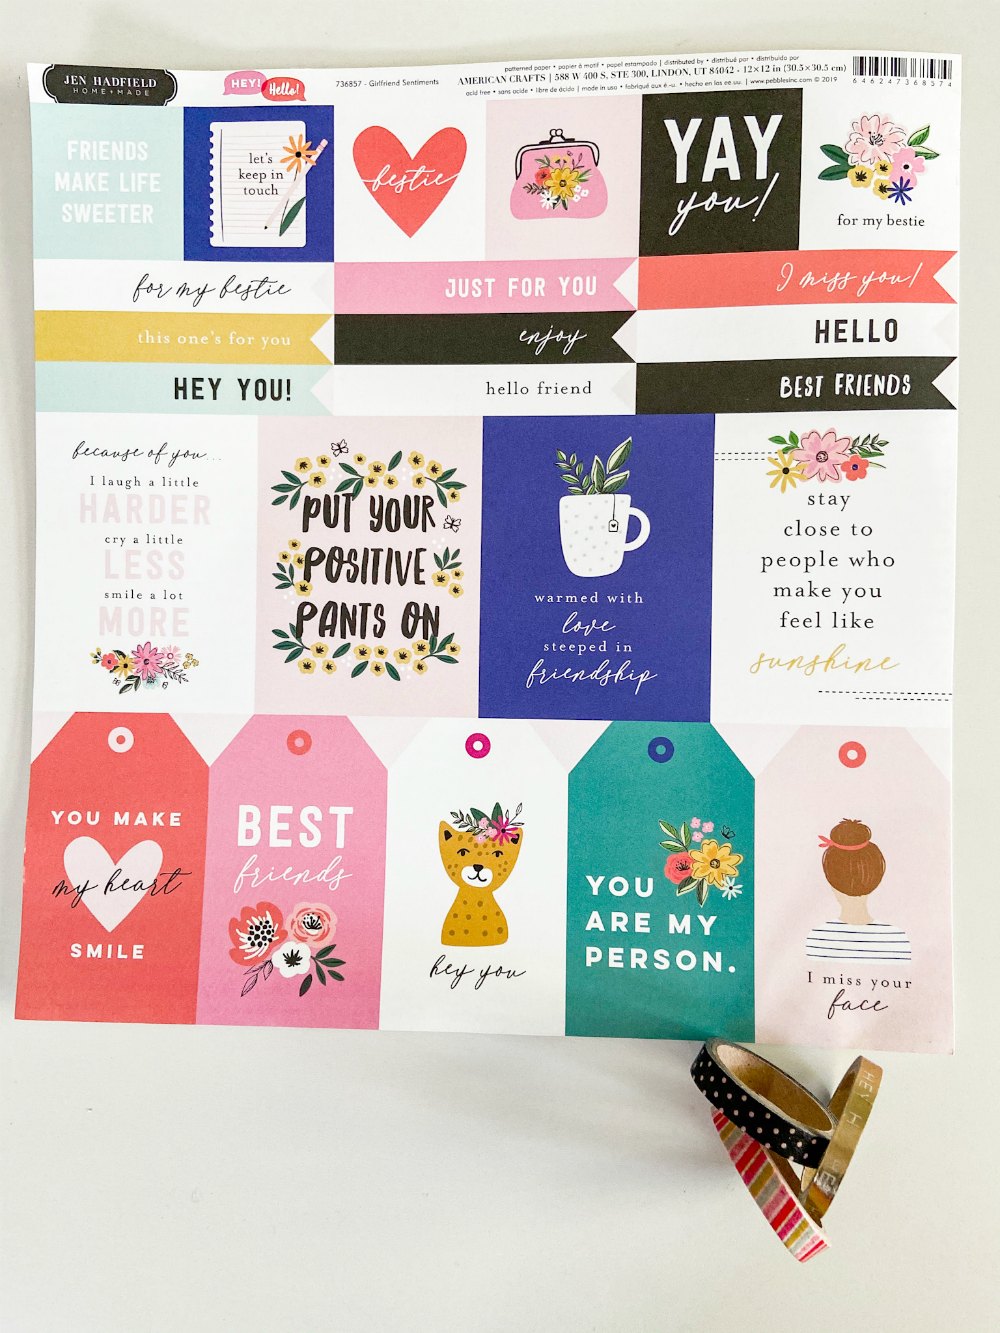
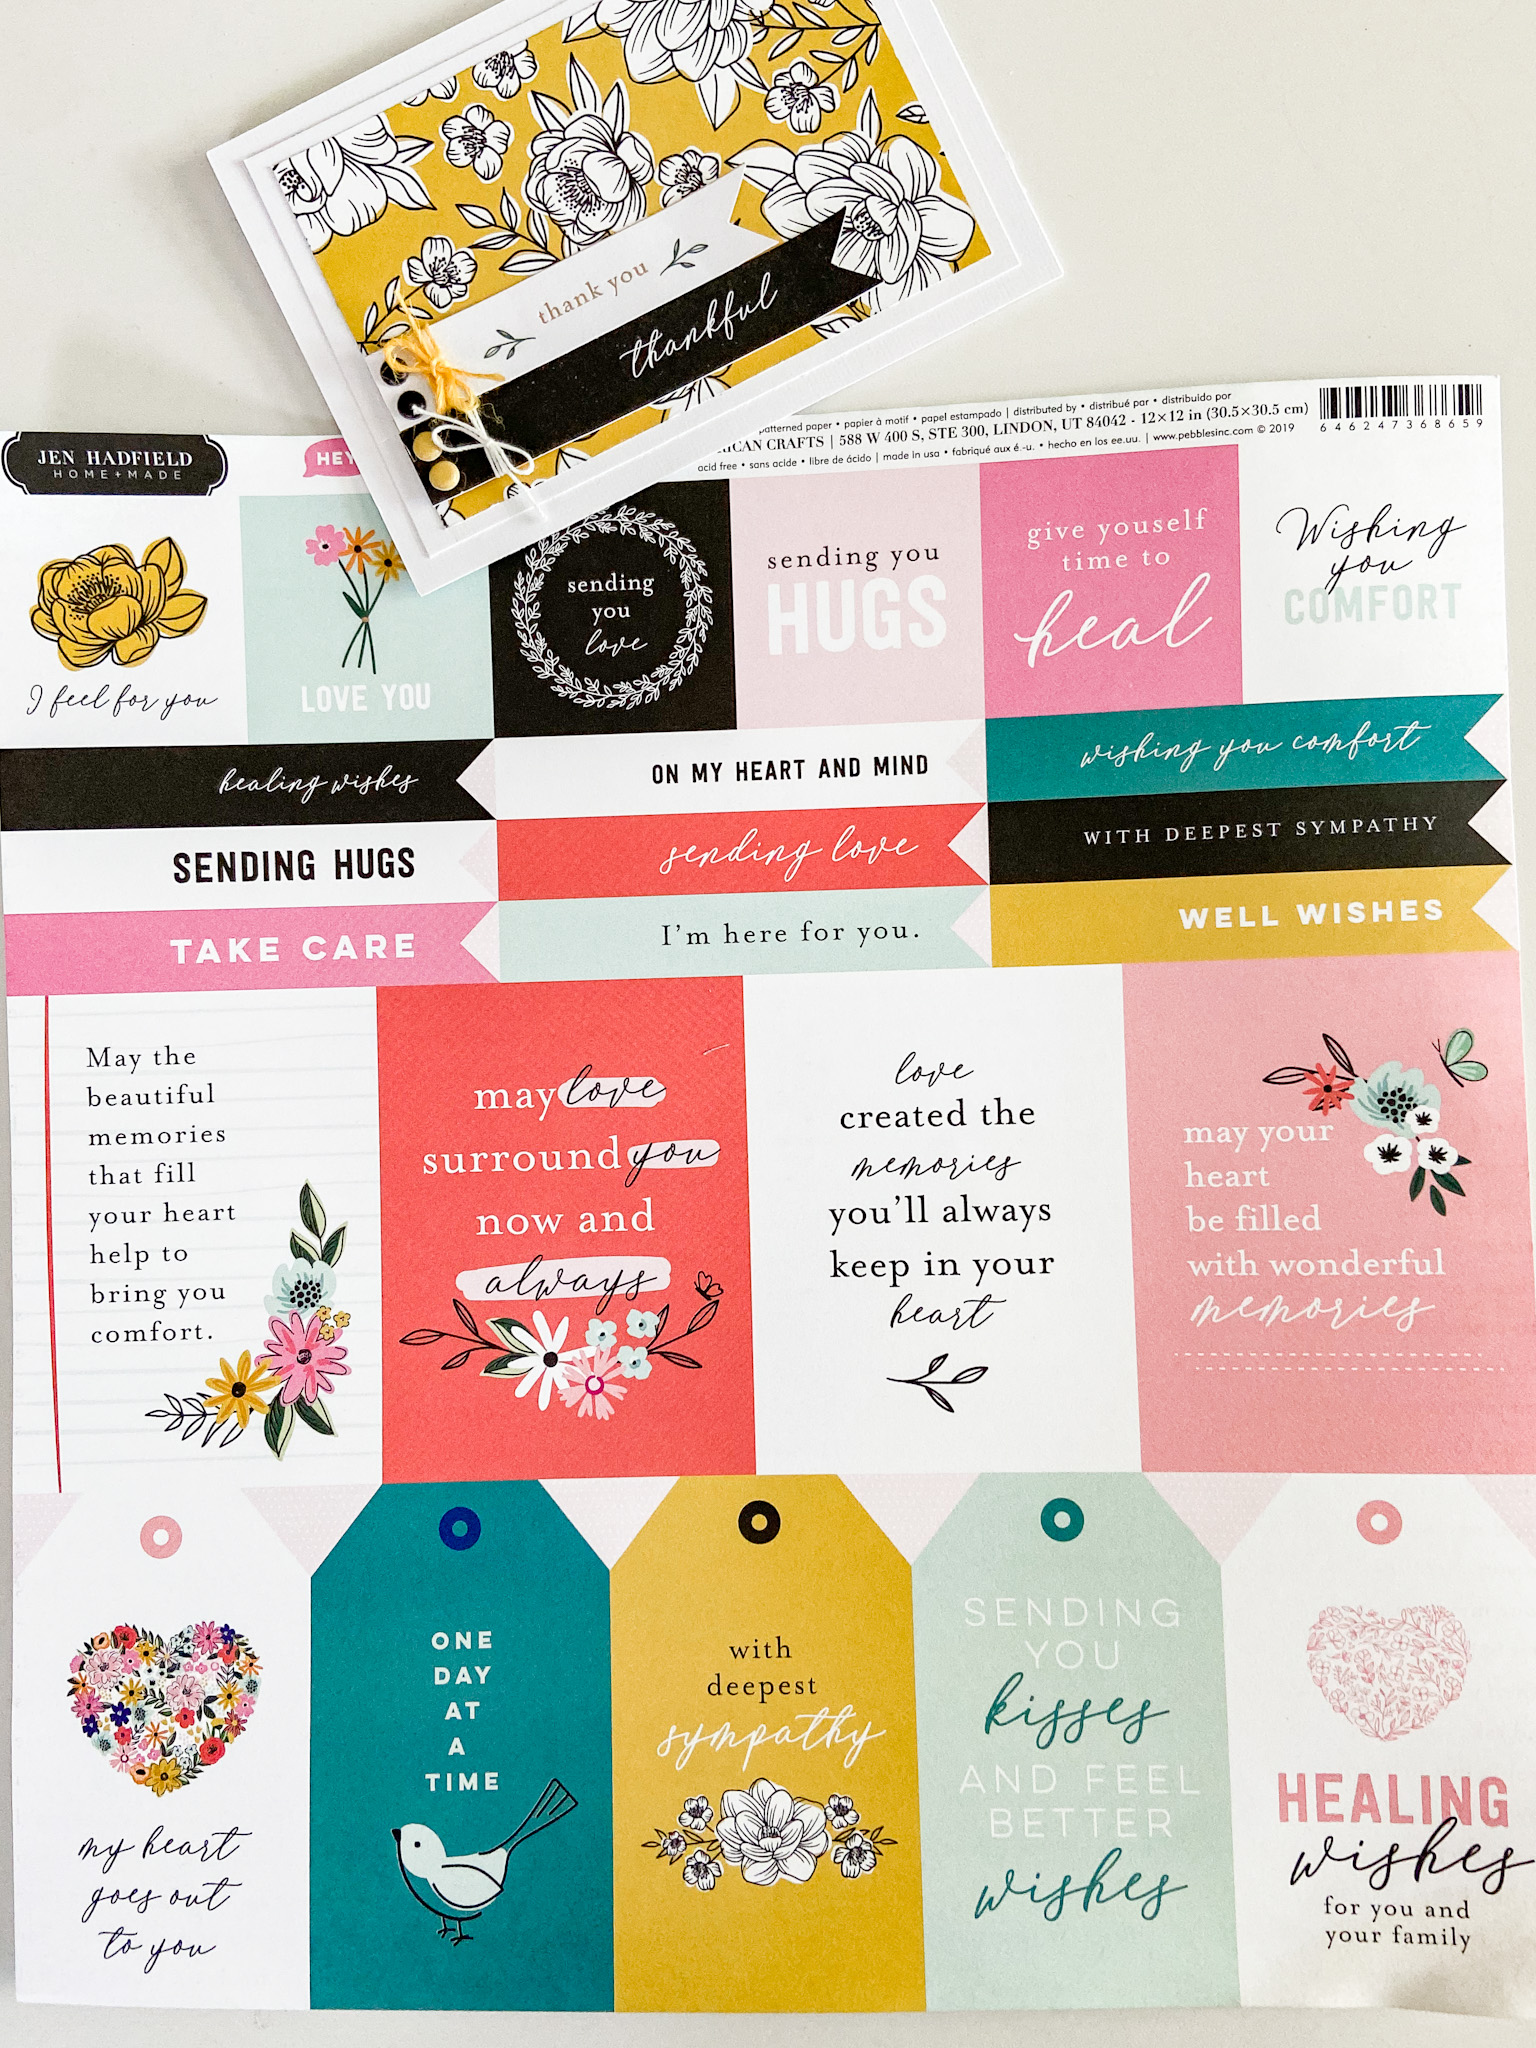
Special Card Making Paper
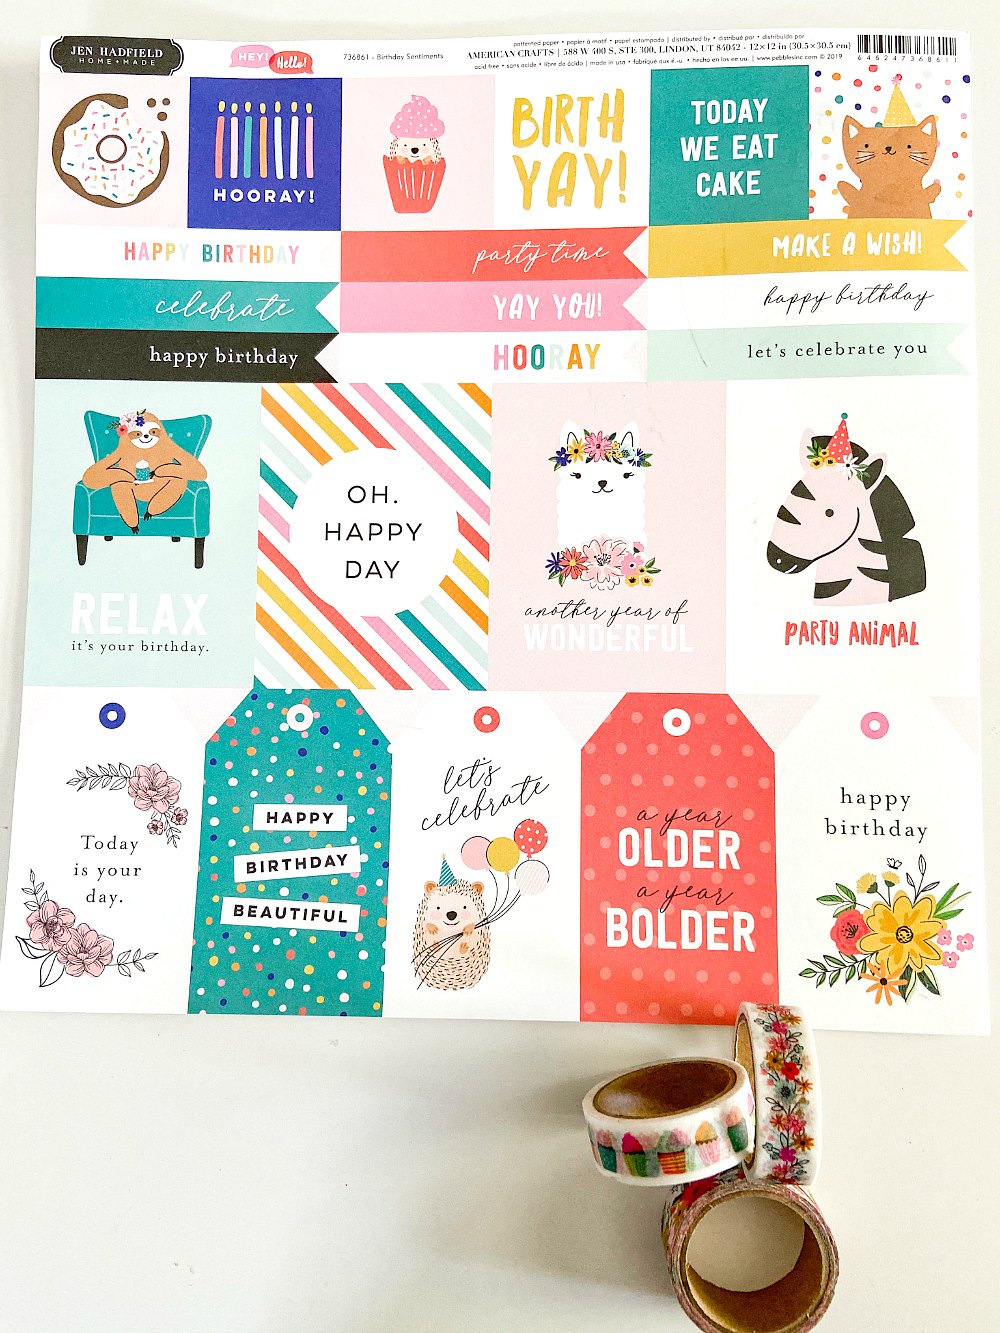
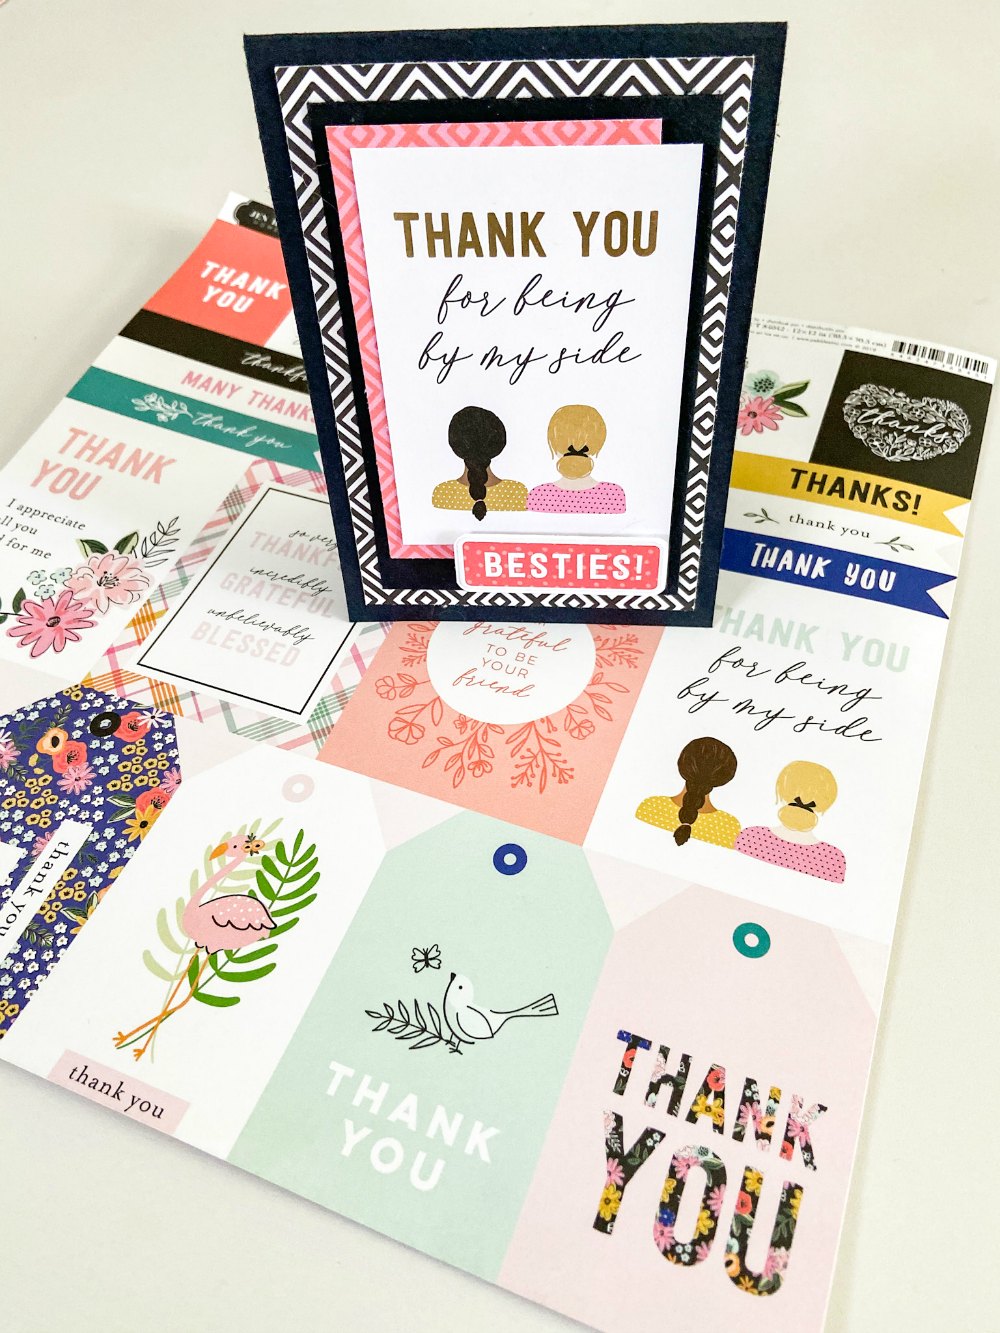
Hey! Hello! has special papers that were developed to make card making a SNAP! Each 12x 12 paper has a theme — friendship, get well/sympathy/birthdays.
Each Paper is Divided Into Easy-to-Use Pieces
Each of the special papers have different sized sayings and graphics for that occasion — friendship/get well/sympathy/birthdays. There are tags that are easy to cut out and use. 3×4 sayings that you can cut out as the main part of a bigger card. Banners that you can layer on cards. And 2×2’s that have sayings and graphics and are great for large cards for layering and as main embellishments for small cards. Plus this paper, sticker and embellishments are all found in the Project Pad which is also at JoAnn Stores!
Cards in Three Easy Steps
You can make a card in three easy steps. Start with a card base. Then cut out a 3×4 or 2×2 sentiment and add an embellishment. In a couple of minutes you have a thoughtful handmade card to send out!
Nine Adorable Handmade Cards in Less Than an Hour

If you use the 3-step card making steps you can create nine cards in under half an hour. But if you want to create more intermediate cards, I am going to show you how to make more advanced cards in less than an hour. I will include the steps below each card. Let’s get started!
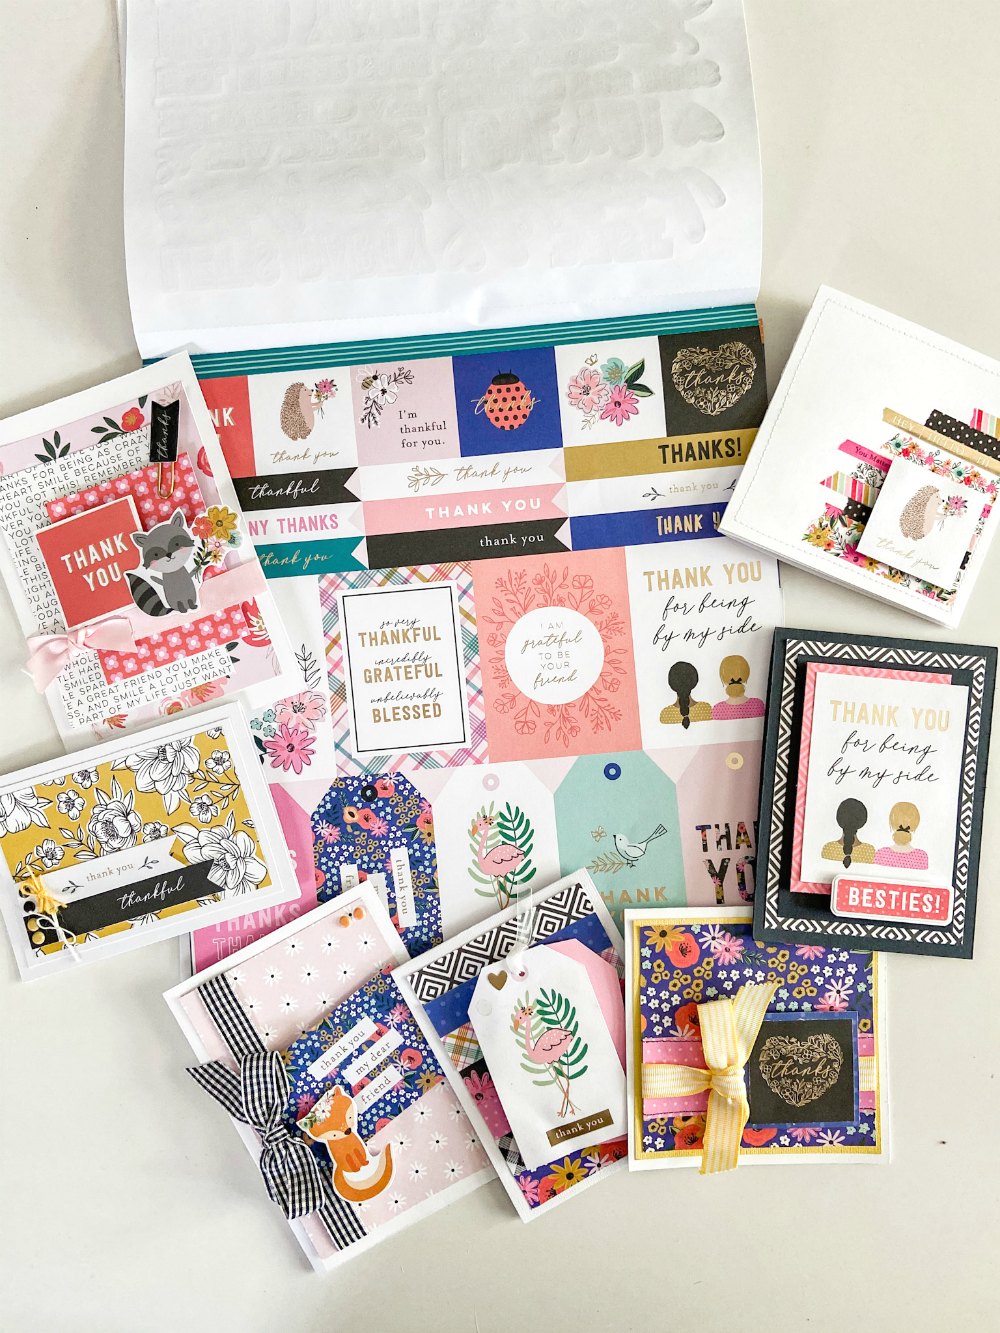
Thank You Cards
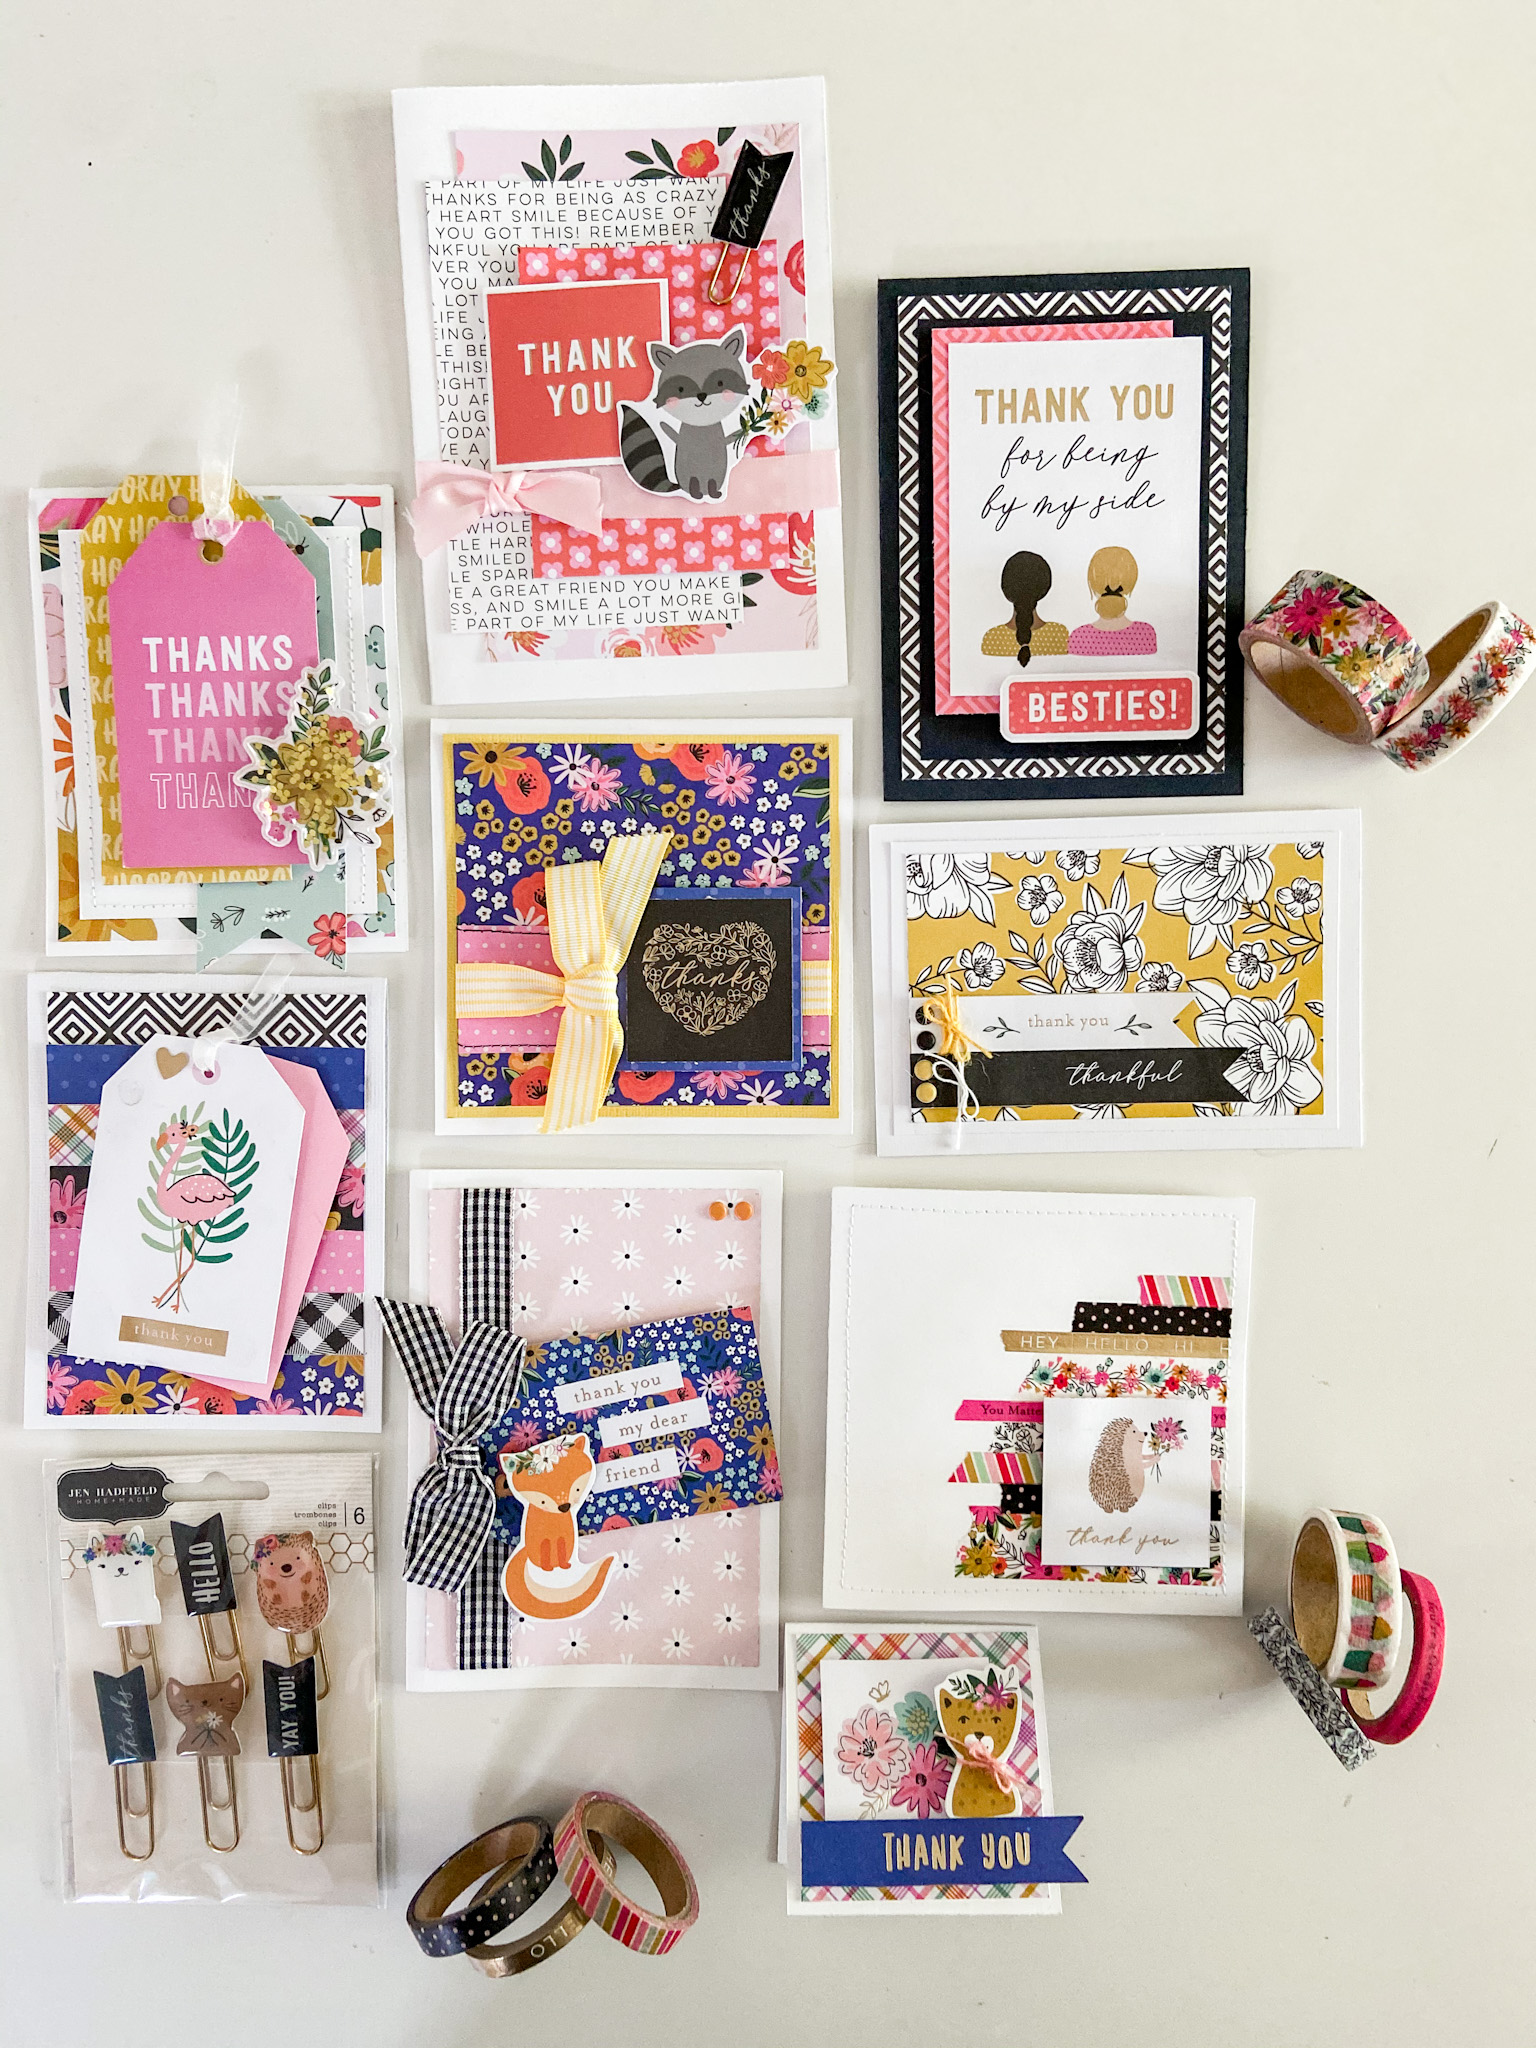
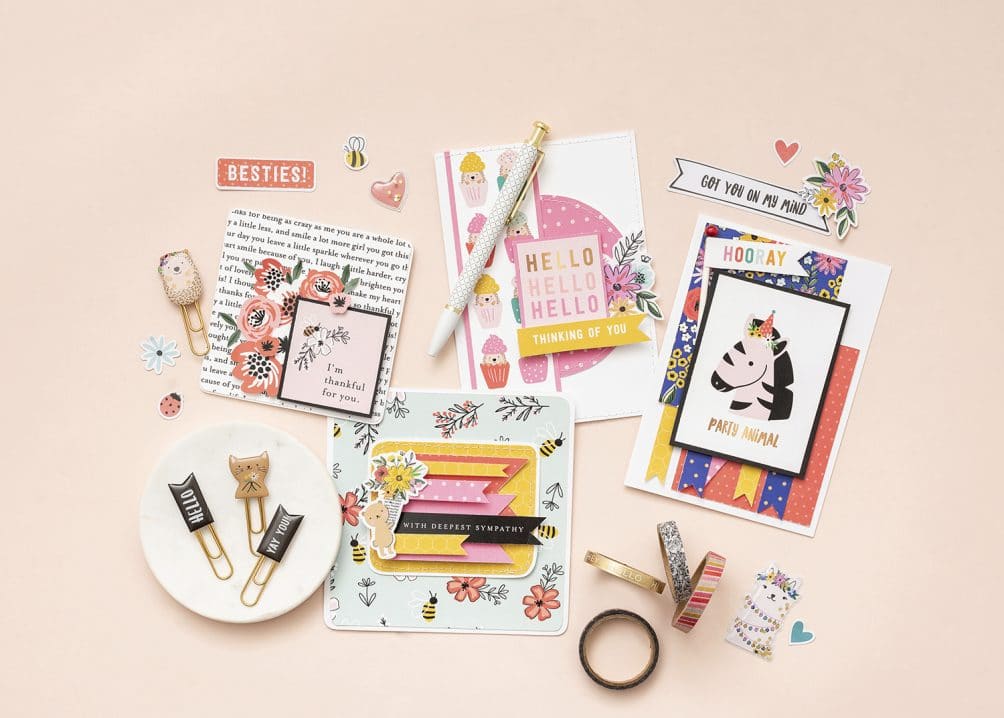
These 9 cards are all using ONE sheet of the Thank You main paper. Crazy right?? Other items include Hey! Hello! 6×8 paper pad, Hey! Hello! Die cuts, paper clip embellishments, shaker stickers, puffy dot embellishments, clip embellishments, washi tape from the line — foam stickers and adhesive.
1. Small Leopard Thank You Card.
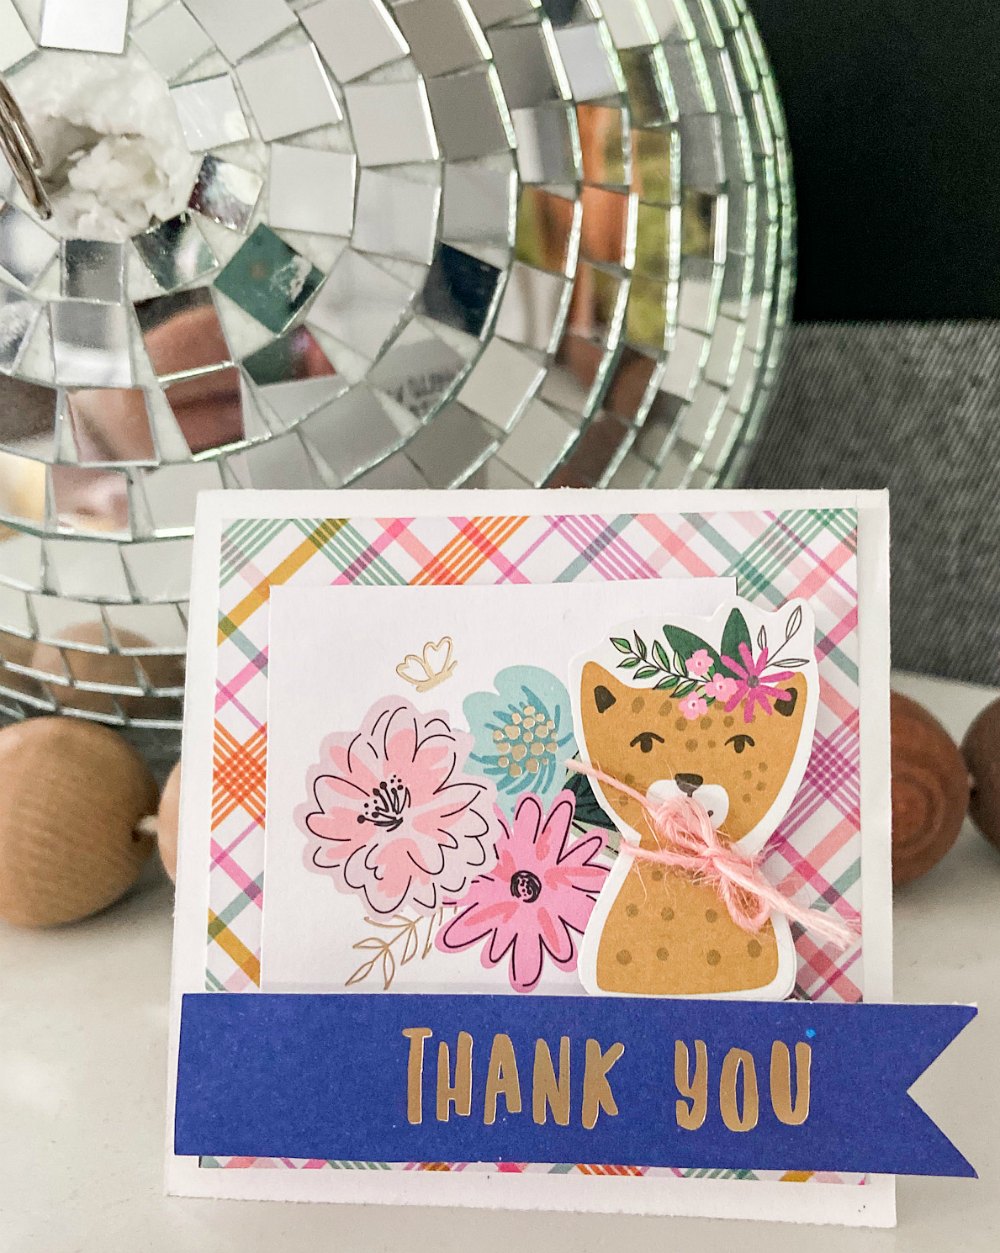
- 3×3 white card base (6×3 folded card stock)
- Add a 3×3 piece of the B side of Cupcake Surprise paper. Add to front of card.
- Cut out the flower embellishment from the Thank You paper and crop around flowers. Add on top of plaid paper with foam stickers.
- Cut out “Thank You ” from Thank YOu paper. Add on top of flower square paper with foam stickers.
- Add leopard from die cuts and attach with foam stickers.
2. Flamingo Thank You Card
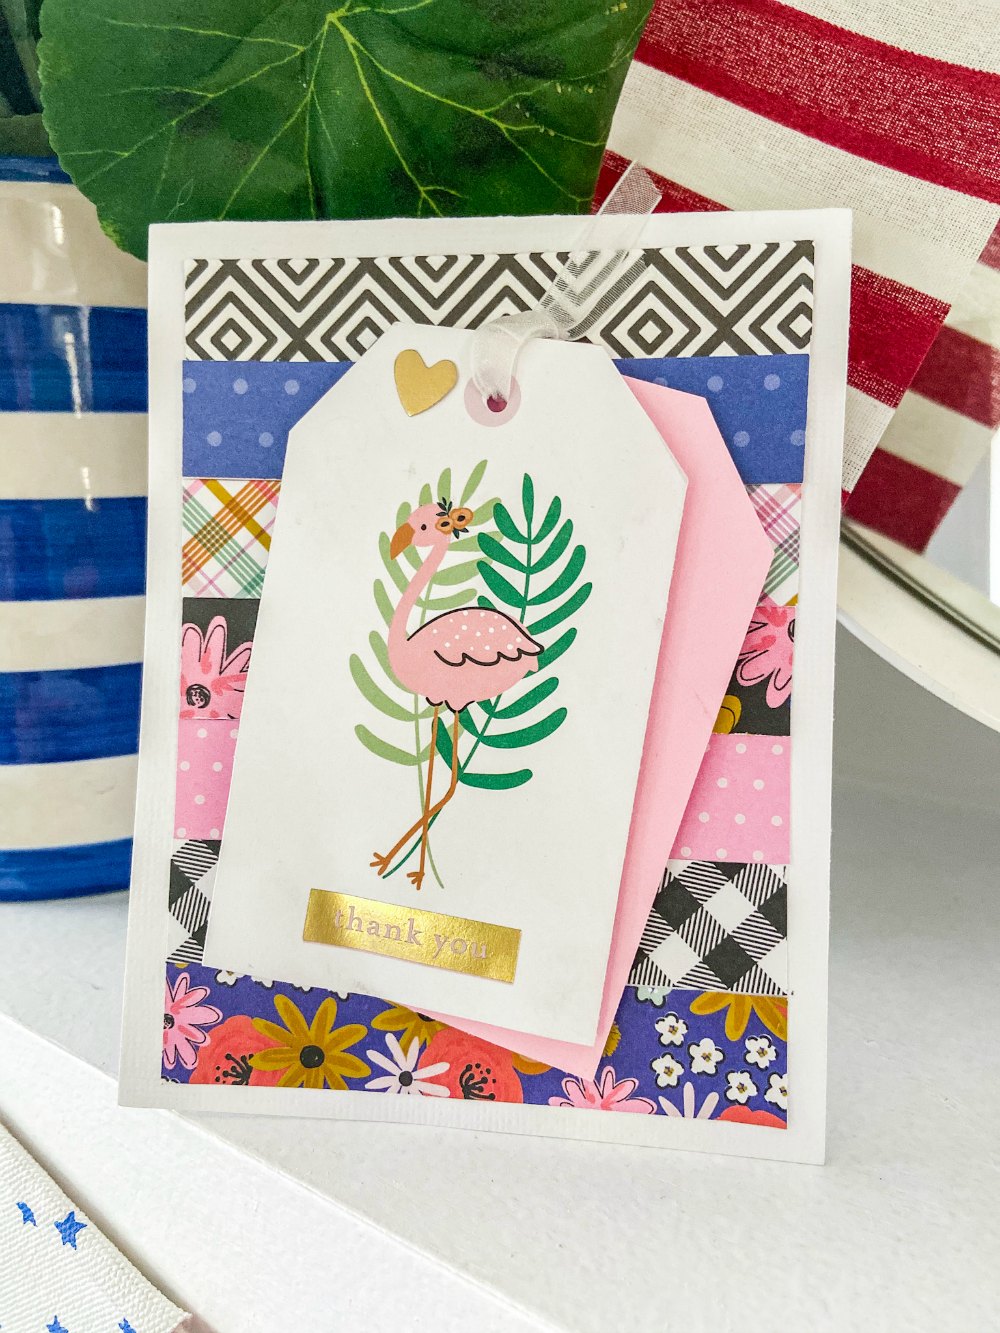
- 4.25″ x 5.5″ base (4.25 x 9 cardstock)
- Cut out assorted strips of paper. Each strip 3.75 x .75. Layer strips on top of front of card using adhesive.
- Cut out flamingo tag from Thank You paper. Cut out a matching tag out of plain paper.
- Add the plain tag shape on top of the paper strips. Add the flamingo tag on top with foam stickers.
- Add gold thank you washi at the bottom and string ribbon through the hole at the top of the tag.
3. Hedge Hog Washi Tape Thank You Card
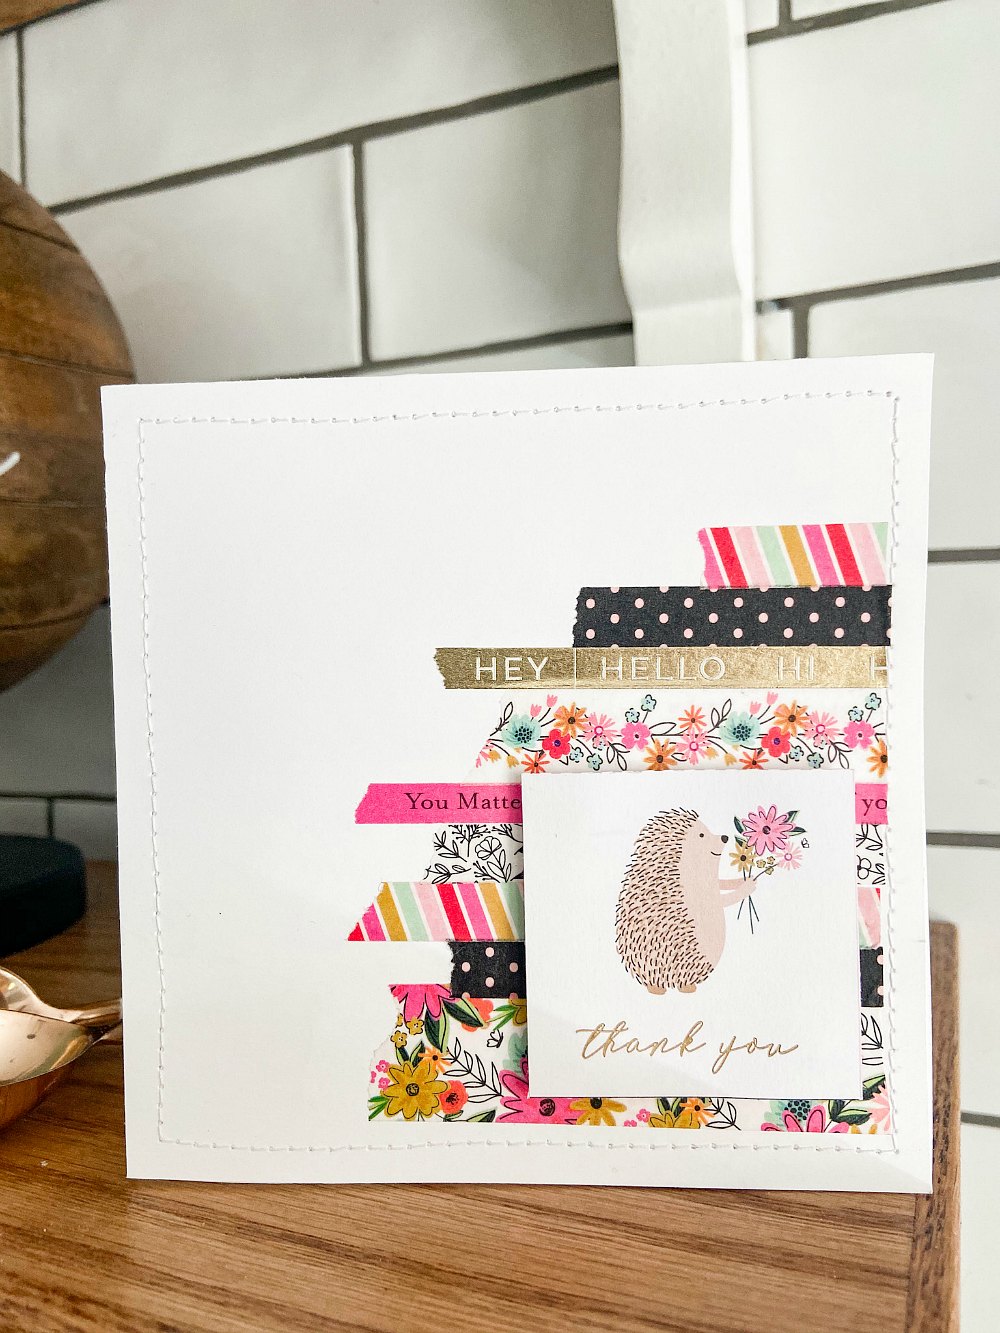
- 5×5 card (5 x 10 card stock)
- Sew around the front side of the card with a sewing machine.
- Add washi tape in line starting at the bottom of the card just above the sewn line.
- Layer washi tape on the card, getting smaller until the top of the card.
- Cut out the 2×2 hedgehog sentiment from the Thank You paper and attach it on top of the washi strips with foam stickers.
4. Yellow and Black Thank You Card
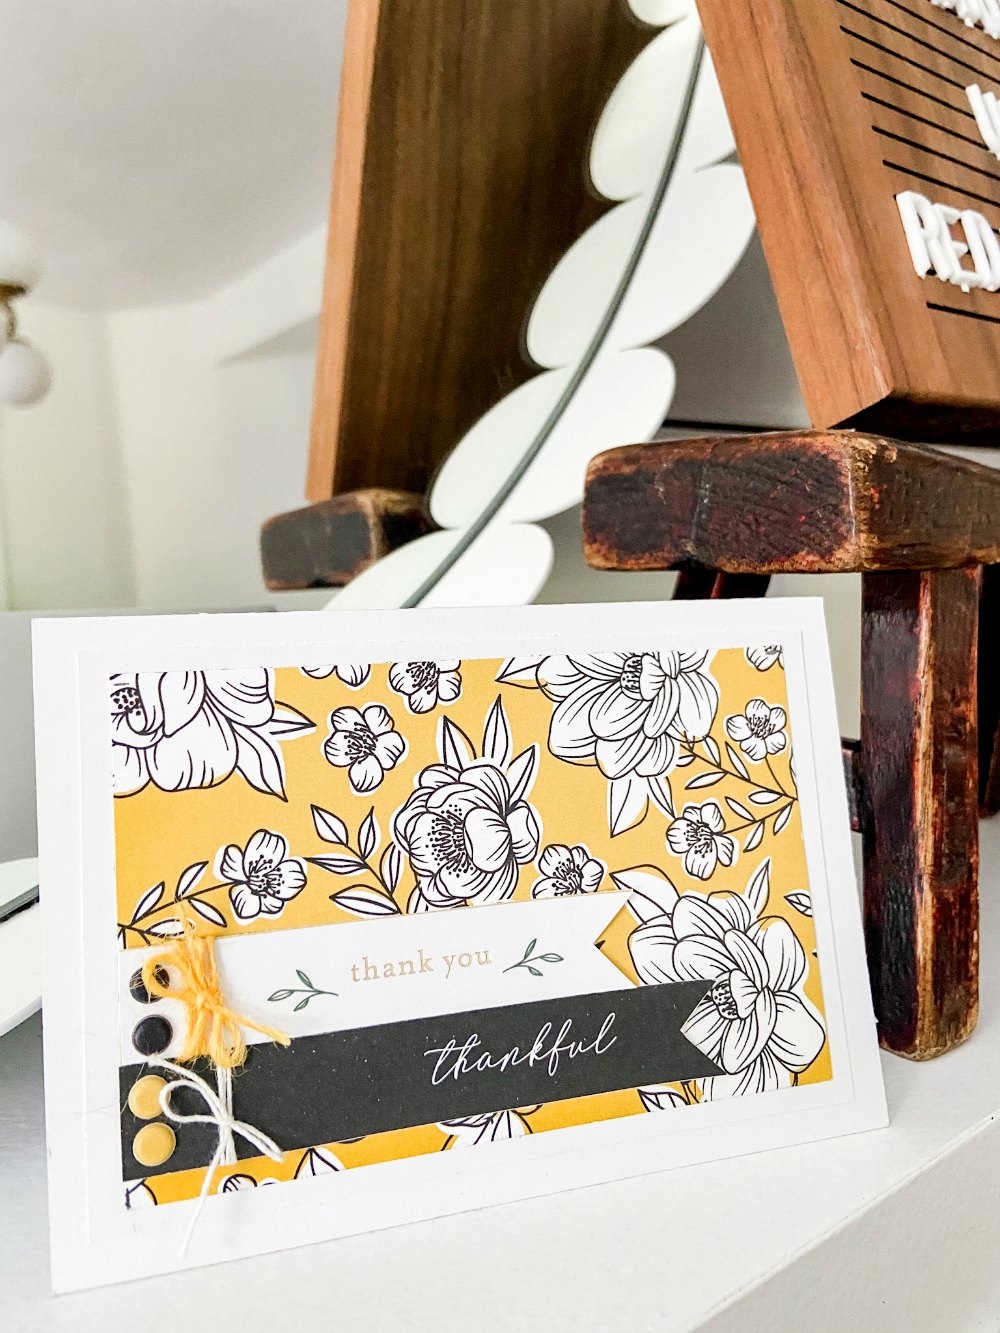
- 5.75×4 card (5.75 x 8 cardstock)
- Add a 5.5′ x 3.5″ piece of white paper to the front of the card.
- Cut out a 3.25″ x 4.75″ piece of “Yellow Roses” paper and attach it on top of the plain paper.
- Cut out two banner from Thank You paper — Thank You with flowers and Thankful on black background. Wrap each banner with string and tie in a bow.
- Glue the banner to the left hand side of the card 1/4″ up from the bottom of the Yellow Roses paper.
- Add dot embellishments to the left sides of the banners.
5. Fox Thank You Card
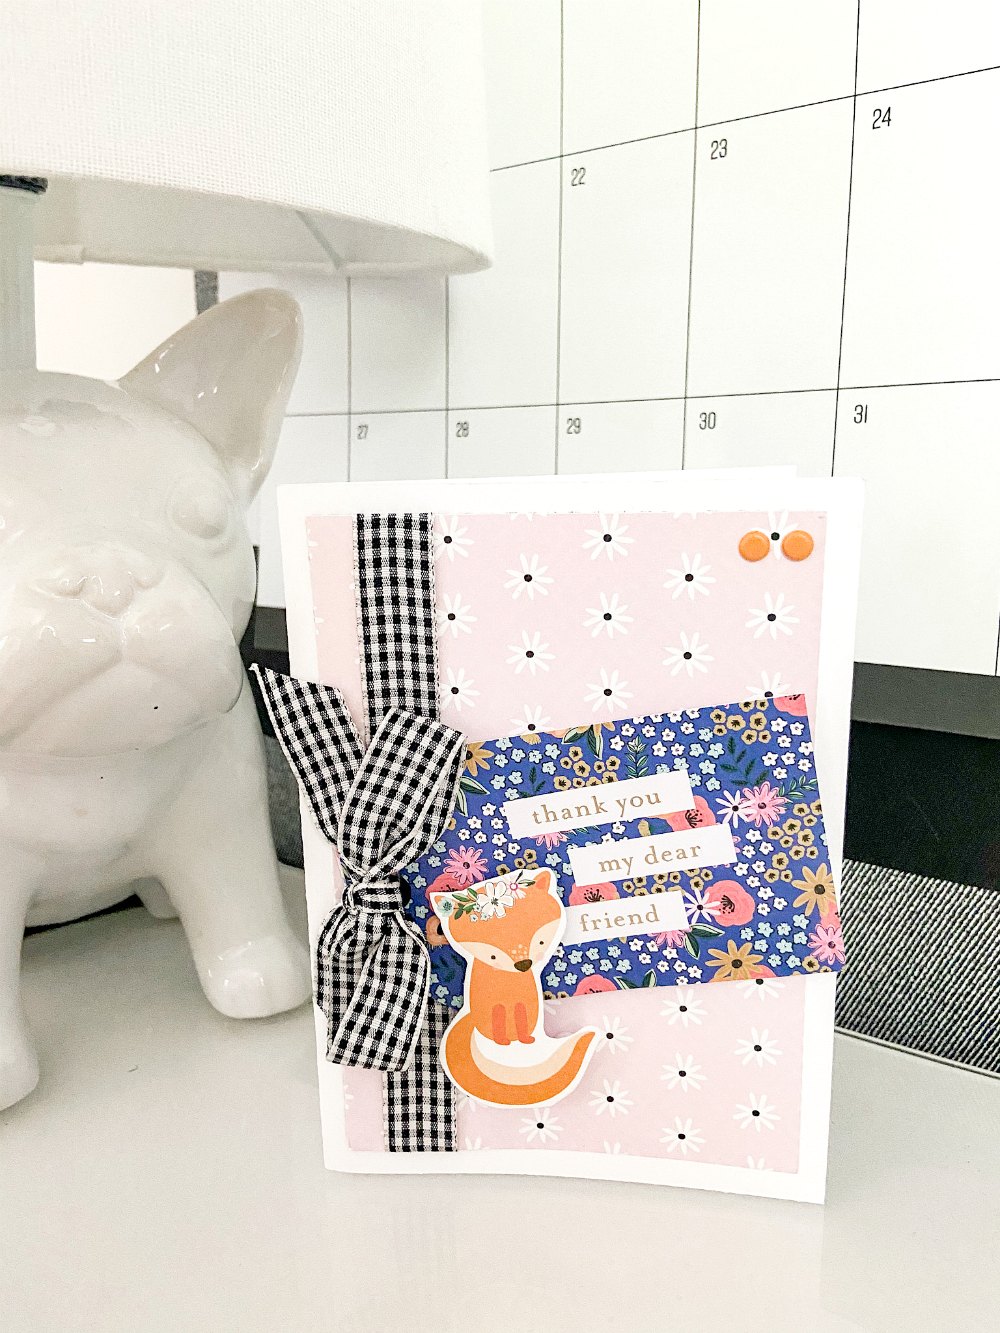
- 4.5×6.25 card (6.25 x 9 cardstock)
- Cut out a 4×5.75 piece of “Loves Me” cardstock.
- Cut out floral thank you tag from Thank You paper.
- Cut a piece of 12″ ribbon, string ribbon through the hole in the tag.
- Wrap the ends of th ribbon under the Loves Me paper and adhesive the paper onto the front of the card with the ribbon edges under the dot paper. Tie a bow and attach the tag onto the middle of the card.
- Attach the fox die cut to the top of the tag with foam stickers.
6. Thanks Shaker Sticker Card
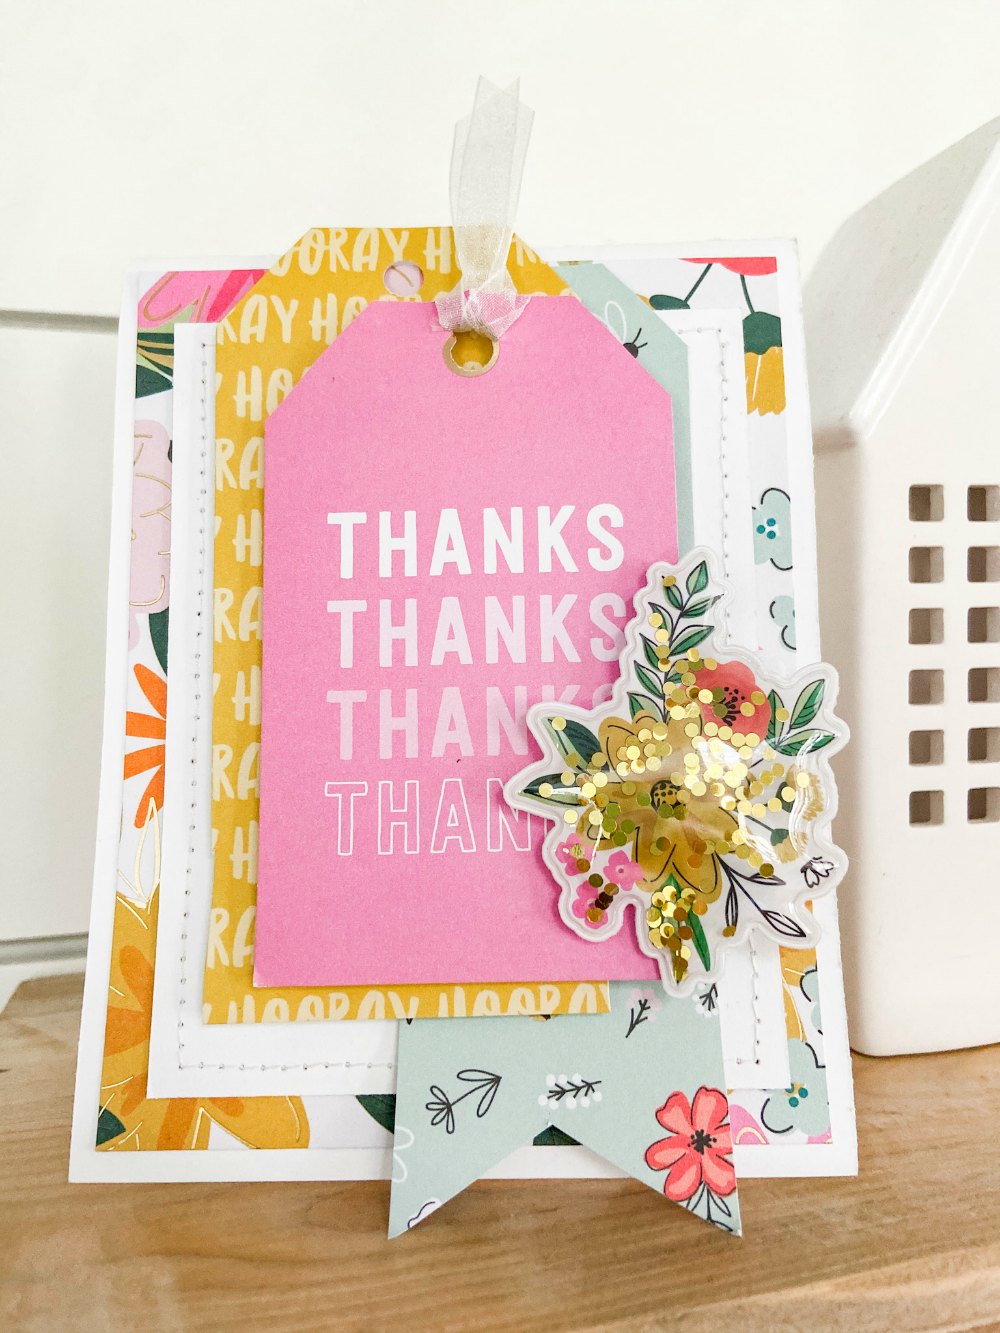
- 5.5×4.25 card (4.25 x 11 cardstock)
- Cut out 5.25×4 piece of “Happy Day” paper and attach it to the front of the card.
- Sew the edges of a piece of white cardstock 4.5×3/5 with a sewing machine.
- Attach the white card stock to the top of the Happy Day paper.
- Cut out a 6×1.75 piece of :Bee Blossoms” paper and shape it into a tag shape with a split bottom.
- Attach the bee tag to the white cardstock, slightly off-center to the right.
- Cut out a 4.75×2.75 piece of “Donuts” backside and shape into a tag shape. Attach the tag over the bee paper, slightly left of center.
- Cut out the pink thanks tag from the Thank YOu paper and attach it to the center of the card with foam stickers.
- Add ribbon through the hole in the tag and tie.
- Attach the floral shaker stick to the right bottom of the thanks tag.
7. Racoon Thank You Card
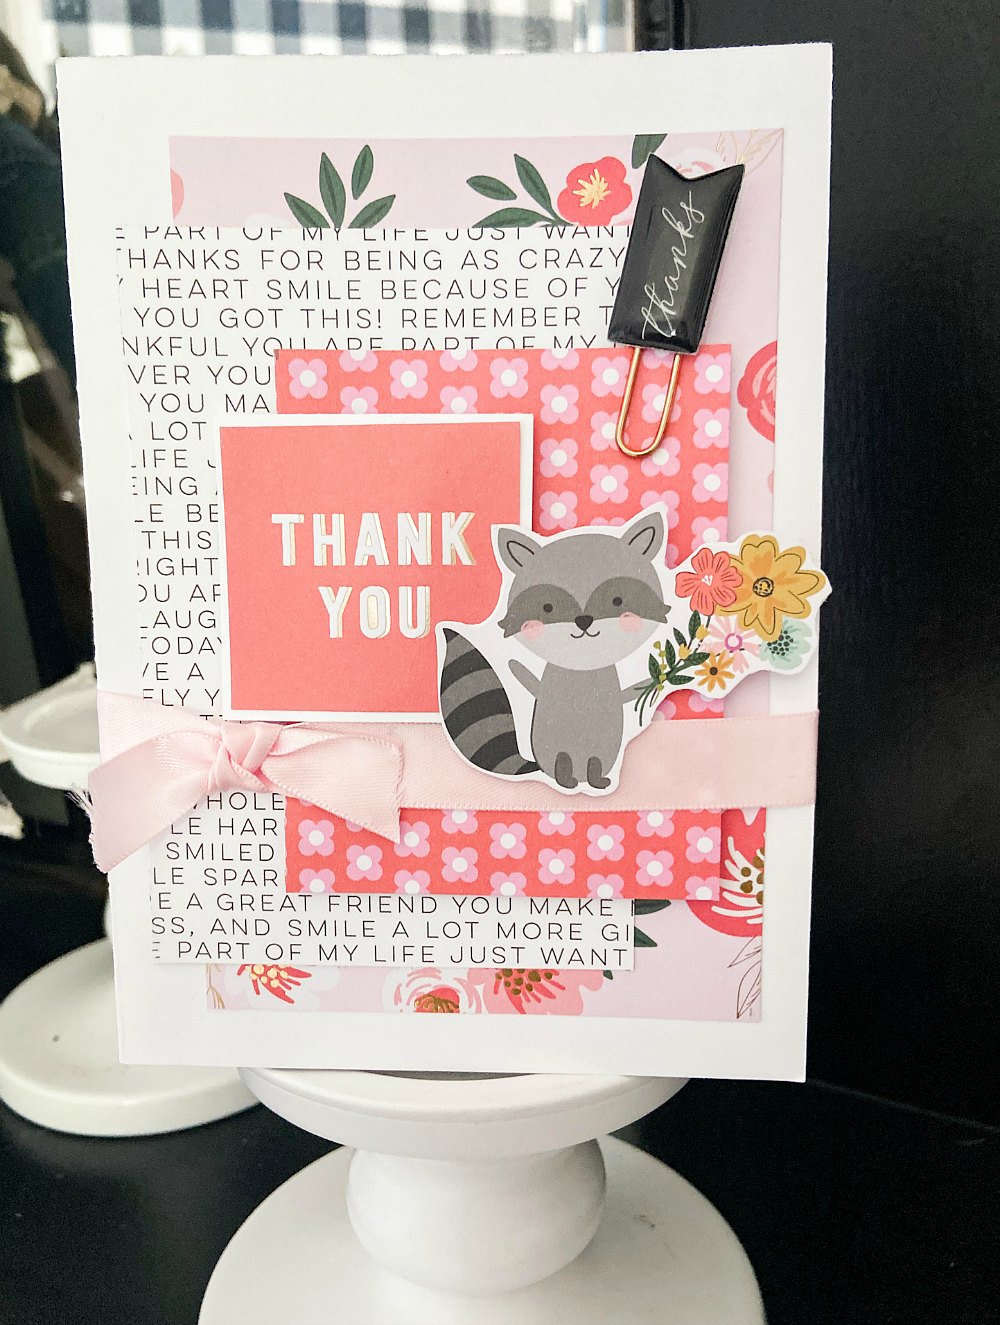
- 4×5 card (7×10 cardstock)
- Cut out a 6×4 rectangle out of “Blushing Blooms”.
- Attach the Blushing Blooms paper to the top of the card, slightly right of center.
- Cut out a 5×3.5 piece of B side of “Thinking of You” sentiment paper.
- Attach the black and white paper to the top of the Blushing Blooms, slightly left of center.
- Cut out a 4×3 pice of “Pink Posies” paper and add it on top of the black and white paper, slightly right of center. Use foam dots to make it raised.
- Cut out the pink thank you square from the Thank YOu paper and add it to the left top of the Pink Posies paper and attach with foam dots.
- Make a slit in the sam between the front of the card and the back 4.25 down the seam – 1 inch wide.
- Cut a 10″ piece of ribbon. Slip one end through the slit you just made and attach it to the underside of the front of the card with tape. Attach the other end across the card and under the front of the card with tape. Cut the ribbon in half and tie a knot at the left hand side of the card. Trim the ends.
- Attach the Racoon die cut to the top of the card, over the ribbon.
- Add a Thanks clip from the clip embellishments.
8. Blue and Yellow Thank You Card
- 5×5 card (10×5 cardstock)
- Cut out a 4.75×4.75 piece of yellow cardstock. Attach it to the front of the card.
- Cut out a 4.25×4.25 piece of “Twilight” paper.
- Cut out a 4.25×1.5 piece of pink dot paper, Sew the pink dot paper to the Twilight paper.
- Cut a piece of 10 inch ribbon. Wrap the ribbon around the back of the Twilight paper and attach with tape. Cut the ribbon and tie into a bow, slightly off center.
- Attach the Twilight paper to the center of the yellow cardstock.
- Cut out the Black and gold Thanks 2×2 sentiment from the Thank You paper.
- Cut out a piece of cardstock slightly larger than the thanks sentiment.
- Glue the thanks sentiment onto the coordinating cardstock square.
- Glue the square onto the pink dot strip, slightly to the right of the bow.
9. Bestie Card
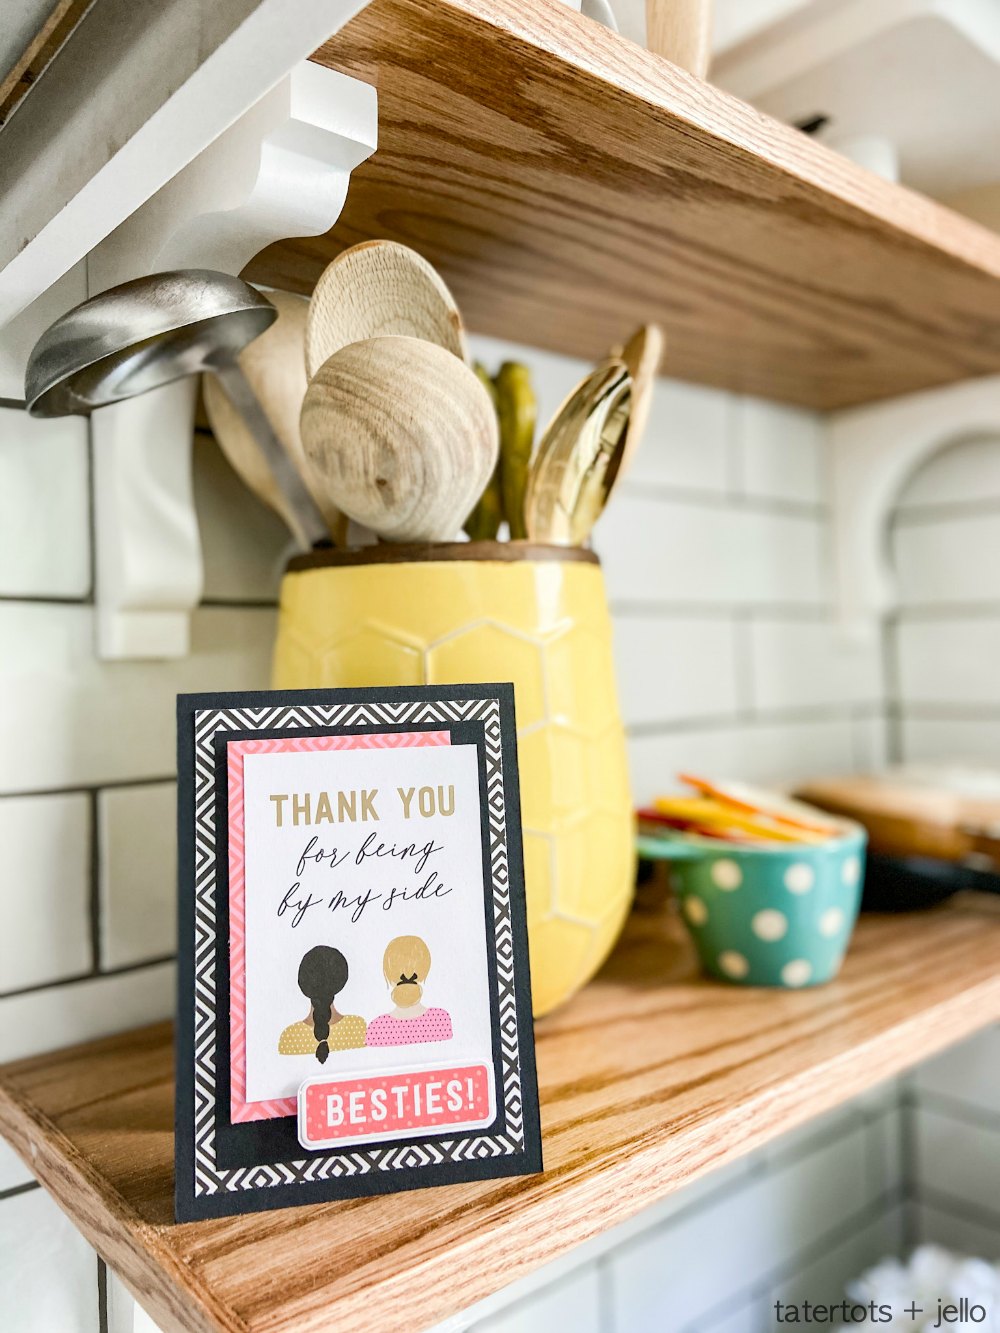
- 4.25×6 card (4.25 x 12 black cardstock)
- Cut out a 5.5×4 piece of B side of Yellow Roses. Attach it to the middle of the card front.
- Cut out a 5×3.25 piece of black cardstock. Attach it to the top of the black and white paper.
- Cut out a 4.25×3 backside of “Sentiment Strips” paper. Attach it on top of the black cardstock, slightly to the left with foam stickers.
- Cut out the Bestie Thank You Sentiment and add it on top of the pink and red paper, slightly to the right.
- Add the “Besties” die cut to the top of the black card stock at the bottom using double foam stickers.
Nine Handmade Cards in Under an Hour
Now you have nine handmade cards to give to your friends and family! You can find my Hey! Hello! line right NOW at JoAnn Stores and online at JoAnn.com. PLUS they are on sale right now!!
Tag Me with YOUR ideas!
Tag me on Instagram with YOUR ideas I would love to see them @tatertotsandjello!
Have a Happy Day!
xoxo

Disclosure – I so thrilled to be a designer with American Crafts. All opinions are my own.