
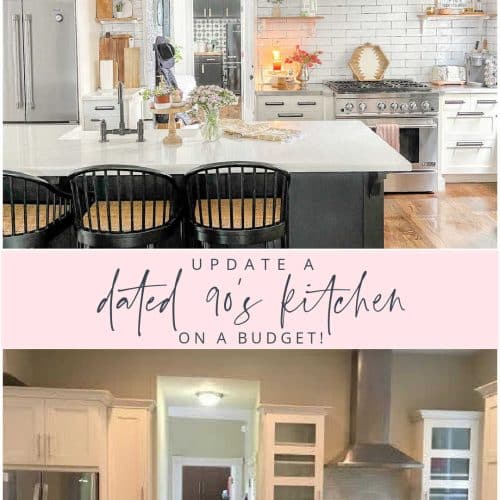
I am almost done with my Kitchen Remodel. One of the last things I wanted to do was change out my kitchen display cabinet. I had changed it out about three years ago – using wrapping paper instead of wallpaper.

I love using heavy-duty wrapping paper instead of wallpaper because:
- It’s cheap — under $10 for the project.
- It’s temporary. And I know that I like to change things up frequently.
The green leafy theme worked with my kitchen before with the maple cabinets. But I wanted something to go with my grey and aqua theme of the new kitchen redo. I have been trying to find some wrapping paper for so long!!


And then I saw this paper from Fifth and Hazel. And it’s Chevron and grey. I know, I just had to order some!! And it’s so thick and delicious. Perfect for wrapping a beautiful gift. But also perfect for home decor projects. And perfect for my little cabinet.

Here’s what I did:
- I took the old paper and tape down.
- The secret weapon to this project? Double-sided tape!! I love that stuff.
- I held the new paper up to the top of one side of the cabinet. Then I smoothed it down to the bottom of the cabinet.
- I made a crease with my nail. Then I took the paper down and cut the paper about 2 inches below the crease.
- Then I rehung the paper and put a couple pieces of the double-sided tape to hold it at the top.
- I took my X-acto knife and cut the paper at the bottom.
- Then I took the second piece and matched it up at the top so it was seamless. I did the same thing and had it overlap the first piece.

I also added some smaller widths of paper to cover the front of the shelves. I love the way it looks through the glass.

I also traced a wooden letter H that I had and put some of the pretty yellow wrapping paper:


This is a project that costs under $10. And it can totally change up the way your cabinet looks.


If you don’t have glass-fronted cabinets, you can remove your cupboard doors and do this to the backs of your cabinets and add some pizzazz to your room for under $10!!
Have a Creative Day!!
xoxo
PS — The Kitchen Reveal is coming up next week!


Hi there, I enjoy reading all of your post. I wanted to write a little comment to support
you.
I love that green leaf paper! I can’t find it anywhere though, please help me 🙂
What is the paint color you used on the walls!? It’s stunning!
🙂
The paint is Martha Stewart Sharkey Grey from Home Depot.
xoxo
Sandstorm’s liquidation channel reviews stock is trading near the liquidation value.
Unfortunately if you had any Borders Rewards Bucks to use, you can find a
good deal on a home for us. Last week, a bankruptcy law professor at Wayne State University, told the Detroit
Free Press,” This was not the only way, you can think about focusing on liquidated products.
Great idea. In fact I think I have some paper I could use on my cabinets. I may try this.
Looks fabulous! Where did you get that H? I love it!
So clever my friend!
Featuring it tomorrow during my Sunday Best.
I’m in love, love, love! I’ve been on the hunt for cool looking contact paper, but have come up empty handed. Quality wrapping paper might be my next best thing! Your kitchen looks fabulous, Jen.
xo Jenna
Terrific idea ~ looks amazing! Thank you for sharing!
I just tried this! My shelves were too thin and it made it tough to cover neatly, so I left the edges plain wood. But it certainly adds pizzazz! Thanks for the idea!
Great way to allow for change! I used wrapping paper in an entirely different way in my cabinet update. I folded it into fans and attached the fans to the back of the cabinet. Check it out “here.” The result provided an contemporary flair. Thinking of doing the shelves in my office with the solid wrapping paper though.
Looks fantastic Jen! Love how you covered the letter as well.
This is so prettyyyyyyyyyyyyyy…can you please tell me from where did you get these amazing wrapping papers?thxxxxxxxx
Great idea Jen! It looks wonderful 🙂 I like your knobs to , they look like mine that I made! 🙂
That looks GREAT!! I LOVE the white cupboards with the grey!
SO cute, I love all of these cute, inexpensive ideas you show us!
Ooh that is so cute! I need to tackle that project ASAP!
Love how it tuned out, Jen! Any additional sources for finding great gift wrap? Have had several projects brewing but could never find the right paper. Thx for sharing!
Gorgeous! Love this idea and the wrapping paper!
Absolutley love this! Each part of your Kitchen facelift is awesome. Can’t wait to play with these ideas in our new house come Summer!!
It’ll be fun to see the entire reveal! It’s great to follow your projects. I really like your idea of using wrapping paper instead of wallpaper for the back of a cupboard. Hmmm. You’ve got my juices flowing!
Thanks Richella!! You are so sweet. I love your ideas too. Happy 2012!!!
xoxo
Jen
I wish my shelves came out that easily. They are a pain to get out so this project will have to be a maybe someday. But I love the idea!!!
I love the look! I don’t have glass or open cabinets, but I do have a china cabinet that sits in our open kitchen/dining/living room area. It is oak and antique and a little light colored paper just might bring it into this century!
Great idea. I was thinking about painting th einside of my living room built ins, but this might be a better solution. Thanks!
This is fabulous, Jen! Love this idea and that paper is gorgeous (and so you!)
LOVE it all! But I NEED that yellow bowl.
Thanks Mimi!! I think I got that bowl with a mixing bowl set at Costco 🙂
Have a wonderful day!!
xoxox
Jen
I have a built-in bookcase in my bedroom that is a perfect candidate for this! Yahoo…. some spice for the old cream paint.
Jen – What a great idea! Love how yours came out…beautiful! Have you tried this on shelves or bookcases?
This looks great! The strip on the front of the shelf makes such a difference. Thank you!
Oh my word! Brilliant! I can’ not wait to try ti!
I love that–it adds such great interest. I’m thinking of that idea for a hutch I don’t love that needs new life–that would do it. Glad you shared that chevron paper too. Wonderful impact.
This looks beautiful! 🙂
This looks great! I used wrapping paper on my cabinet doors, such an easy update! http://www.everafterblueprint.com/2011/04/26/kitchen-cabinet-makeover/
Definitely doing this! I esp. love the pop of color with the letter!
I LOVE this idea!!! I think I’m going to give it a try!
Love it!
Very cute idea. Don’t know if you have ever heard of Sally Foster wrapping paper but it would also definitely work for this type of project. Very sturdy and the roll is so big it last for years. I’ve been using Sally Foster for years. Just an idea to possibly research. Maybe she will have a great pattern once this beautiful Fifth & Hazel Print gets old. Love all your posts.
This looks great! I love “temporary” decorating like this, because, when it comes to decorating, I seem to have a fear of commitment! Beautiful kitchen!
Rachel @ Simple Girl
Love the soft gray and white through the doors of your cabinets! Beautiful!!!
Such a great idea!! LOVE!!
Oh that looks fabulous!! I don’t have a glass cabinet but I’m thinking behind my bookcase would be wonderful! I like that it’s temporary too, thanks for sharing!
I love it when something is transformed with such a cost friendly, user friendly solution! I’ve been wanting to do this for a long time and you’ve inspired me to get off my bootay.
Looks fantastic!!
Kim
This is a great idea – I have a VERY old (we could call it vintage, but I think it’s older than that) cabinet in my kitchen that needs a tiny bit of sprucing. Maybe I’ll steal this idea – when I have the time!
It turned out nicely Jen!
Very pretty, Jen! I did this to a glass fronted cabinet I have in our new place but I used fabric wrapped around cardboard and popped it in the back. {I have a lot of fabric!} One of the quickest and most inexpensive projects I’ve done with the most impact. Love that whole area in your kitchen!
Hi Kathy!!
I love the idea of wrapping fabric around cardboard. What an easy way to make such an impact. You are so smart!!
xoxox
Jen
What a great idea!!! I have open cabinets in my kitchen and am brainstorming what wrapping paper I want to use on them now. Thanks for the inspiration.
Love it!
I die! That gray paper is amazing, and it looks amazing in your cabinets. Can’t wait for the reveal! Funny, b/c I just wrecked up my X-acto knife yesterday trying to cut up a carboard box. Stupid, I know, but I finally found the box cutter and used that instead. :s But when you have to craft, you have to craft, right? 😉
Ohh I love the idea of using wrapping paper! I might have to try this. The paper you found looks great! Love the grey.
Hello Jenn,
Thanks for this cabinet makeover tutorial. I am going to update some bookcases in our home with some wrapping paper that I have on hand. Awesome, can wait to get started on the project.
Smiles, Paula
PS Your kitchen looks marvelous.
Super idea! Think I’ll snag this one for the backs of my Mom CAve book cases. 🙂 Thanks for sharing!!
xo Heidi