Welcome to the Summer of Paper series – where we’ve invited fabulous guests to create projects using supplies from my Home + Made paper decor line.

Hi TT&J Readers, I’m Cathie and I blog at Creative Cutter Room!

I’m a longtime scrapbooker, instructor and Cricut enthusiast. I love working with my Cricut machine—so much so that I authored a book on the subject, Cricut Expression: A Comprehensive Guide to Creating with Your Machine. In addition to my book, I teach classes about Cricut Expression®, Cricut DesignStudio and Gypsy®, on scrapbook retreats and Cricut® Cruises!
I’m so excited to share what I created with some of the new product coming from Jen!
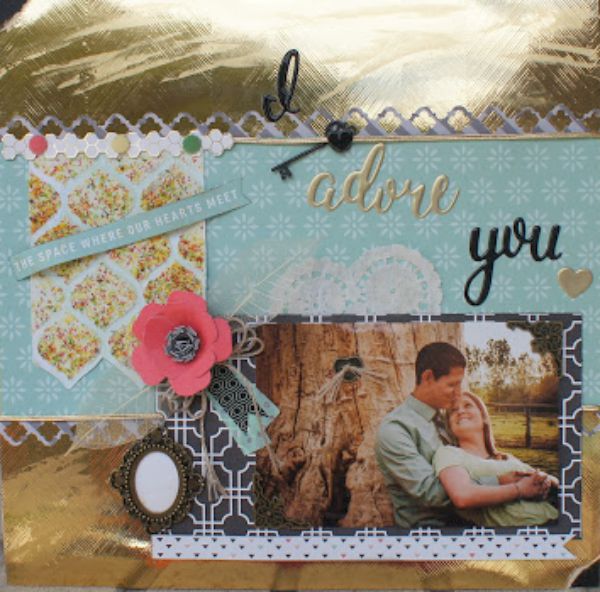
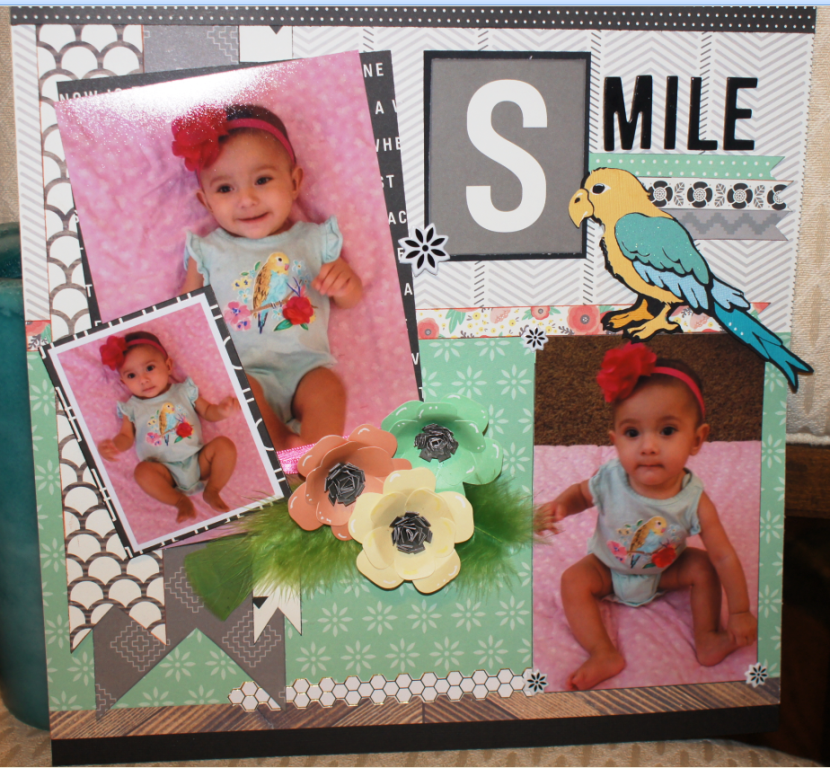
I received a box full of fantastic product everything in this collection is so versatile! I had a hard time just making one project. So I created a few things to share and one layout to walk you through. The Scrapbook layout above features some of her amazing paper, including gold cardstock and a stencil that I was so excited to play with.

I LOVE the pattern and couldn’t wait to start creating….I placed the stencil over my cardstock and taped it to the table for stability.
I added some medium weight paste in two small sections
***DESIGN TIP***
Mak an experimental piece to try out some ideas and then another piece to use on your layout.

Here is where I had some fun…before the paste could dry I pressed some Spring colored Flower Soft sprinkles on top and then pressed it into the paste with a scrap piece of cardstock. I also used some Sea Foam glimmer mist that I made myself to give it just a hint of color. This piece was so FUN to create and added just the right amount of texture to my layout.
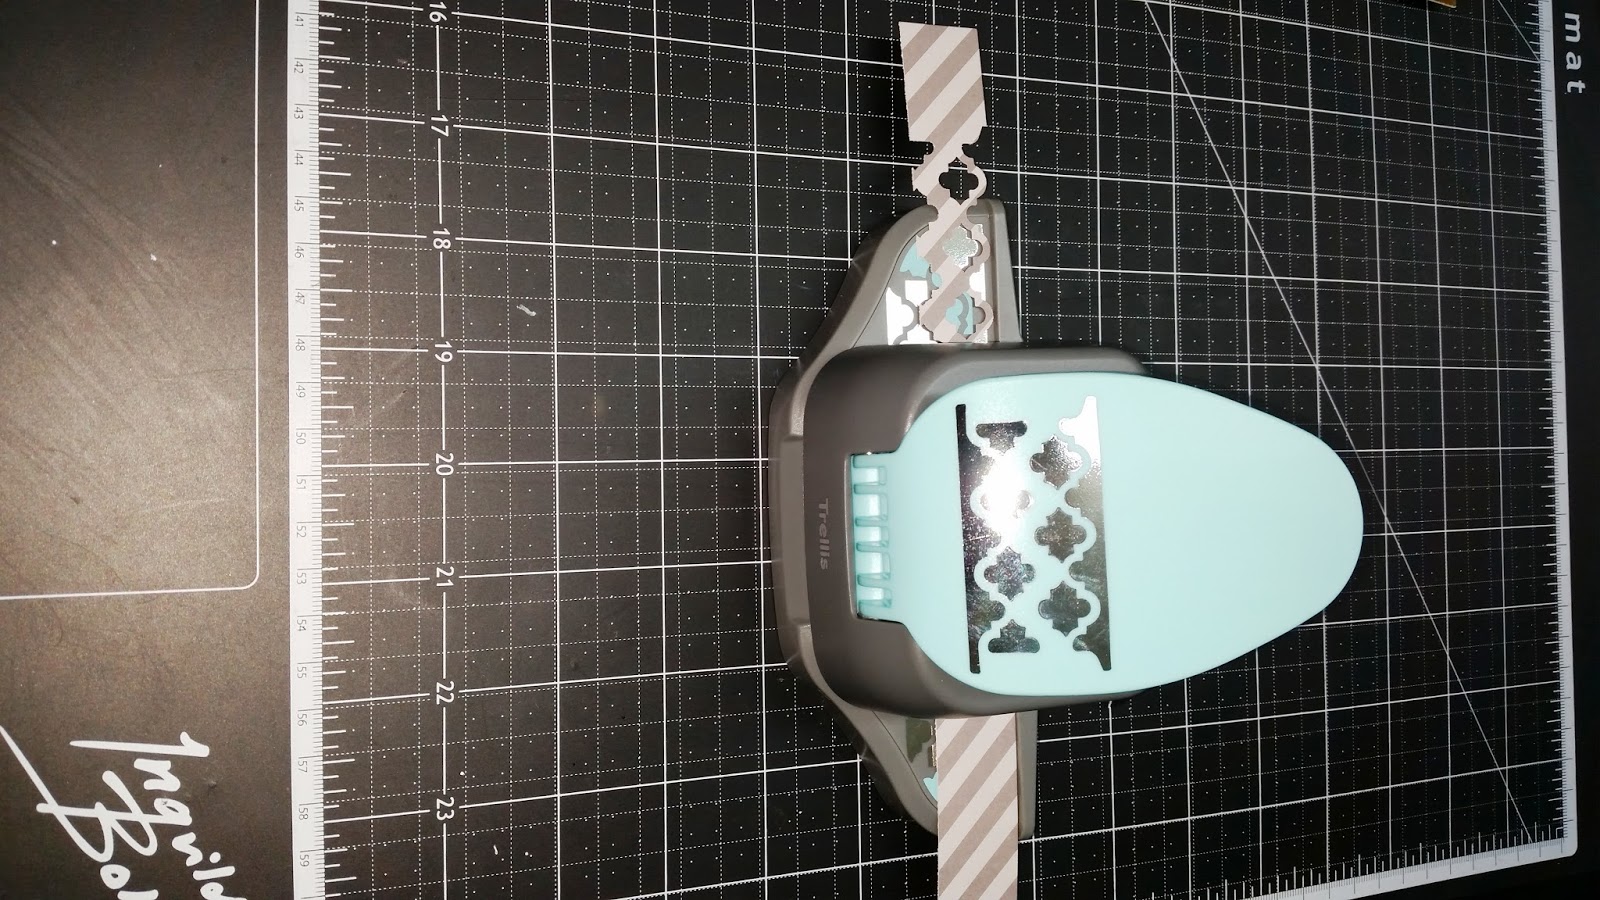

I couldn’t believe just how much this grey stripped patterned paper matched my son’s tie in the picture so I just had to add it to page. I used the Trellis punch by WeR and added two punched strips to top and bottom of this 6×12 piece of patterned paper. The color and patterns available in this collection will just blow you away….perfect for any occasion pictures.

The gold base was a no brainer….it highlighted perfectly the sun glow captured in my picture. I took my stenciled shape and added it to the left of the page with 3 coordinating brads over a piece of gold trimmed honeycomb…..this cute little piece came from the packaging in this product line…..
Jen’s collection is so fun you want to use every little piece of it.
I couldn’t help but fussy cut all of the honeycomb off of all of the packages!!

I added a gold glimmer misted paper doile, skeleton leaves, metal embellishments and some washi tape in coordinating colors to complete my layout.

Oh and of course Jen’s collection have some PERFECT puffy sentiments in black and gold that gave me my title. She even had 3D paper flowers that made a natural focal point for this layout….I use the rest of these adorable flowers on my next layout I will share following this post.
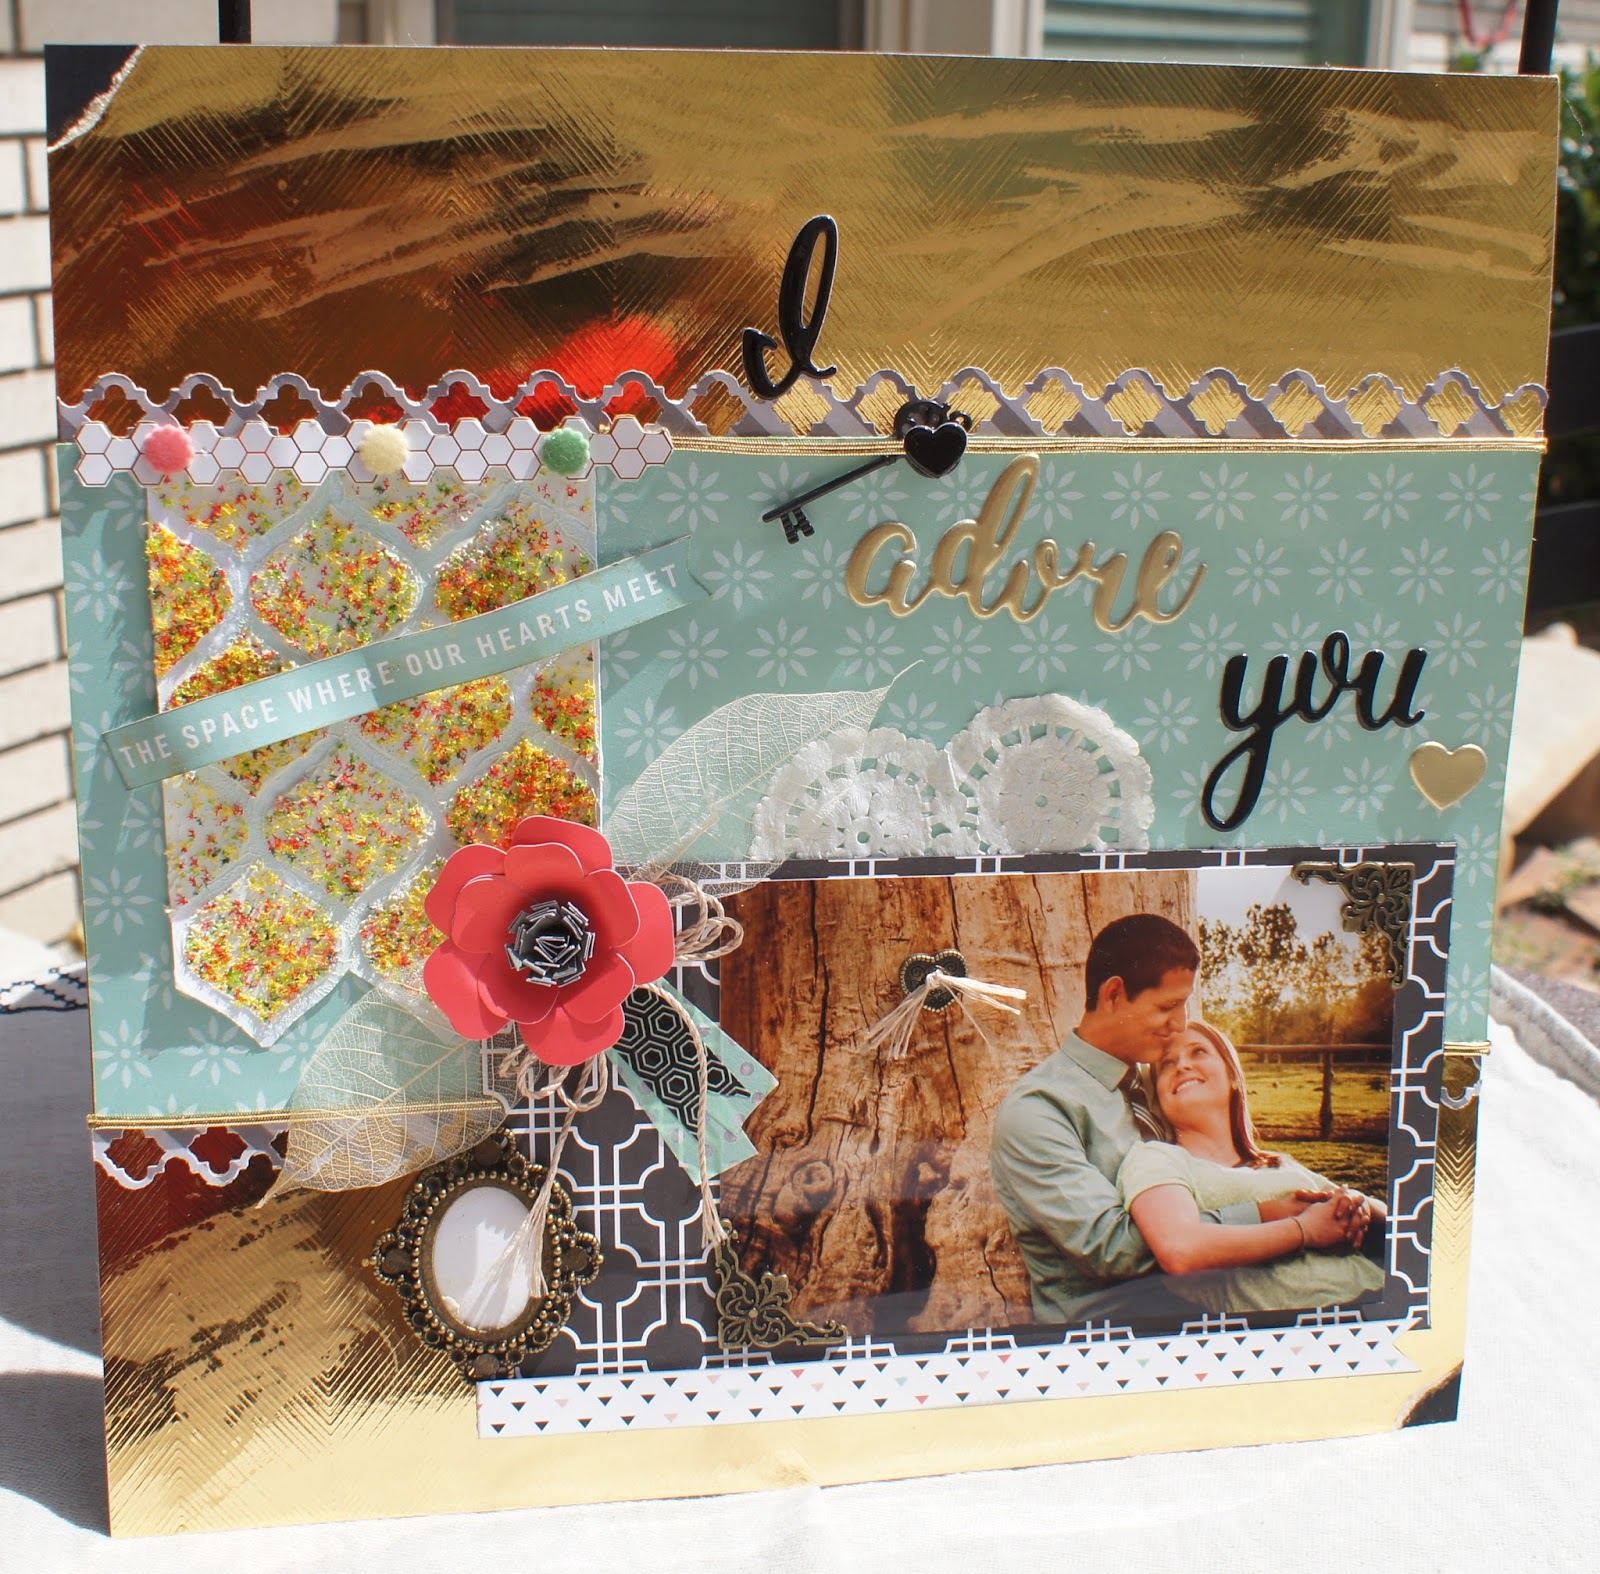
Here are some more pictures of the finished layout. I love that the sentiment banner came from the trim piece of one of the papers that I just had to use!!

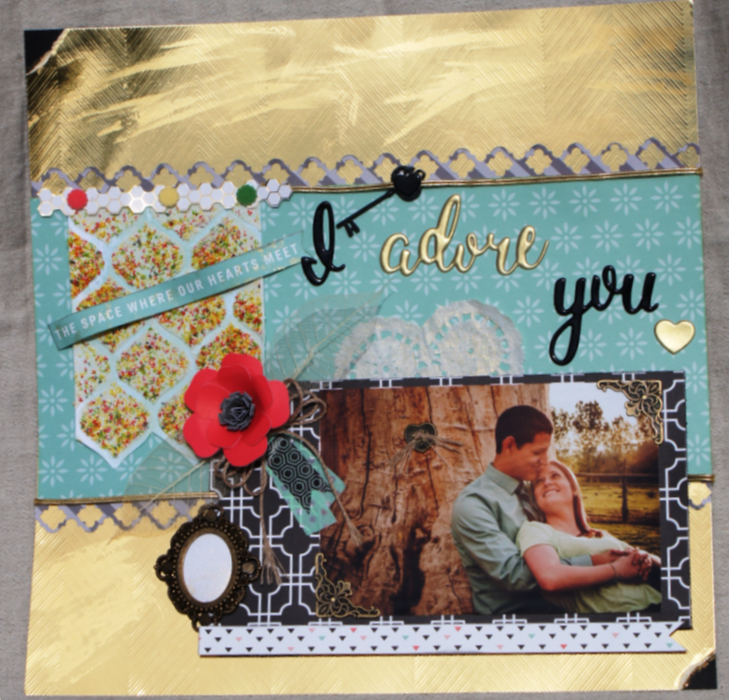
The I in the title was a little difficult to see on the gold-so I did decide to move it and here is a look at an alternate way to place the sentiment.
If you liked this tutorial, then I hope you will check out some of my other classes including my Cricut Expression class on Craftsy or even more fun are my CRUISES featuring some creative card making.
Leave me your comments, I always love hearing what you think of the products and projects shared. Jen Hadfield’s paper collection is a winner for me….so much fun….so versatile….so inventive in style and color….
I know you will have fun checking out this collection.
For more fun check out this awesome Turtle Shaker Card tutorial…...
HUGS

*******
Thanks Cathie! What a fun layout.
Make sure to follow Creative Cutter Room and
And if you’d like to try this project she shared today, you can find my Home + Made line at craft and hobby stores near you!
xoxo


