Hi! My name is Shannon and I blog at Madigan Made… where creative living is made simple. Today I’ll like to share my pinecone wreath.

And I should tell you that I’ve been called the Clark Kent of craft blogging. Why? Well, by day I work as a pharmacist and by night I try to help my readers find easy and elegant solutions for their home. I love to blog about simple crafts, DIY décor and easy recipes.

If you are a regular TT&J reader (like myself), then you already know that Jen loves wreaths. I share Jen’s passion for a pretty holiday wreath, too! So, today I thought I’d share with you how I made this simple pinecone wreath.

I collected a bunch of pinecones when I was outside this fall. I thought that they would make a pretty, wintery wreath. To break from the traditional round wreath, I decided to use a rectangular frame as a base.
Let me show you how to make it.

Simple Silver and Gold Pinecone Wreath
Materials needed:
- Pinecones
- Small frame (mine was 8” x 10”)
- Hot glue gun
- White spray paint
- Silver and gold glitter or metallic craft paint
- Silver and gold beaded garland
- Ribbon
- Hair dryer
Steps to make a pinecone wreath:
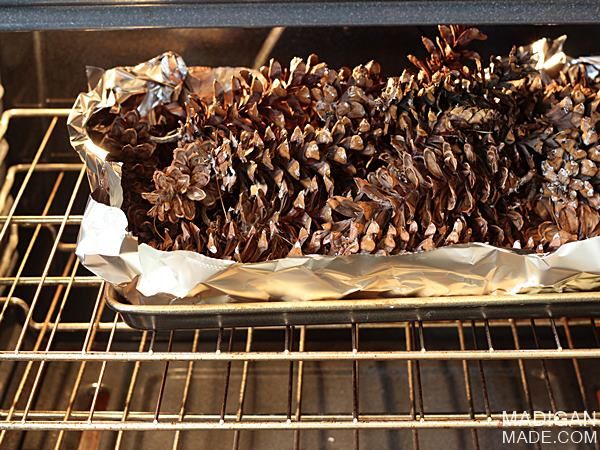
If you found your pinecones outside, it is a good idea to bake them in the oven to dry up the sap and kill any bugs that hitched a ride inside. Line a cookie sheet with foil and bake your cones at 250 degrees for about 30 to 45 minutes. (Warning: your house is going to smell like pine trees! Light a candle afterwards.)
If your frame is not already white, paint it white with craft paint or spray paint.
Using a hot glue, attach the pinecones to the edges of the frame. I added pinecones to the interior and exterior perimeter of the frame. Do your best to find places on the cones that ‘connect’ with the frame when leaning against it. Use big dollops of hot glue at those locations to hold the pieces to the frame. You may need to press the pinecones to the frame for a minute or two until the glue cools.
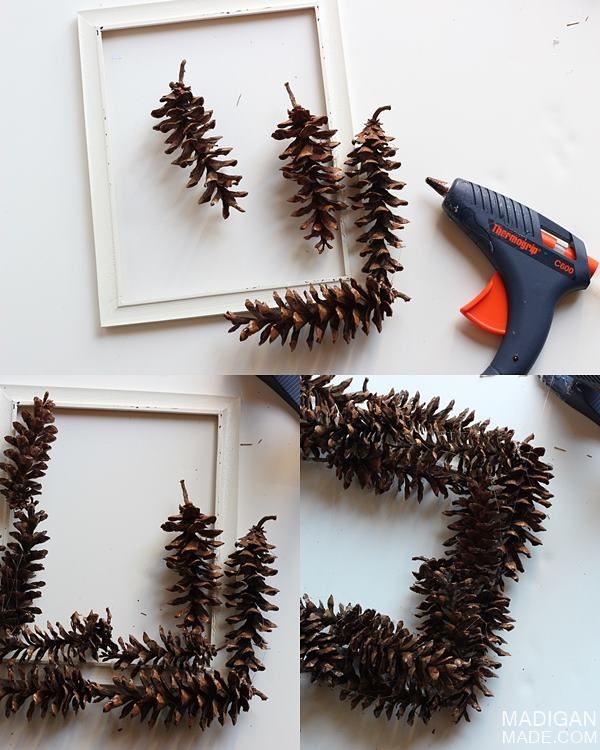
Once the interior and exterior areas of the frame are covered, go back and glue another line of pinecones down the ‘center’ of those cones already glued down. Once your wreath is covered in pinecones, grab a hair dryer and use the heat of that appliance to melt away any visible glue strings.
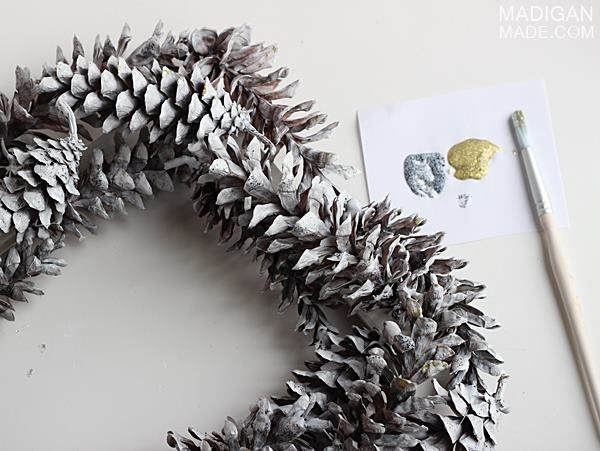
Then, take your pinecone frame outside and give it a coat of white spray paint. I wanted some dimension in my wreath, so I purposely did not try to get paint in every crack and crevice. A light coat of paint is all it needed to make the wreath a little snowy.
Once the spray paint is dried, brush on a little silver and/or gold glitter craft paint to some of the pinecones. It does not have to be perfect. Just hit the edges of some of the pinecones periodically to add a little sparkle.
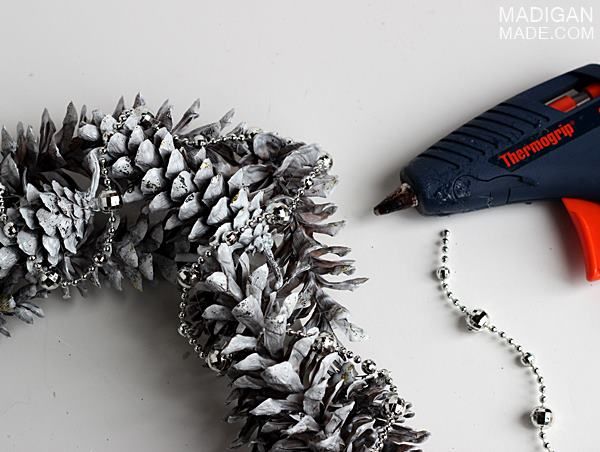
Once all the paint is dry, turn your glue gun back on. Arrange the silver garland on the wreath in a pattern that looks good to you on the wreath. Tack the garland down every couple of inches using the hot glue so that it stays in place. Repeat the same process with the gold garland. Use that hair dryer again to get rid of any glue strings.
Finally, glue a gold or silver ribbon to the back of your frame to hang it.

I love how this wreath twinkles with the gold and silver accents. It will be perfect to hang up for the holidays, but I think it will carry me into the rest of the winter season, too!
If you wanted more ideas for simple, creative living, I’d be delighted if you joined me on Madigan Made!!
– Shannon Madigan
********
Thanks Shannon! I do love wreaths, and that wreath is so elegant and simple!! I just love the combination of gold and silver, too. Shannon really has a great style, you should hop on over to Madigan Made to check out some of her other ideas. Here are a few of my favorite projects of hers:

This DIY Necklace from Copper Tubing is so beautiful!
I love how she took something so simple and made it into something so elegant!!

She made this Ribbon Bowl out of an inexpensive spool of ribbon and some Mod Podge! I think it makes the perfect Christmas Bowl. How clever!!
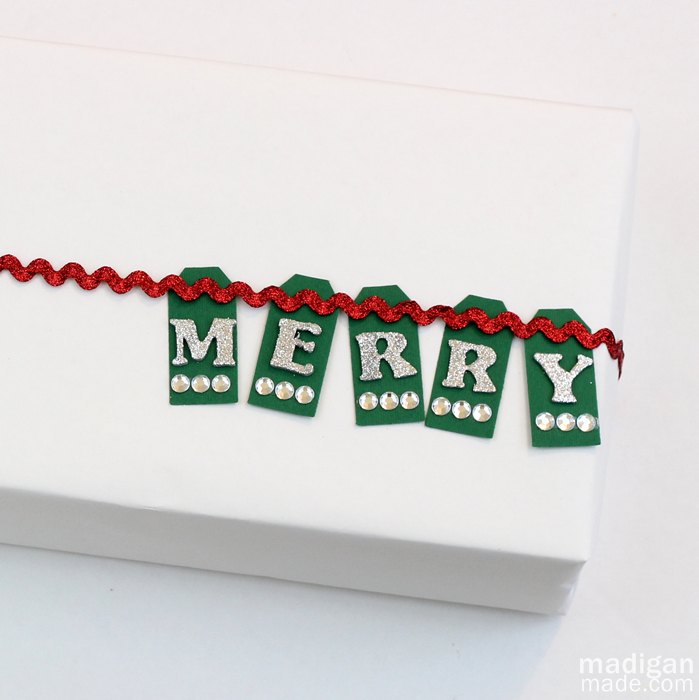
I also love how she can take something so simple, and make it look pretty! These Quick and Elegant Gift Tags will make your presents look extra special this year!
Visit Madigan Made and


I love your pine cone wreath , I’m going to make one to hang on my sons memorial tree this xmas
Thanks for sharing
This is simply STUNNING!!!!! I love love love it!
I LOVE this! Sharing at my FB page later today and pinning. Thanks!
LOVE the wreath – it’s gorgeous & I love decorating with things I find in my yard.
I have to say (at the urging of the hubs) that he cringed as a Fire Chief when he saw pine cones being baked in the oven. Even at low temps- the pitch has a flash point & pine cones are naturally very combustible. This could be incredibly dangerous. But that’s my fire safety mindset that takes over me. I just want everyone to be careful, especially this time of year. Loving all the creativity & thinking outside the box with these beautiful creations.
Ohh i love the pinecone wreath! Love this post. You’re very creative!
xoxo Zoe
http://thatszoe.blogspot.com
Very elegant, lovely. I have never seen the idea of heating the pine cones in the oven before, and I never knew you could get rid of all those annoying glue gun strings with a hair dryer. You learn something new every day and I’ve learnt 2 things in 5 minutes!