Hello Tatertots & Jello readers!
My name is Landee and I blog at Landee See, Landee Do. Today I will share this burlap christmas trees project! Basically I get inspiration from anywhere and everywhere and use it to create things for my home and my life. Yes, it’s typical DIY blogger stuff but I slather it with sarcasm and sass to keep you coming back for more. 🙂 Stop by if you get a chance! You can find my site HERE and you can also find me on Facebook, Pinterest and Twitter.

I’m super excited to be here on Jen’s amazing site to share a little Christmas craft with you today!

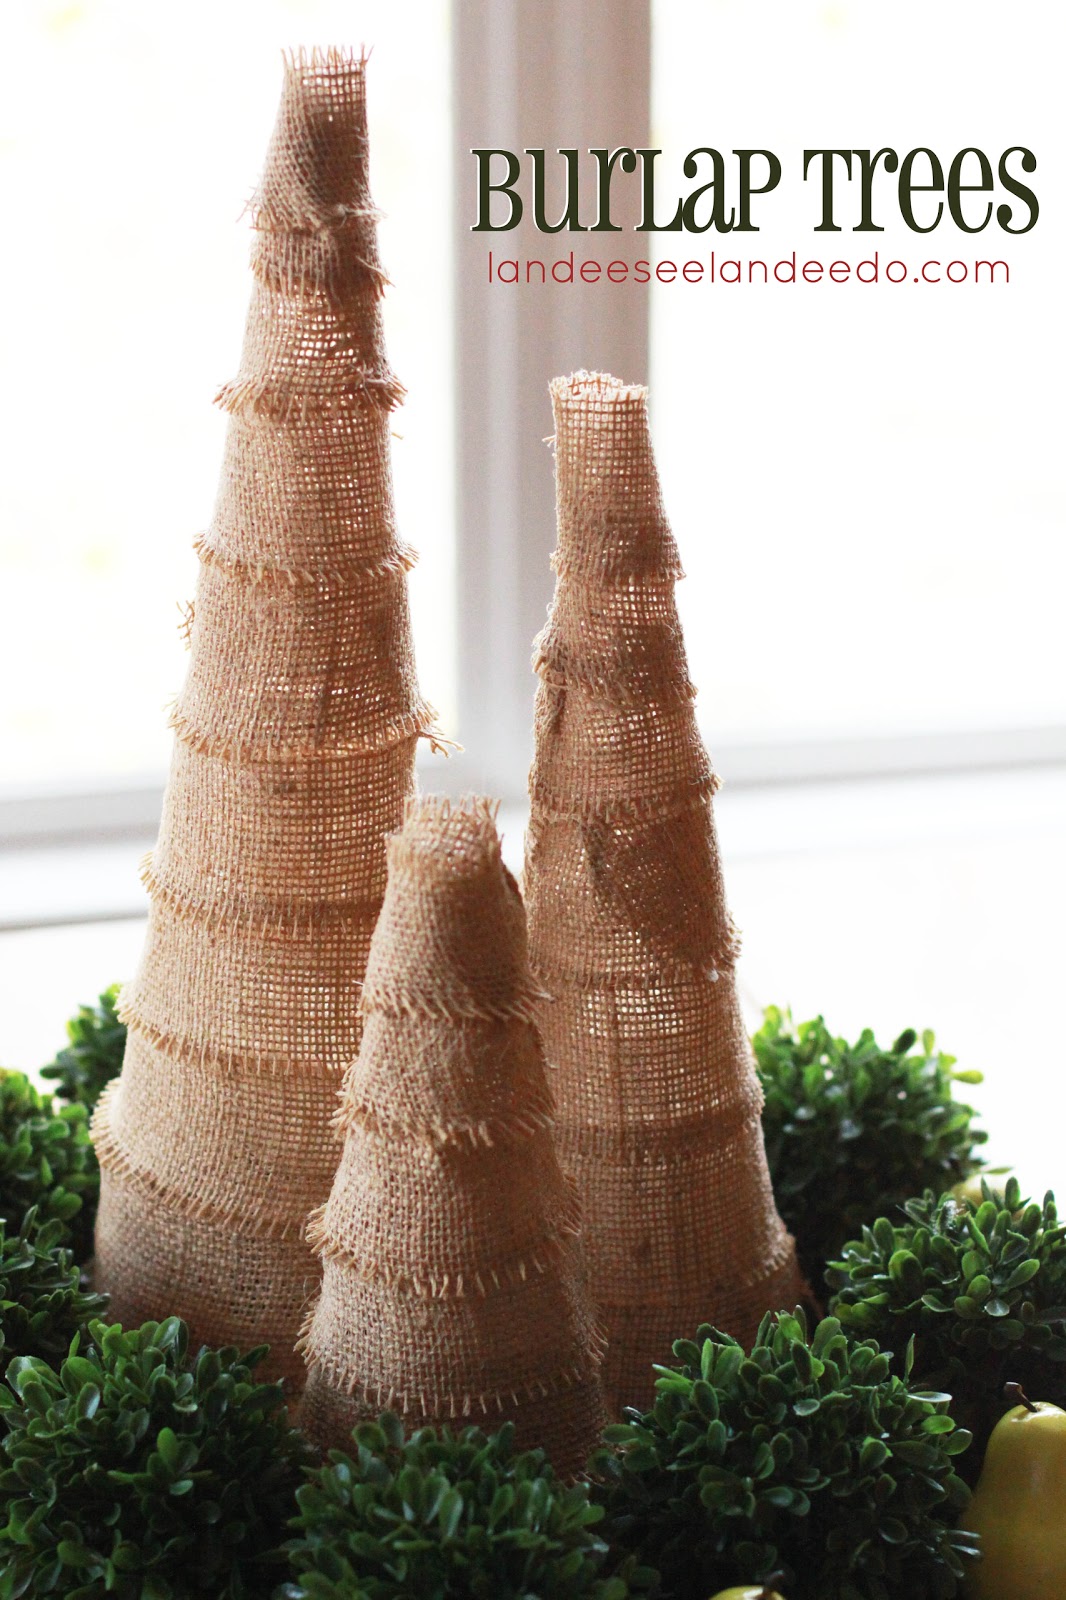
Burlap is such an interesting material… one minute it’s holding a bunch of dirty potatoes and the next it’s all the rage in home decor. I can’t even begin to explain it but I absolutely will jump on the Burlap Bandwagon! I decided to try to make some free standing burlap trees using a classic crafting tool…. fabric stiffener! I loved how they turned out.
Here is how you make them:
Supplies Needed:
- Styrofoam cones, various sizes, LEAVE THE PLASTIC ON! If plastic is already off then wrap your cone in saran wrap or similar material.
- Strips of burlap
- Fabric Stiffener (I used Aleene’s brand)
- Something to protect your work surface

Step ONE: Wrap a burlap strip around cone to measure how long you will need. The fabric stiffener shrinks the burlap significantly so cut them longer than you think. Trim them to size (your hands will be messy so it’s best to cut them before you get started!)

Step TWO: Pour fabric stiffener into old bowl and add some water to dilute. The added water makes it much easier to work with. Soak first burlap strip and remove excess stiffener by flattening strip with your fingers from top to the bottom and allowing it to drip back into bowl. This keeps your strip nice and neat.

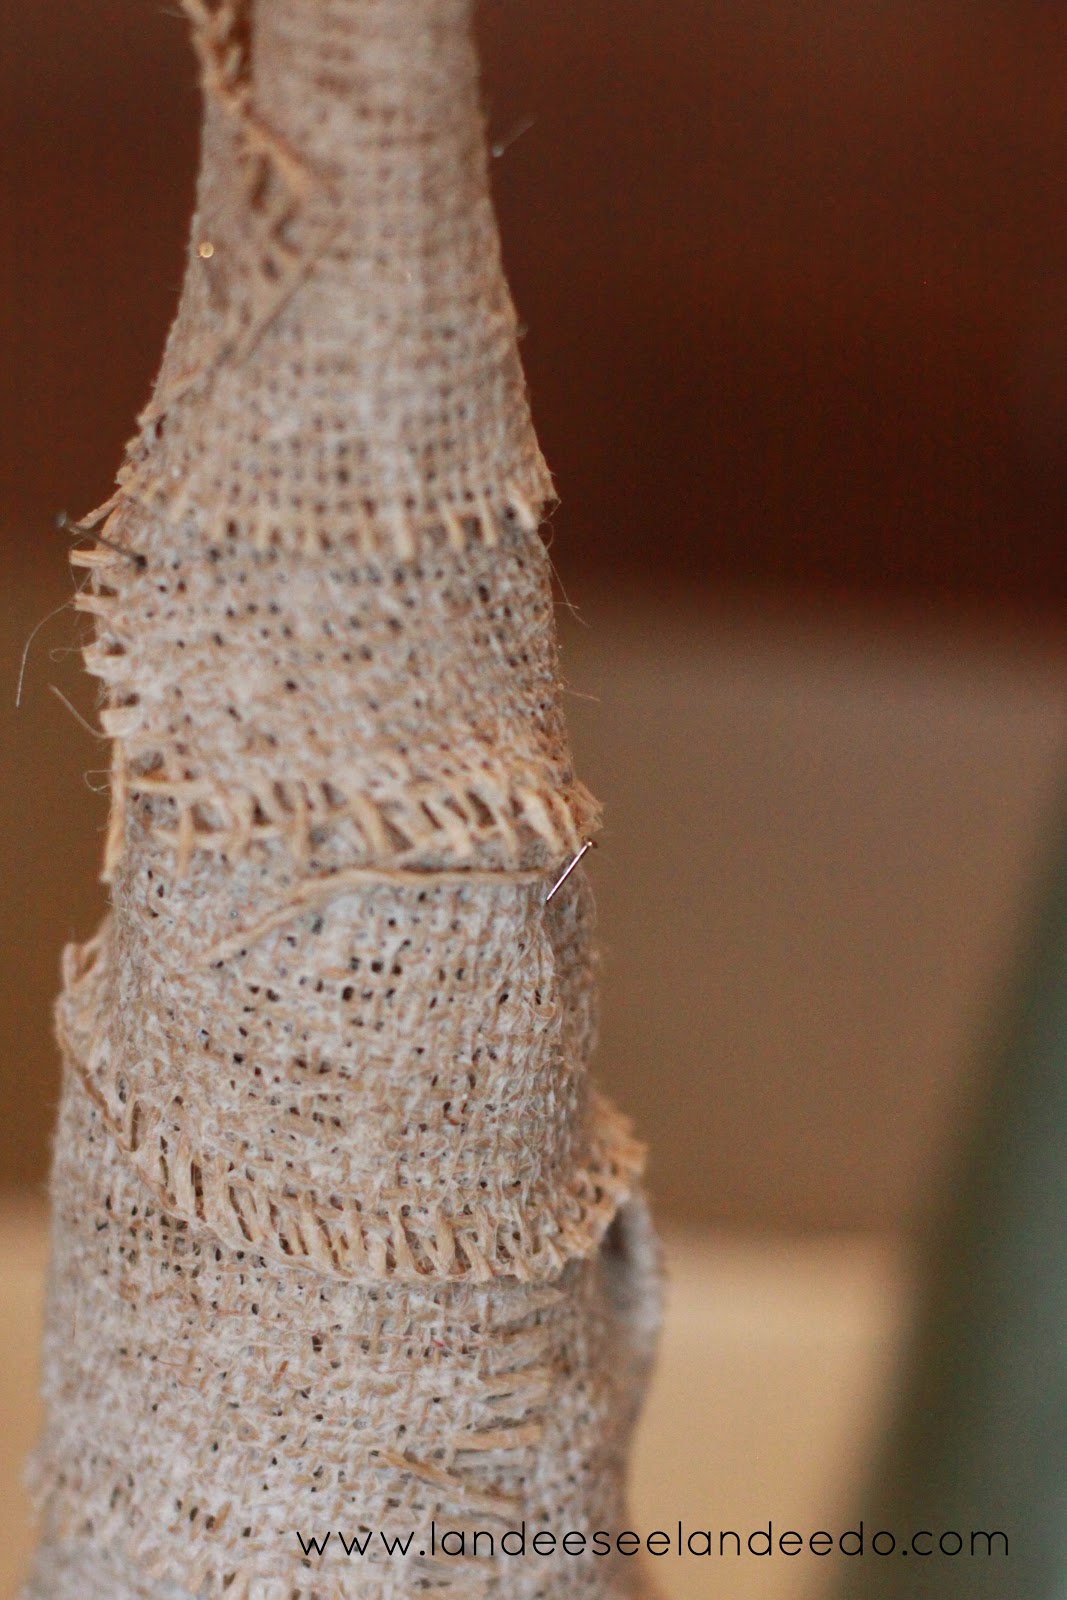
Step THREE: Wrap strip around base of tree. Repeat with the remaining strips until tree is covered smoothing and arranging as you go. It’s like paper mache!

Secure with pins where necessary to get the look you want. Allow to dry completely (may take overnight depending on how much stiffener you used).
Step FOUR: (not pictured) After tree is dry, use a butter knife or other long, thin object to separate the burlap from the cone form. It should come off fairly easy but be patient and remember to remove any pins first!

As I was doing my trees I decided to create a little frayed edge along the bottom of my strips by removing some of the cross fibers and “fluffing” the fibers as I went and allowing them to dry that way. I thought it was a cute little detail if I do say so myself!

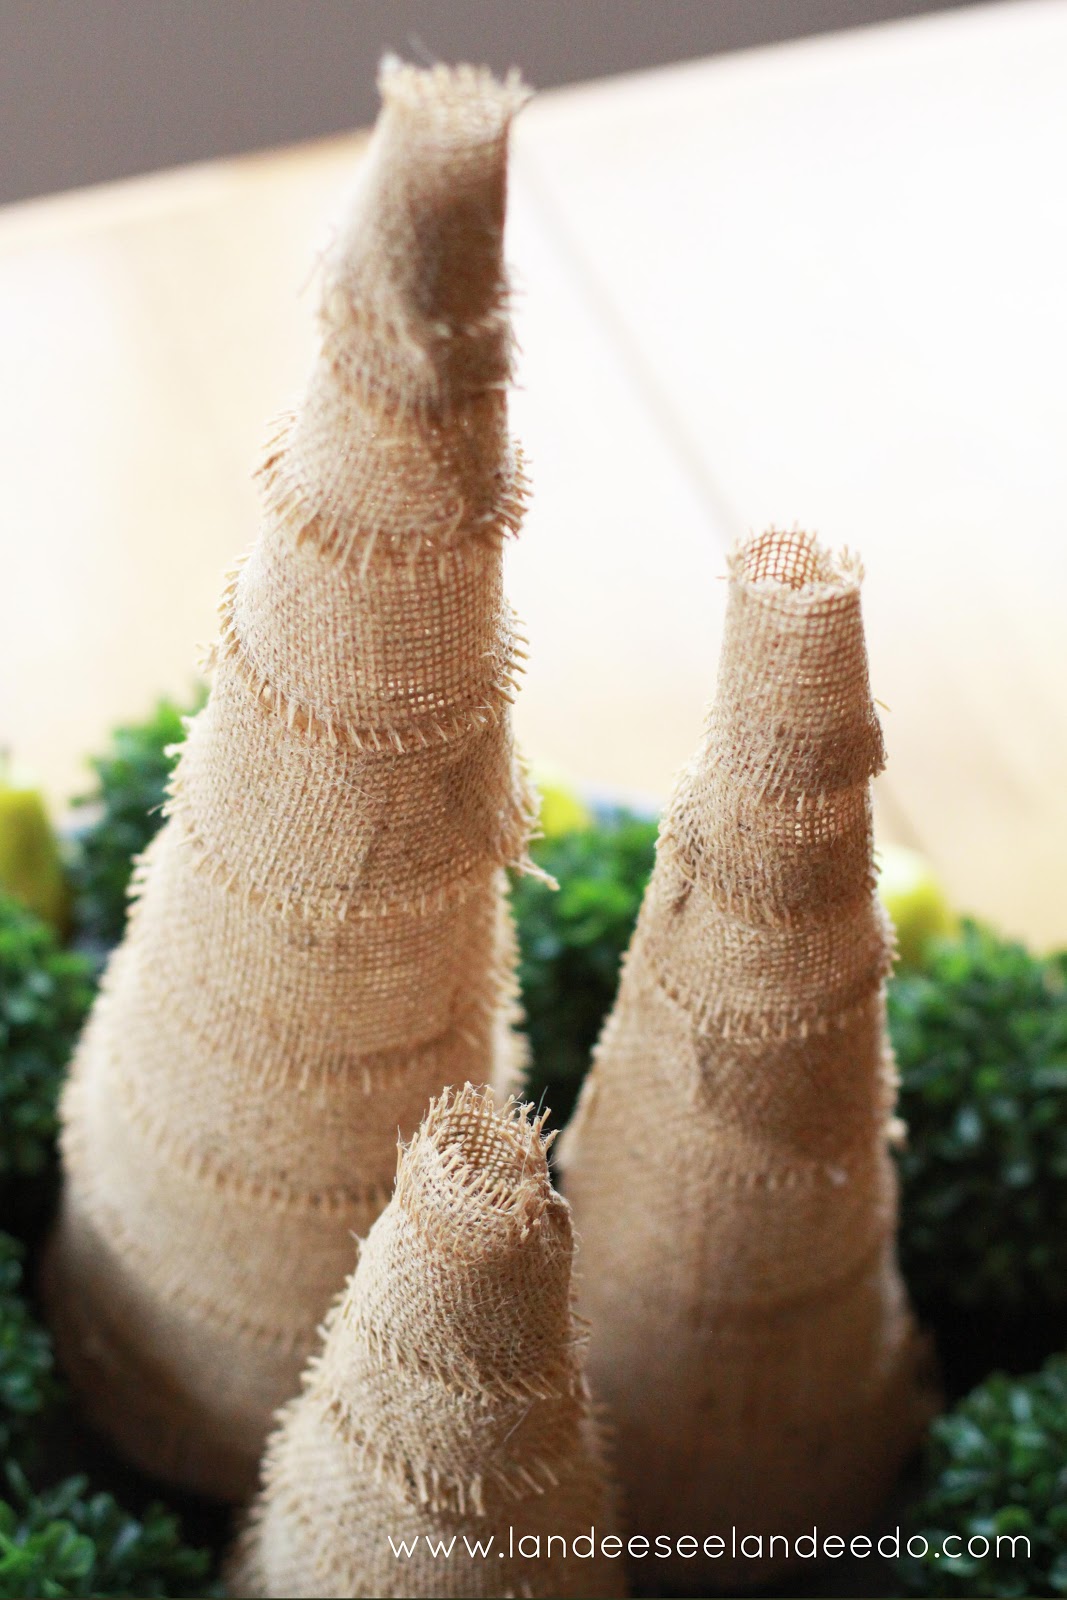
Step FIVE: Arrange your burlap trees anywhere for a pretty, natural touch to your Christmas decor!
I also thought these would be nice with some Christmas lights shining out from the inside! Battery operated tea lights would also work. I love how it looks!

What I love about these trees is they are simple and classic. You can add embellishments or leave them as is. You could even spray paint them! I also love that you can keep reusing the styrofoam cones to make as many as you like. And it doesn’t get much cheaper than burlap so you could make a lot of them with very little money. Wouldn’t they be pretty down the center of your Christmas dining table or along your mantle? Lots of possibilities!
Merry Christmas and thanks for having me Jen!
* * * * *
Thanks for the awesome project, Landee!
Burlap Christmas trees are one of my favorite holiday projects!
Go follow Landee See, Landee Do for more cute holiday projects, including:


Those Burlap Trees are so fun,Landee!!
Thanks for sharing them with us.
Be sure to check out Landee See, Landee Do – it’s one of my very favorites!!
Have a Happy Day!!
xoxo


Love these!! using them with little lights underneath is very sweet and clever!!
I love these trees! Thanks for the great tutorial!
Leslie
House on the Way
LOVE LOVE LOVE these trees!
CUTE!
These are just beautiful! I love these! And they’re really wonderful with the lights.