Hello fellow TT& J fans! I’m Kara from Creations by Kara, and I’m happy to be here again this year for Jen’s Happy Holiday series!
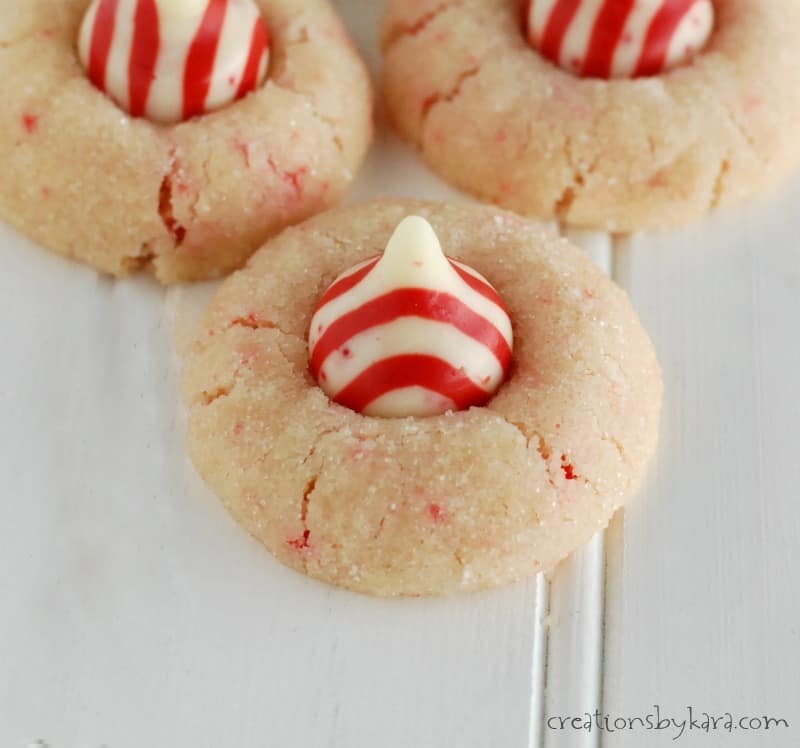
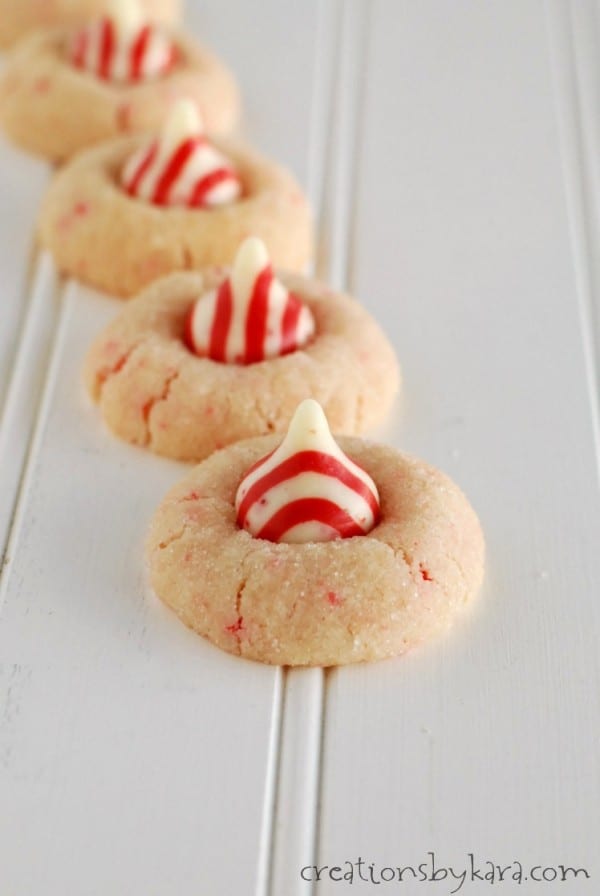
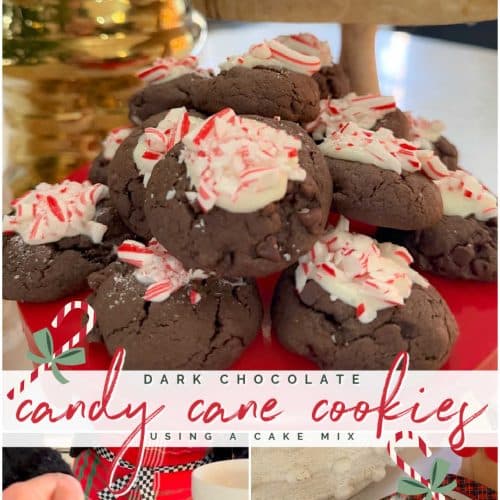
Today I’m sharing a recipe for a pretty and delicious Christmas cookie. If you’re like me, you can’t wait for all the seasonal mint chocolate candy to hit store shelves! I always stock up on these candy cane kisses, as well as the mint truffle variety. They are both so yummy! I love eating them straight out of the bag, but I also like finding ways to use them in baking. Last year my mom and I experimented and came up with these Candy Cane Peppermint Kiss Cookies. They were a huge success!
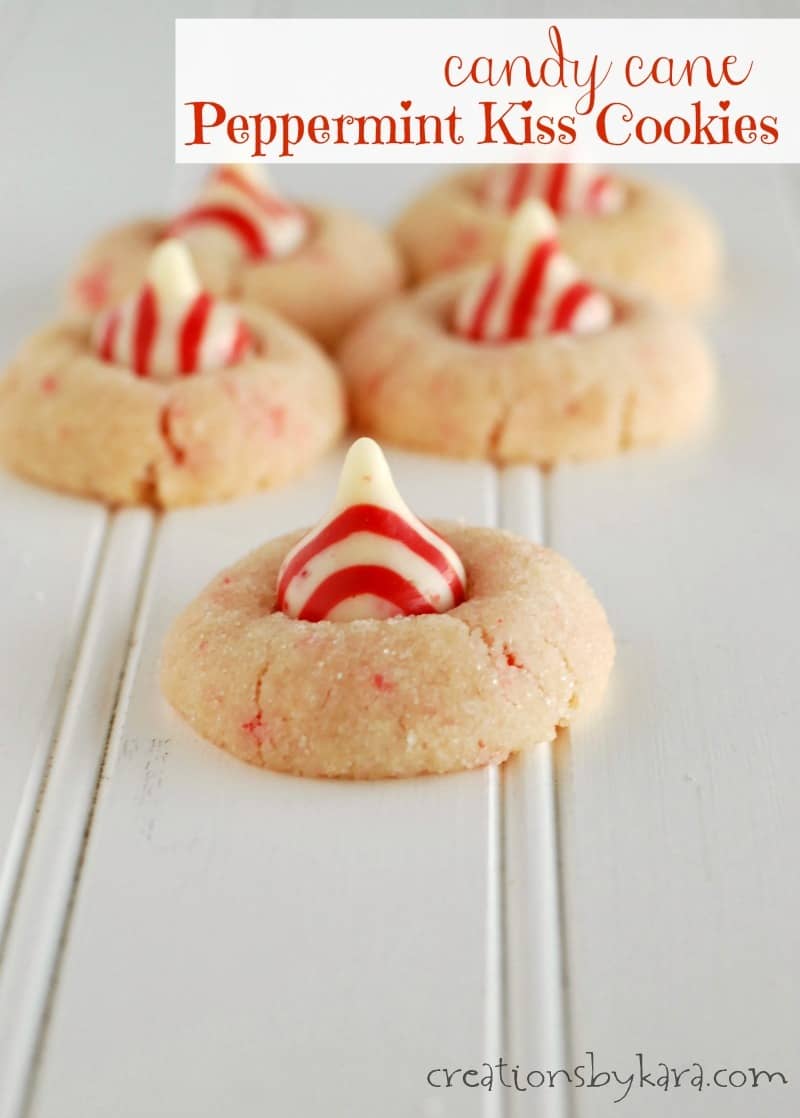
They have crushed peppermint candies in the dough, and a Hershey Candy Cane Kiss on the top. If you are a fan of mint, you will love these cookies! They are rolled in sugar, so they have a sparkle to them that is so pretty. They are perfect for Christmas cookie trays, or for gift giving. Just make sure that you let them sit for a couple hours before stacking them. That will give the kisses a chance to harden up again.

Candy Cane Peppermint Kiss Cookies
- 1 cup butter, softened
- 1 tsp peppermint extract
- 10 peppermint candies, very finely crushed
- 2 cups flour
- 1/2 cup sugar
- 1/4 tsp salt
- 1/2 cup sugar for rolling
- 1 pkg. Candy Cane Hershey kisses
- Cream together the butter and peppermint extract.
- Beat in the crushed peppermint candies.
- Add the flour, 1/2 cup sugar, and salt; stir well.
- Chill for 30-60 minutes.
- Roll in 1” balls, then roll in sugar. Place on lightly greased cookie sheets.
- Bake at 350° for about 12 minutes.
- Immediately press a kiss in the middle of each cookie.
- Cool for several minutes on the pan before removing to cooling racks.
- -Makes 3 dozen
1 cup butter, softened
1 tsp peppermint extract
10 peppermint candies, very finely crushed
2 cups flour
1/2 cup sugar
1/4 tsp salt
1/2 cup sugar for rolling
1 pkg. Candy Cane Hershey kisses
Cream together the butter and peppermint extract. Beat in the crushed peppermint candies. Add the flour, 1/2 cup sugar, and salt; stir well. Chill for 30-60 minutes. Roll in 1” balls, then roll in sugar. Place on lightly greased cookie sheets. Bake at 350° for about 12 minutes. Immediately press a kiss in the middle of each cookie. Cool for several minutes on the pan before removing to cooling racks.
-Makes 3 dozen
Do you have a favorite Christmas candy that you like to use in baking? Or you a strictly unwrap and eat it kinda gal?
*******
Thanks Kara! Those look so delicious. I’m adding this to my list of cookie recipes to try this year. Kara has amazing ideas on her blog. Here are a few I think you’ll love:
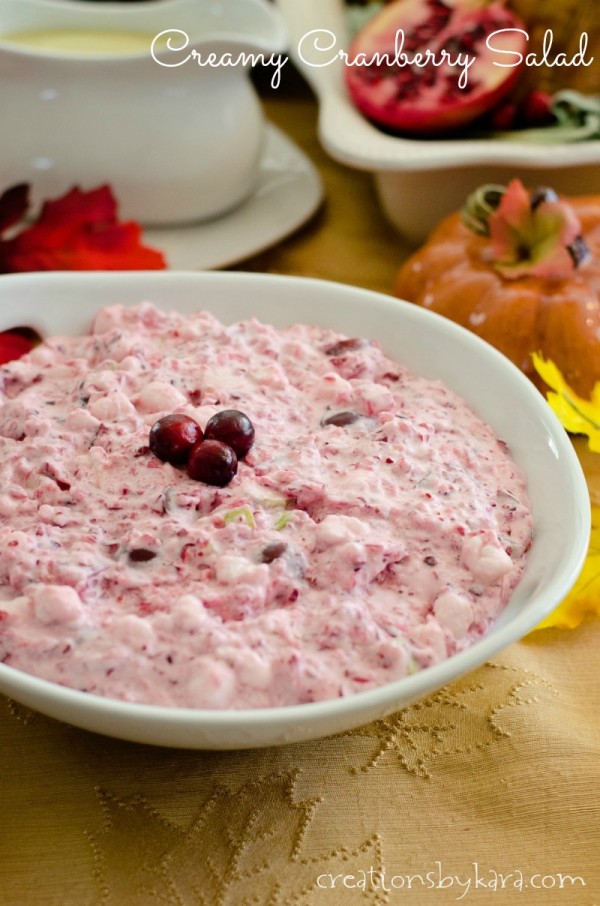
If you’re looking for a yummy side for Thanksgiving, why not try her Creamy Cranberry Salad. Looks so good!
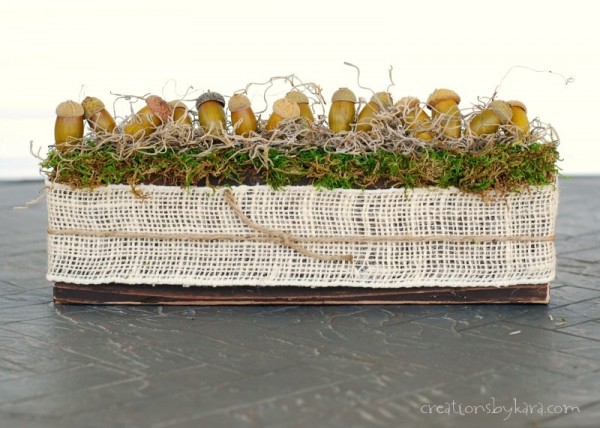
And her Rustic Fall Centerpiece with Acorns is so darling! It would be perfect on the Thanksgiving table.
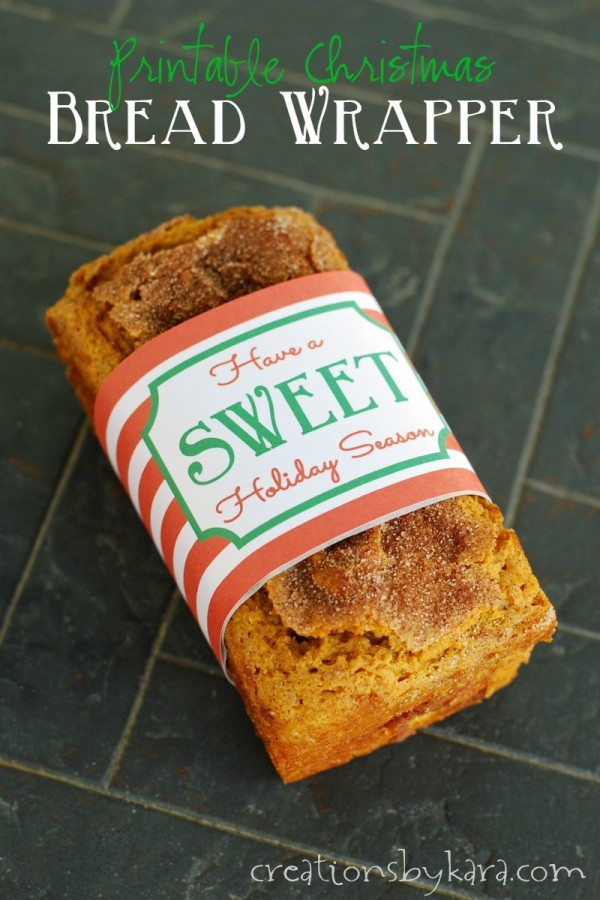
And if you’re giving gifts for the holidays, make sure to pick up her Printable Christmas Bread Wrapper!
Visit Creations by Kara and


These cookies are a disaster! I followed the instructions to a T, but only just sprinkled the sugar on top rather than to roll them. That’s it.
They turned out flatter than a pancake, but rock hard.
However, I added the kisses anyway and left them to cool for a little bit. This turned out to be an even bigger mistake, as the kisses just turned into molten white and red chocolate the second that I made any sort of attempt to move them to the cooling rack.
Oh, and despite the fact that I slathered the sheet in cooking spray, these things were practically glued onto the cooking sheet. They were also rock hard… yet soft and fragile at the same time.
I don’t know how anybody could manage to screw up this badly… but congrats. You did.
I’m so sorry to hear that! These were a guest post so they aren’t my recipe. I wish I could help you figure out why they didn’t turn out!
xoxoxo
Have you ever considered about adding a little bit more than just your articles?
I mean, what you say is important and everything.
However just imagine if you added some great visuals or video
clips to give your posts more, “pop”! Your content is excellent but with pics and video clips, this website could undeniably be one of the best in its field.
Good blog!
i just made these and they came out great! i subbed 1/2 cup of the flour for 1/2 cup of cocoa powder because i wanted chocolate peppermint kisses. i’ll be taking them to a christmas party tonight. thanks kara!
also, for those of you that had some trouble with the recipe…this base is a basic shortbread and no egg is needed; the extra stick of butter makes up for it. i let mine cool on the pans for 2 minutes before i pressed a kiss into them. don’t press too hard and work quickly. then definitely let them cool all the way on the pan until the chocolate hardens up again. if you move them too soon, the kiss will fall into a puddle and then you won’t get the look you want.
I also thought that the lack of egg was wrong. After reading these comments, I added 1 egg to the recipe, which mirrors other Hersey Kisses cookies I’ve made in the past. They came out perfect!!! Only thing I would suggest is to NOT leave them cooling on the pan before moving to a cooling rack. . . the kisses melted a bit too much and lost their shape. But these are absolutely melt-in-your-mouth delicious. Going on the annual list for sure!!! Thanks for a great recipe!
Trying to make these and noticed the recipe does not call for eggs. I assume you need eggs to bind everything together?? Help!
Disappointed too! Mine look nothing like the picture. Thinking eggs are missing from the recipe? Something is needed to bind the flour & butter.
So sad, tried these and they totally fell flat and fell apart. Has anyone else had this problem?
Yes, had the same problem, is there something missing from the recipe? Ours looked NOTHING like the picture!!
want to print recipe but it comes up with 7 pages with ads and pictures. Just nee to print the recipe. Could fix it so that I just print recipe without all the other pages that I don’t need
I had the same problem and just printed the 2nd page. Still a few ads, but I got the entire recipe.