
Today’s tutorial is from one of my favorite bloggers. Amy from Positively Splendid. Amy is adorable and she has SPLENDID ideas. I had the treat of meeting her at Blissdom this year and then again at Creative Estates a few weeks ago. She is as adorable in real life as she is on her blog.

{here we are with Emily of Decor Chick and Jess of Frugal with a Flourish at Blissdom}
Hello, everyone! I am absolutely over the moon to be sharing a project here at Tatertots and Jello today! Jen’s blog is among the first I ever followed, and I never cease to be inspired by her wealth of creativity. I’ve had the privilege to meet Jen in person twice now, and I have to say that she is just as charming in person as she is on screen!

My name is Amy, and my blogging home is known as Positively Splendid, a place where I share about my passion for all things creative. As a wife and mother of three (with our fourth due in the fall), I find pursuing creative endeavors to be the thing that preserves my own unique identity. I love taking ordinary ingredients and transforming them into something lovely!

My goal is for my blog to be a little haven of crafting and DIY inspiration, and a place where creative people of all skill levels can come and feel right at home. Because I feel strongly that everyone should be equipped to create something beautiful on their own, each and every project at Positively Splendid is explained to the last detail with step-by-step photo tutorials. I like to think of each tutorial as sitting down with friends to learn something new together! I would love for you to stop in for a visit!
Today I’m going to share with y’all a tutorial for how to create a vibrant and fun throw pillow cover to punch up your home decor. This project was inspired by this gorgeous rug I came across on Modern Chic Home a few weeks back.

All set to make a peacock pillow of your own? Let’s get started!
For this project, you will need…
Printable Templates
Circle Templates (PDF)
Feather Template (PDF)
An 18″ pillow form
White cotton twill fabric
Washable ink marker
Freezer paper
Grey spray paint
Felt in assorted colors
Coordinating thread
Basic sewing supplies: Machine, shears, etc.
Optional: Rotary cutter and mat
Prep Work
Print off and cut out your feather template.
Cut your twill fabric to the following dimensions:
(1) 18.5 x 18.5″ square
(2) 18.5 x 11.25″ rectangles
step 1/ Trace your template onto your freezer paper your desired number of times, and cut out your shapes. For my pillow, I used 17 feathers. Use your washable ink marker to mark the precise center of your square piece of fabric. Iron one of your feather pieces directly over this mark, taking care to ensure it is straight. Now, iron your remaining feather pieces in your desired configuration around your center piece, making sure each feather is evenly spaced as you work.

step 2 / Spray your fabric piece evenly with your paint, applying 2-3 light, even coats. When the paint has dried, remove and discard your freezer paper pieces.
step 3/ Cut 3 pieces of freezer paper to 8.5 x 11″. Print the circle templates you downloaded above onto the dull (unshiny) side of your freezer paper. Note: For my pillow, I printed 2 sheets of the large circles and 1 of the small circles. Iron your printed templates onto your felt, distributing the circles among your different colors as desired. Carefully cut each of your circles out, and discard the freezer paper backing.

step 4 / From each of your small circles, cut a small notch, as shown. Carefully stitch these smaller pieces onto the lower portion of your larger felt circles. Place your stitched pieces at the bottom of the feather spaces on your pillow front, aligning them toward the bottom point of each feather. Carefully stitch around the perimeter of each circle to affix them to your pillow front. Repeat until each feather space contains a circle piece.

step 5 / Fold one of the long edges of one of your rectangle pieces under 1/4″; press. Fold under another 1/4″; press. Stitch this hem to secure. Repeat with the other rectangle piece. Lay your completed front panel on a work surface, right side up. Place one of your rectangle pieces on top of your front piece, right sides facing, so that the top edge and corners of each piece are aligned and the hem you just sewed runs through the center, as shown. Pin. Place your other rectangle piece over the other two pieces in a similar fashion, this time aligning the bottom edges and corners. Pin. Note: Then hemmed edges of your rectangle pieces will overlap by 3 inches at the center. Using a 1/4″ seam, stitch all the way around your pinned pieces. Clip your corners, and turn your cover right side out. Slip your cover onto your pillow form.

All finished!


Thank you so much, Jen, for having me over today! I hope to see y’all over at Positively Splendid very soon!

Twitter: @splendidamy
Facebook: facebook.com/PositivelySplendid

Amy – that is just so cute.
Amy has so many wonderful ideas, I don’t know where to start. Seriously.

{this is the first project of Amy’s that I was introduced to — Metal Flowers}

{She makes the most amazing pillows — check out these Patriotic Outdoor Pillows}

{And I adore her Boy/Girl room — she made all of the bedding — amazing}
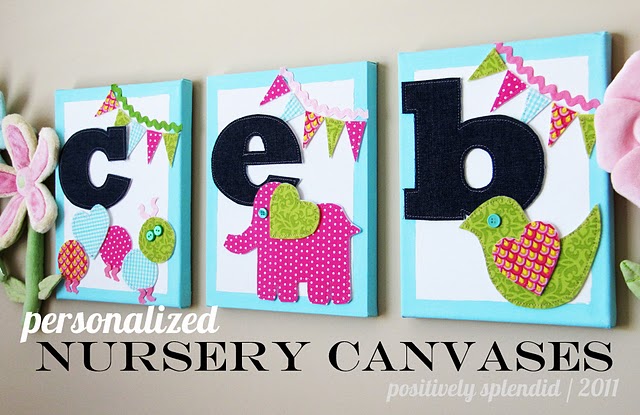
{And another Fab idea — Personalized Nursery Canvases}
AMAZING!!
Seriously, every single idea that Amy does is wonderful. You will want to see all of the new ideas at Positively Splendid!!
xoxo
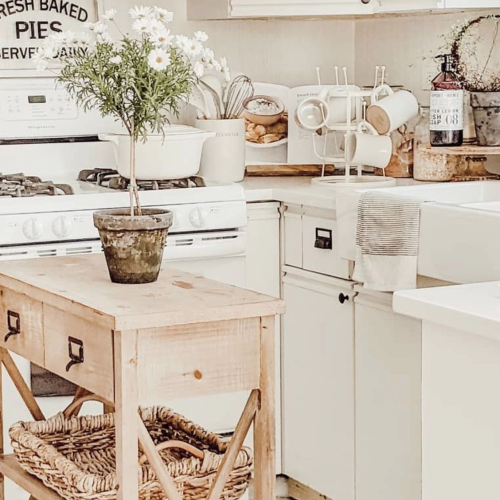
PS — I made over my front door and porch today. I can’t wait to show you what I did. Here is a sneak peek:

Have a great day!!
xoxo


LoveLoveLove.
For realz.
OMG, so cool!! I should totally do this!!
Fabulous, just fabulous! Love the final product and she shared a great method too!
Absolutely love this pillow!
I love this pillow!!! I need to save this PDF for when I have some down time. Does a mom ever really have down time? Yes! I will make some for something this awesome.
So wish I could do that!
I would LOVE to have you link up to my Whassup Wednesday Par-Tay! And I have a party button you can grab and put on your blog so your friends can come too:)
If you are NOT already a Follower of Elements Interiors….HELLEEERRRR!
Click that Google Follow button and YOU will be ENTERED in my
"Its a SURPRISE!" GIVEAWAY to be announced EVERY MONDAY! Yeppers! You read it right,
a Winner EVERY MONDAY!!! With GREAT Goodies you wont want to miss!!
Hope to see ya at Whassup Wednesday!!!
*ENTER LINKY PAR-TAY Here! *
xoxokara
I'm so excited to see Amy here. Amy – that pillow is stunning! It is so graphic and fun. I wonder: Did you plan to make it in your blog colors, too? LOL.
What a clever pillow…so fun!
TOTALLY showing my age here.. but that adorable pillow makes me think of the Partridge Family… ack i am old!
Maddie
That is just gorgeous. I am a sucker for anything with a peacock print.
Lovely idea!
Amy always comes up with the most beautiful project! I love the fun colors in this pillow! Jen I can't wait to see your porch…it bet it looks so fun and bright with that yellow!
Must.get.sewing.machine.NOW!
so totally awesome! love this!
Great guest post, Amy! The pillow is beautiful…love the colors. Nice tutorial too!!
Jen, can't wait to see your front porch. 🙂
This is so fabulous!!! I linked to your tutorial on Craft Gossip Sewing:
http://sewing.craftgossip.com/tutorial-mod-peacock-throw-pillow/2011/04/26/
–Anne
This is so so fabulous! It's going straight on my list of "things to make when Summer rocks round" =) x
That is a GREAT pillow! Thanks.
Downright…RAD to the Bone!!