Tatertots and Jello

COLORFUL HAPPY HOME -- Daily DIY, Decor, Craft and Recipe Tutorial

  • My Home
    • 1905 Cottage
    • Daybreak House
  • DIY
    • DIY Projects and Ideas
    • Organizing
    • Tutorials
    • Printables
  • Decor
    • Spring Projects
    • Summer Projects
    • Fall Projects
  • Crafts
    • Kids Crafts
    • Painting Projects
    • Paper Projects
    • Sewing
    • Wreaths
  • Holidays
    • Valentines Day
    • Easter
    • Halloween
    • Thanksgiving
    • Christmas
    • HAPPY Holidays Series!
  • Recipes

Explore

  • my home
  • diy
  • decor
  • crafts
  • holiday
  • printables
  • recipes

Connect

Home » christmas » Guest Project — Make Burlap Christmas Trees!

christmas, guest tutorials · December 2, 2010

Guest Project — Make Burlap Christmas Trees!

Tatertots & Jello is a participant in the Amazon Services LLC Associates Program, an affiliate advertising program designed to provide a means for sites to earn advertising fees by advertising and linking to amazon.com.
Hello all!!  I am Angie with The Country Chic Cottage and I am BEYOND thrilled to be here on Tatertots and Jello!!  

The Country Chic Cottage is all about decor, transformations, crafting, and tutorials…all while on a budget!  I started blogging after a new year’s resolution to spruce up my home decor.  The twist?  No budget to do it with!  🙂  
Come on over and follow along with my adventures!
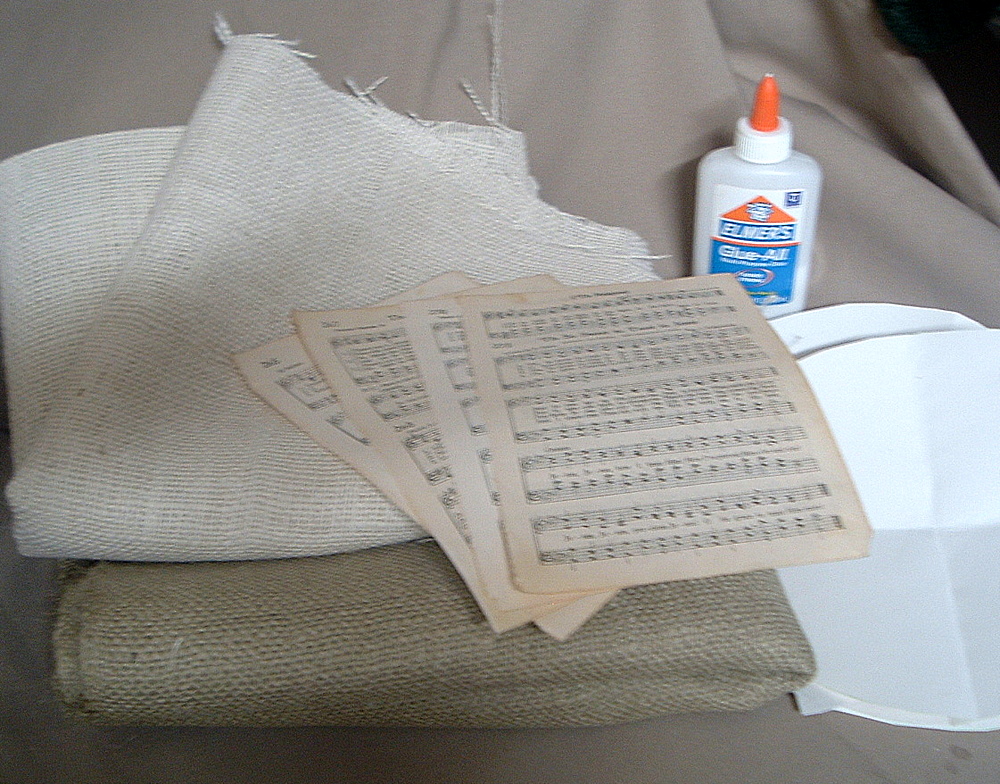
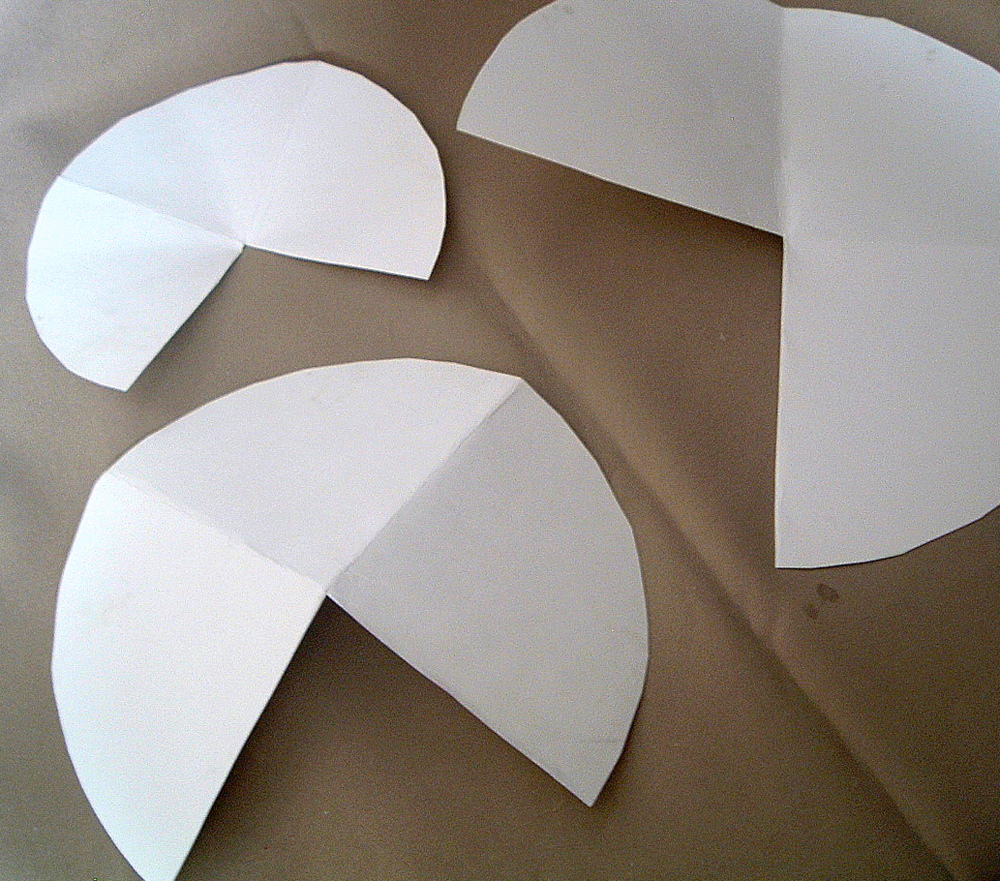
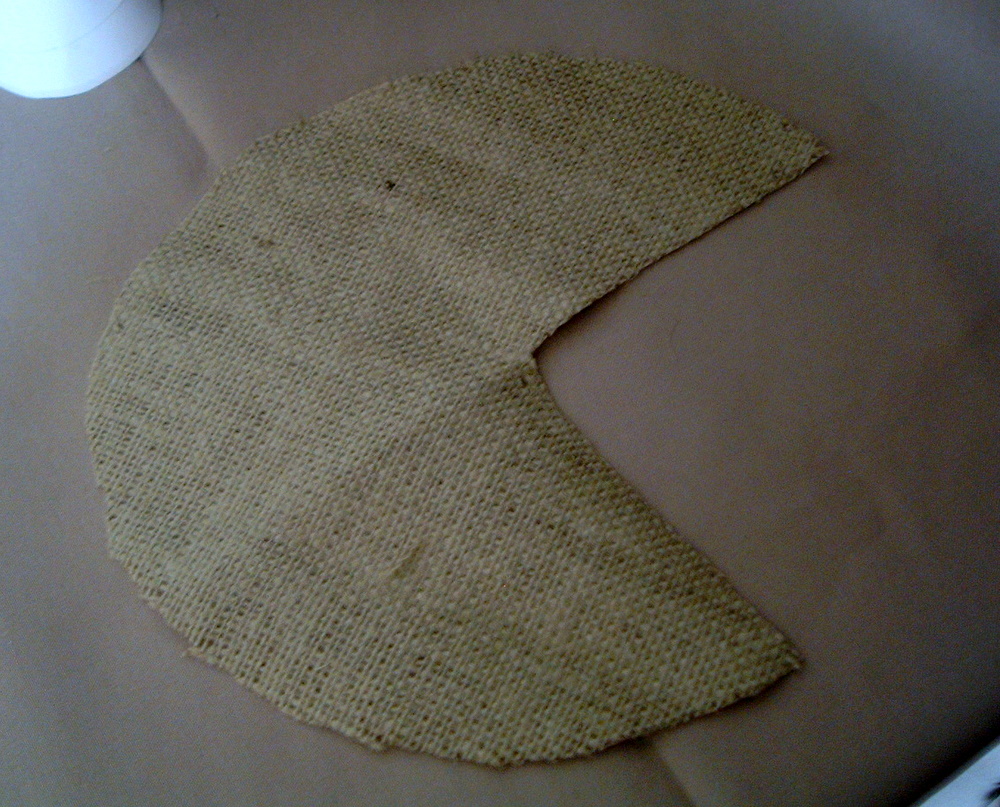
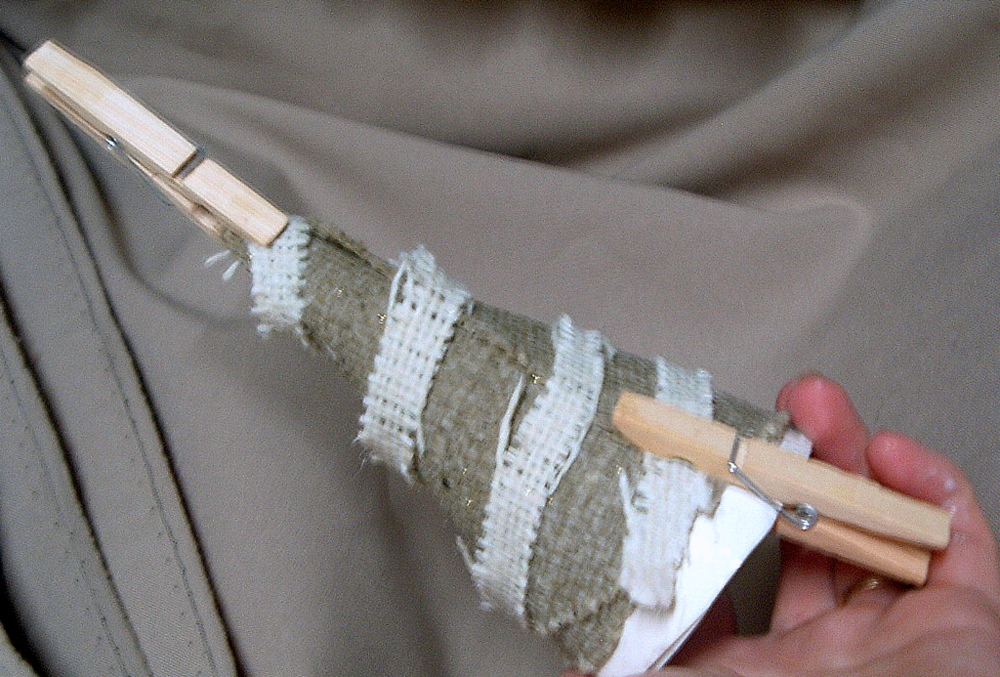
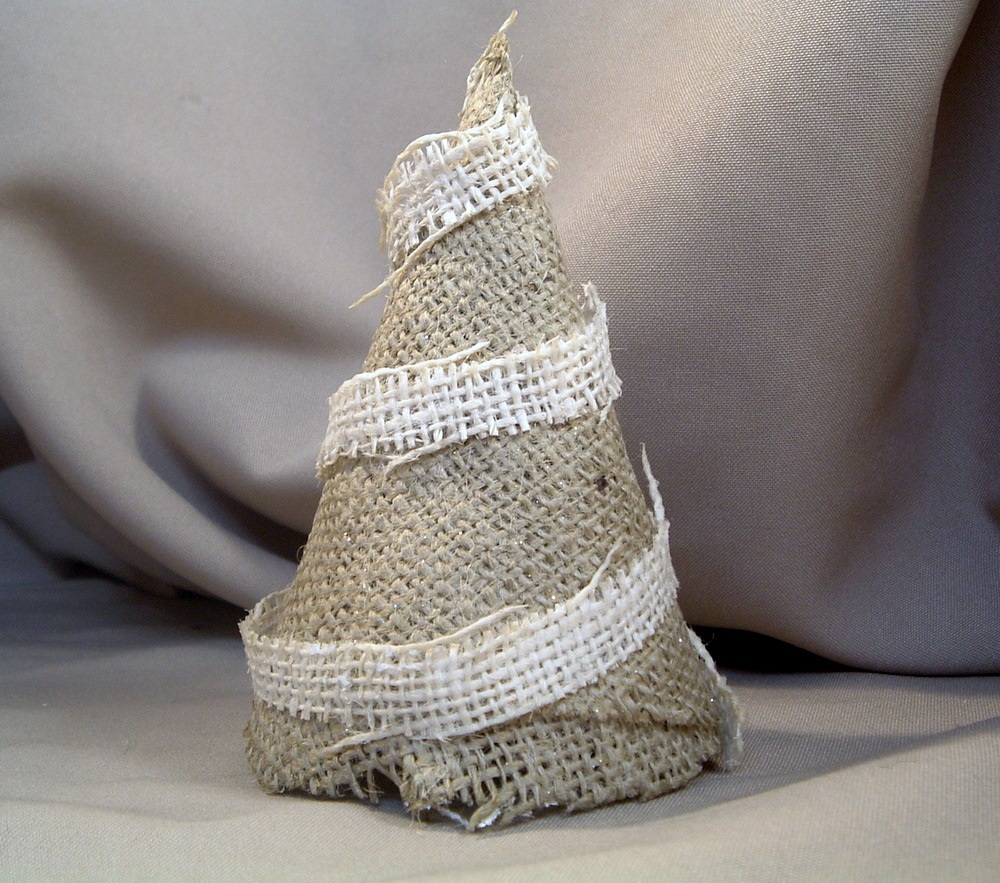
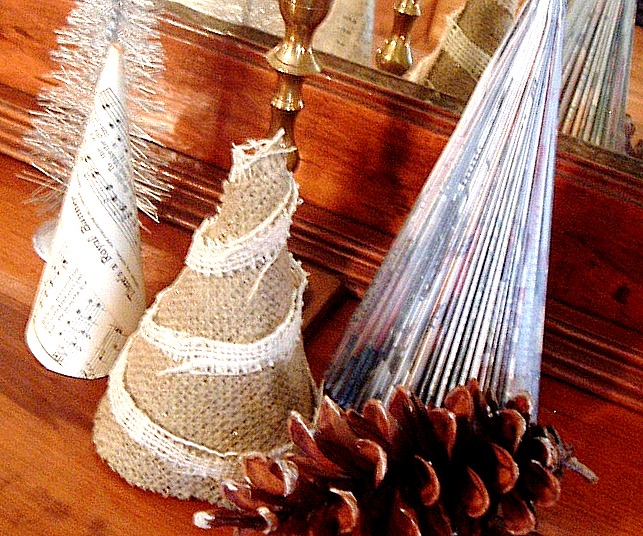
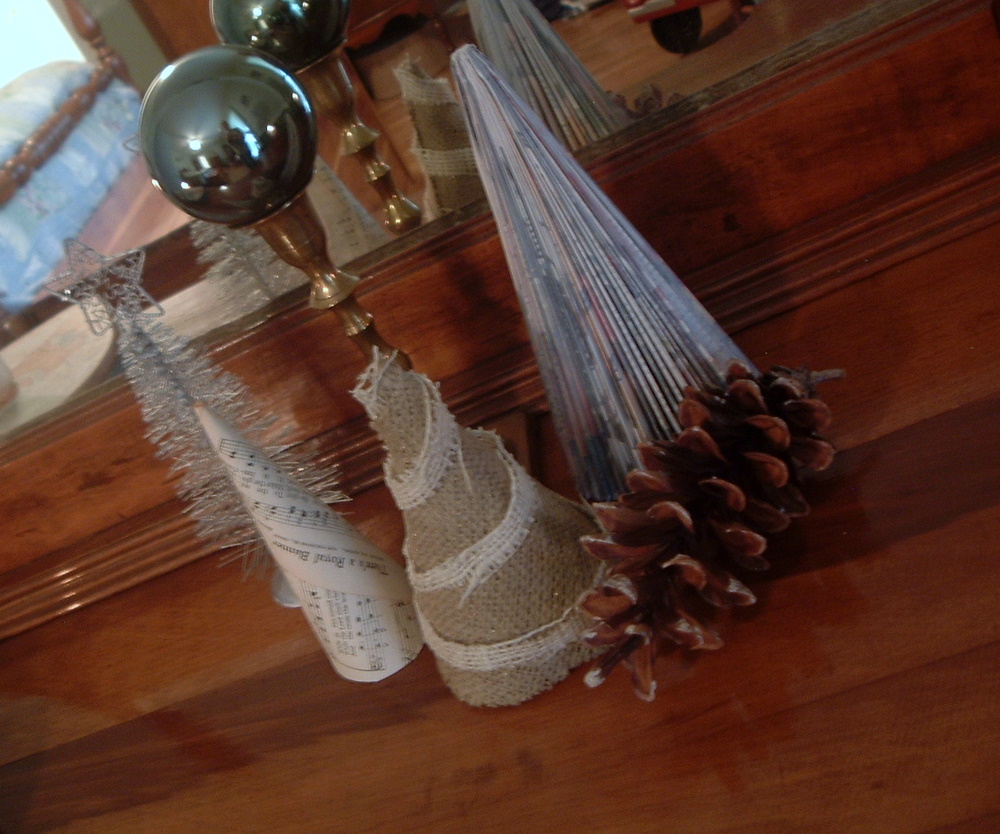
It is time to start Christmas decorating!  


What better way to decorate than with
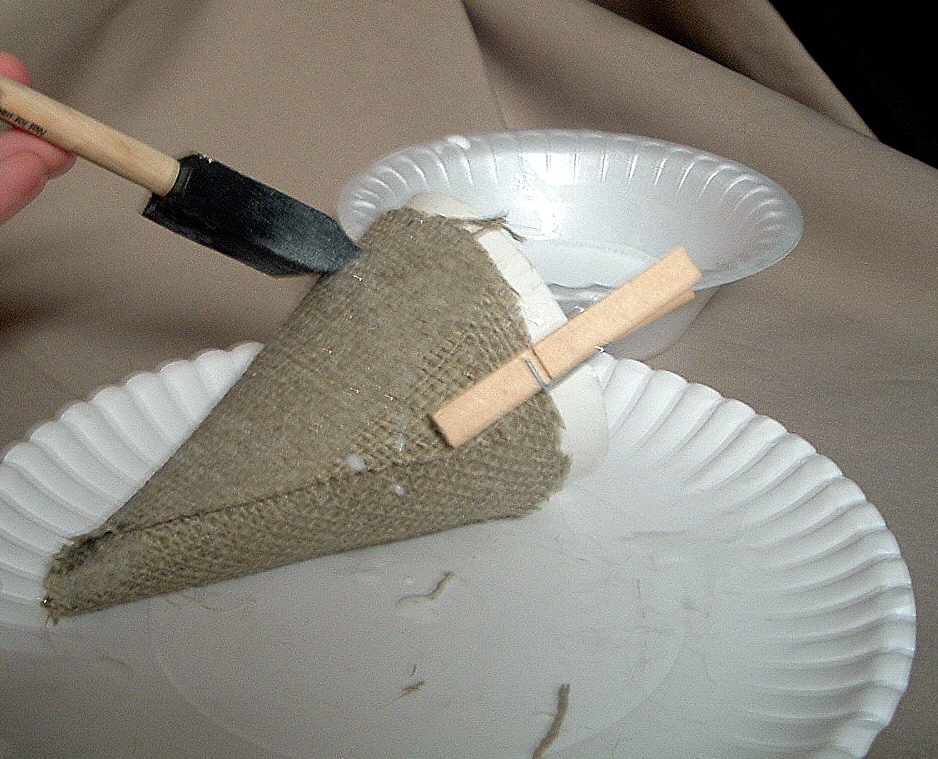
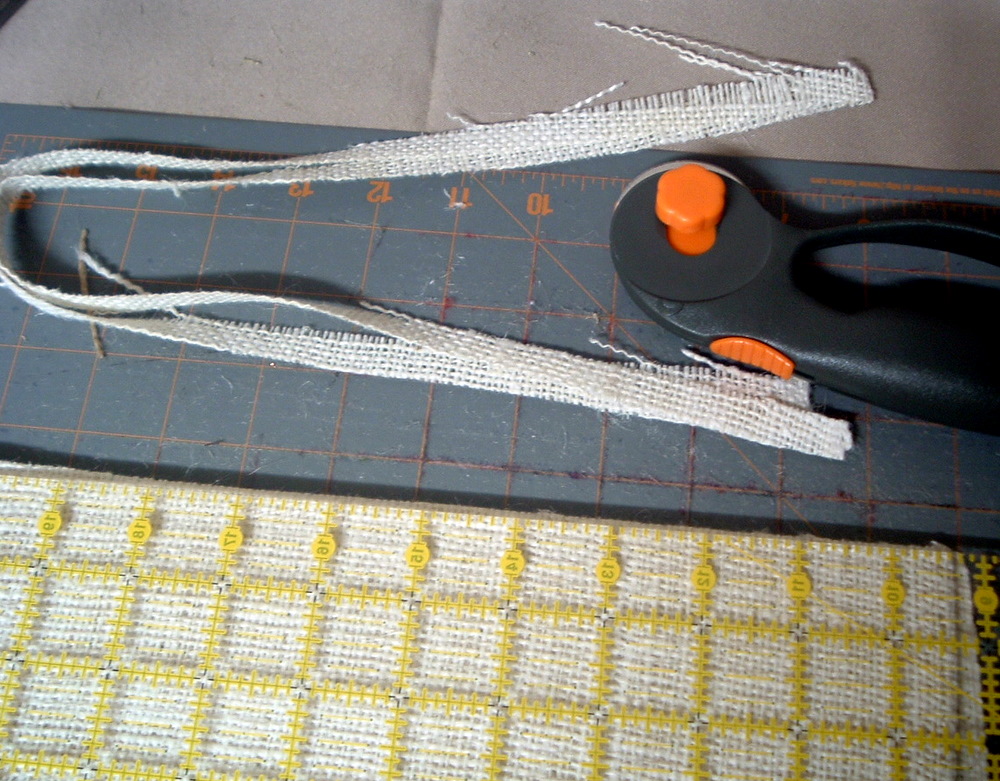
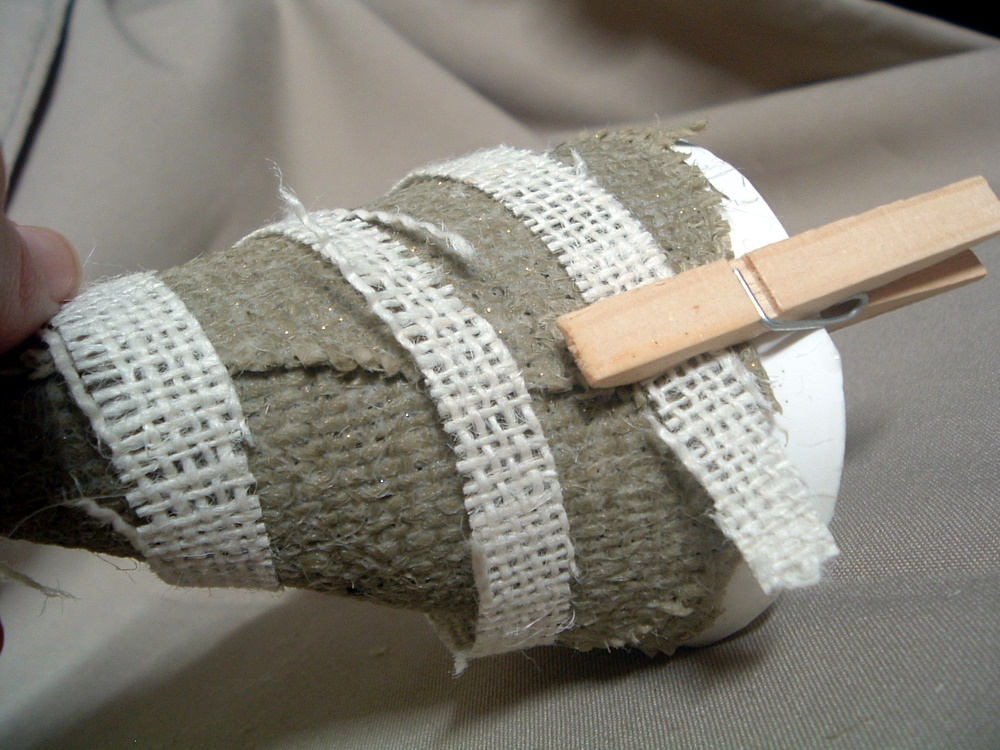
Burlap Christmas tree! 
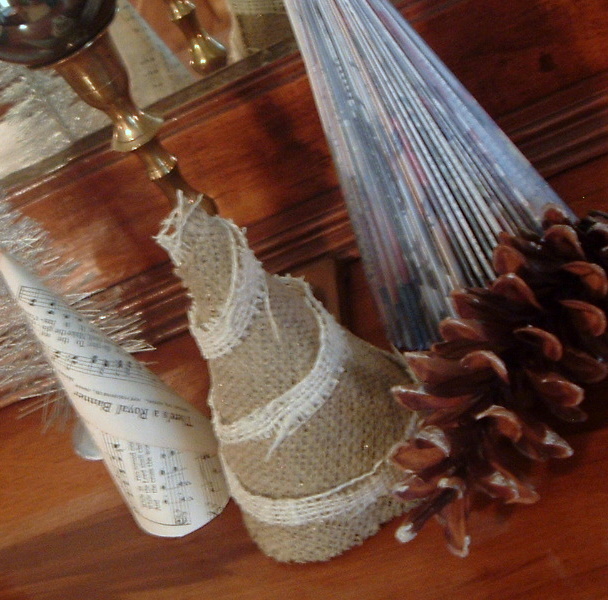
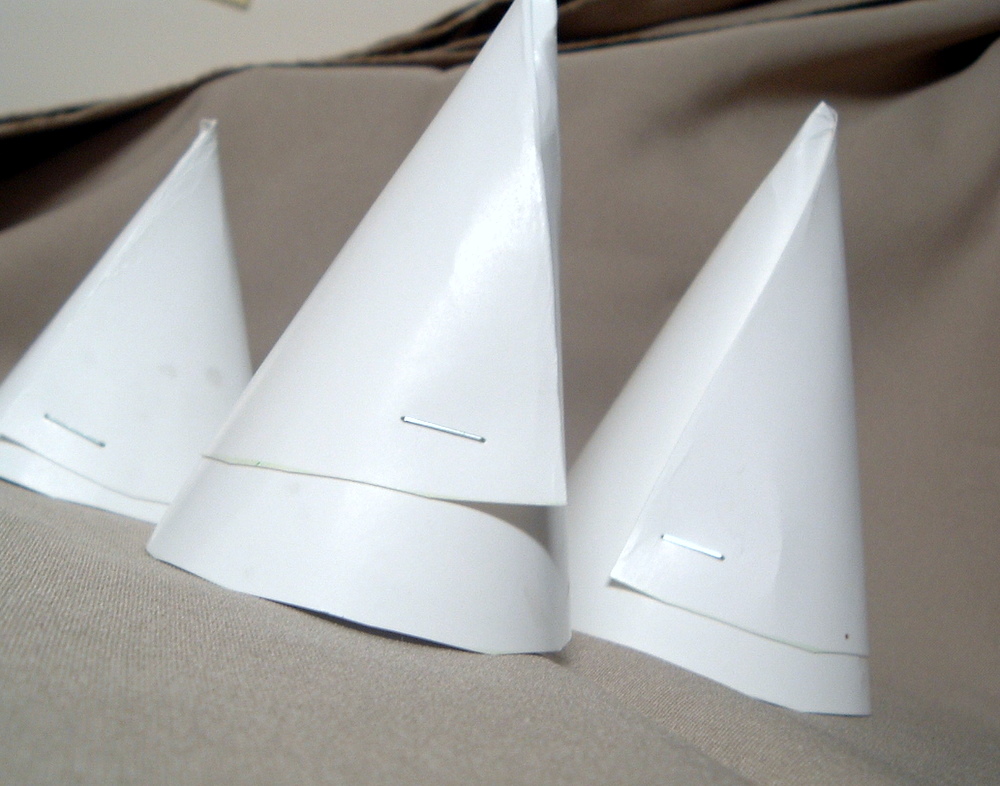
Wanna make your own?  Gather two different colors of burlap, some glue, and some poster board.  If you want one of those little sheet music trees you can gather that up too! 🙂

Cut your posterboard into patterns…like this…I used a plate to cut into circles then folded into fourths.  Remove one of the fourths.
Use this to cut out your darker color burlap.
Wrap your poster board into a cone to make your tree form.
I just used a staple to secure.  Wrap your burlap around your form and secure with a clothes pin.
Mix 1/2 glue and 1/2 water.  Now…that same paint brush…the day before…I used it with some glitter paint….yep…glitter ended up in my glue.  I actually liked it after I finished it!  So maybe add a touch of glitter to your mixture.  Apply your mixture generously all over the burlap.
Cut the lighter burlap into a long thin strip.
Wrap it around your form securing on both ends with two clothes pins.

Apply more glue mixture…liberally.  And let dry.  Yes it will take a looong time to dry.  Then just remove the inner form by crushing it and pulling it out. 

Want to make a sheet music tree too?  Just wrap around into a cone, secure with scotch tape, and cut off the bottom to be level.  So easy!
That other tree?  It is a Martha Stewart folded magazine tree…google it.  Martha does the instrutions much better than me!  🙂
Thanks so much for having me Jenn!!  🙂 
~Angie~

What a fun project Angie! I love that you used posted board instead of foam – so much cheaper!!

I love Angie’s blog — she has tons of fun ideas and tutorials!
Some of my favorites are:
 
http://2.bp.blogspot.com/_5Kx310I-wzg/TPMI5K3mTjI/AAAAAAAACQM/0jsfB_vlyz0/s1600/DSCF5626.JPG
{Dictionary Ornaments}

http://1.bp.blogspot.com/_5Kx310I-wzg/TMgLRqRZa8I/AAAAAAAACBM/Ib0rBLpuw20/s1600/DSCF5022.JPG
{Ballard-inspired Finial Knock Off}

http://4.bp.blogspot.com/_5Kx310I-wzg/TL7PT-UWwzI/AAAAAAAAB_0/ulIw7VUPrCQ/s1600/DSCF4839.JPG
{Shabby Rose Fall Wreath}

http://3.bp.blogspot.com/_5Kx310I-wzg/TLZWYz5hQ4I/AAAAAAAAB9M/Uh-z6sSukj8/s1600/DSCF4470.JPG
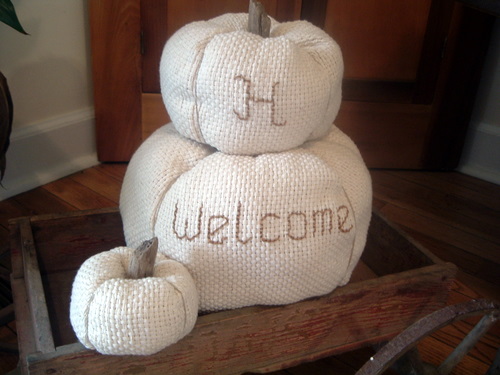
{Monks Cloth Pumpkins}

There are so many fun ideas – it’s hard to choose just a few! Be sure to stop by
The Country Chic Cottage
and say hi!

xoxo


This post brought to you by

Posted By: Jen · In: christmas, guest tutorials

It’s beginning to look a lot like Christmas — My Blue and Silver Christmas Mantel!!
Guest Post — Make Polka Dot Glitter Trees!

You’ll Also Love

Free Printable Patriotic BannerFree Printable Patriotic Banner
Paint Candy Corn Treat Jars – an Inexpensive Fall Gift Idea
Great Ideas — 15 Cozy Christmas DIYs!

Comments

  1. Karisa says

    February 18, 2011 at 6:03 PM

    LOVE the burlap tree! I've posted them in my Link Love roundup on FaveCrafts Blog: http://www.favecraftsblog.com/link-love-burlap-bonanza/

  2. Sue (Someone's Mom) says

    December 2, 2010 at 5:03 PM

    What a great use for burlap…I really enjoyed this post!

  3. Jenna Scott says

    December 2, 2010 at 3:09 PM

    I love this idea, and I also love burlap. I used burlap on my tree this year, as a ribbon. They have some cute ideas at Pottery Barn, but their burlap ribbon is so expensive there that I decided to make my own burlap ribbon.

  4. Victoria says

    December 2, 2010 at 2:35 PM

    Oh, I love the burlap- I haven't seen that yet- perfect for a rustic Christmas!

  5. Jesse says

    December 2, 2010 at 5:34 AM

    Oh my gosh Jen, those are so cute!

    goodgirlgoneglad.com

  6. Fleur de Bee says

    December 2, 2010 at 4:53 AM

    NO WAY! I did a dress pattern tree craft this year too! We MUST be on the same page! How cool is this gal! xo Molly

  7. CandaceAshley says

    December 2, 2010 at 3:24 AM

    Oh Burlap, my favorite medium! Great ideas, and cute cute crafts! I heart that fabric so much! Thanks for sharing!

  8. Kelli @ RTSM says

    December 2, 2010 at 2:27 AM

    So many cute trees! I have been wanting to do some glitter ones…no I think I need to add burlap ones to my list too:)

  9. Shel at Dreamy Nest says

    December 2, 2010 at 2:19 AM

    I love those trees! I have some burlap and I see a Christmas decoration project in my future. Too cute!

  10. Jen @ tatertotsandjello.com says

    December 2, 2010 at 2:16 AM

    Thanks for such a fun tutorial Angie! I love the burlap. Such a cute little tree. Thanks for coming by and guest posting. It's so fun to have you!

    xox
    Jen

  11. Christine says

    December 2, 2010 at 1:49 AM

    Very cute Angie! Every time I see burlap I think of you Jen!

  12. Angie @ The Country Chic Cottage says

    December 2, 2010 at 1:43 AM

    Jenn many thanks!! And double thanks for all of your patience! 🙂

    Angie

Hi! I'm Jen Hadfield. I'm a mom of 5 restoring an 1891 home in the heart of Salt Lake City. I love being creative and sharing simple ideas to make your life easier and more beautiful!

Receive the Latest Crafts, DIY, Recipes and More in your INBOX!

Follow us on Pinterest! It's awesome!

Top Posts & Pages

Copycat Panera Spinach and Artichoke Egg Soufflés - SO good!
Spruce up Your Outdoor Space with a DIY Recirculating Fountain! (tutorial)
A New Deck in Under 30 Minutes!
12 Must-Have Items to Pack on an Alaskan Cruise!
How to Change a Recessed Can Light into a Pendant Light with No Remodeling!
DIY Fountains to Make Your Yard Amazing!


Popular Posts

  • Copycat Panera Spinach and Artichoke Egg Soufflés - SO good!
    Copycat Panera Spinach and Artichoke Egg Soufflés - SO good!
  • Spruce up Your Outdoor Space with a DIY Recirculating Fountain! (tutorial)
    Spruce up Your Outdoor Space with a DIY Recirculating Fountain! (tutorial)
  • A New Deck in Under 30 Minutes!
    A New Deck in Under 30 Minutes!
  • 12 Must-Have Items to Pack on an Alaskan Cruise!
    12 Must-Have Items to Pack on an Alaskan Cruise!
  • How to Change a Recessed Can Light into a Pendant Light with No Remodeling!
    How to Change a Recessed Can Light into a Pendant Light with No Remodeling!
  • DIY Fountains to Make Your Yard Amazing!
    DIY Fountains to Make Your Yard Amazing!
  • DIY Secret: How to Print on Post-It Notes (and Free Printable Template)
    DIY Secret: How to Print on Post-It Notes (and Free Printable Template)

As seen in


Amazon Affiliate

Tatertots & Jello is a participant in the Amazon Services LLC Associates Program, an affiliate advertising program designed to provide a means for sites to earn advertising fees by advertising and linking to amazon.com.
  • About Me
  • Advertising
  • Get Featured

Copyright © 2025 Tatertots and Jello · Privacy
This site is a place for positive discussion and ideas. Negative talk, comments that disparage others, and similar are not welcome and may be removed.