Good morning! I have a treat for you today. I would like to introduce you to a really fun girl — my friend Jen from Dangerously Domestic! Seriously, how cool is that logo? Jen is a really upbeat, creative girl full of fun ideas. She is here to share a fun tutorial AND she is having a fantastic giveaway too! Take it away Jen!!!
Hi there Tatertots & Jello fans. I’m Jen of Dangerously Domestic.
I kind of feel like I snuck in here because I certainly don’t belong .
OH but I’m super happy to be here.
I adore Jen , she is not only super talented but just a very generous and kind gal.
Thanks for having me today young lady!
Alright just let me finish my lunch and then lets get to the Tutorial!
 It was a rainy , rainy day today just want to put that out there in defense of my pictures!
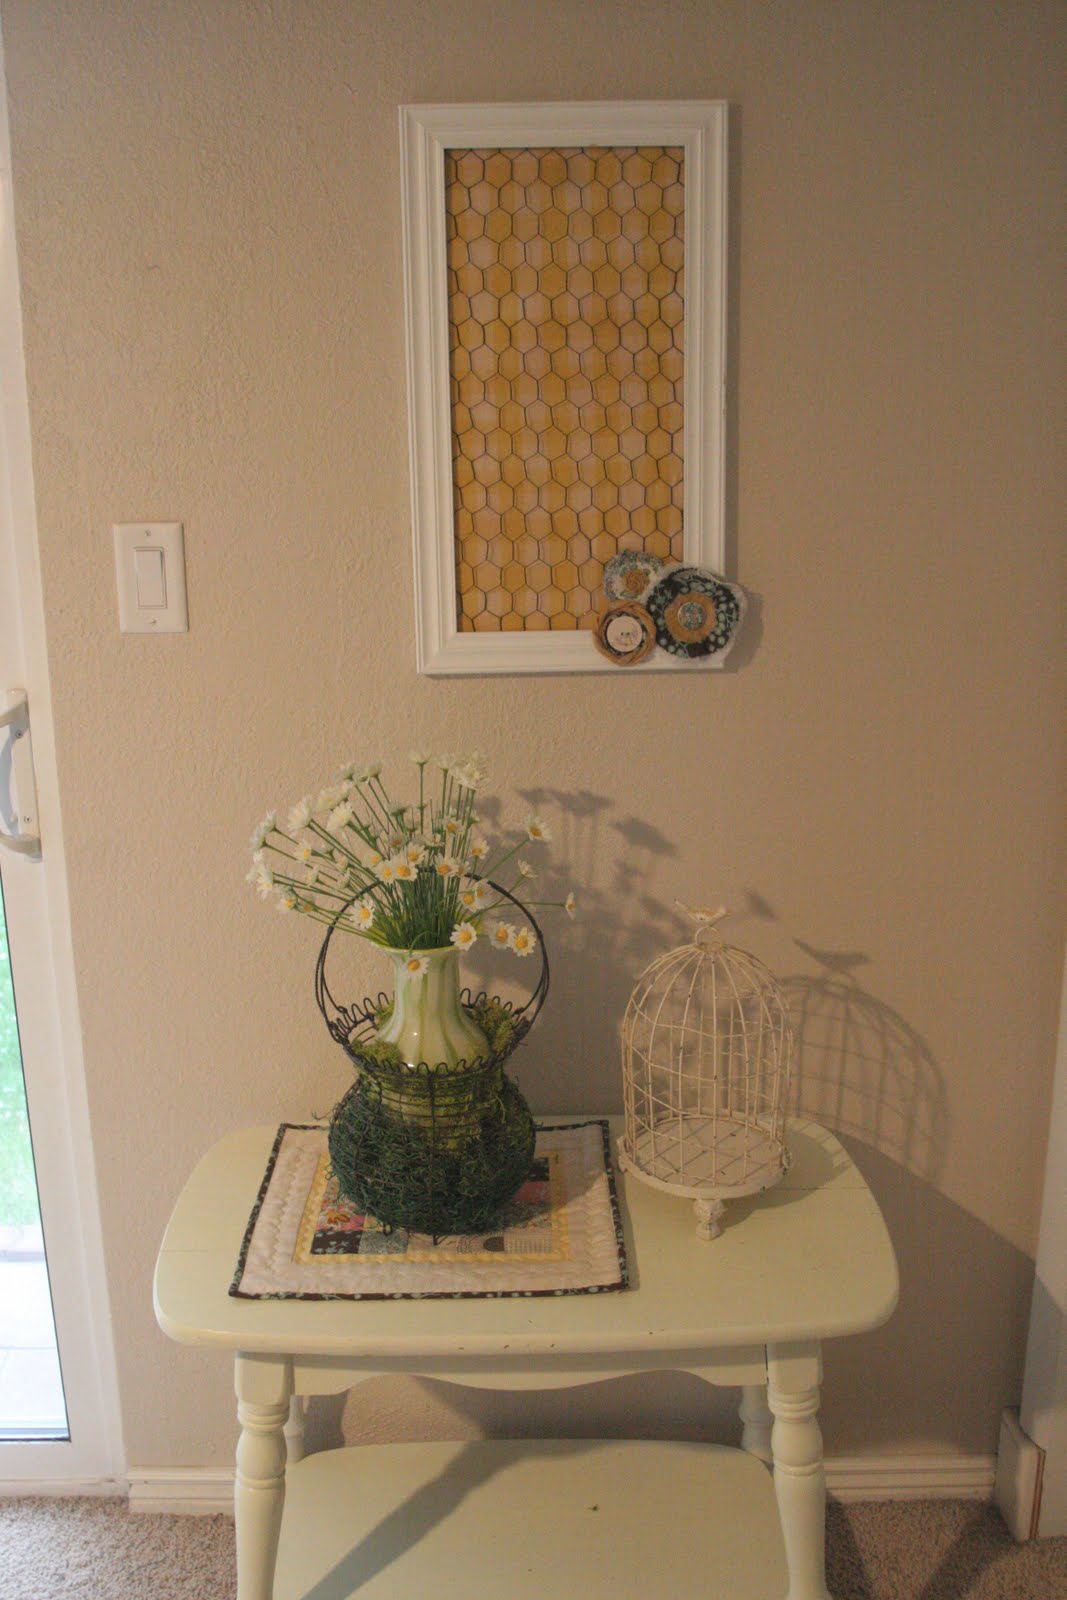
I’ve been dreaming of using some chicken wire in one of my projects ever since we put some over our square foot garden to keep the neighbor cats out of it.
Here’s what I came up with.
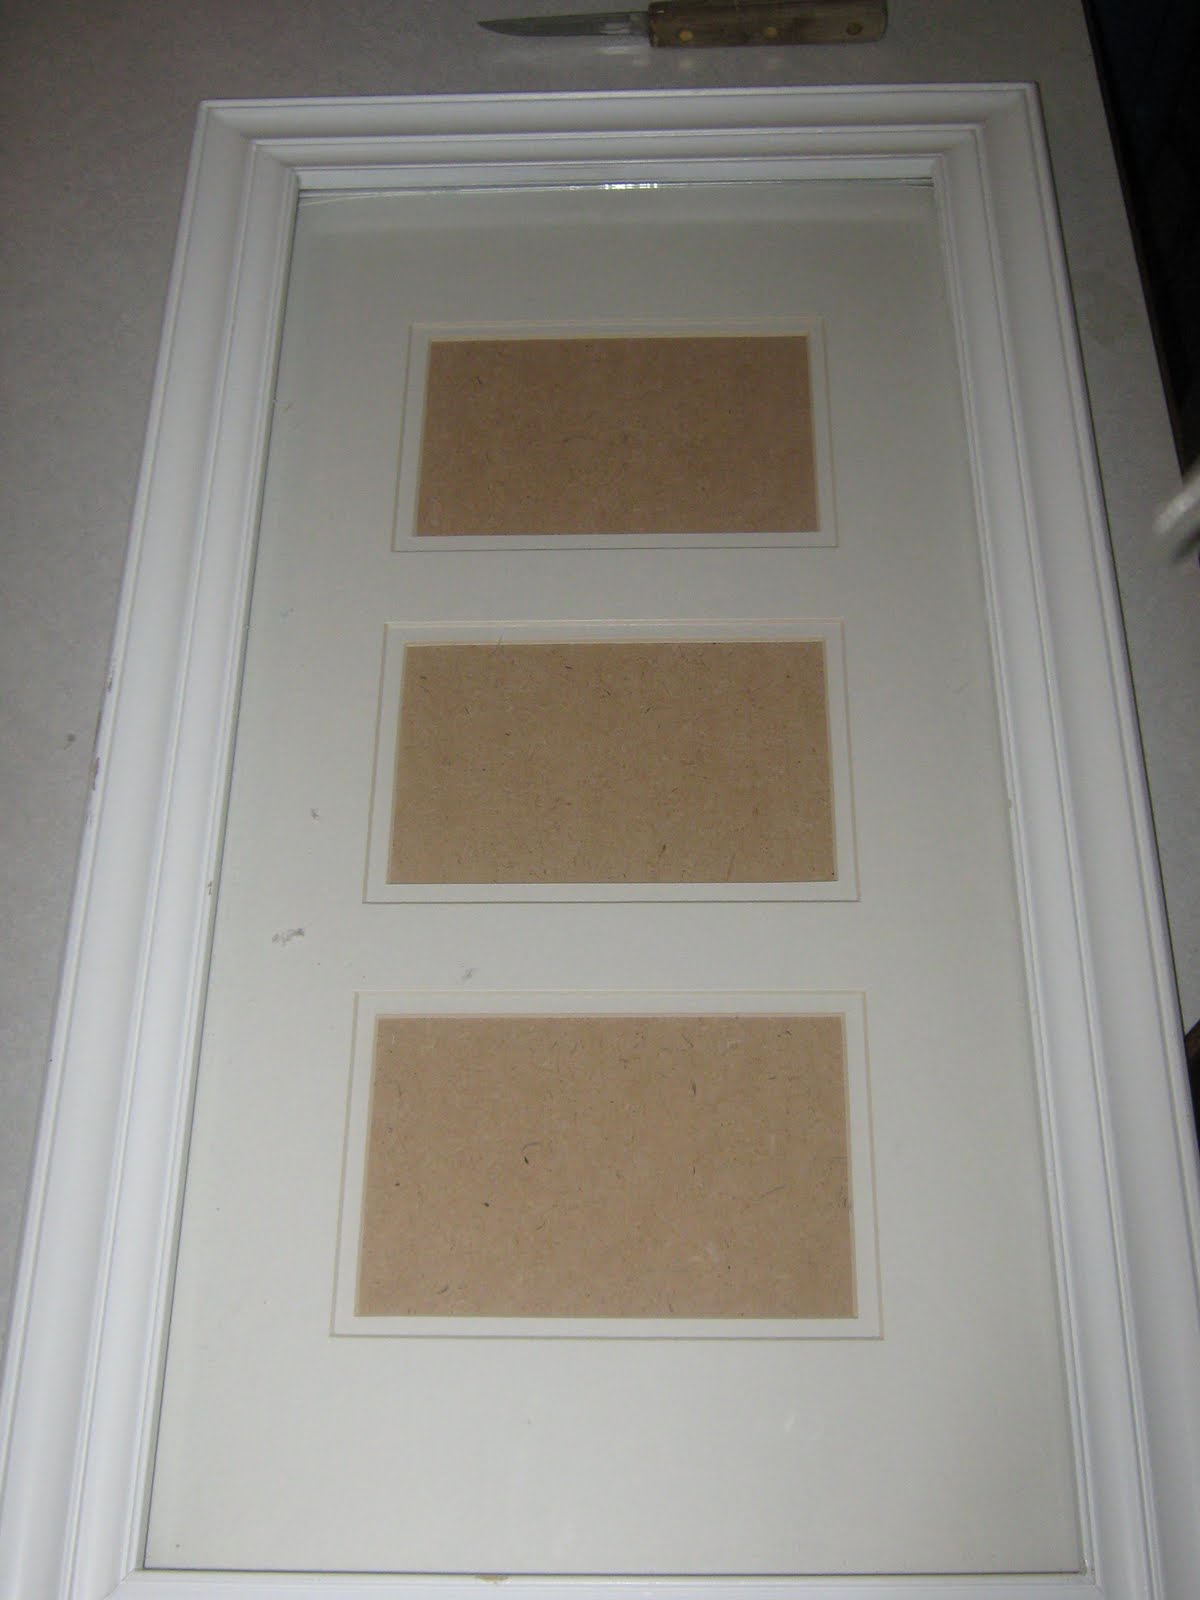
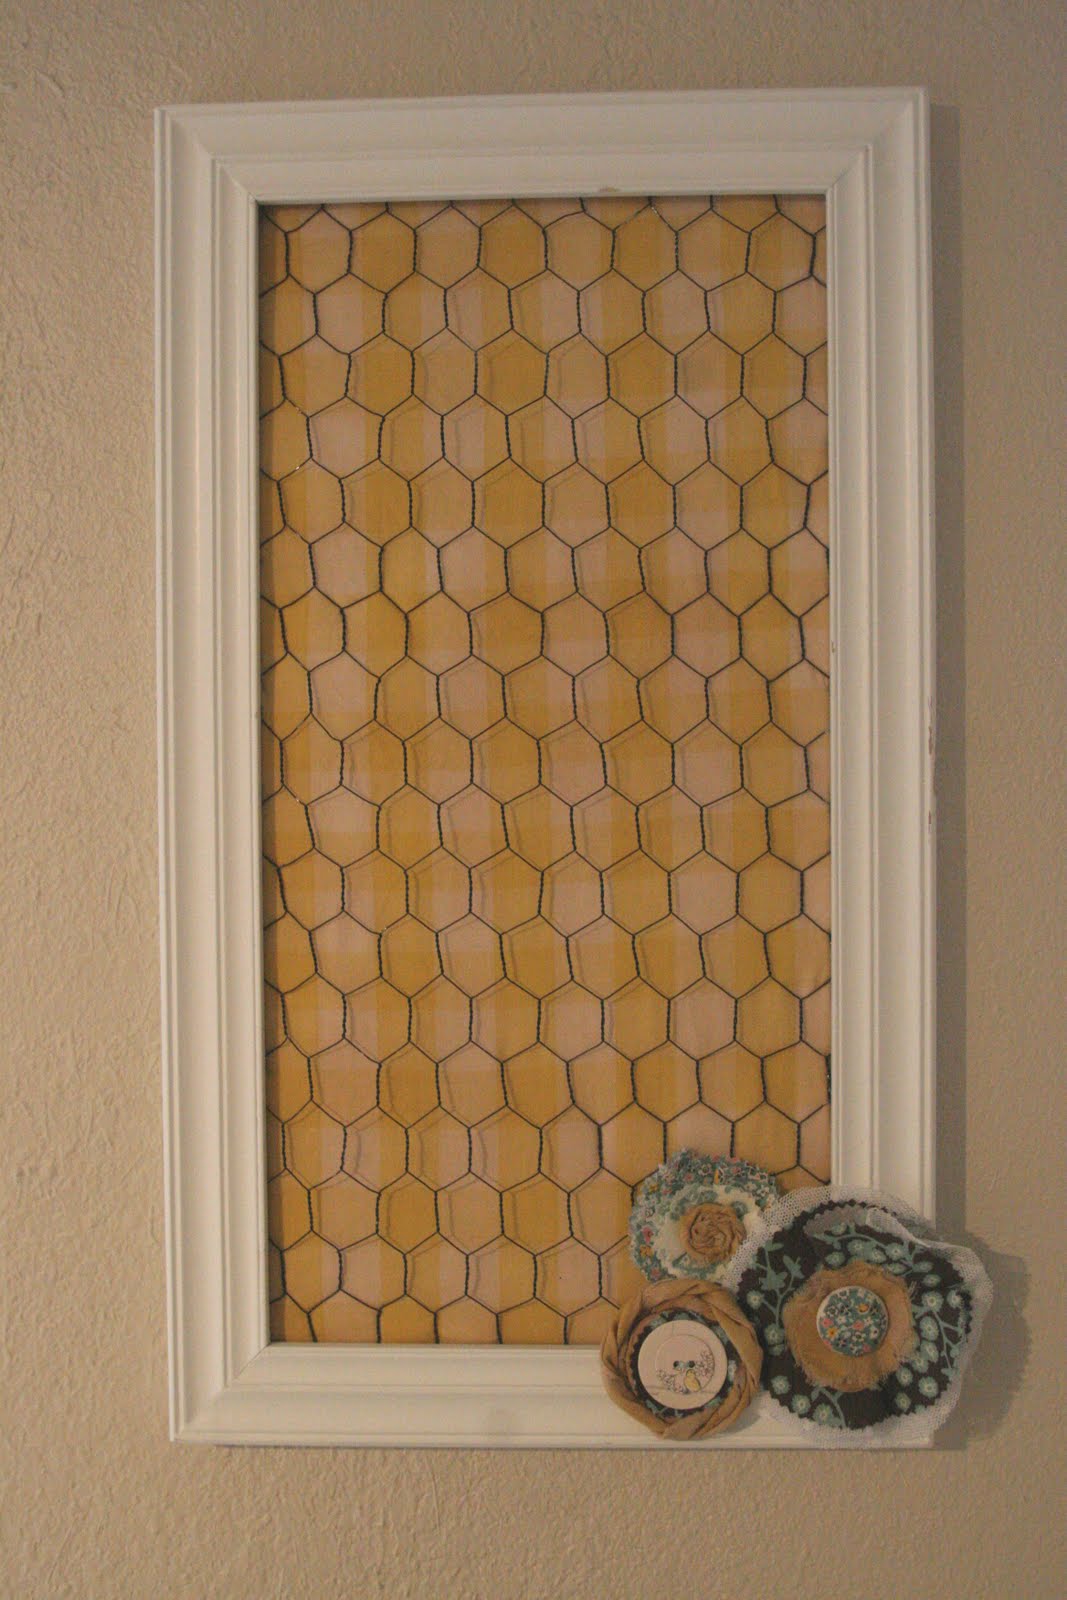 I’ve had this frame layin around for awhile and it was already white so I thought voila!
 I just took the mat board out and the glass. You can save them for a different project . Ok, don’t know the technical name for it but you know the thing that holds all the pictures in on the back. You know! Well, that is what you are going to be attaching everything to. I knew that I would be adding some width to the sides of it so I just took some sharp scissors and cut a bit off the edges.
 I measured the back thingy and then out to the garage I went to cut my chicken wire. You can buy chicken wire at places like Home Depot or Lowes. Using some wire cutters I cut the wire just about a half square bigger then the back board.
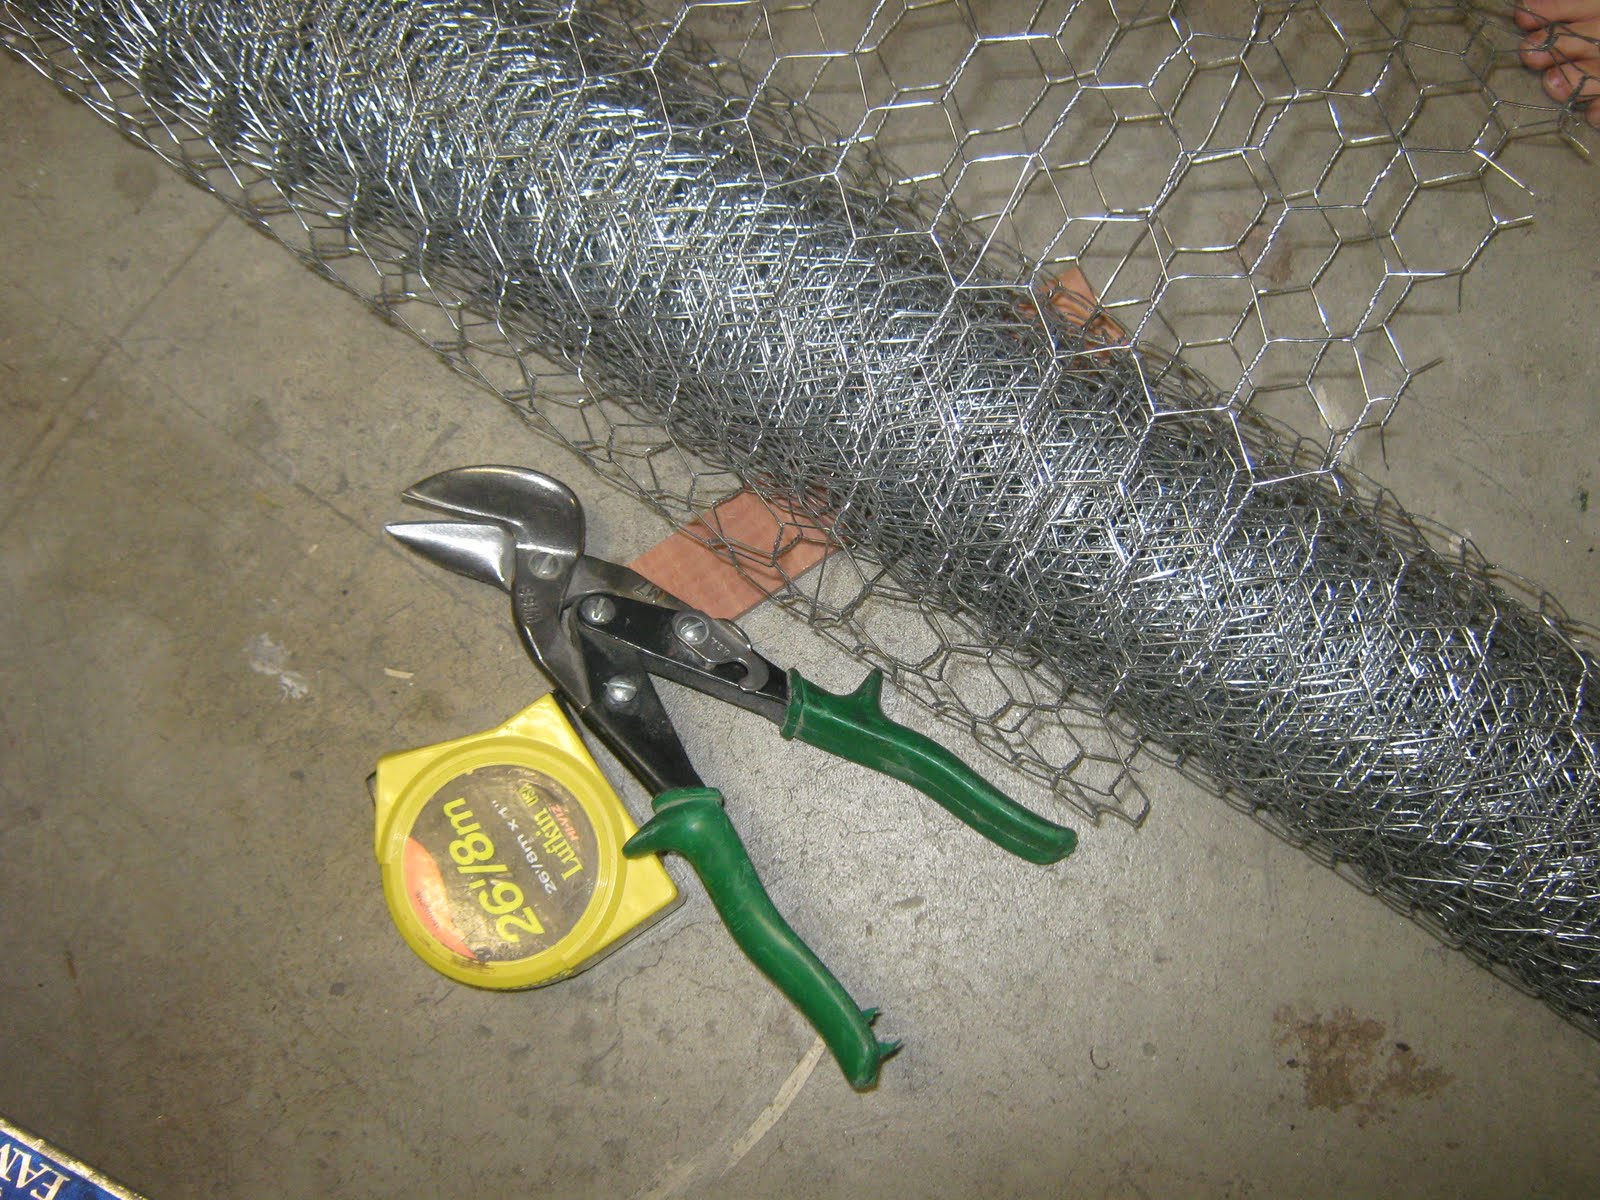 Spray painted it black. Put something under it or you will have a neat faux finish on your garage floor. The hubby won’t appreciate your handywork.
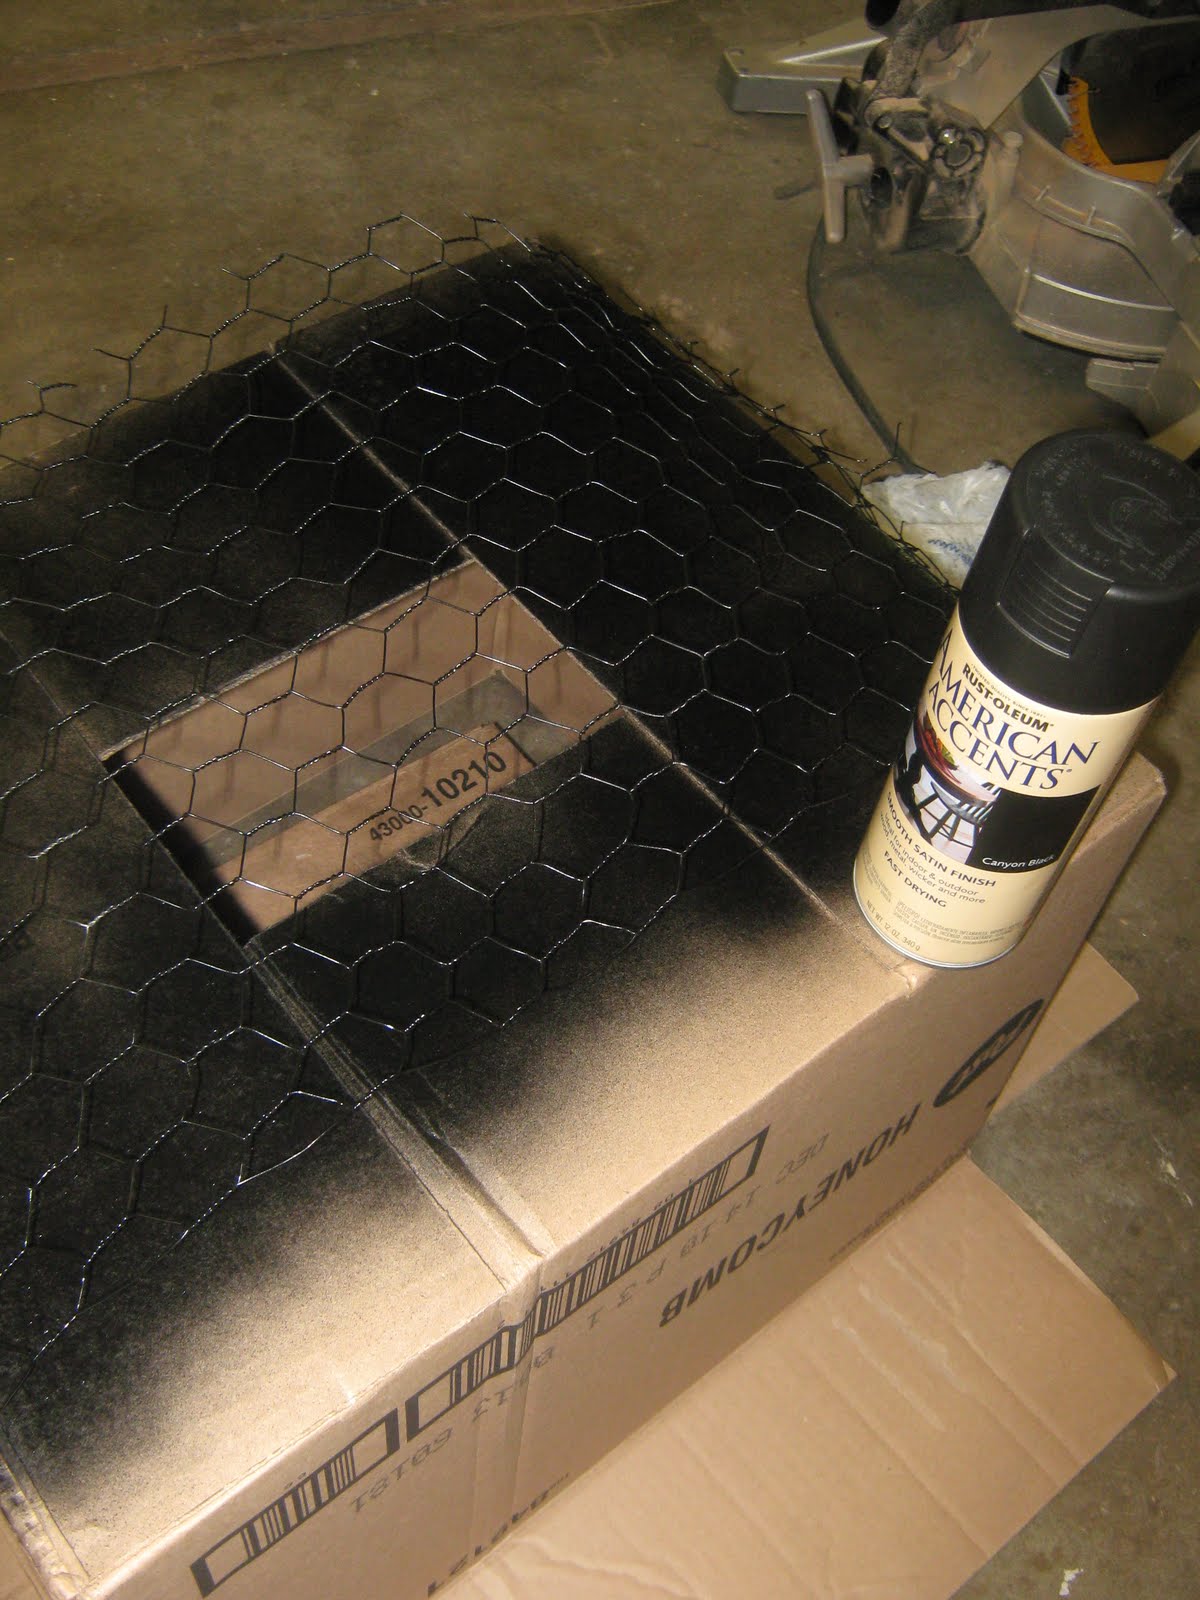
Pick out a great piece of fabric and like the wire cut it about 1/2 inch to an inch bigger all the way around. I went with gingham . Something about gingham & chicken wire.
I used to hate gingham – no I really hated it. Now I’m in love with it. This was a bit bright for where I wanted to put it.
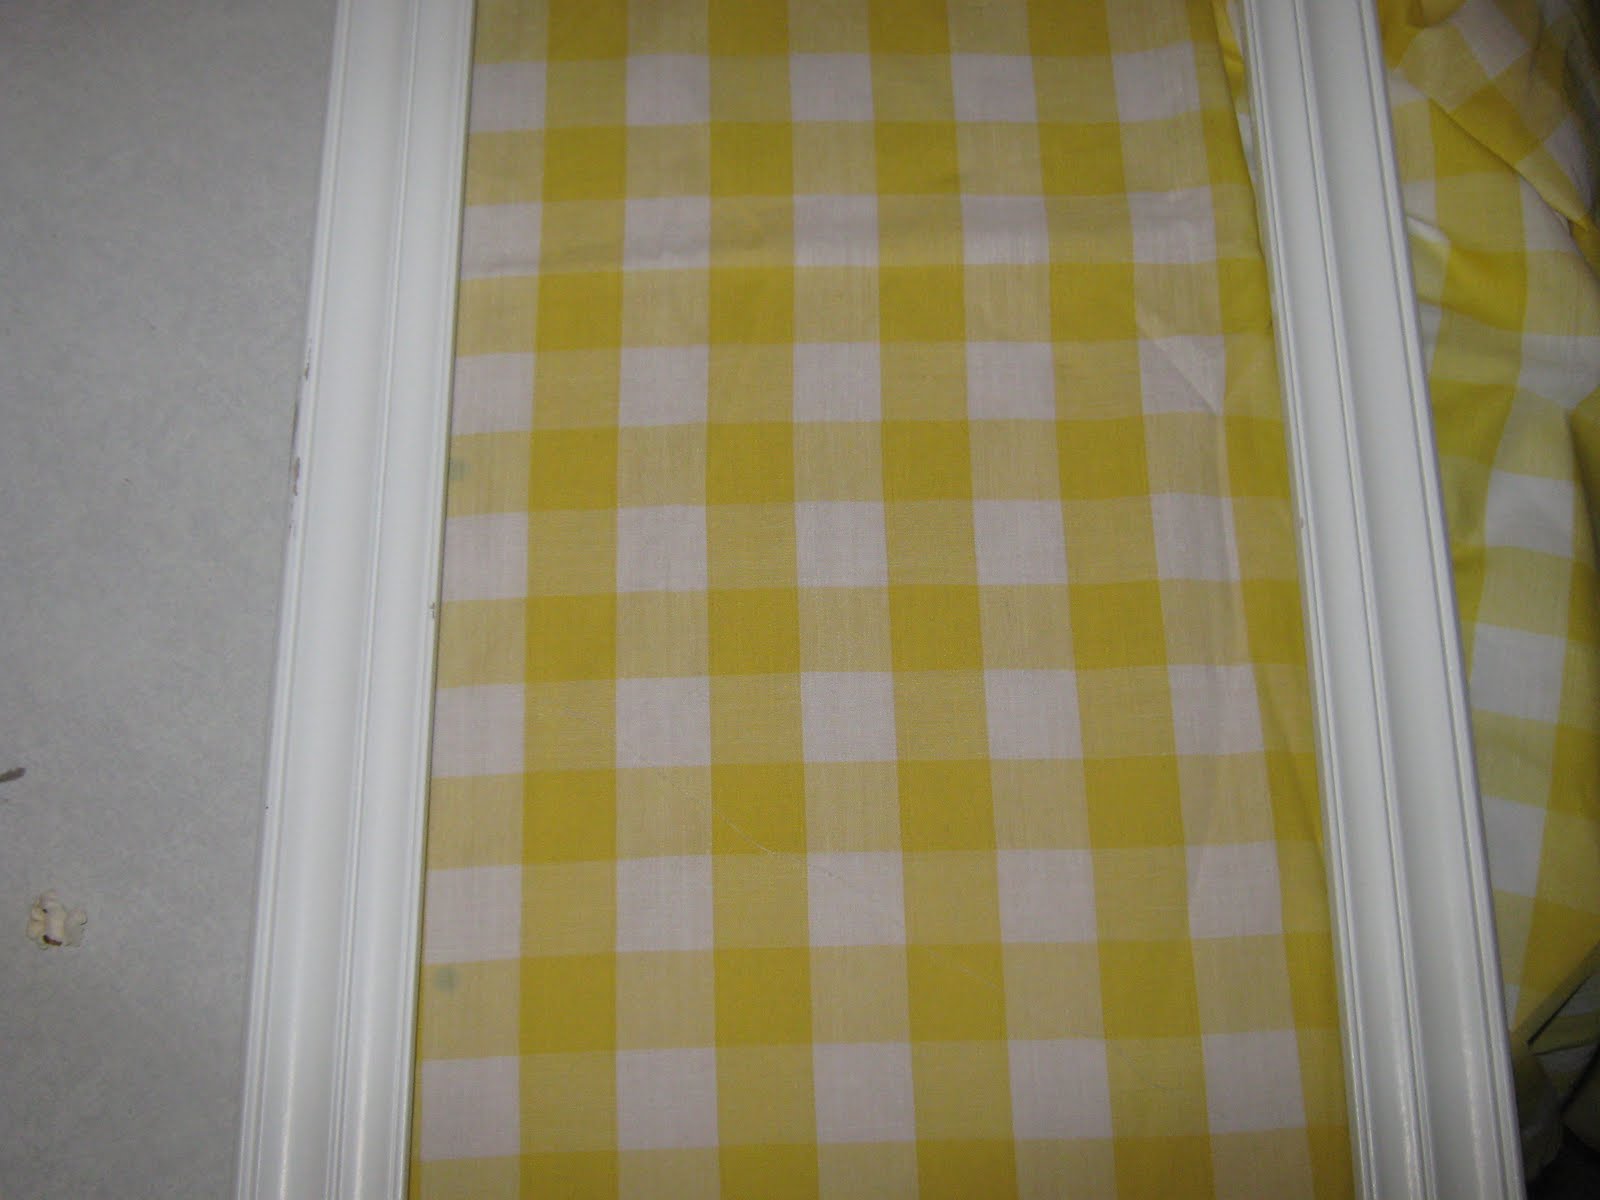 No biggie! I just dipped it in a little bath of Tan Rit Dye and I had the color I was after.
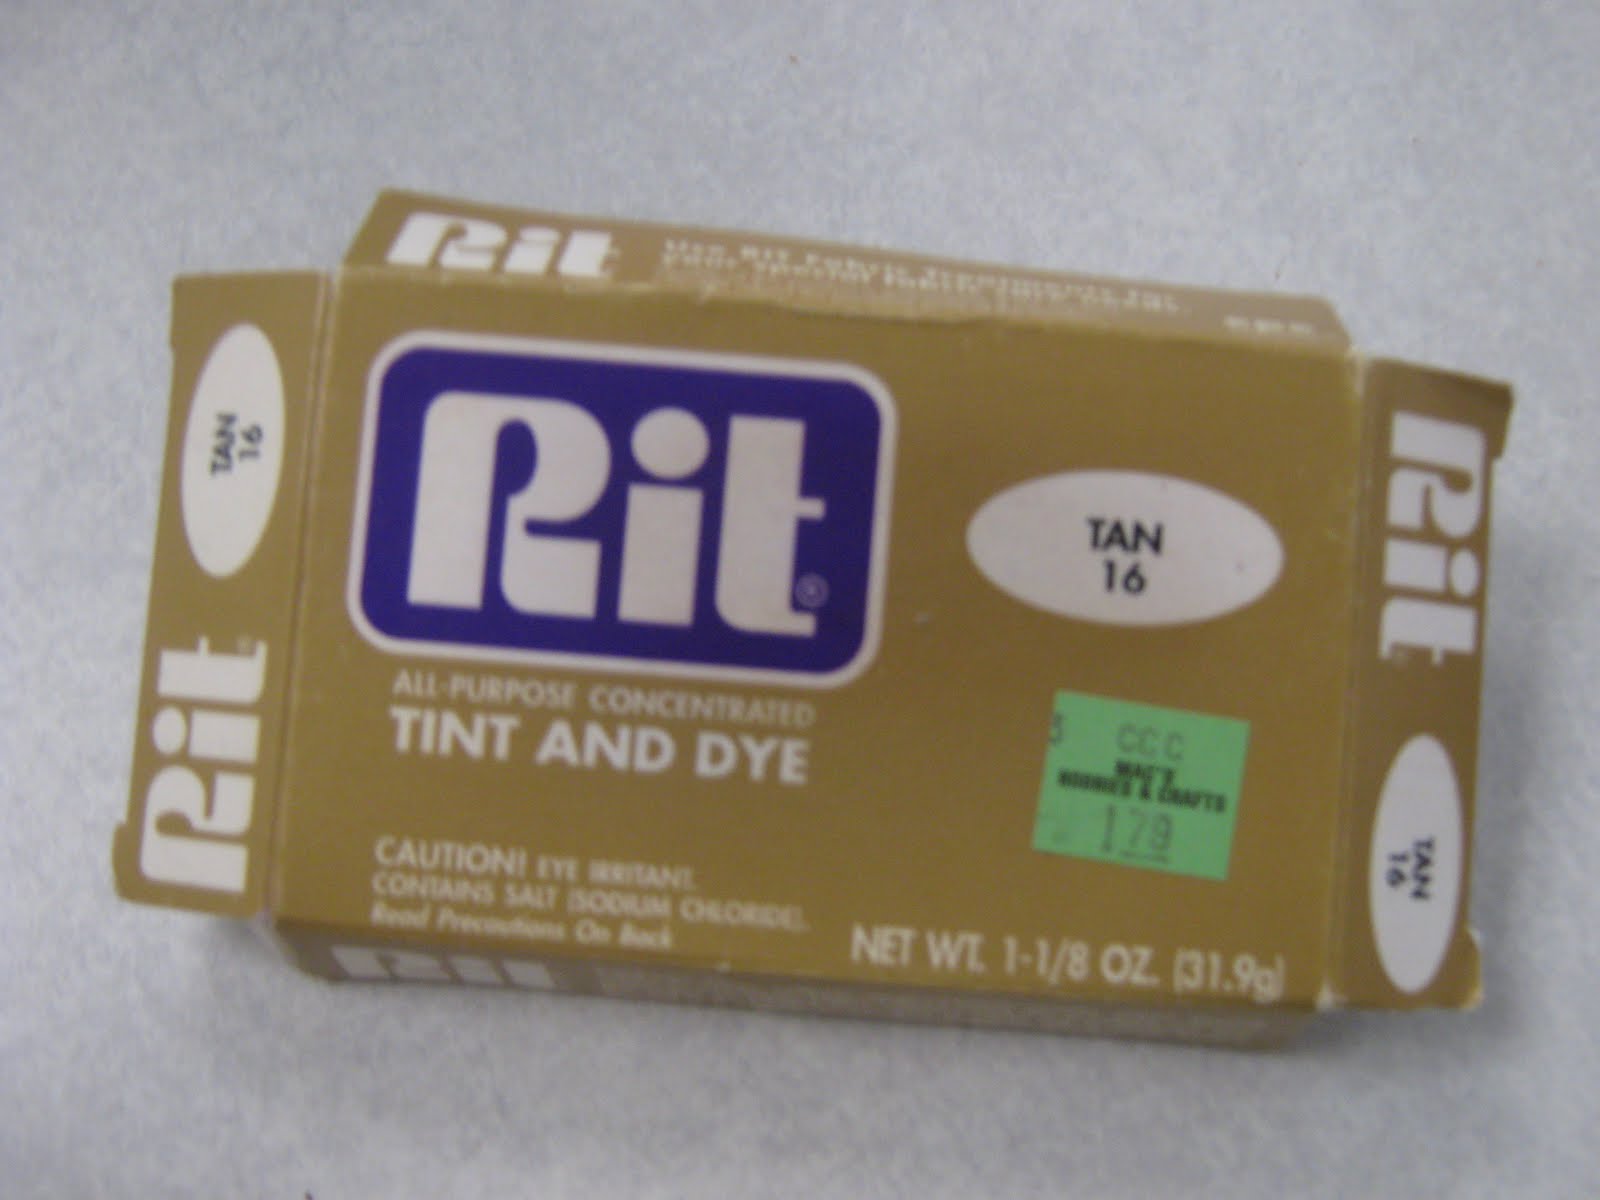 You don’t have to do this step but I think it makes it look nicer. I added a layer of warm & white . Just hot glue it on or use any adhesive of your choice.
 Next, I wrapped the fabric around and glued it to the back. It looks sloppy but I swear I neatened it up a bit. No one will see it .
 Now this part was a bit tricky but only because the wire wants to curl up. I just held it flat with one hand and stapled it with the other. A regular old stapler did the trick just fine.
 Now just pop it into the frame and secure it with a bit of hot glue at the corners.
 Now just make your favorite fabric flower and embellish it.
If you would like to know how I made my fabric flowers hop over to my blog & I will be glad to show you!
 Again, sorry about the pics !
Here are a couple of my past projects.
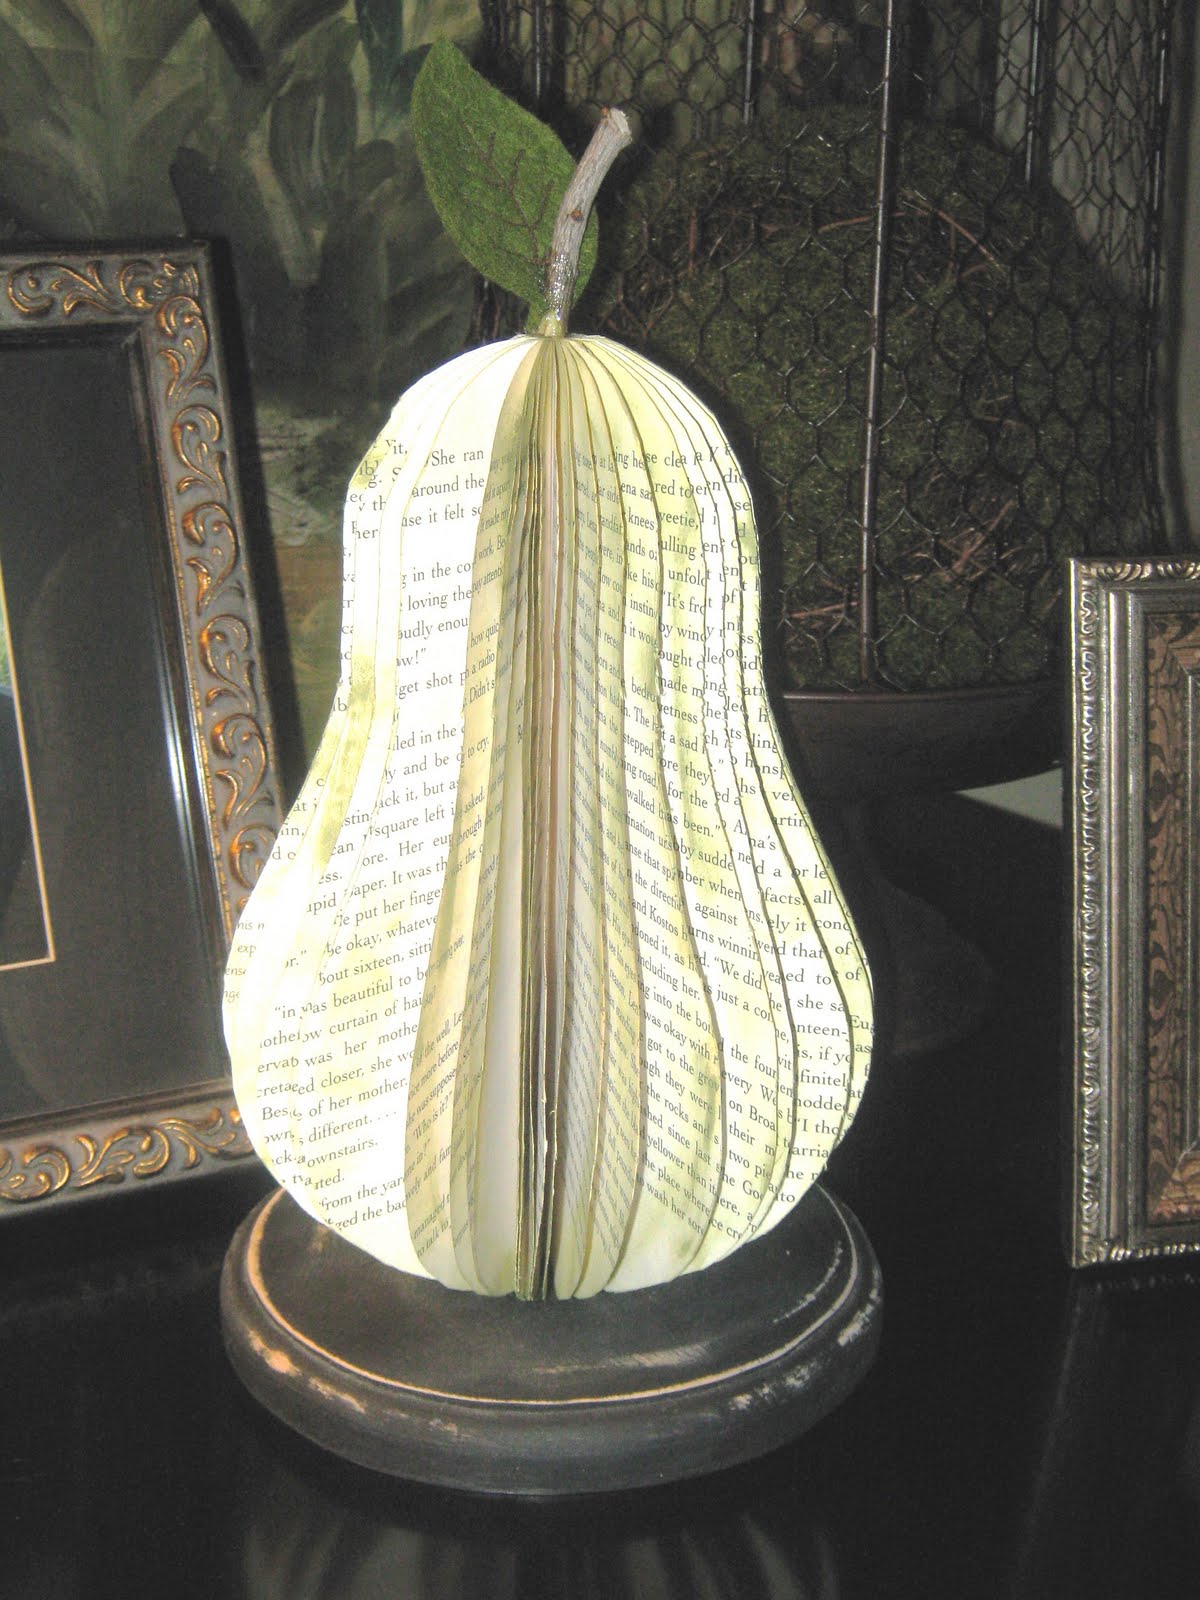
Pear Shaped Book
 T-shirt makeover
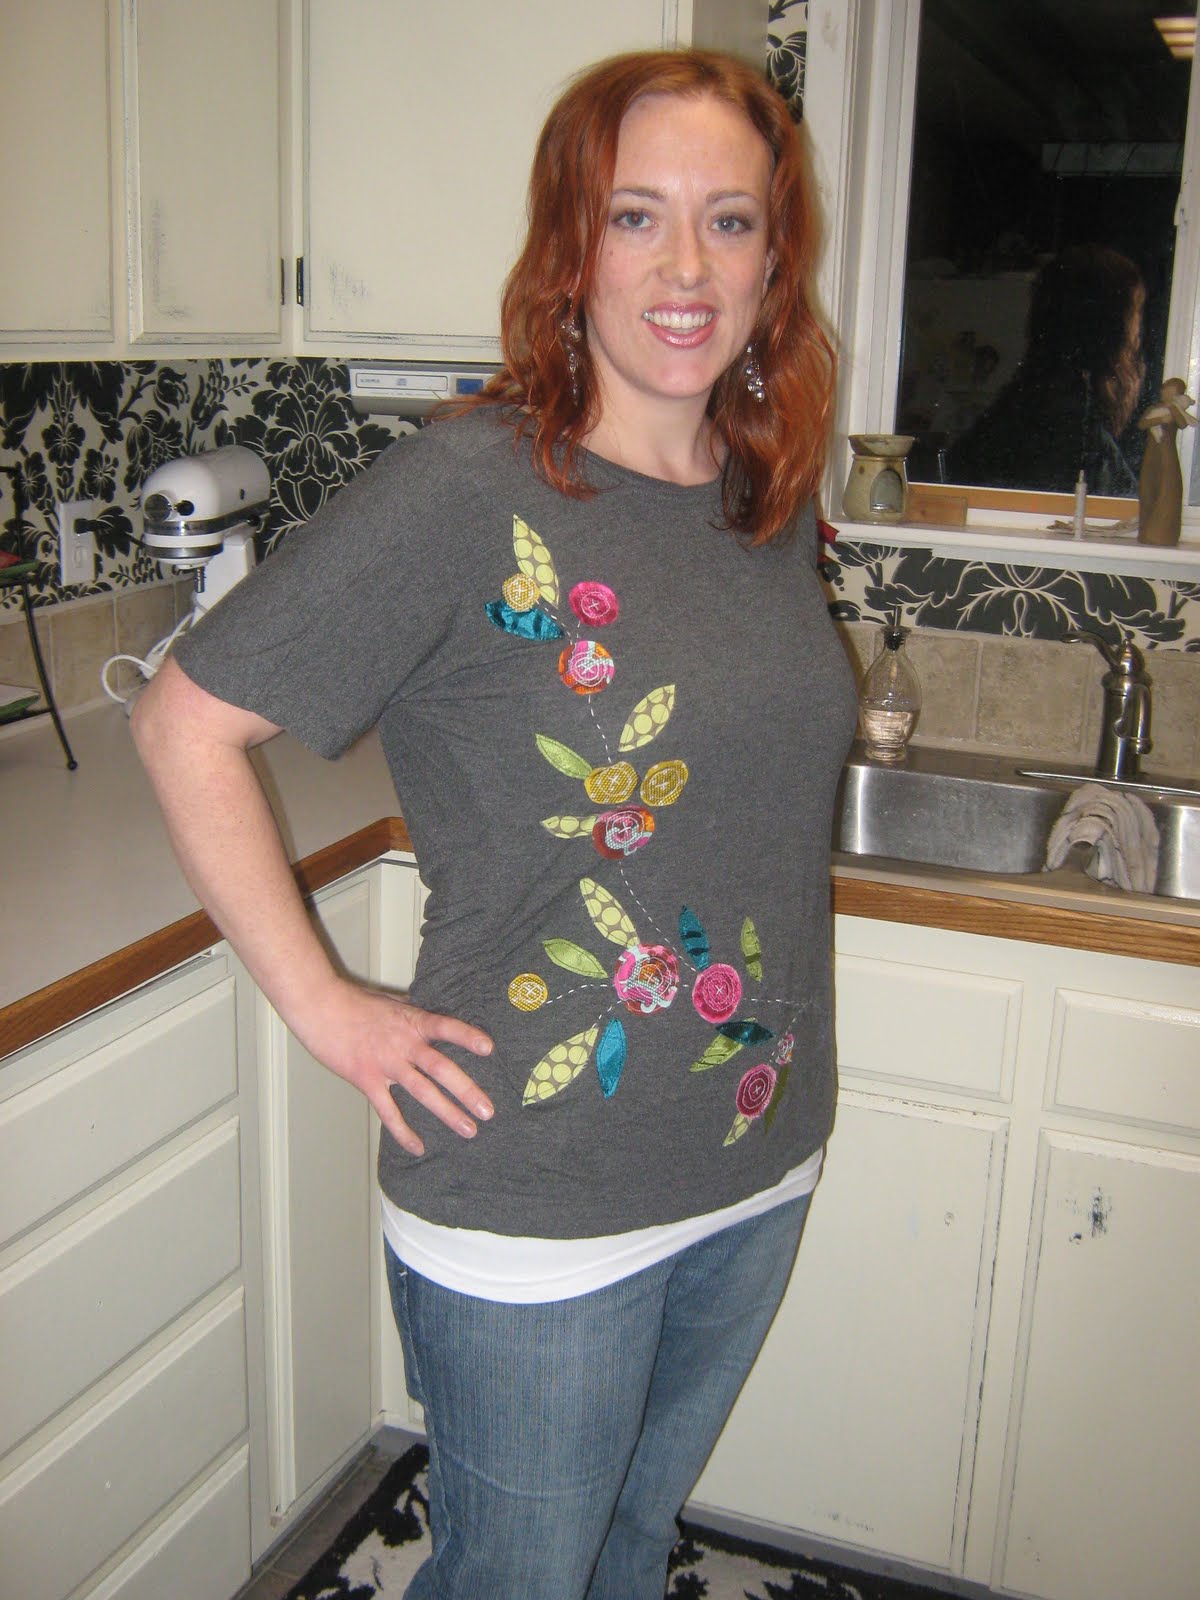
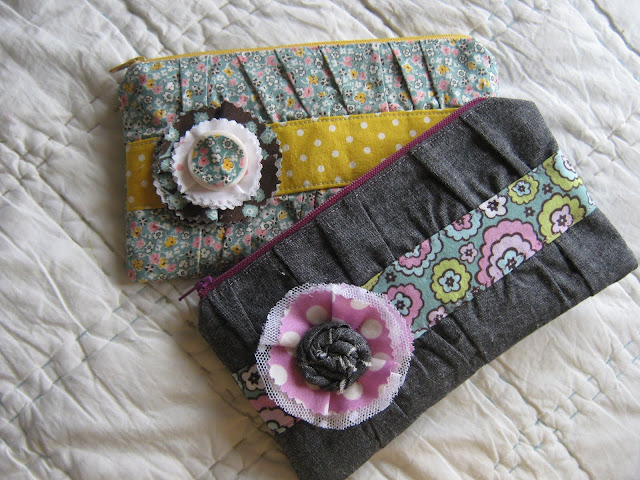
Just for fun I thought i would have a little giveaway for Jen’s readers. I’m giving away one of these clutches. Do you recognize this pattern? Noodlehead has the pattern for these over on her blog. http://noodleheads.blogspot.com/
Come over to my blog & find out how to enter.

Thanks for listening to me go on & on! Thanks again Jen. This was fun!
Thanks for listening to me go on & on! Thanks again Jen. This was fun!
Smiles & Big Big Love,
Jen
Thanks Jen! What a happy project. I love it and the flowers are so cute! That picture of you eating the tatertots and jello is cracking me up!!!
Feel free to take this button for sharing your tutorial with us.

And thanks for having such a great giveaway too — I will be over in a minute to enter!
Also, be sure to stop by Beth @ Stories of A to Z’s Vignette party today and see all of the loveliness!
XOXO


Such cute things! Yeah, I want a clutch really bad.
Aww, this is such a great idea, I love it! Thanks so much, I'll be linking.
Love the clutches so sticken cute. You ladies are so talented. Thanks for sharing.
That is an awesome frame!
That pear-shaped book is A-dorable!
Absolutely love this project!
Great tutorial!
really cute and easy, i think i could pull it off;}
oh how lovely! this would look just beautiful near a vanity to hold earring, don't you think?
so cute that she used my tutorial, hers turned out great. 🙂
Thanks for letting us know about this wonderful tutorial and giveaway – I'm off to enter! Be back soon 🙂
~ Kristen
I love the clutches
I've given you the Sunshine Award!
A cute project – I like it! Love the lunch picture. LOL Headed over to Jen's blog to follow her. Sounds fun! 🙂
Jen my friend-so glad that You introduced me to such a happy gal!! Thanks for always keeping us in the know of all the fabulous blogs out there! You rock girl!!
thanks for the giveaway, love the cluth (and her logo/header-darling!). Thanks, Carli
What a fun project! Thanks for sharing…off to go enter that contest!
Hi Jen,
I'm friends with the other Jen but your blog sure is cute so many great ideas.
So smart to use the Rit dye on the wire. I would have never thought of that!
Really cute idea. Thanks for sharing. Be blessed. Cindy
Super super cute idea. That Jen is fantastic. I bet her house is all decked out in cuteness.
Those clutches are so cute, and so is this project you did! I love the yellow fabric!
love it!!!
So cute! I love the clutches and the tutorial is so awesome! 😉
I have been following domesticly dangerous because that Jen is my darling dear old friend. I'm so excited to be introduced to your site and the many others. I can feel the creative energy flowing. Now just to find the time.
Thanks ladies.
Great projects, and I love, love, LOVE the logo!!! Too cute!
Thanks for introducing us to all these new artists!
Love the chicken wire frame! Going to check out your blog now. 🙂
I LoVe, lOve, LOVE this! I am in love with chickens so this would be just perfect for my house. Jen you have great ideas, loved the blog, please enter me in the giveaway, they are also so trendy and fun!!!
[email protected]
That's an adorable use of chicken wire. Love the look of the fabric after the dye too.
I just got that you were eating tater tots and jello. I thought it was maybe fried shrimp and cocktail sauce. Who knew.
Very cool that everyone is all guest bloggy today. I need a guest on my blog….somebody with some great crafting ideas. I'm in a rut.
Love the clutches!
I just love the cute ideas on both of these blogs. Thanks to the 2 Jens!
LOVE LOVE LOVE your blog! Your projects give me inspirations for most of my own home decorating! Thanks,
Cara
Mrs. Dangerous Domestic is a fav. She has a nack for making random things come together to make something lovely. and She always adds her own little 'touch' to every project. 🙂
I love the clutches.
Thanks for an awesome tutorial, Jen.
I really love your style and am so glad to have found your blog. Off to look at that adorable clutch 🙂
Warmly,
Nicole
Love the tutorial and the clutches!!!
Such a fun idea! I love the gingham with the chicken wire! And that pear shaped book is one of the neatest things ever!
such a cute tutorial and the clutches and dang cute too!!! I am headed over to enter her giveaway now!!
Went to her site to enter the giveaway. This chicken wire would be great to put postcards, wedding invites etc on. Thanks for more fab ideas, Jen!
So cute! Thanks.
AWWW Jen, thanks again for featurign me! This is super duper fun! I really do heart Tatertots & Jello! Have a fab Day!
Love that framed chicken wire art! I will have to try that!! 🙂 Thanks for sharing some awesome creativity!!!
I'm a follower!!! The clutches are sooooooooo cute!!!!!! 🙂
How fun… I have stopped by Jens blog before! such great talent!! Thanks for posting about her…I had just asked her last week if she wanted to do a post on my blog too 🙂 great minds think a like!
I love that chicken wire frame! So cute!
love these little clutches!
love these little clutches!
Hey Jen and Jen! 🙂
Cute projects and love the T refashion pic too!
I love this project! I did wonder about the chicken wire curling up, and I'm glad to hear it was as simple as holding it down with one hand while stapling with the other.
Both of these are So cute! This girl needs an etsy shop! I would be her first customer! I really like those fabric buckets!
so excited to learn about dangerously domestic… thank you!
I'm following her now! She's awesome! Thanks for introducing us to her!
Little Miss Dangerously Domestic is so creative. Love her, love the frame, love the clutch. Thanks for featuring her.
Thanks for introducing us to Jen at Dangerously Domestic. The tutorials were great.
The frame would be great for a memo board or a jewelry holder! I'm going over to her site to enter her giveaway.
Hi Jen!
Sorry I haven't been blogging much lately…just haven't had the time. With school winding down in a month, I have so much on my plate…not to mention trying to sell our house! This is such a fun and unique idea! I will definintely sign up for her giveaway…have a blessed day!:)