Tatertots and Jello

COLORFUL HAPPY HOME -- Daily DIY, Decor, Craft and Recipe Tutorial

  • My Home
    • 1905 Cottage
    • Daybreak House
  • DIY
    • DIY Projects and Ideas
    • Organizing
    • Tutorials
    • Printables
  • Decor
    • Spring Projects
    • Summer Projects
    • Fall Projects
  • Crafts
    • Kids Crafts
    • Painting Projects
    • Paper Projects
    • Sewing
    • Wreaths
  • Holidays
    • Valentines Day
    • Easter
    • Halloween
    • Thanksgiving
    • Christmas
    • HAPPY Holidays Series!
  • Recipes

Explore

  • my home
  • diy
  • decor
  • crafts
  • holiday
  • printables
  • recipes

Connect

Home » Easter Craft: what to do with those plastic eggs

Uncategorized · March 25, 2010

Easter Craft: what to do with those plastic eggs

Tatertots & Jello is a participant in the Amazon Services LLC Associates Program, an affiliate advertising program designed to provide a means for sites to earn advertising fees by advertising and linking to amazon.com.
I got out my Easter bins a few days ago. Why is it that I always think I have way more cute holiday decorations than I actually do – lol? What I discovered is that I have approximately 5 million of those cheap, plastic Easter eggs.
So I decided to do something with some of them. I took my leftover fabric scraps and decoupaged the eggs. So if you’re like me with a million of those eggs, take some of them and transform them into something that you actually want to keep!
This is what I did:

First take your eggs and apply some glue to keep them closed. I used super glue.

Then take your fabric and cut it into small strips. It depends on how big your eggs are, I cut mine in 1 inch x 4 inch strips. Then I made some cuts around the edges of the material — this will make the material mold to the egg’s shape much better. To save time I cut about 6 layers of material at once into strips, then took all six layers and made cuts in the sides of the strips. I cut some of the strips in half – 1 x 2 inches to fill in gaps at the end.

{Note: I used a bristle paintbrush to do this — actually a stenciling brush. I found that if you use a brush with bristles, you can apply pressure at the end and smooth out wrinkles and air bubbles.}

Apply a coat of decoupage medium to the back side of the first strip, not directly onto the egg. Now lay the first strip onto the middle of the egg, right over the opening. Smooth it down with your fingers. Don’t put any decoupage medium on the outside of the fabric until the whole egg is covered. This will cut down on having your hands covered in Mod Podge. I also kept a damp washcloth right next to me. After each egg I wiped my hands off. 

Now apply the next strip of material, making sure to cover the back of the fabric in decoupage medium. I applied the strips to the naked parts of the egg first and then covered up the holes at the end. 
Once the whole egg is covered, smooth down the wrinkles. NOTE: your egg is going to have wrinkles, you are just trying to make it as smooth as possible. 
Then add a thick layer of decoupage medium over the whole egg and lay it on wax paper to dry.
It was such a fun project that I am looking around for something round that I can do it on and keep the balls out all year long!

And, if you are still in the mood for decoupaging when you are done, here is a tutorial on how to decoupage scrapbook paper onto your eggs.

Have a Terrific Thursday!

I’m linking up to:


XOXO

PS — I have a quick giveaway — I will post about it tonight!

Tweet

Posted By: Jen · In: Uncategorized

Cupcake Wreath Update
Spring Project: Ruffled BURLAP Runner

You’ll Also Love

Simple Easter Bunny Treat Bags
upcycled chair to planterSpring DIY Upcycled Chair Planter
Kids Outdoor Easter Scavenger Egg HuntKids Outdoor Easter Scavenger Hunt – with printable clues!

Comments

  1. Jen says

    March 27, 2010 at 7:31 PM

    They look so pretty! But I think after my egg disaster last year (the mod podge and scrap book paper one you did? I tried to copy it – total FAIL) I may skip this one 🙂

  2. Gay Vaughan says

    March 27, 2010 at 3:04 AM

    Jen, I am so honored to have you at my party! You always have the greatest ideas and this is just one example. Thank you for bringing your hodgepodge to my party. I love seeing what you are up to!
    ~Gay~
    itsahodgepodgelife.blogspot.com

  3. Stacey @ The Blessed Nest says

    March 27, 2010 at 12:33 AM

    These are so fun & cute! Love the colorful fabrics!!
    Blessings,
    Stacey

  4. Mel Tales says

    March 26, 2010 at 3:20 PM

    Jen- Your eggs are adorable! I have been thinking of doing fabric eggs, but just havent until I saw yours! Thanks for the motivation! I linked you up too! :o) Happy Friday!!!!!! Hugs!

  5. pk @ Room Remix says

    March 26, 2010 at 12:52 PM

    This is such a cute idea, Jen! Love the bright, fun color. Have a good weekend…

  6. Amanda says

    March 26, 2010 at 11:55 AM

    Beautiful! Love how they look in that glass jar!

  7. [email protected] says

    March 26, 2010 at 4:43 AM

    Love both the fabric and paper eggs!!!

  8. Mommy of Two 24/7 says

    March 26, 2010 at 4:01 AM

    Jen- Make a burlap and colorful egg wreath to keep out year round! These eggs are all over my place, and this is a great way for me to use some up. I've already made some topiaries, and now I want to make some of these to go with my decor! Thanks for the great idea. 🙂

    Follow my blog and leave a comment on the freebie post! I'm doing a giveaway for some hair ties! 🙂

    mommyoftwo247.blogspot.com

  9. Laura says

    March 26, 2010 at 3:14 AM

    These turned out so pretty! I love them.

  10. Jenny says

    March 26, 2010 at 2:06 AM

    These are so cool! Speaking of Easter, I have something for you here:
    http://ourniftynotebook.blogspot.com/2010/03/virtual-easter-basket.html

  11. Connie Weiss says

    March 26, 2010 at 12:31 AM

    I tried to make eggs like this last year and I used tissue paper and it totally didn't work out. I think I'd do much better with fabric.

  12. Dawn says

    March 26, 2010 at 12:10 AM

    These eggs are so cheerful! I think I will try making some too. Thank you for the awesome idea.

  13. Tammy says

    March 26, 2010 at 12:08 AM

    These are so cute. I think they would be cute year round!

  14. Fleur de Bee says

    March 25, 2010 at 11:05 PM

    EEK! So cute! I am doing some with vintage music paper but now I'm rethinking ALL of them in music haha! Thanks for the inspiration!! xo

  15. Kimbo West @ a girl and a glue gun says

    March 25, 2010 at 10:57 PM

    these are to die for cute. love them.

  16. Meet Virginia says

    March 25, 2010 at 10:14 PM

    Jen! I would so totally love it if you would put the giveaway up! That is so sweet of you, thanks so much!! Hope you are having a great day!!

    Check out my awesome GIVEAWAY

    ~Morgan

    Meet Virginia Crafts
    Meet Virginia's Etsy Shop

  17. Creations By Cindy says

    March 25, 2010 at 9:38 PM

    Adorable! Be blessed. Cindy

  18. [email protected] says

    March 25, 2010 at 9:36 PM

    I love how colorful they are! Very cute! I've decopauged tissue paper and scrapbook paper on them before but never tried fabric. Great idea!

    Manuela

  19. Carmie, the Single Nester says

    March 25, 2010 at 9:16 PM

    These look awesome! So colorful and modern!

  20. MaryJanes and Galoshes says

    March 25, 2010 at 9:05 PM

    so colorful, and much better than throwing them out!

  21. Emily says

    March 25, 2010 at 8:44 PM

    I LOVE this idea! I haven't been happy with my Easter decorations this year – I'm going to have to do this ASAP!!!!

  22. Jessica @ Barefoot by the Sea says

    March 25, 2010 at 8:42 PM

    Jen, can you let me know if it's ok to link to my blog?

  23. Kami @ Sweet Charli... says

    March 25, 2010 at 8:41 PM

    Those are super-cute! Definitely a cheap project! I will be doing these for sure! Thanks!

  24. Michele {The Scrap Shoppe} says

    March 25, 2010 at 8:39 PM

    So glad for the scrapbook paper version! I seem to keep ALL my scrap scrapbook paper just knowing I'll use it at some point. This is the perfect project for that! Thanks for sharing!

  25. Jenglamgirl says

    March 25, 2010 at 8:36 PM

    Hi JenJen~ Love your whimsical colors in your crafting and decor ideas…. I almost did fabric covered eggs back a few weeks ago.. but did the mod podged napkin eggs. Yours look so cute in the apothecary jar. Hugs, jgg

  26. Jessica @ Barefoot by the Sea says

    March 25, 2010 at 8:35 PM

    I love this so much! Thanks for sharing…..

  27. Amy says

    March 25, 2010 at 8:33 PM

    These are very cool!

  28. Amanda @ Serenity Now says

    March 25, 2010 at 8:17 PM

    I love those brightly colored eggs! I'm working on an egg project right now…thanks for the Mod Podge tips. 🙂 Thank you also for the linky on your sidebar!!! 🙂

  29. Marie says

    March 25, 2010 at 7:51 PM

    Very pretty Jen!! I love them! xxoo

  30. Delia says

    March 25, 2010 at 7:46 PM

    Very cute…but I am totally drooling over your ruffled table runner. Is that what that is?

  31. Jaime @ Our Journey says

    March 25, 2010 at 7:44 PM

    Ok, now I want some plastic eggs so I can cover them in fabric! So cute!!!

    Oh! I'm hosting a fabric applique giveaway on my blog … would love to have you stop by!

    http://www.theclayfamilyblog.blogspot.com

  32. Shannon @ Posh Pieces says

    March 25, 2010 at 7:44 PM

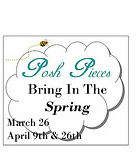
    Love this! I have a bunch of these little plastic eggs in my house right now. I am so going to do this to them! Way to spruce them up! Would love it if you linked up at my Bring In The Spring Party!

  33. Ruby Red Slippers says

    March 25, 2010 at 7:28 PM

    I love this!!!
    I am doing this-I wonder if my boys would do it with me??? Instead of coloring eggs???

    We'll see-

  34. Bird says

    March 25, 2010 at 7:24 PM

    Love using up scraps of fabric! Great idea, seems very simple to do and looks fab!

    I'm also having an EASTER link party if you're interested! It's over at: Birdcrafts.blogspot.com

    See you there?! 🙂

  35. Miller Racing Family says

    March 25, 2010 at 7:06 PM

    Fabulous project. I hate plastic eggs, but I don't have the time or the patience to make the beautiful Easter eggs. I think this would easy enough to create. Thanks for the idea!
    Have a fabulous day!

  36. Kathy @ Creative Home Expressions says

    March 25, 2010 at 7:02 PM

    These turned out really pretty, Jen! Great use for fabric scraps that might be too small for anything else, too. I didn't even attempt to see what I had in Easter stuff in the attic. I'm sure there is too much of it and probably most of it should be junked.

  37. ♥Amber Filkins♥ says

    March 25, 2010 at 6:59 PM

    I spy, with my little eye, my favorite drink in the 'wholetireworld'. Diet Coke!

    Those are so super fabulous Jen! Love them!!

  38. Andrea says

    March 25, 2010 at 6:53 PM

    Those are really great. I tried to do some scrapbook paper eggs over the weekend, but they did not work out. I ended up glittering them and making a wreath. I'll be posting tomorrow! I need to try these though, I love them!

  39. [email protected] Beautiful says

    March 25, 2010 at 6:46 PM

    Cute, cute, cute…did I mention CUTE??? You rock girly!

    Glad to hear your daughter is doing well after surgery. Sorry about the Strep…when it rains, it pours…right?

    Love you
    ~Amanda

  40. Embellished Bayou says

    March 25, 2010 at 6:44 PM

    So colorful & fun, thanks for linking up!

  41. Misty says

    March 25, 2010 at 6:44 PM

    I LOVE LOVE LOVE it…as usual!!! You are one of my faves!!!!! Wish you were my neighbor! lol

  42. Kelli @ RTSM says

    March 25, 2010 at 6:31 PM

    So cute! Those are much more attractive than all the plastic eggs I have hiding in my Easter bins! I did something similar to this with plastic pumpkins and scrapbook paper around Halloween!

  43. Mechelle Harrison says

    March 25, 2010 at 6:31 PM

    These eggs are so cute!

  44. Jen~ Lipstick and Laundry says

    March 25, 2010 at 6:29 PM

    Looks great, last year I covered my eggs in sheet music and glitter them, when I pulled them out this year, they still looked GREAT!

Hi! I'm Jen Hadfield. I'm a mom of 5 restoring an 1891 home in the heart of Salt Lake City. I love being creative and sharing simple ideas to make your life easier and more beautiful!

Receive the Latest Crafts, DIY, Recipes and More in your INBOX!

Follow us on Pinterest! It's awesome!

Top Posts & Pages

Copycat Panera Spinach and Artichoke Egg Soufflés - SO good!
Spring Mushroom and Moss Wreath
DIY Secret: How to Print on Post-It Notes (and Free Printable Template)
DIY Black Painted Window Frames
Spruce up Your Outdoor Space with a DIY Recirculating Fountain! (tutorial)
How to Change a Recessed Can Light into a Pendant Light with No Remodeling!


Popular Posts

  • Copycat Panera Spinach and Artichoke Egg Soufflés - SO good!
    Copycat Panera Spinach and Artichoke Egg Soufflés - SO good!
  • Spring Mushroom and Moss Wreath
    Spring Mushroom and Moss Wreath
  • DIY Secret: How to Print on Post-It Notes (and Free Printable Template)
    DIY Secret: How to Print on Post-It Notes (and Free Printable Template)
  • DIY Black Painted Window Frames
    DIY Black Painted Window Frames
  • Spruce up Your Outdoor Space with a DIY Recirculating Fountain! (tutorial)
    Spruce up Your Outdoor Space with a DIY Recirculating Fountain! (tutorial)
  • How to Change a Recessed Can Light into a Pendant Light with No Remodeling!
    How to Change a Recessed Can Light into a Pendant Light with No Remodeling!
  • How to Make a Simple Garden Planter Box
    How to Make a Simple Garden Planter Box

As seen in


Amazon Affiliate

Tatertots & Jello is a participant in the Amazon Services LLC Associates Program, an affiliate advertising program designed to provide a means for sites to earn advertising fees by advertising and linking to amazon.com.
  • About Me
  • Advertising
  • Get Featured

Copyright © 2023 Tatertots and Jello · Privacy
This site is a place for positive discussion and ideas. Negative talk, comments that disparage others, and similar are not welcome and may be removed.