Welcome to the Summer of Paper series – where we’ve invited fabulous guests to create projects using supplies from my Home + Made paper decor line.
![]()
Hello all you Tater Tots & Jello fans! I am so excited to be here today to share a few of my ideas with you! Hi, I am Rita, mother of 4, grandmother of 10 and married to my best friend! I love sewing, quilting, crafting, cooking, gardening, and being able to share my ideas with you! I would love for you to join me in…Finding Joy in the Journey! You will find me at Pink Polka Dot Creations.
I was so honored when Jen sent me a fun box of goodies and asked me to make something…it was just like Christmas!
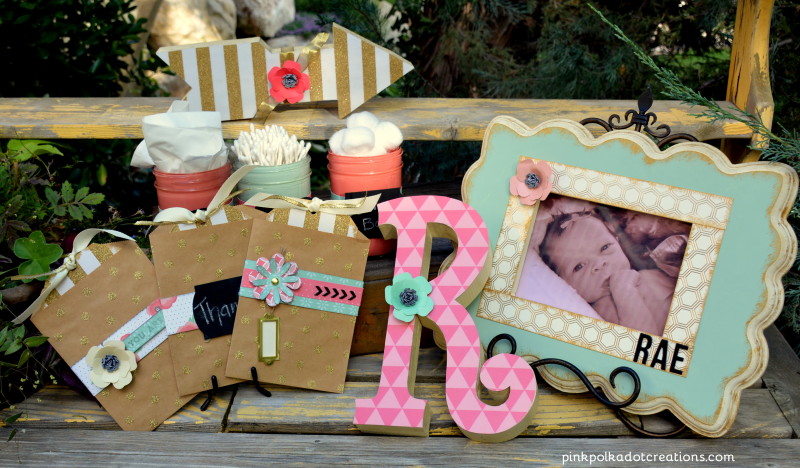
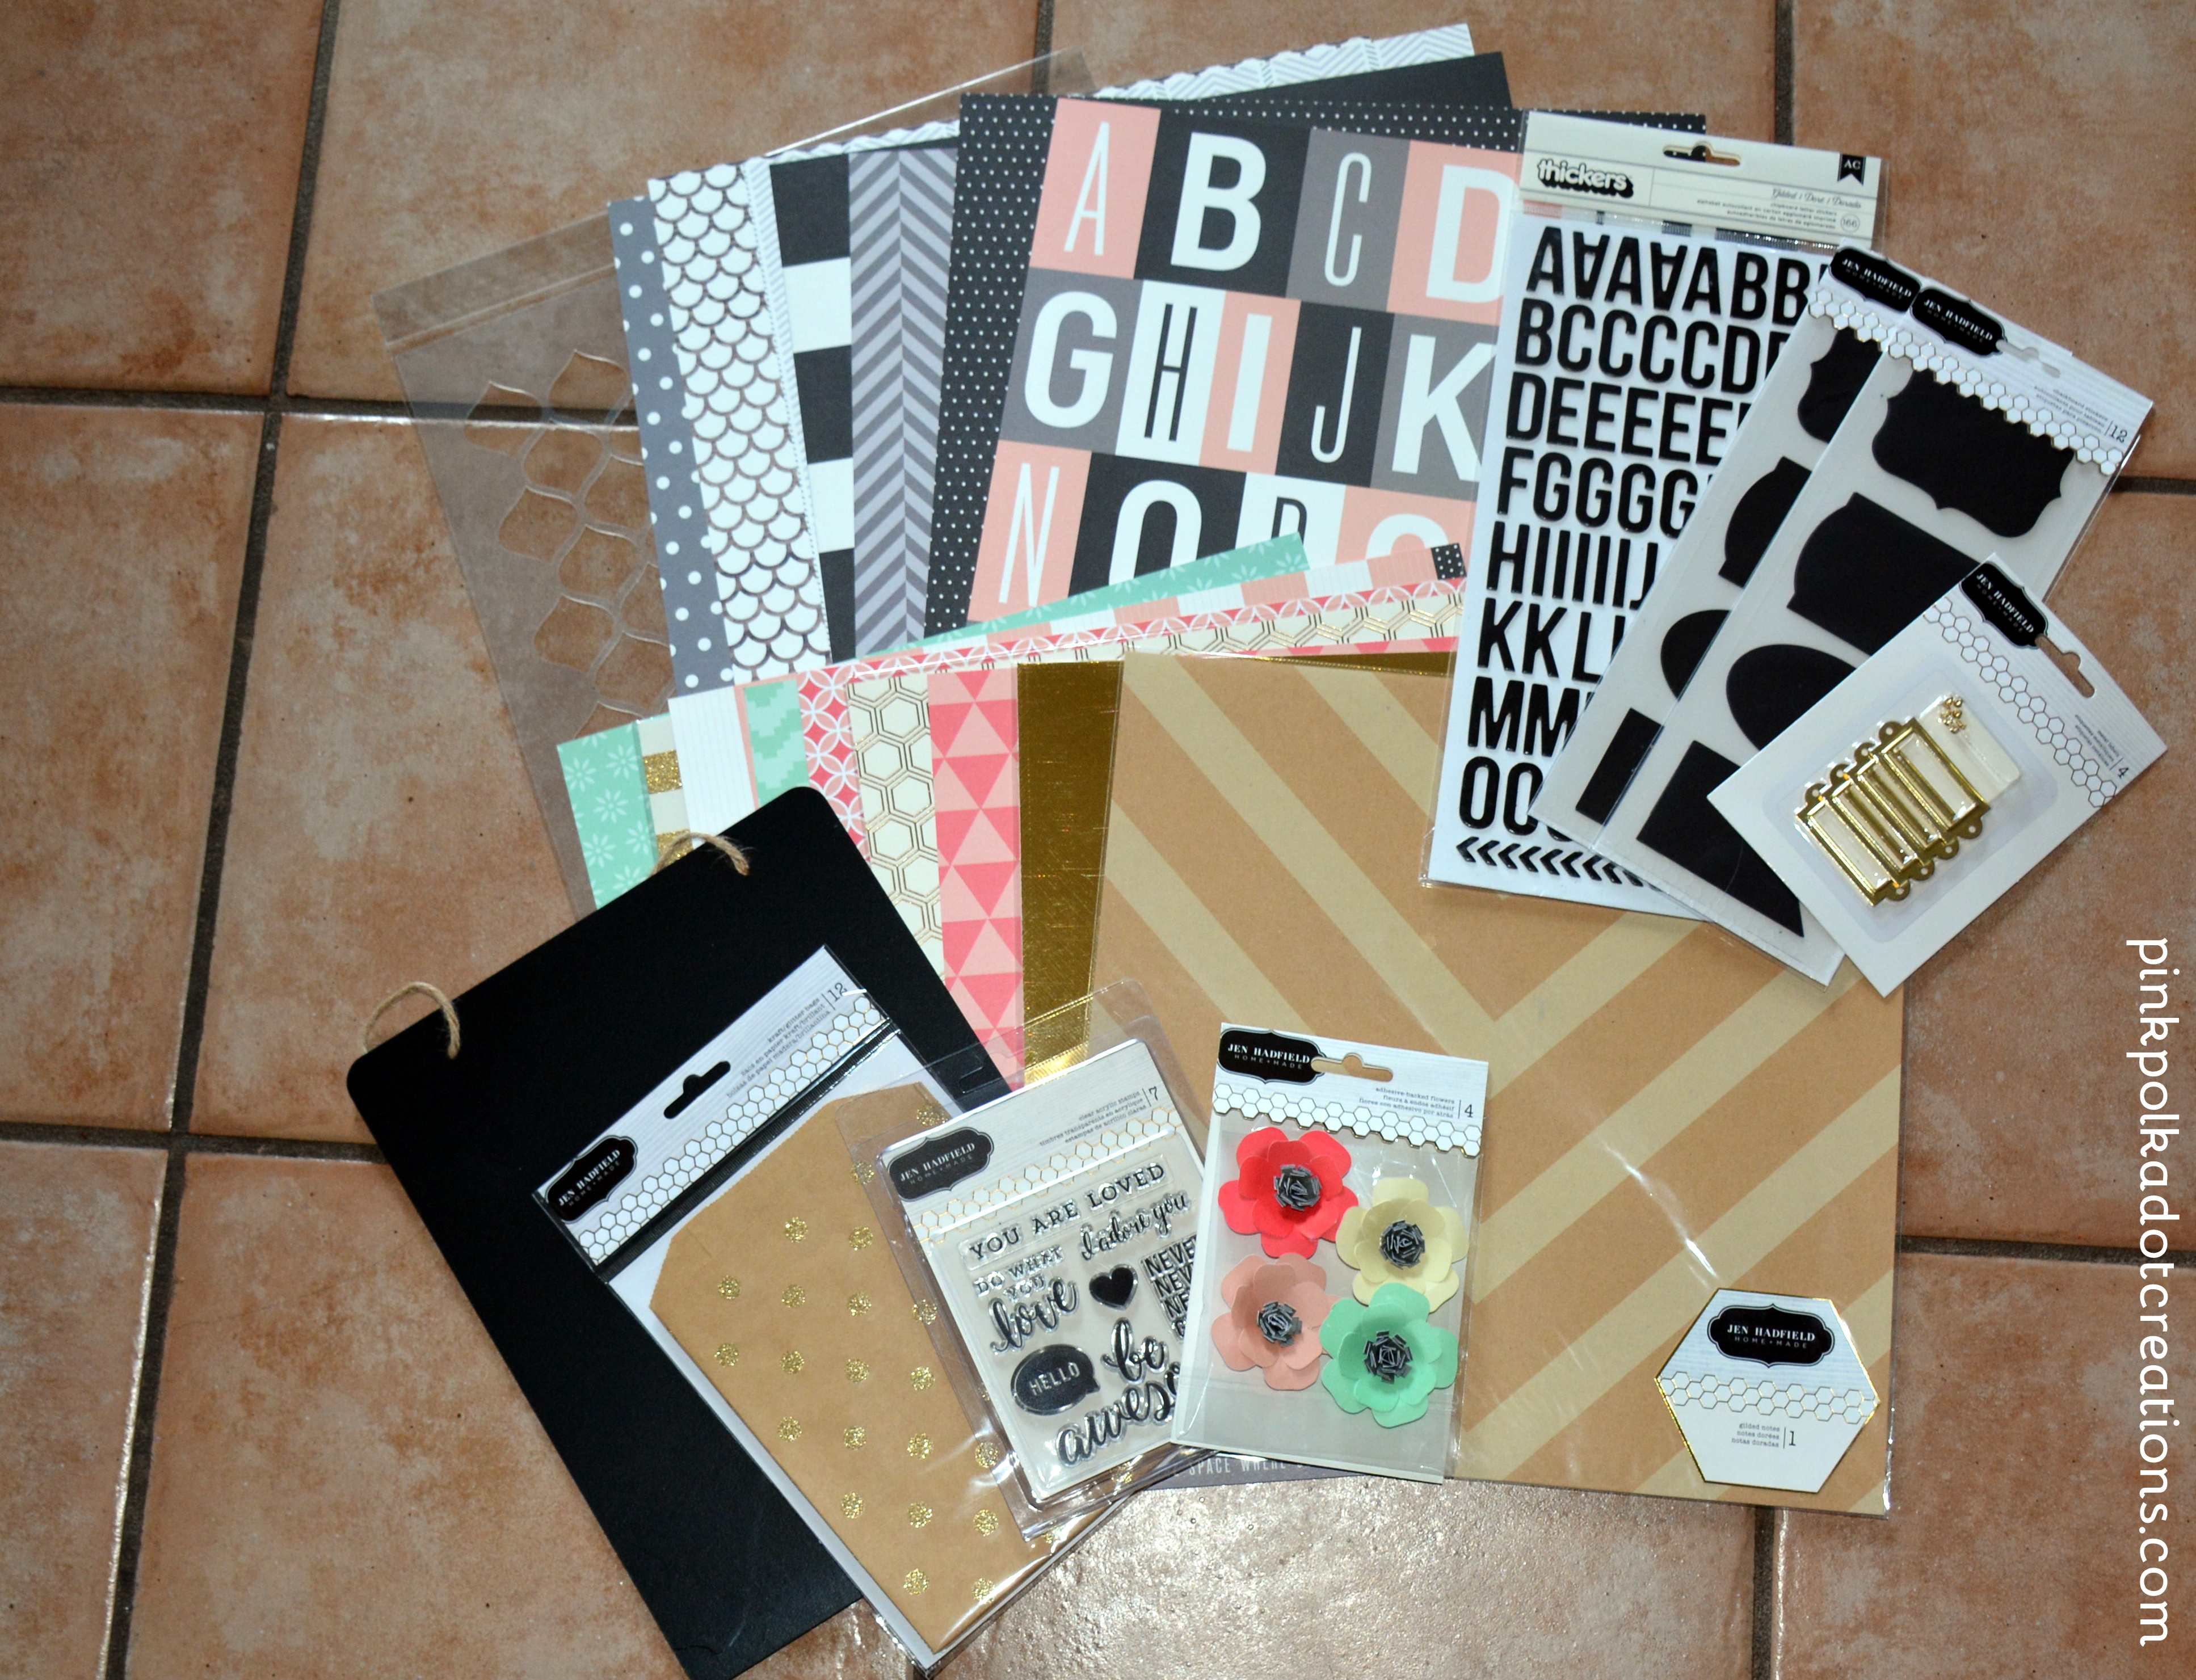
These are a few of the things that I made…but first of all let me show you all of the goodness that I got to choose from: Look at all of these goodies! There were so many darling double sided papers and fun specialty papers with glitter and foil. And the colors were absolutely beautiful! Included in this kit was a chalkboard, gold glittered bags, fun word stamps, darling flowers, metal book plates, chalkboard label stickers, Thicker letter stickers and a fun stencil!
So let me tell you how I made some of these projects…We’ll start with the nursery decor.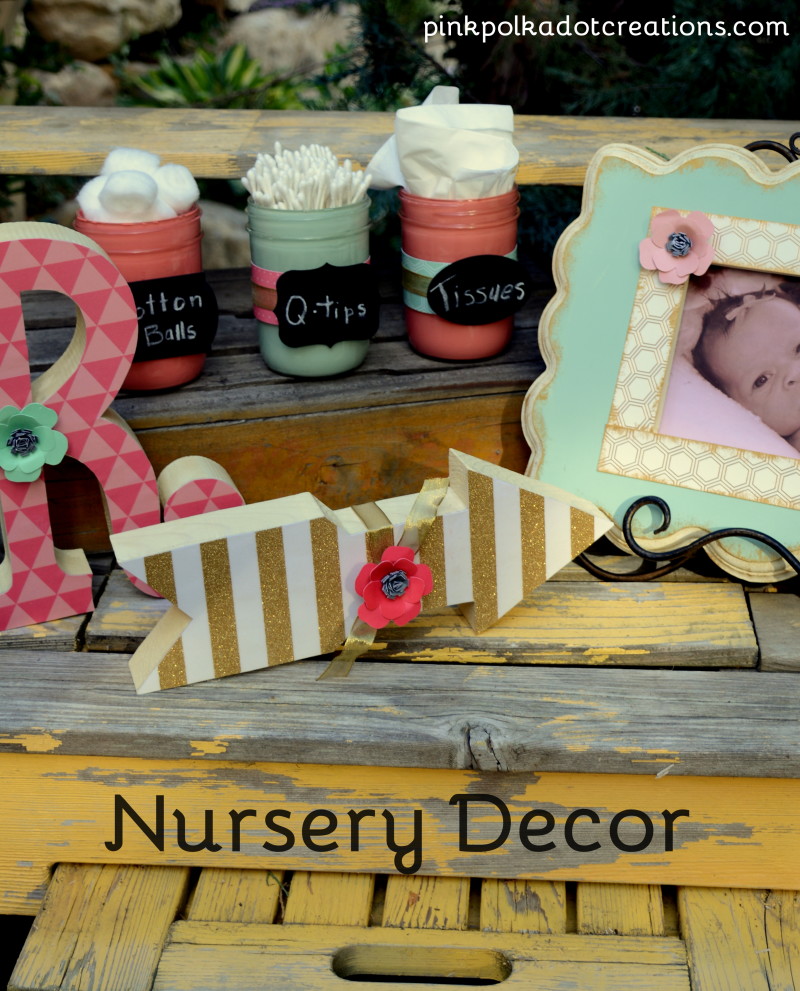 When my daughter saw all of the colors in this kit, she told me that it was the exact colors of her friend’s nursery, so we thought this would be perfect to make some fun nursery decor for her new little one!
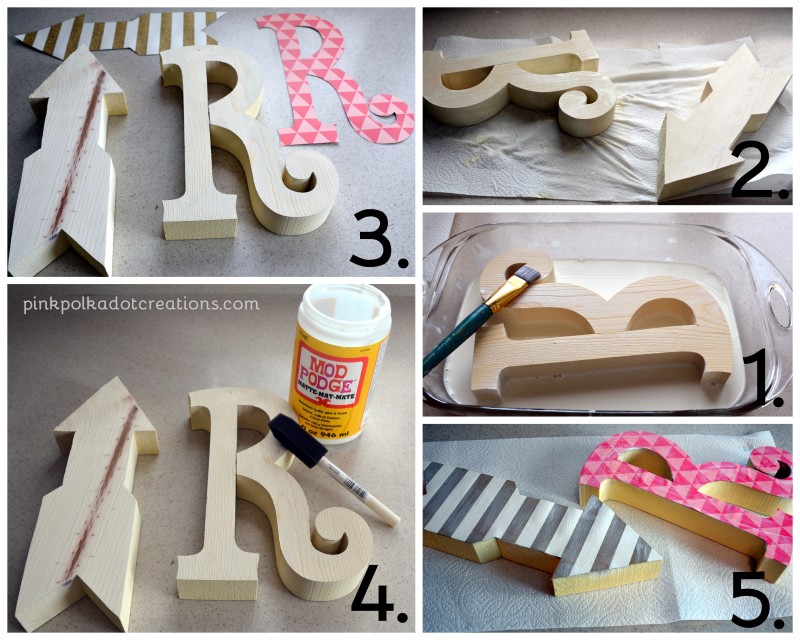 I started with the wood monogram letter and the chunky arrow.
1. I mixed some Ivory paint in water and put it in a glass pan. This is to make a nice wash for your wood. Dip the wood piece into the wash and brush it up the sides at least half way, then turn your wood piece over and repeat. 2. Take it out and let it dry well on some paper towels. Do not let the wood sit for a long time in the wash or it will raise the grain. 3. Trace the reverse outline on the back of your paper and then cut it out. 4. Add Mod Podge to the wood and not to your paper. Lay the cut out paper on the Mod Podge and smooth it down. Let dry. I added 3 more coats of Mod Podge to the entire surface to give it a nice sealed finish. Don’t worry about bubbles when applying your Mod Podge, they will flatten as it dries, but if you do get a bubble, poke a tiny hole with a pin and flatten it out. I have a detailed post on my blog here on how to make these wood cutouts.
Now lets move on to the fun mason jars!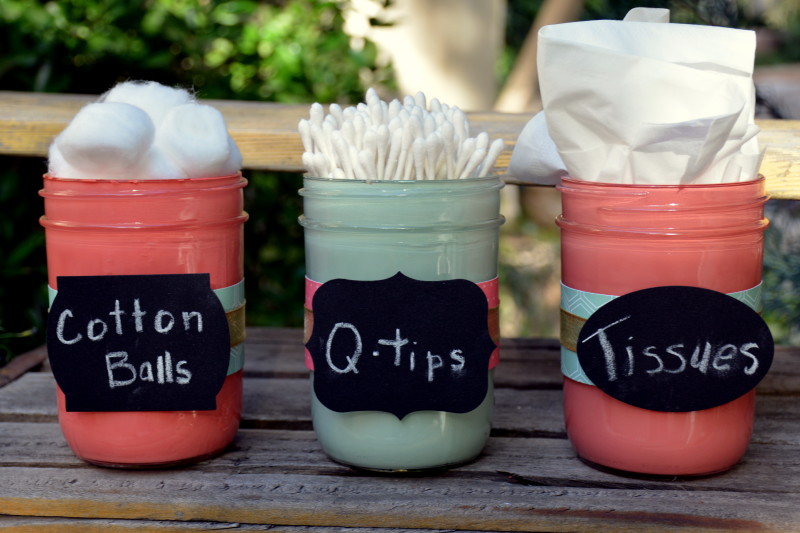 These are a perfect addition to any nursery and they are so simple to make!
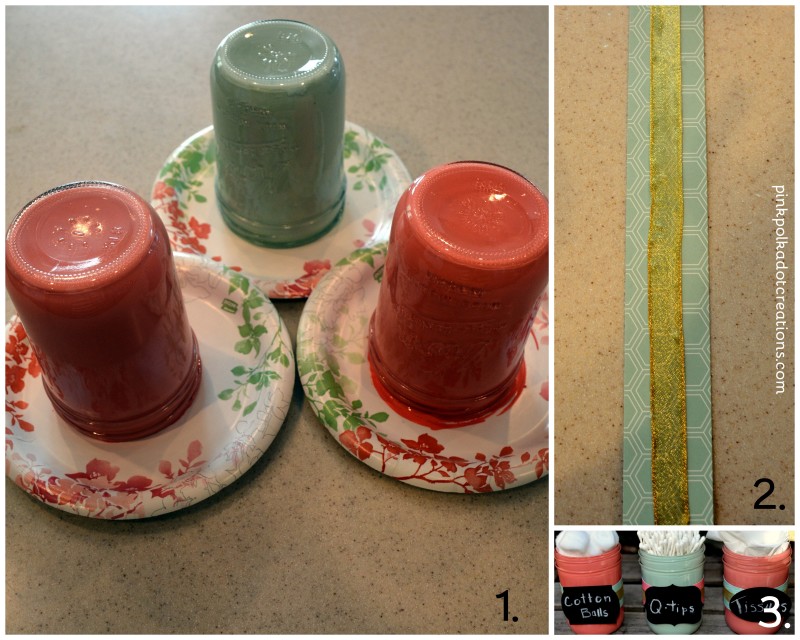
1. You will need 3 wide mouth pint jars. Put a squirt of acrylic paint into the bottom of each jar. Add the lid and shake the jar until all of the insides have been coated with paint. Turn the jars upside down and let the excess paint drip out for about an hour. Then turn the jars over and let dry overnight.
2. Cut strips of paper 1.5 x 12 inches and add a ribbon to the middle of the paper. Wrap the strips around the bottles and tape the ends.
3. Glue one of the chalkboard labels to the front and fill the jars with fun goodies.
I also have a tutorial on my blog, Pink Polka Dot Creations, for making these painted jars.
To finish off the Nursery Decor we added this fun picture frame: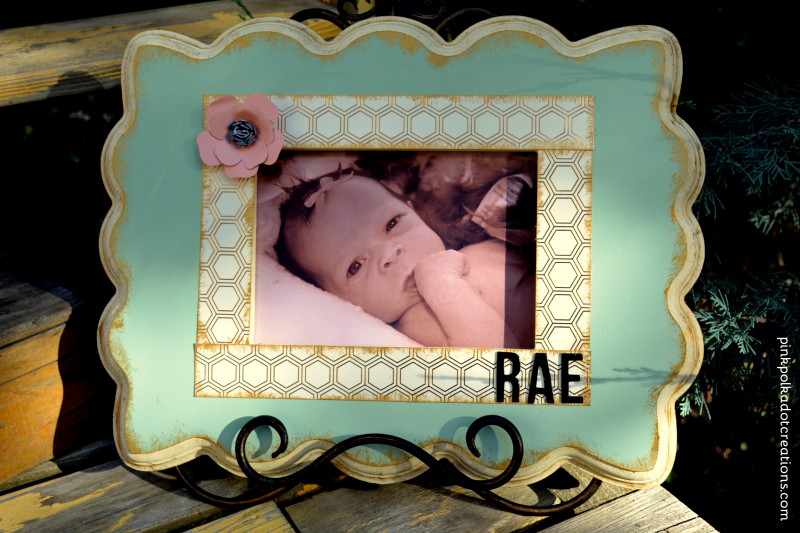 We just painted the wood frame and then distressed it all with gold paint. We add 1 inch strips of the gold foil embossed paper around the edges of the opening. Added one of the cute paper flowers to the top and the name with the Thickers letter stickers. I got all of my wood pieces and frame from the Wood Connection in Utah, if you live outside of Utah, you will need to check with your own wood or craft stores.
So there are some fun Nursery Decor for a new little one! Who wouldn’t want to bring their new baby home to all of that cuteness?
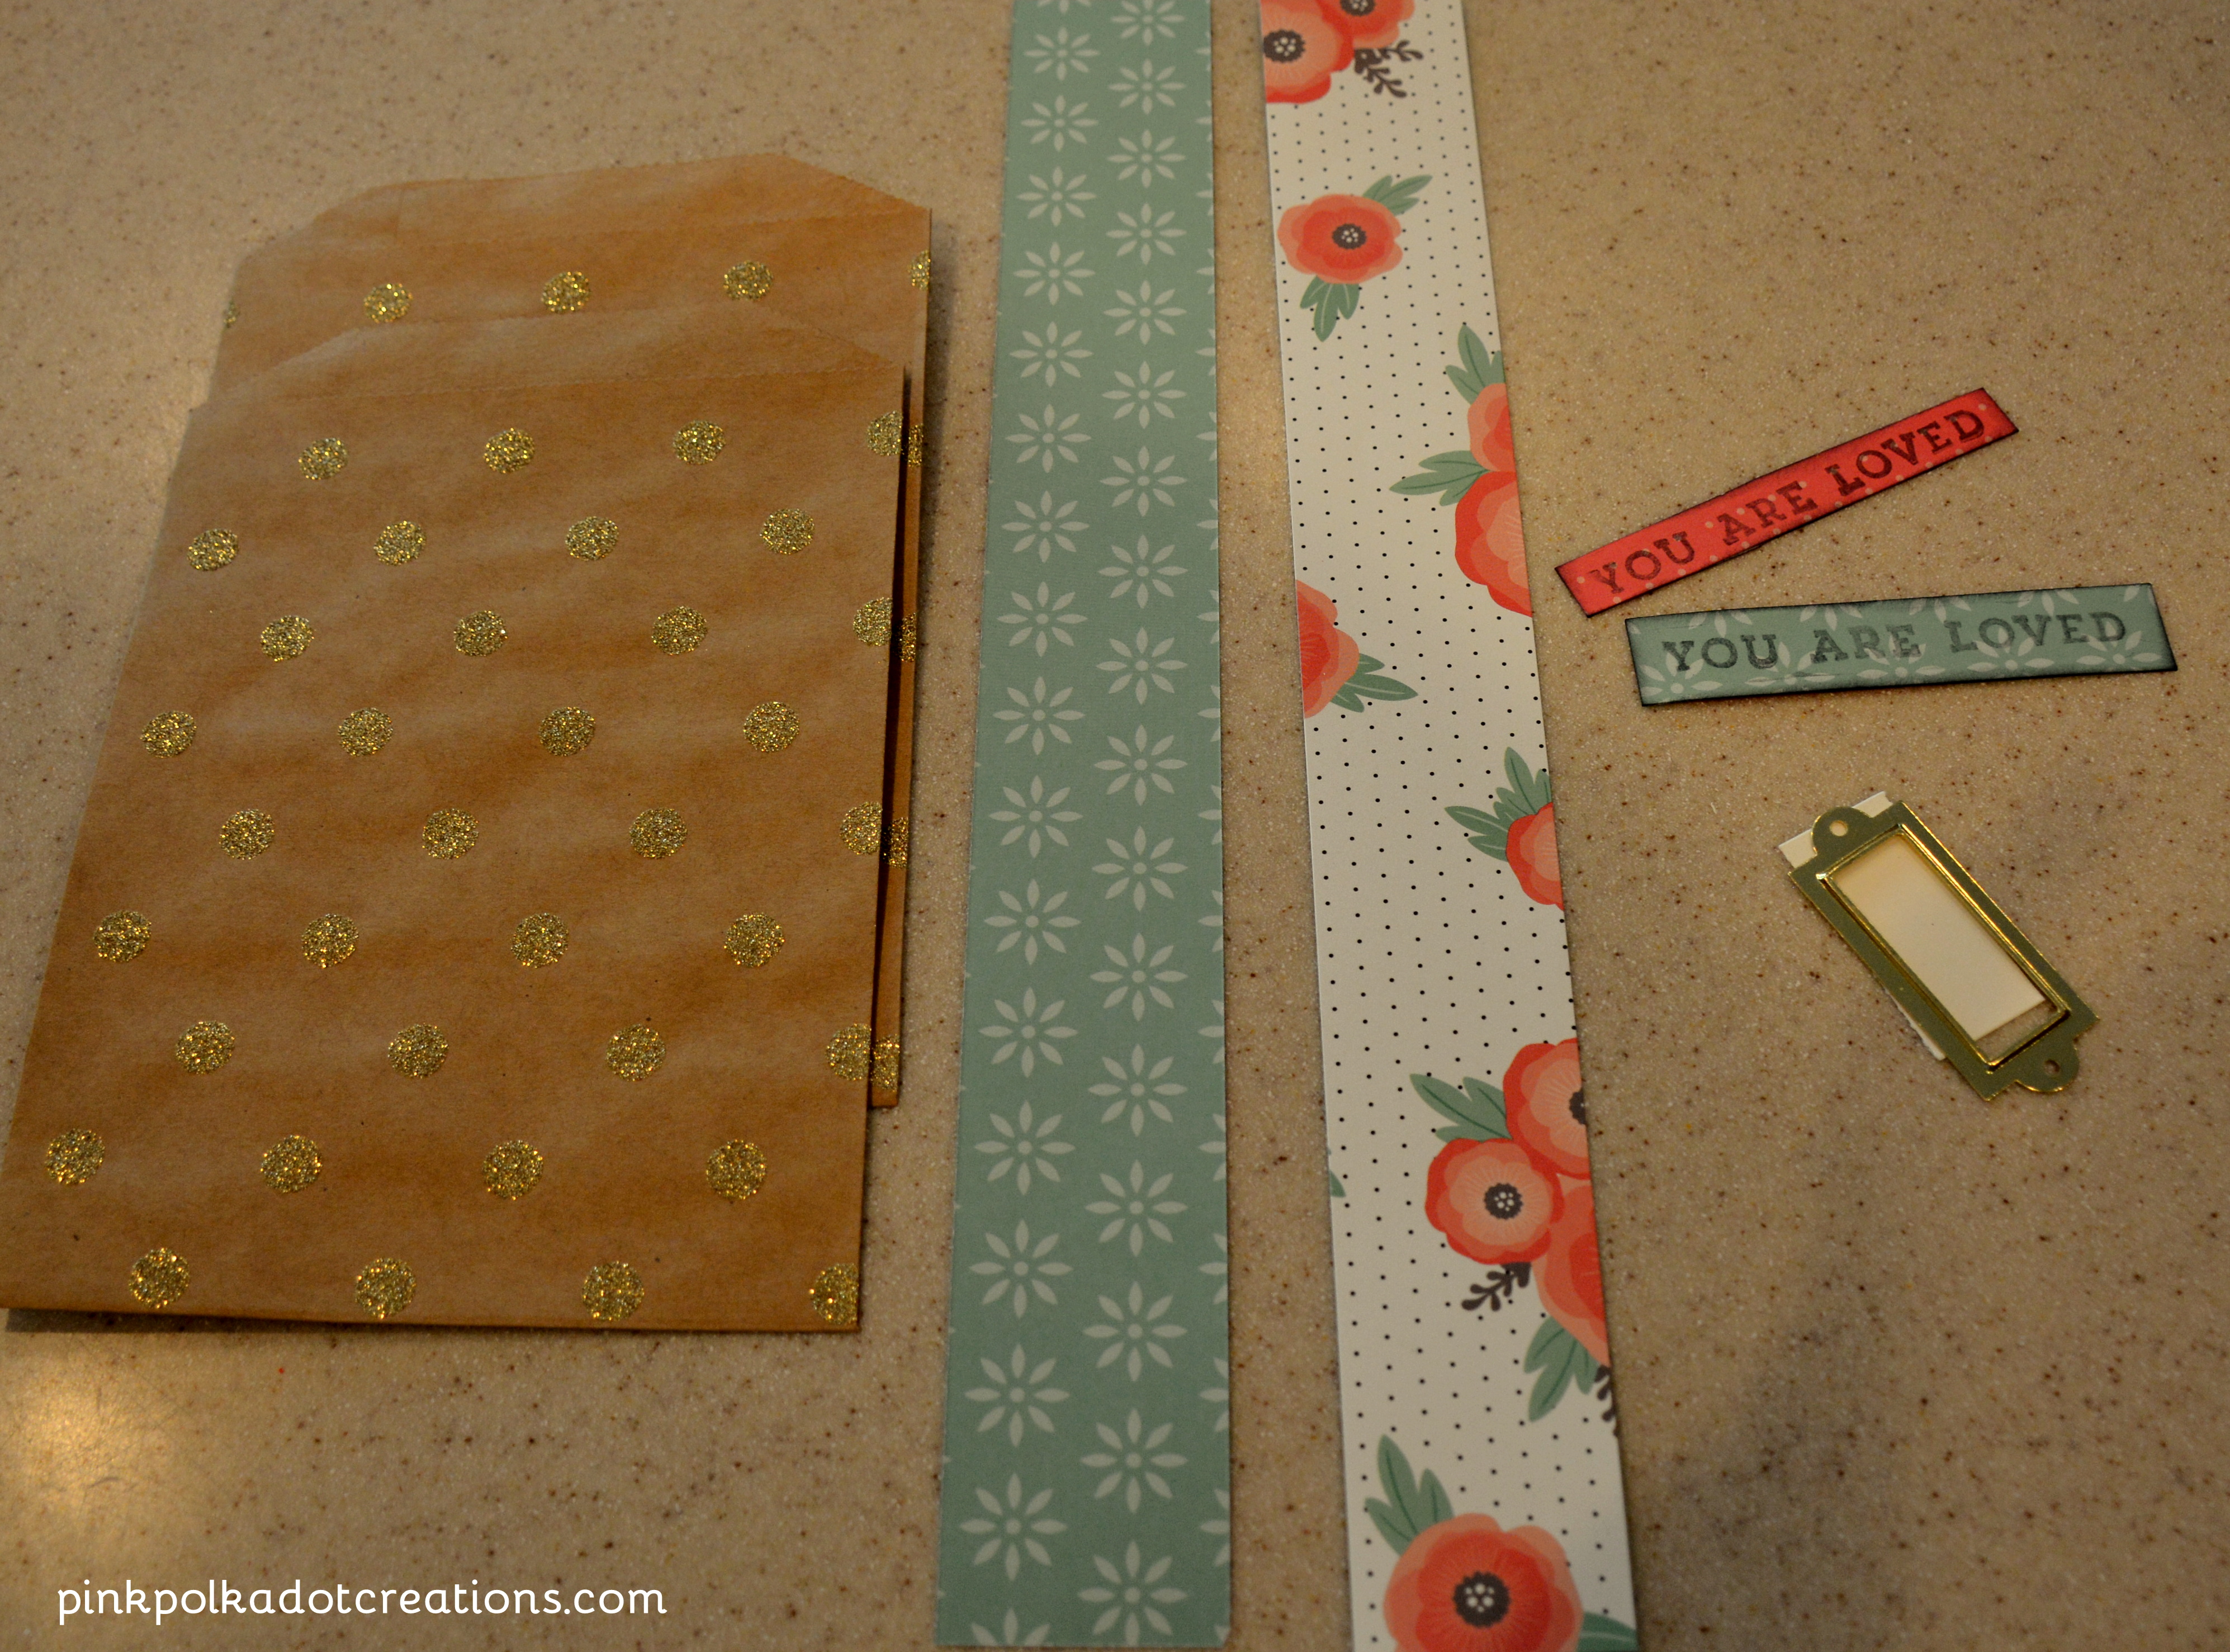
Next I decided to make a few cards…because who doesn’t need cards?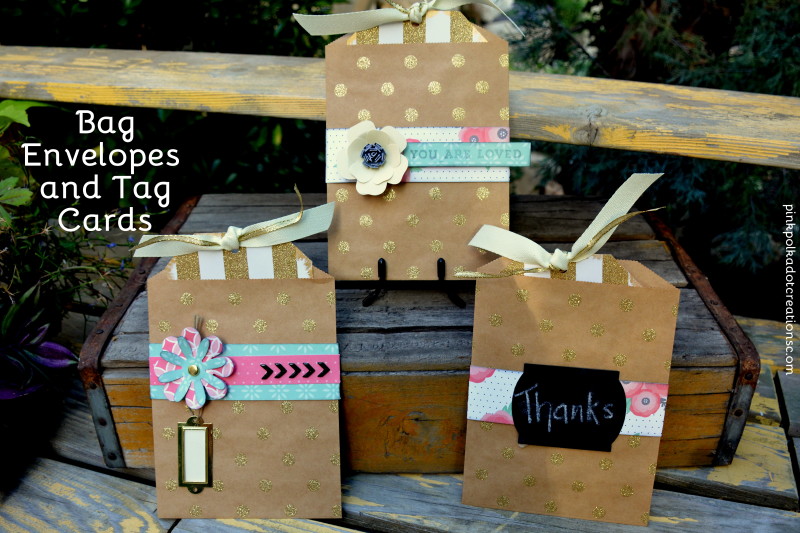 These envelopes are made with the cute little gold embossed bags! All I did was wrap a 1.5 inch strip all the way around the bag and glue on the back then you can embellish them any way you like. I added a flower and a “book plate” name tag to one with the fun little arrow stickers. The next one I simply added a chalkboard label! The top one has one of the cute paper flowers that were included in the kit and I stamped a sentiment on an strip of paper and added it to extend outside of the border. I simply cut a tag “card” to go inside the bag and tied ribbons to the top. These bag envelopes are perfect for adding a small treat, money or gift card to give to your recipient!
I have one last project that I did from this wonderful kit!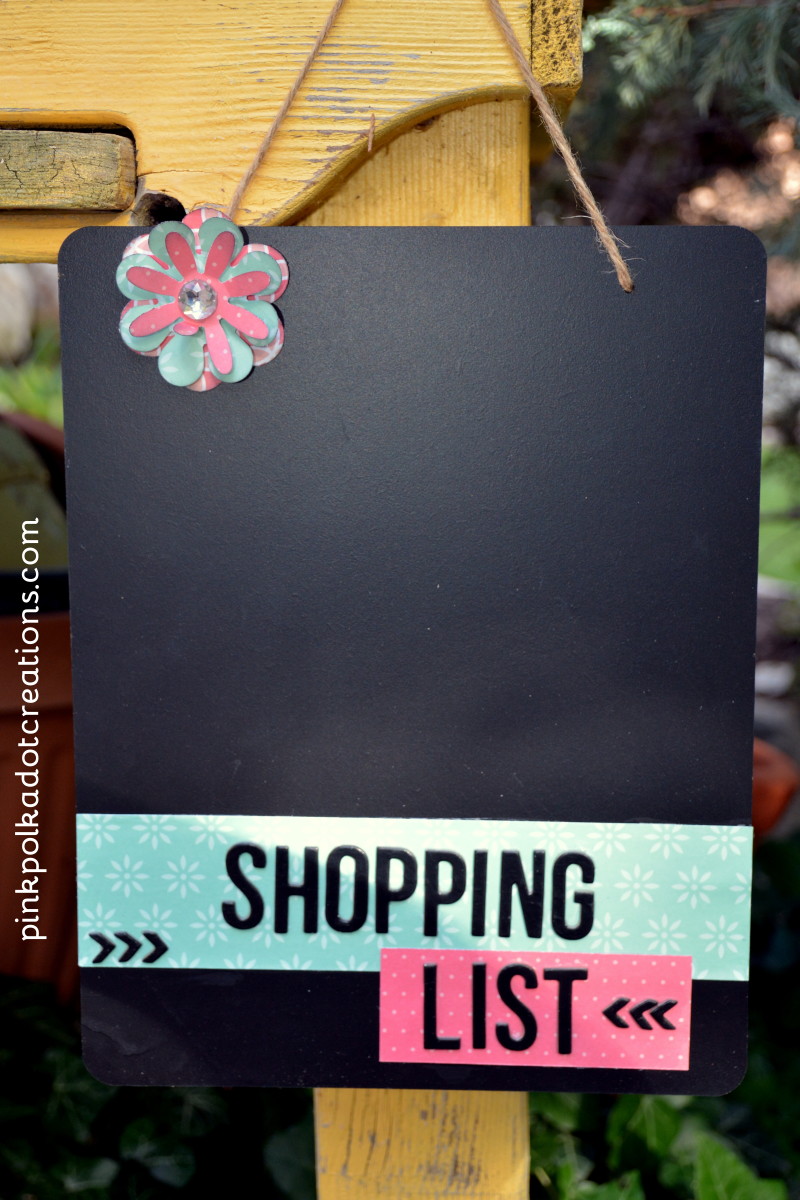 It it this fun chalkboard shopping list! I am going to put this inside my pantry door and whenever I run out of something I can simply write it on this shopping list. When I get ready to go to the store to do my grocery shopping, all I have to do is take a picture of the list with my phone and I am ready to go!
This is an easy project and they would make fun gifts!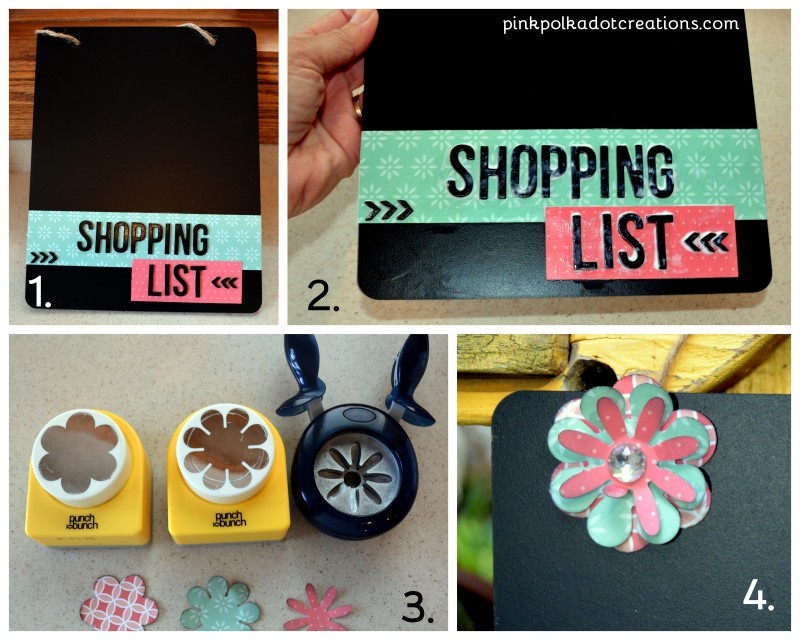
1. Cut a strip of paper to go all the way across the front of the chalkboard. Add your Thicker stickers to spell out shopping and add a few arrows to the side. Then cut a smaller piece of contrasting paper and add the word “list” with some more arrows.
2. I painted a coat of Mod Podge over the paper and stickers so they would be held on a little better, since this chalkboard will be hanging vertical.
3. I punched 3 different flowers, inked the edges and layered them with a jewel and added it to the top of the chalkboard. And there you have a fun little list for your shopping needs!
I hoped you have enjoyed some of these projects and that I have inspired you to go out and make something fun today! I want to thank Jen, again, for this wonderful opportunity. I love her blog and she has so many great ideas!
**********
Thanks Rita! I’m so amazed at all of these fun projects you made with the Home+Made line! So many great ideas! Rita has even more great ideas on her blog. Here are a few I know you’ll love:
She has this awesome idea for a Cute Car Kit. Great way to always have what you need in your car for those little “emergencies”.
She also has some super cute Free Printable Recipe Book Dividers to help you get your recipes organized. It would be such a fun gift idea, too!
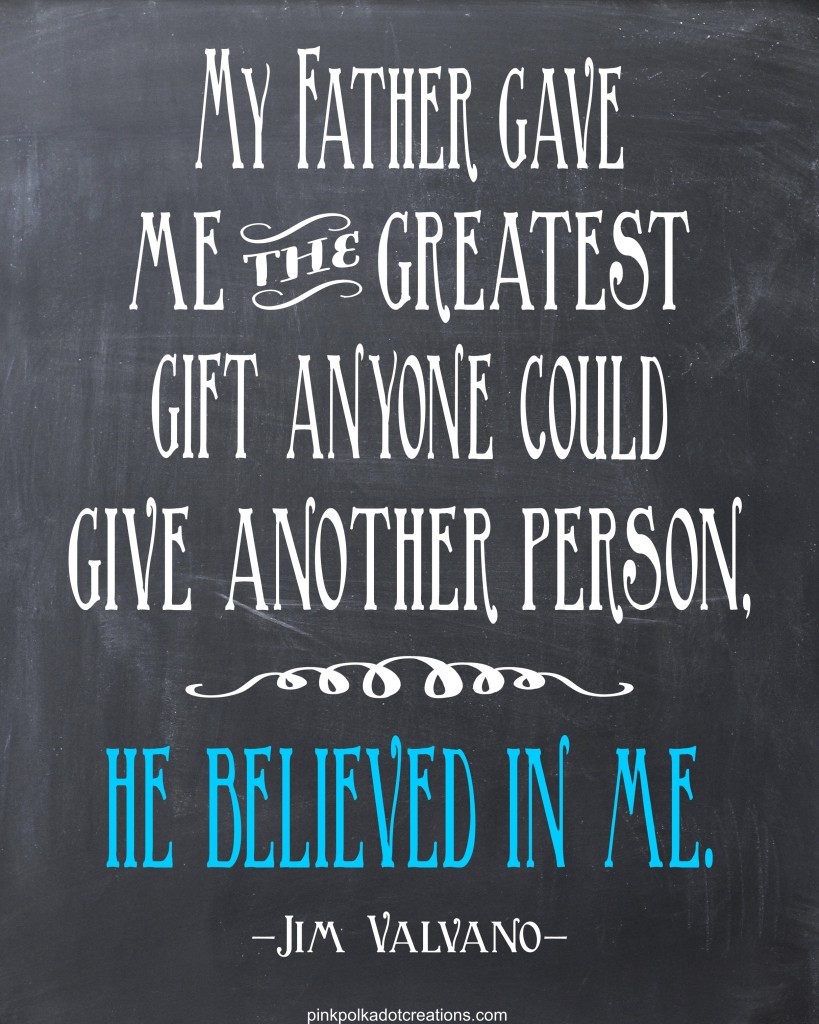
She also has this gorgeous printable quote – My Father Gave Me. Make sure to grab it for your home!
Make sure to follow her at Pink Polka Dot Creations and


Such a fun post!! Love the mason jars. Thanks for sharing 🙂