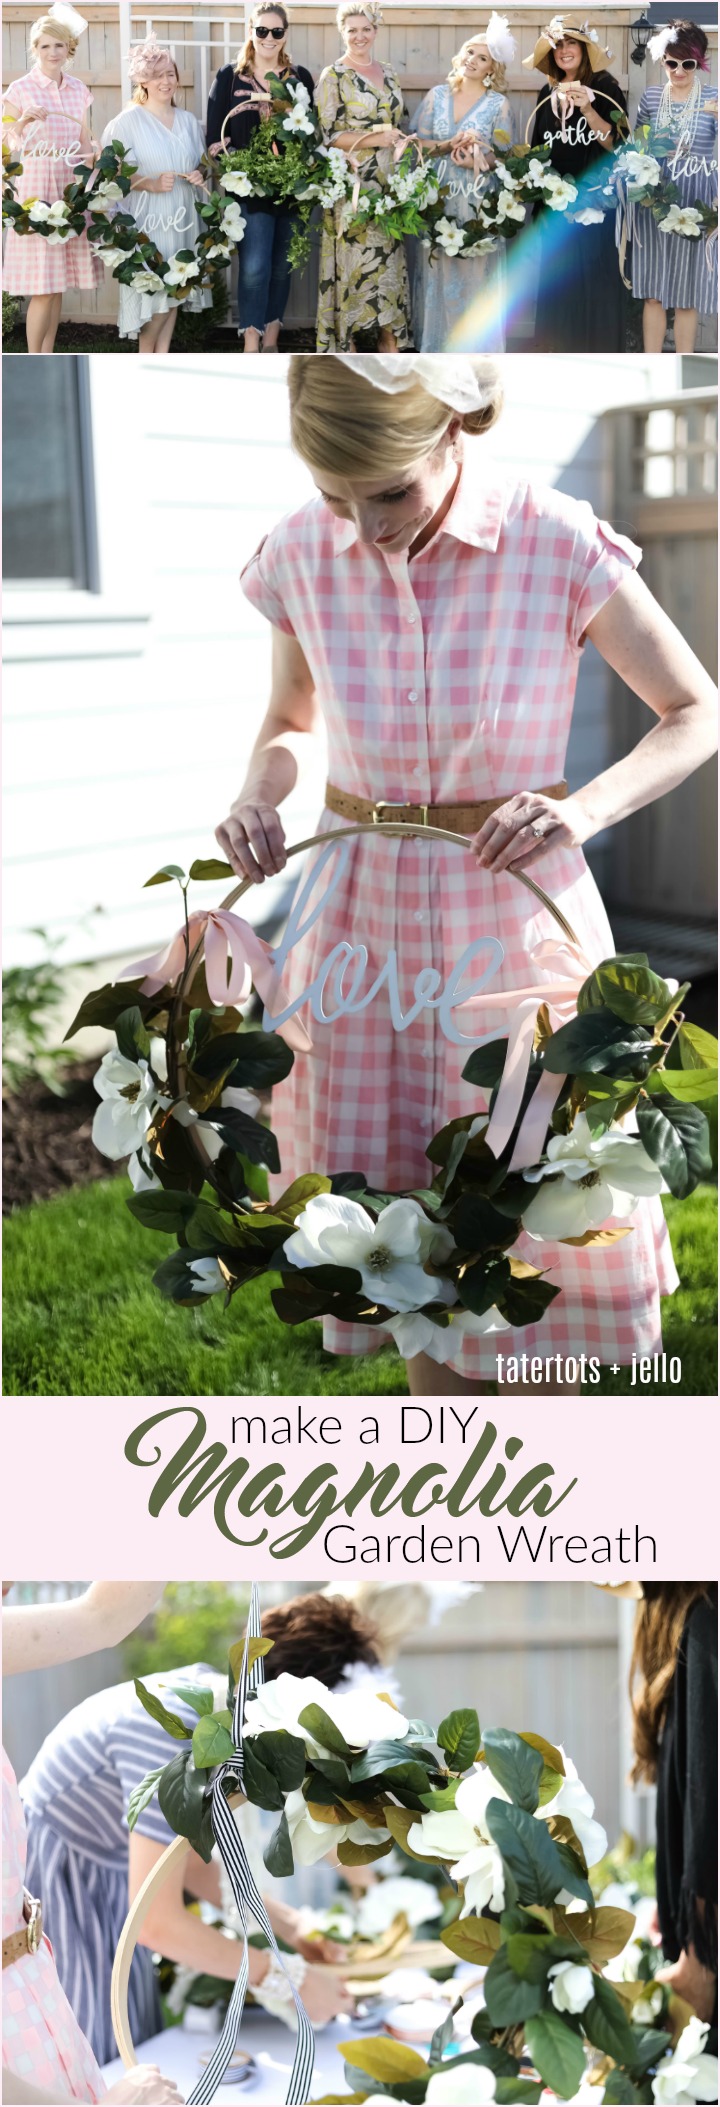
Make a DIY Magnolia Garden Wreath for Summer. All it takes is a few materials and in less than 15 minutes you will have a beautiful wreath to hang on your door or wall!

Today’s tutorial is the most beautiful wreath from my SUPER talented neighbor and friend, Cara of Catcher In The Rye Photography. She hosted the most GORGEOUS Royal Wedding Party last weekend. And not only did we eat like royalty, we made summer magnolia wreaths!! Welcome Cara!!

If you know me, you know I love me some creativity.
But if you also know me, you know that if there’s an easier way to do something, I’ll find it. And that includes crafts.
So when I saw a Pinterest photo a few months ago of a beautiful wreath made from an embroidery hoop, I thought to myself, “…Challenge accepted!”
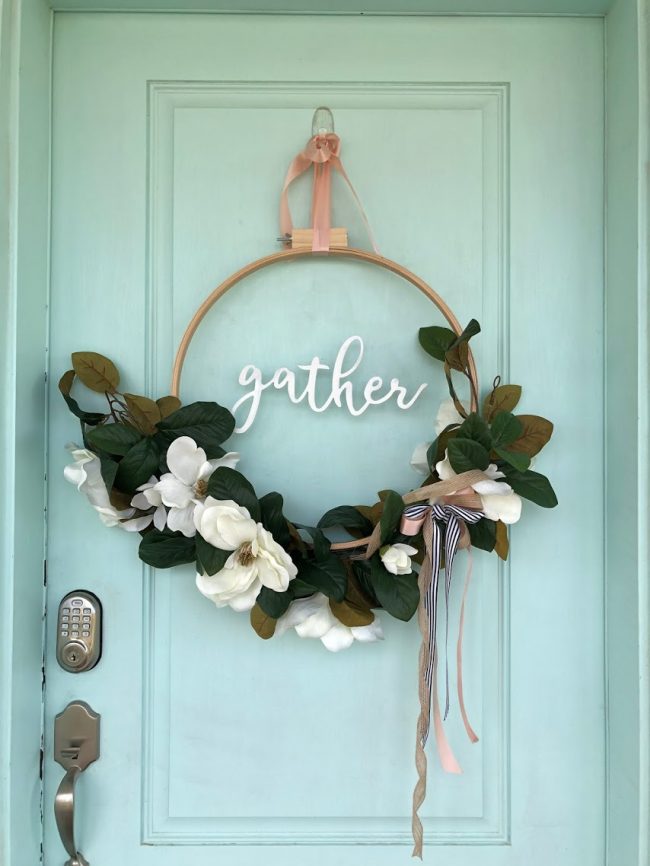
DIY Magnolia Garden Wreath
Having determined I could find a way to do it, I decided to make a DIY garden wreath for my home.
I’m sure there’s a more intricate way to make an embroidery hoop wreath, but the way I came up with takes me less than five minutes total, and involves only five ‘ingredients’:

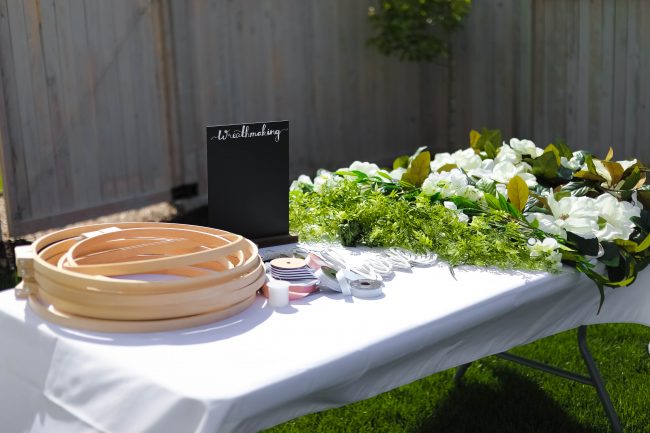

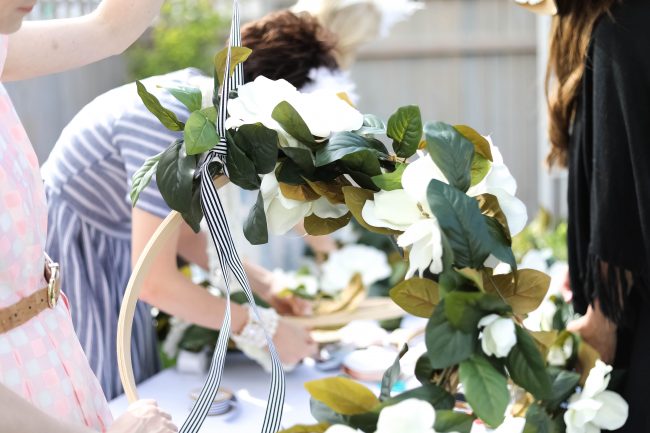
- Embroidery Hoop (I use an 18″ or a 23″ from Hobby Lobby)
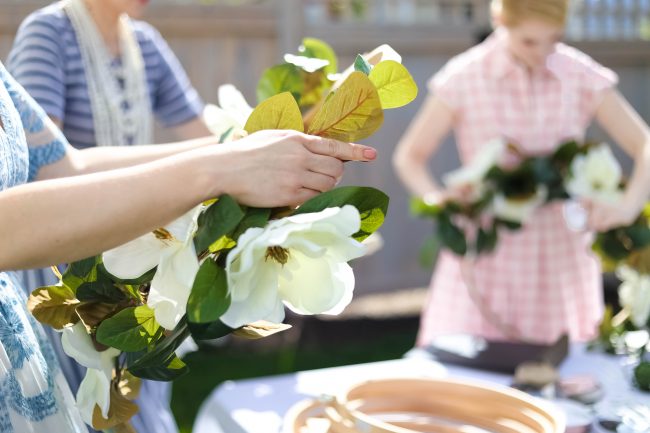
- Garland (I use magnolia because the flower has special meaning for me, also from the HobLob)
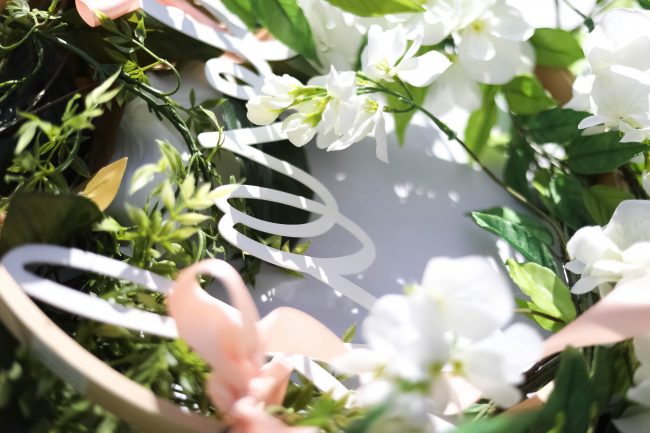
- Galvanized Metal Word (You can choose any word you like; I buy mine from – yep, you guessed it! – Hobby Lobby, and then spray it white)
- Twine or Fishing Wire (You can use any kind of twine or wire for this – the smaller the .mm the better!
- Ribbon (Any ribbon that goes with your decor! You can find beautiful burlap ribbon or your classic grosgrain at any craft store. Swoon.)
The first time I attempted this wreath, it literally took me 5 minutes to make one. It was that easy.
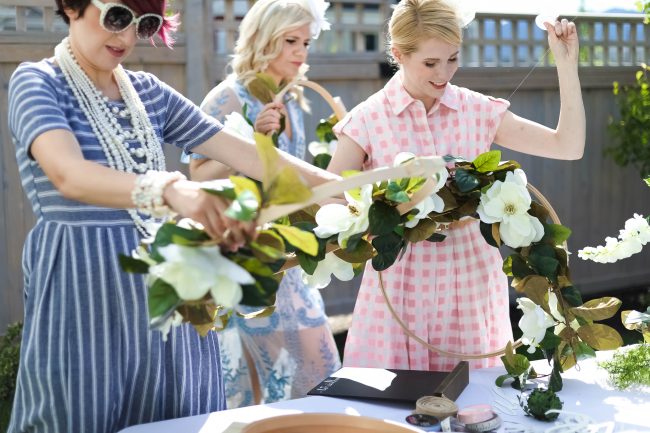
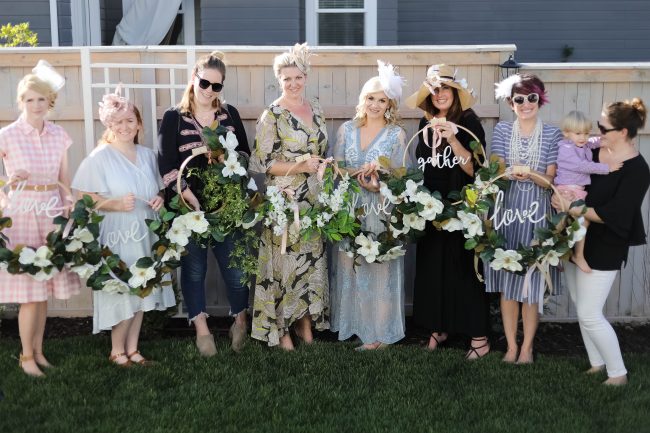
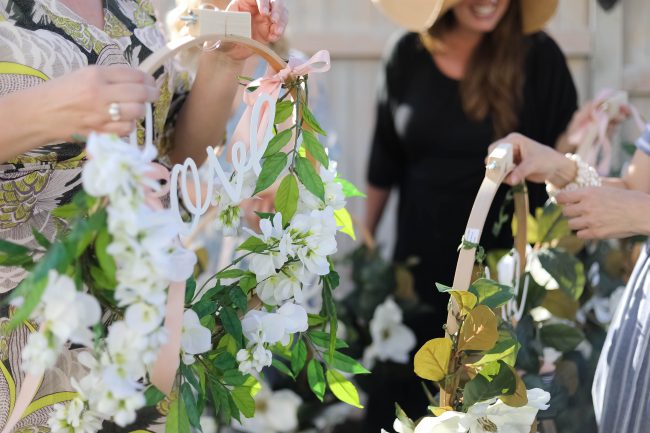
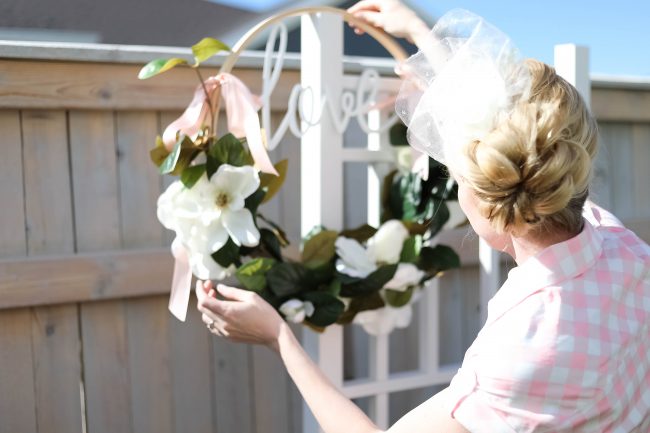
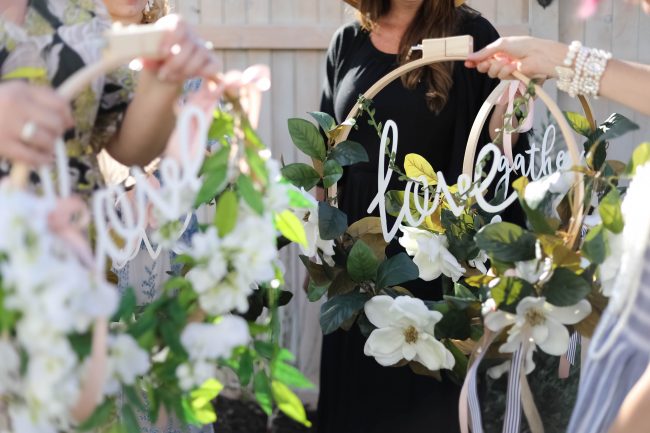
So, of course when I hosted my tea party last weekend in honor of the royal wedding, I knew I had to incorporate this easy and beautiful craft. Best of all, it’s the perfect craft because anyone can do it!
Making Your Wreath
Once you have your materials, the steps are super easy:
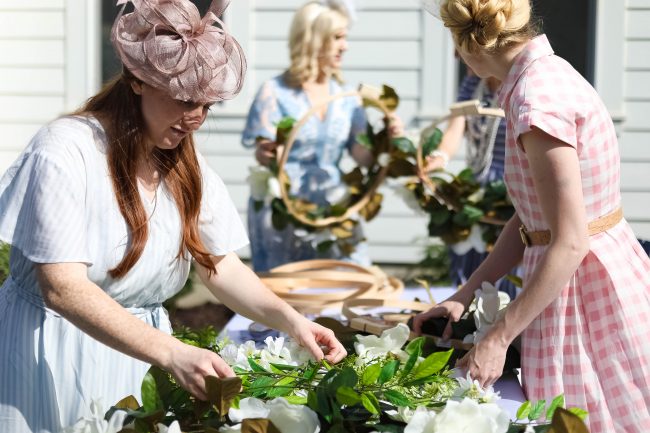
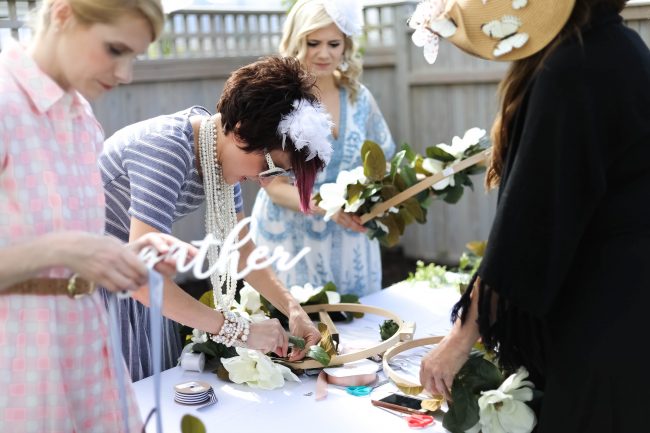
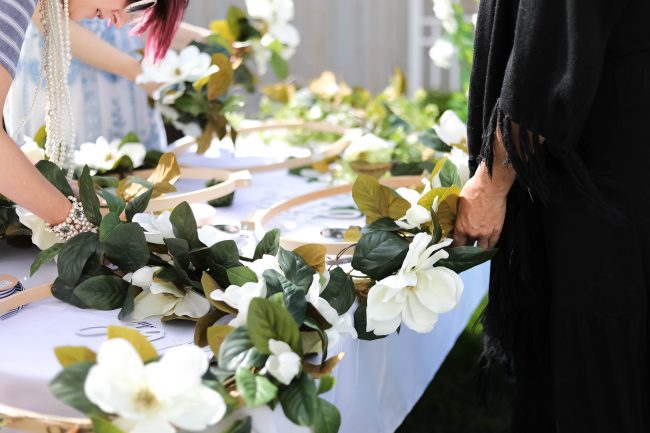
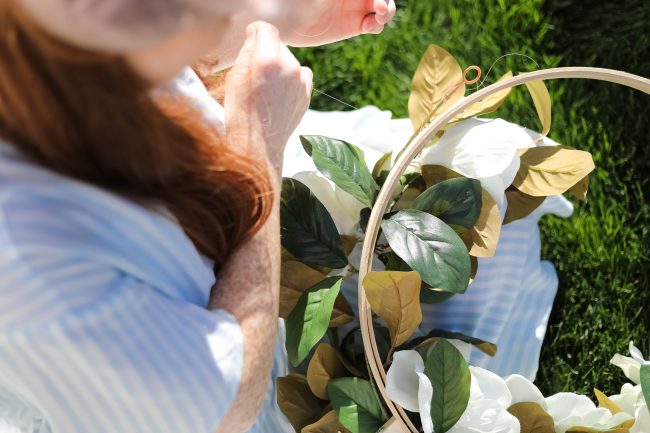
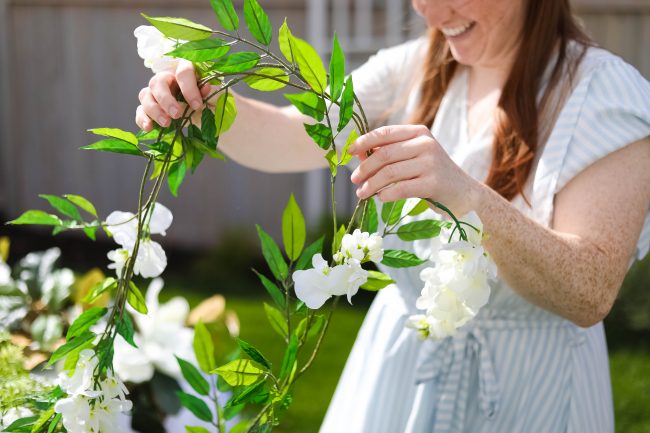
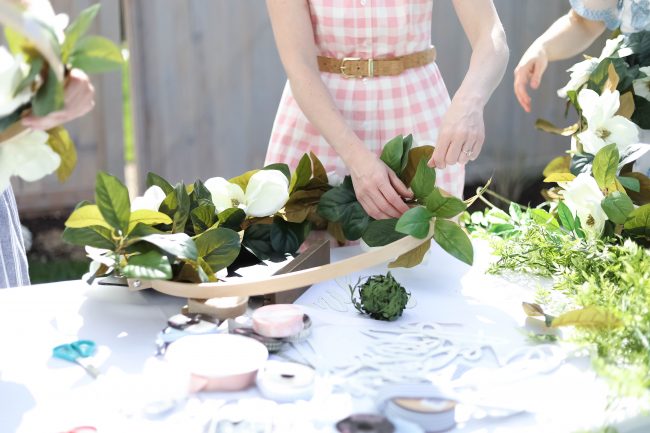
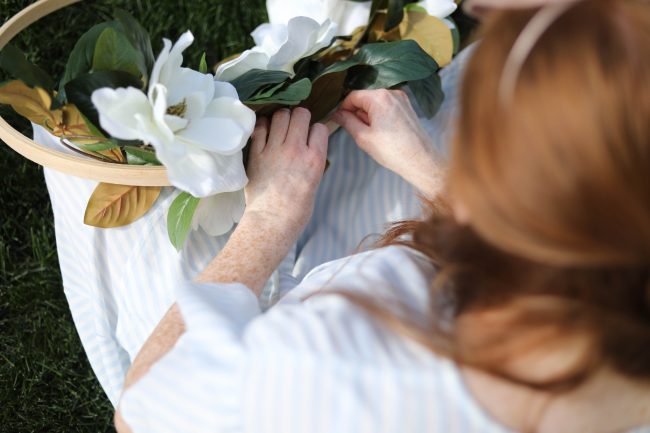
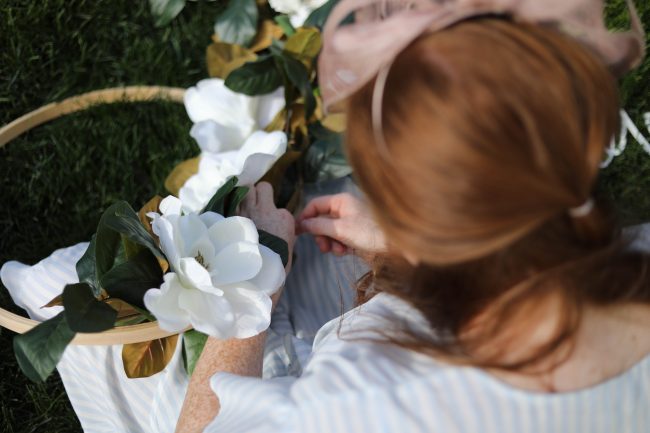
- Align your garland along one side of your hoop. (Note: If you get your garland at Hobby Lobby, it’ll come folded in half. I just use the entire thing, folded in half.)
- Use your wire or twine to affix your garland to the hoop. (I literally just wrap and wrap and wrap, and then tie it off at the end.)
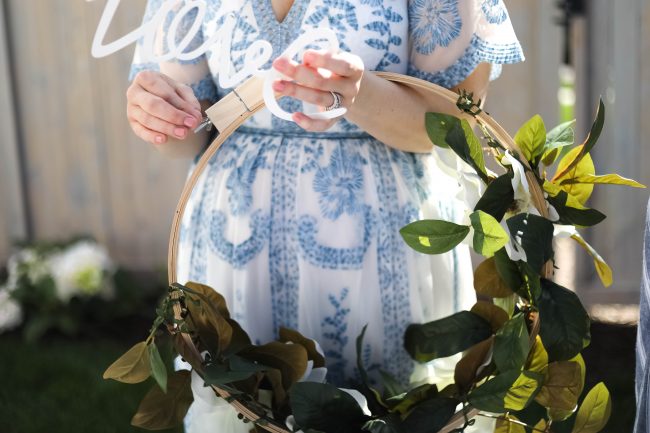
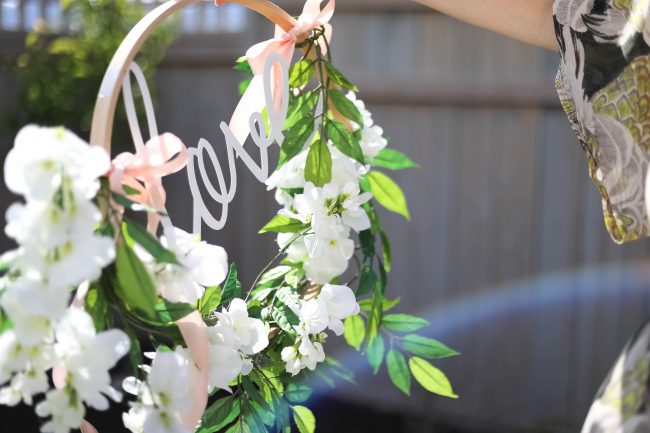
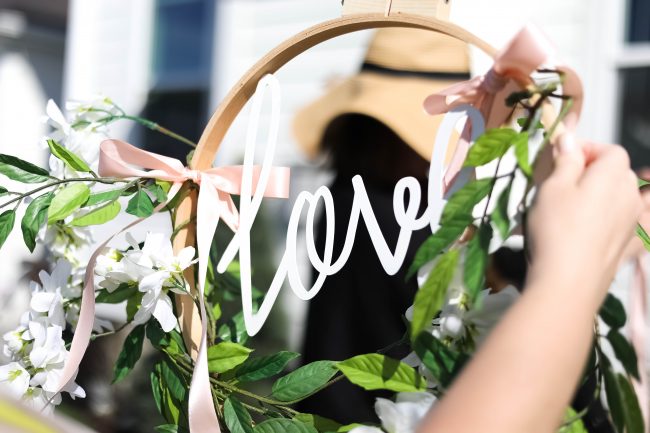
- Now that your garland is affixed, place your metal word in the middle of the hoop wherever you like.
- Thread your twine or wire through your word, wrap it around the top of the hoop, and tie it off. (The word I found, “love,” has little hooks on the back, so I just threaded the wire through those. If you have a word with no hooks, just thread it through the letters themselves.)
- Once your garland and word are affixed, select the ribbon you want to use to hang your wreath, and tie it at the top.
- Voila! You’re done!
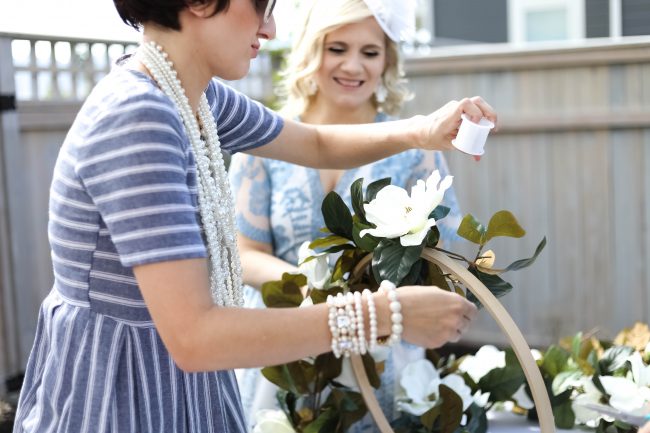
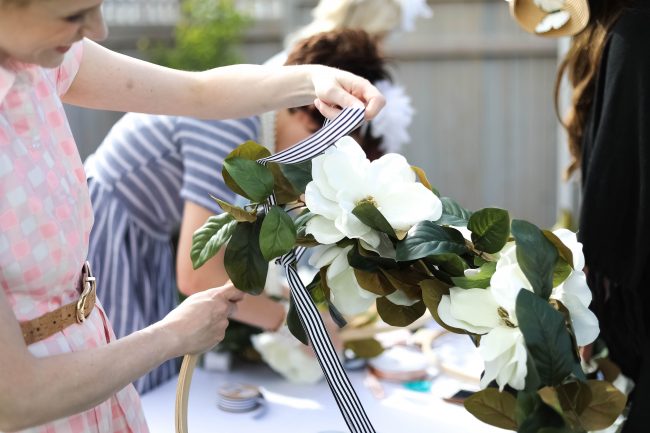
When we did this craft at the tea party, some of the girls opted to use ribbon instead of twine, and it was a beautiful option! Have fun with the project, and let your personality (and home decor color scheme) shine!

 Use your wire or twine to affix your garland to the hoop. (I literally just wrap and wrap and wrap, and then tie it off at the end.) Now that your garland is affixed, place your metal word in the middle of the hoop wherever you like. Thread your twine or wire through your word, wrap it around the top of the hoop, and tie it off. (The word I found, \"love,\" has little hooks on the back, so I just threaded the wire through those. If you have a word with no hooks, just thread it through the letters themselves.) Once your garland and word are affixed, select the ribbon you want to use to hang your wreath, and tie it at the top. Voila! You're done!")
What’s more, the fun part of this craft are the variations you can make in a pinch.
Do you need a quick Fourth of July wreath for your door? Follow the basic steps, but add firework garland and a festive ribbon. Halloween? Same thing, but keep it black and orange!
Finishing Touches
At the end of the day, don’t let fear of complicated crafts keep you from expressing your creativity! Just remember: You can’t make a perfect circle without cutting corners.
Thanks for letting me guest post! Pop on over to my site and Instagram account to check out more photos from our lovely tea party! You can also find the complete gallery from the tea party on my photography site under the party’s album.
Comment below with any questions!
Cara
Thank you Cara!!! Be sure to check out Cara’s amazing ideas on her social channels and blog!!
And you can see all of the amazing details of her Royal Wedding Tea Party too!!
Have a Creative Day!
xoxo


Magnolias are beautiful flowers worthy of being on display. These wreaths are gorgeous and can be put on display both outside and inside the home. It is also possible to make the wreaths with other flowers if you don’t have access to magnolias.
I can see a wreath making party going on in the post, lovely.