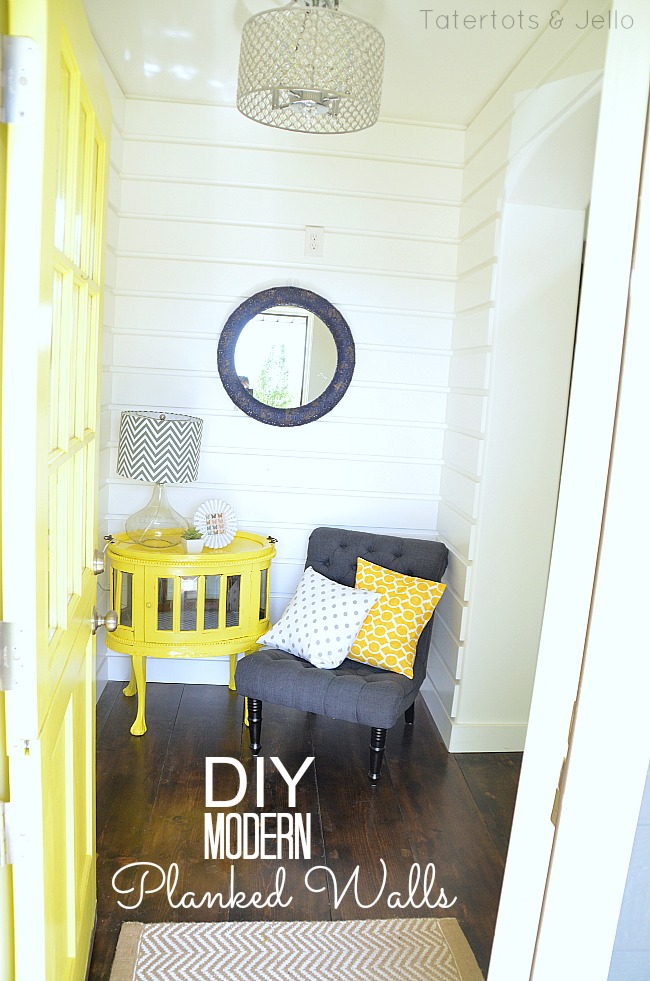
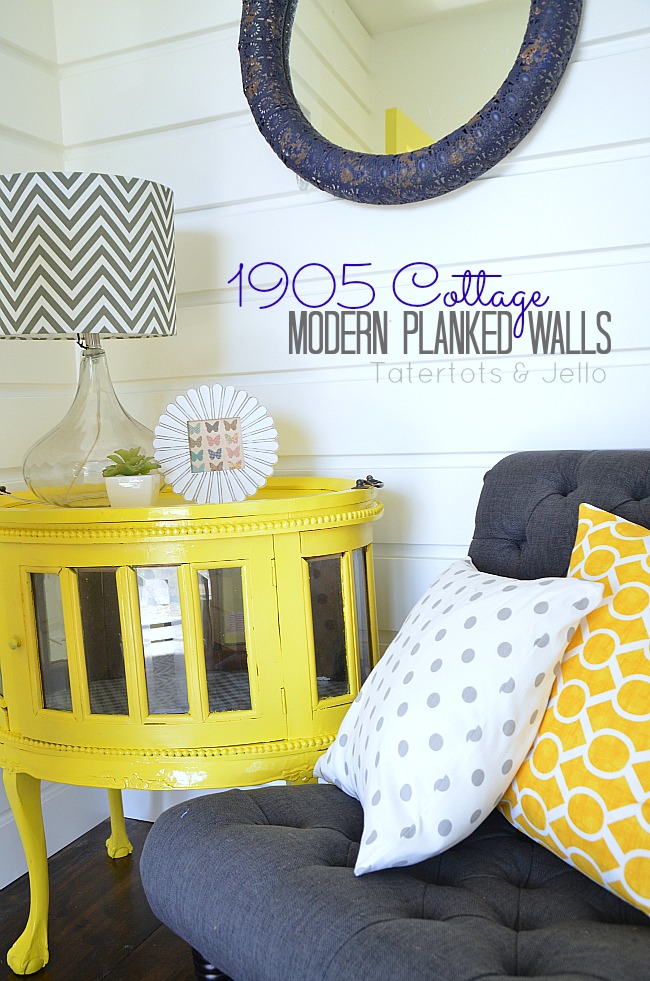
I was so inspired by the hall on the main floor of the 2012 Parade of Homes blogger house that I worked on last Summer! I knew that I wanted to do something similar in my 1905 cottage! (I changed mine a bit from what we did there.)
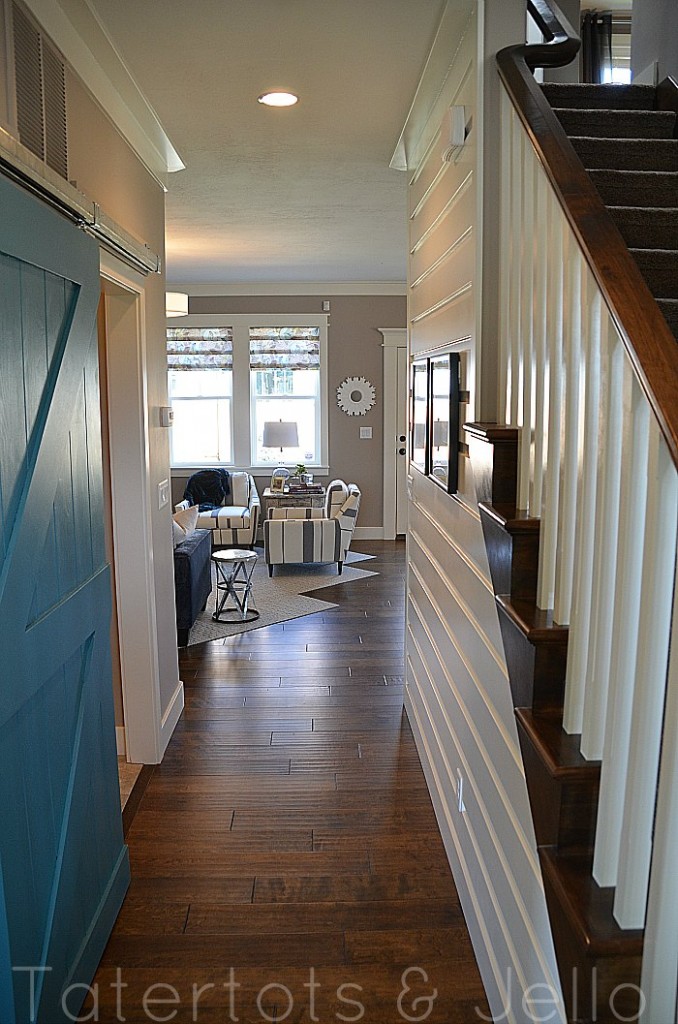
I love this treatment because it adds architectural interest to a room or wall and can even make the room or space look larger. It’s not hard to create and you can run the planks either vertically OR horizontally for different looks.
We planked the entire small entryway at the #1905Cottage and it really adds a POP when you walk into the home.
Last year the entryway was dark and uninviting. The first thing you saw was a big closet. Practical but not welcoming. When we tore the closet down we discovered it was hiding another doorway … which we adjusted a little, but that’s a story for another post.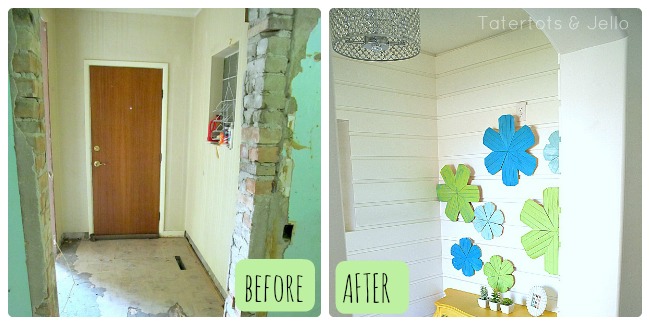
The floor was a mess, as you can see in the before pic. We wished that we could have kept the original wood floor, but whatever adhesive they had used ages ago was nearly impossible to remove. While we managed to refinish the original floors in other rooms, the entry was unsalveageable. Check out how we refinished the floor into a planked floor.
The walls project looked pretty straightforward, and, in theory, they were.
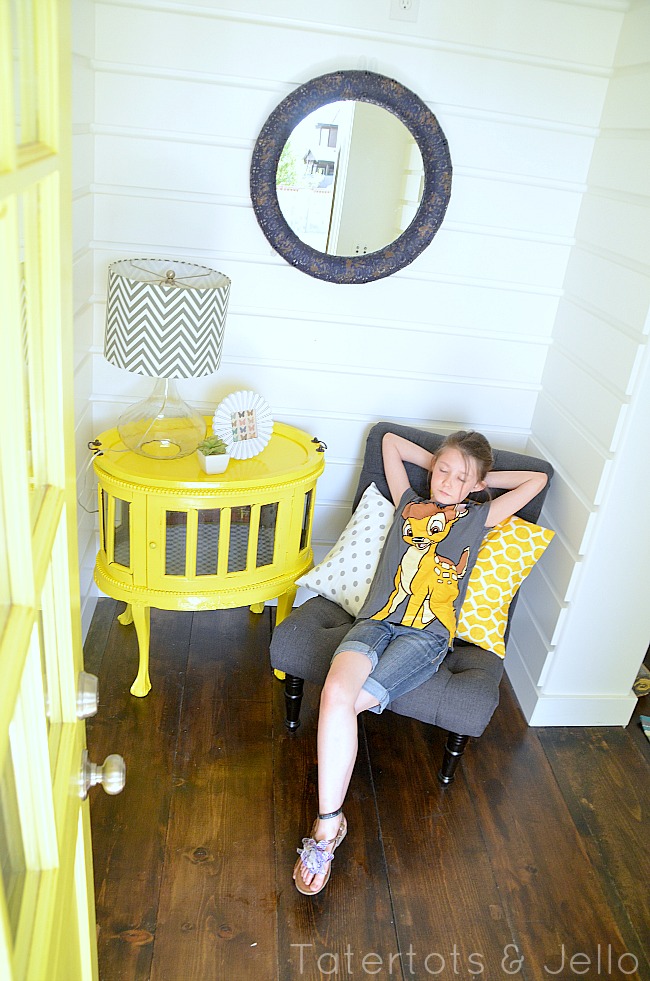
The thing that made these a bit challenging was that even AFTER we shallow-framed and drywalled the walls, hoping to straighten them out, they were still walls on a house that’s over 100 years old. So we had to sometimes do a bit of trimming here and there to make the boards fit better.
I’ll explain the basics of how we did it, and then I’ll talk about some of the challenges we ran into and how we overcame them.
(Plus, I’ll explain why there’s a power plug in the middle of the wall!)
Supplies
- MDF molding – we used the 5 1/2 inch casing molding. It’s basically a flat piece (5/8 thick) with two rounded edges. You can use whatever thickness you want. Use whatever thickness you want for baseboard molding as well.
- Nail gun (we used a pneumatic gun — and we’re happy we did since we used it throughout the house in the remodel. You could just as easily use thin nails and a hammer, but it will take longer.) We used long enough “brads,” or nails, that they would go through the molding, through the drywall, and into the stud.
- Compound miter saw (again, use what you have)
- Level
- Measuring tape
- Stud finder
- Pencil
- White caulk, spackle, fine sandpaper (and a mouse sander) and paint (for the final finish)
- Refreshing beverages

Here’s what we did:
Step 1: Measure & Buy
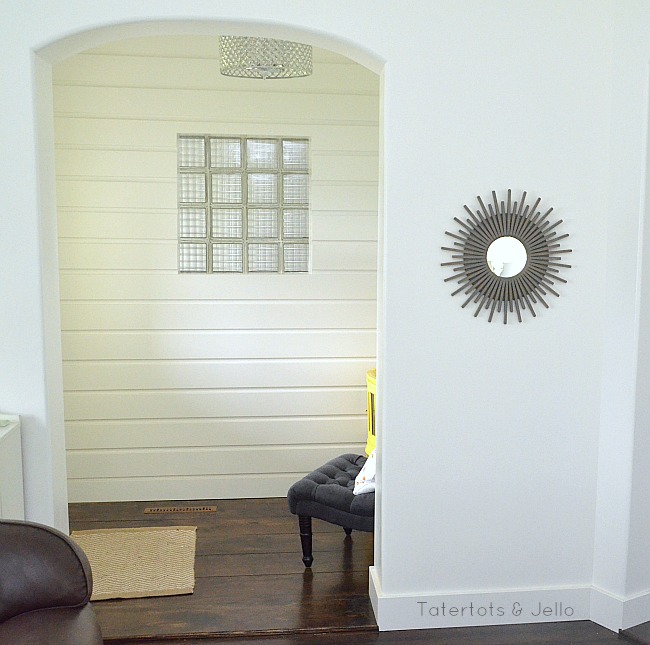
Planned our work and did preliminary board measurements. Since it’s an entry, the walls are not just plain rectangles — the west wall has the front door in it, then immediately to the north there’s a glass block window (providing extra light in the laundry room), to the east a plain wall, and to the south an arched, large opening into the front room. We decided not to do our slats on the wall with the front door in it since it would look odd against the doorframe.
We decided to use the carpenter’s trick of using spacers between each row as we worked rather than try to measure every time, so to make it easy we decided to make the space between rows equal to the molding turned on its end — easy! So that meant each row took up about 6 inches of space (5 1/2 plus 5/8). To make sure we got enough wood, we measured each wall or section, and then divided the vertical measurement by 6. that told us how many boards we needed of each length. Luckily this room is small enough that we did not have to do any seams (put two boards end to end). Once we had that measurement finished, we bought the wood. We made sure we bought enough long pieces of wood that we didn’t have to seam — good to keep in mind. We also find that we have plenty of places to use the leftover molding!
Step 2: Find your Studs
To make your life easier, it’s a great idea right now to get out the stud finder. We used the stud finder to find each of the studs, and marked them from floor to ceiling using a pencil and one of the molding pieces as a straightedge. Now we don’t have to look for the studs every time and can put the nails in where they will pull and hold the molding in places. This is especially important when, like us, your walls are not totally straight.
Step 3: Measure (again) & Start
Once we had the molding in hand, we checked measurements to make sure molding would work out evenly. In other words, if we knew that we were going to have about 6 inches of space (technically, 6 1/8 inches of space), we want that space to work out evenly so we don’t have to cut a board lengthwise — which is both difficult and less aesthetically pleasing. (In other words, it’s hard and doesn’t look good.)
To make our wall work out evenly, we set the baseboard molding to be the right height to make sure our slats worked out evenly. We first installed the baseboard molding. We did the molding along the whole bottom of the room, although we did one wall at a time after that.
Start at the bottom — you’ll see why in a moment. (Our exception to this rule: when we did the North wall, we wanted the board along the bottom of the window to look like a window sill, so we placed that one first and worked our way out from there. Luckily the measurements worked out for us, so it was easy.)
Tip: while we used a compound miter saw, which can make cuts at fancy angles, you don’t need to do that for this project. Just cut both ends with 90 degree cuts. Remember to cut each end of the board: can get beat up in transit/at the store, and even when they’re first manufactured, the finishing doesn’t make the ends perfectly square. Plan on just butting the board up against the next.
Step 4: Add the Next Board and Repeat
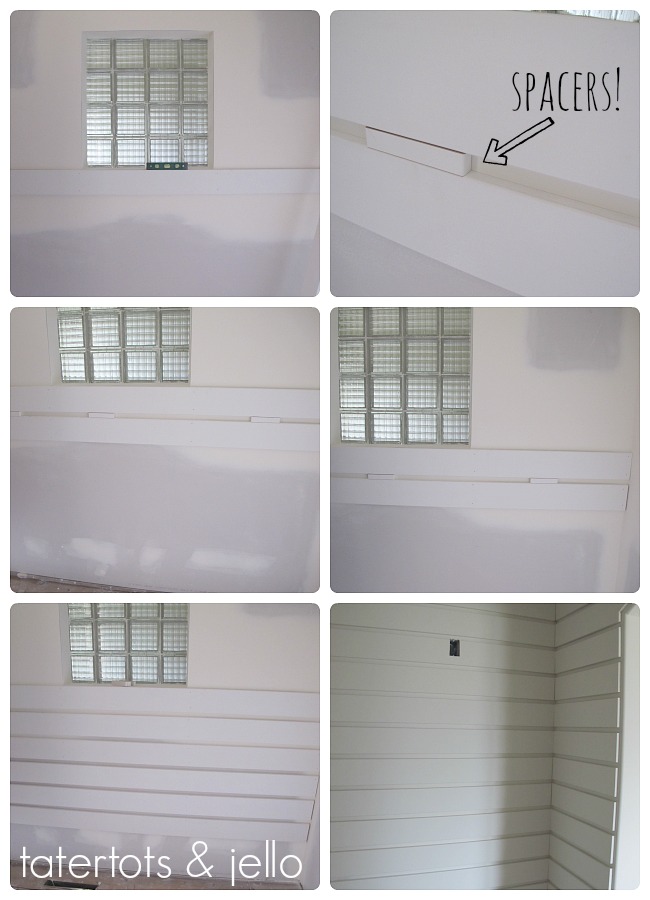
Once we had our square baseboard in place, we cut 5 or 6 pieces of the wall molding to use as spacers. We cut them thick enough to be useful but thin enough that they would rest on top of the previous board below without us having to hold the spacers in place.
We did the easier, square (North) wall first, then the South, and then the East wall between the other two.
We laid the spacers along the top of the baseboard. (If you have regular molding in an existing room, you might have to just measure this first step.
We then measured the horizontal length, cut a piece of molding to fit (cut both ends!). We rested it on the spacers. and checked it with the level just in case. We found we could make very minor adjustments (less than a 16th of an inch) to try to keep the boards level — but not so much that they didn’t look straight relative to each other.
We held the board in place and quickly nailed in place on studs. two nails per stud.
Tip: Where there was no stud, we tried to put the nails in at an angle — two or three — in opposite 45-degree directions, kind of in a “V” shape. This helps pull the molding against the wall where there was no stud. Although we were planning to caulk, we wanted the tightest fit possible.
Now, we just repeated the process. In this older house, we found that we had to measure each row because the walls weren’t totally straight. You may have an easier time. We worked our way up the wall.
We started with the North wall, and then did the South wall. Although we had reframed the room, it was still not square, so we had to push the straight board against the uneven wall in places where it did not perfectly line up.
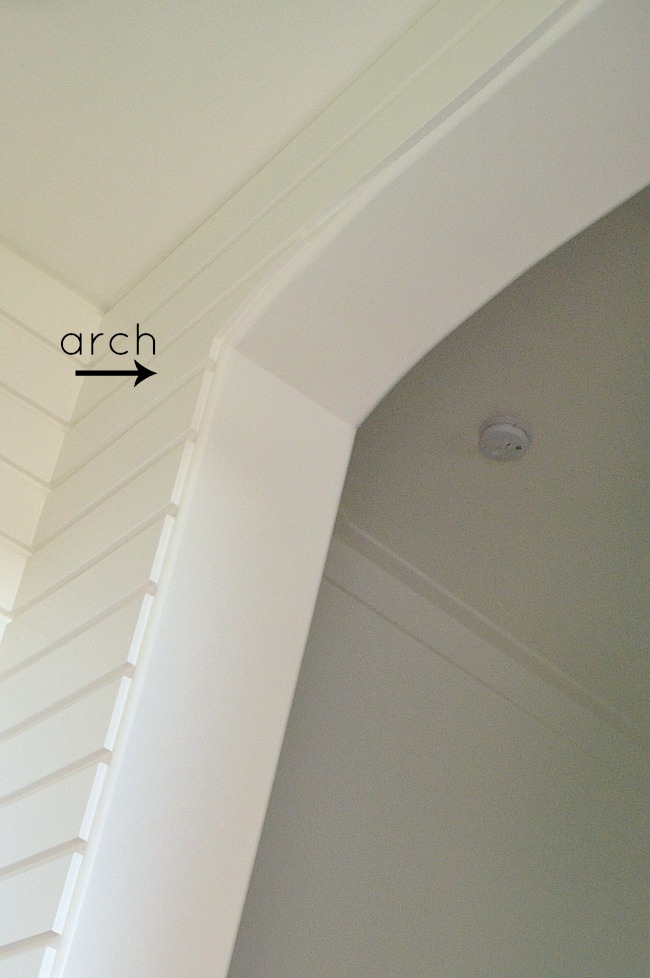
The South wall arch was a pain. We decided not to match it perfectly but to just try to echo the shape, like this:
The East wall was quick and easy ,comparatively. We did this wall last so that we could just slide those pieces in. Of course, since the walls weren’t perfectly straight, we sometimes had to take a little off of each board — even not at 90 degrees exactly, to finagle each board to fit perfectly.
Tip: If you have power plugs in your room, and I bet you do, you may want to measure enough space around them that you can fit a standard plate against the wall, still — so you’ll cut a notch bigger than the hole. If you end up with a plug that is right underneath your molding, you’ll need to be a bit trickier. Plan to cut the hole only a tiny bit larger than the existing plug hole on the wall. (Here’s the pro tip for cutting holes like that in boards: you can start the cut using your drill just inside the corners, and then use a handsaw or jigsaw to cut the rectangular hole.) To comply with standard electrical code, you’ll also want to buy a box extender, which is just a plastic box with no top or bottom that slides into the molding hole you cut and fits into the existing electrical box. You definitely want to use one.
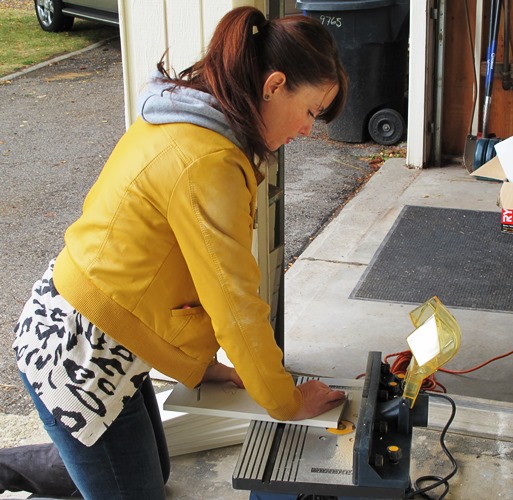
Tip: If you don’t like the edges on a particular board, or if you need to modify one to fit exactly — like if you need to make a shorter board to fill in an uneven space, you can just “rip” the board lengthwise and then use a router to round the edge, like I did:
Tip: To add a more polished look, we routed all of the edges around the arch that we exposed. This eliminated the sharp edges and gave the whole room a finished look. We did the same thing on the ends of the molding around the window.
Step 5: Finish Work
As you might have imagined, the caulking on this project takes a while. We used a power caulk gun (I know!) along the wall-to-molding seams and spackle on the nail holes. We let both dry and then sanded the spackle as smoothly as we could. An important step here is to vacuum up the sanding dust and then use a talk cloth or wet cloths to wipe the surfaces completely clean. Then we painted the walls and … we were done!
Tip: If you do a room as small as this one, you can create a shelf that just slides right into place when you want it. You may have noticed there’s an electrical plug high on the East wall. That’s why it’s there: so that I can slide the shelf in place and use it for seasonal decor … and slide it right out when I don’t want it. We just made sure to choose a board for the shelf that was less than 5/8 of an inch thick — smaller than our spacers — so we can slide the shelf without marking the paint. We just slide it into the grooves!

I just love this planked wall room. It makes me smile every single time I walk in the door!
Thanks for stopping by!
I appreciate it so much.
xoxo


I just LOVE this look! I’m redoing my basement with a cottage-y feel, and this would be perfect. Thank you for sharing this! Pinning it now. 🙂
I’ve seen the planked walls in a few local home tours I’ve taken, and LOVED them. And your DIY looks just as awesome as the expensive, professionally finished walls. Great work!!
Be still my heart… I seriously love these walls that much! Need to find somewhere in our house to do them… Am thinking kitchen. Thank you for your awesome tutorial! Pinning for reference.
Thanks Krista!!!
xoxo
I’m impressed! I have two sons who are carpenters and I know they would be too. I just love what you have done. The colors are wonderful too. You should do a video of your houses interior!
Wall looks amazing! Great Job. Love the color choices.
Emily @ elizabethjoandesigns.com
I am so sad to have torn down our house earlier this year (built in 1903) so I’m living vicariously through you! LOL The spaces are lovely- great job, Jen!!!
You do such a great job with this house! Everything is gorgeous!
Jen you’re truly a gifted DIY! I love this and the most amazing part, how neat and wonderful your walls look. I’m remodeling my bedroom, do you think I could add color to this, or should i play safe and stick with white? I was thinking taupe? Let me know. And bravo on the amazing work!! xxx
Eva
This is great! I love the finished look. I would love to do this in our unfinished room in the basement. Thanks for the great tips!
what a wonderful space to walk into!! it’s just darling Jen!!
Just gorgeous!!!
LOVE IT! To be honest, my favorite part is the colour choice on your furntiture:) I have been looking forward to an opportunity to combine yellow and grey for sometime in my own home:)
if only i could look as stylish as you do when it comes to DIY! these walls look incredible, Jen! you have left nothing undone! simply amazing.
It’s like you read my mind! I was just researching how to make planked walls this weekend, trying to convince my husband we NEED them in the bathroom. Thanks for the great tutorial and inspiration!
Kimber…..you have to do a lot more prep work when planking walls in a bathroom, because of the moisture factor. Be sure to do your research before planking your bathroom walls. Just wanted to share this info. with you. Have a Great Day.
I love this! It is beautiful! Thanks for giving a great step by step on how you did it. I think this needs to go in my must tackle but later pile. lol
Hugs,
Sandra
The Adored Home
oh my goodness, jen, it is beautiful! i LOVE that wall..your house is looking incredible! (plus i love how stylish you are when working with your router!):) YOU are amazing.
Thanks Kiki!! I just love that little place. It’s been so much fun to work on!
xoxo
It’s just beautiful. I love this one & the one you did before. Has such an impact.
O M G this looks freaking amazing! I am in love. Thanks for the tips – now to figure out where to do one of my own……… crap, my list just got longer!
I love the entryway walls…I just finished planking the headboard wall in my bedroom. New paint and curtains too, and it looks great. I love the 1905 cottage and am wondering when we will get the whole house tour???
Cindy
Oh I want to see your bedroom Cindy!! Have you posted it anywhere??
I still have a few projects I am finishing up at the 1905 Cottage but I love the idea of a video of the whole thing. That would be super fun!
xoxo
Hi Jen. unfortunately i haven’t updated my blog in a while. i did post some pics of the room on flickr… you can see them here http://www.flickr.com/photos/cindosha/sets/72157634902969891/
i love it and it is just so cottagy now….