Tatertots and Jello

COLORFUL HAPPY HOME -- Daily DIY, Decor, Craft and Recipe Tutorial

  • My Home
    • 1905 Cottage
    • Daybreak House
  • DIY
    • DIY Projects and Ideas
    • Organizing
    • Tutorials
    • Printables
  • Decor
    • Spring Projects
    • Summer Projects
    • Fall Projects
  • Crafts
    • Kids Crafts
    • Painting Projects
    • Paper Projects
    • Sewing
    • Wreaths
  • Holidays
    • Valentines Day
    • Easter
    • Halloween
    • Thanksgiving
    • Christmas
    • HAPPY Holidays Series!
  • Recipes

Explore

  • my home
  • diy
  • decor
  • crafts
  • holiday
  • printables
  • recipes

Connect

Home » Anatomy of a Snapshot Part II: Eliminating Distractions in your Background

Uncategorized · April 22, 2010

Anatomy of a Snapshot Part II: Eliminating Distractions in your Background

Tatertots & Jello is a participant in the Amazon Services LLC Associates Program, an affiliate advertising program designed to provide a means for sites to earn advertising fees by advertising and linking to amazon.com.
will-collage

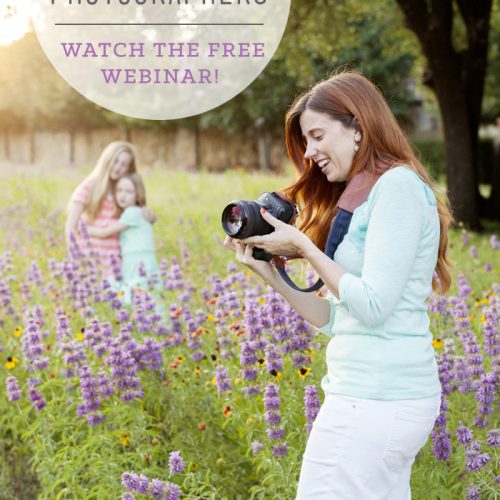
Thanks to everyone who left  love on my blogs last week!  I love photography and am excited to share what I know with others.  There were several questions asked and I hope by the time this series is done, those questions will be answered.

I hope you all looked through your photo files last week in search of chopped limbs and are practicing incorporating all body parts into your current shots.

This week we’re focusing on backgrounds.  In your photos, your subject should always be the focus.  But sometimes we’re not aware of clutter or objects in the background that cause distractions until we’ve got the print in our hands and it’s too late.

In our original Snapshot, can you spot at least 4 distractions?
When I look at this snapshot, my stream of conscience goes a little something like this:
“Those are my boys… 
Hmmm…  I’ve been looking for those shoes…  
That bag matches his shirt… 
I should really change out that painting and put something seasonal on that table…  
It looks like Will is exactly one step shorter than his brother…”
See how the boys are no longer the focus of my photo?  Too many distractions.
Here are three ways to eliminate distractions in your photos:
1.  Declutter the background!
It doesn’t take much to make sure your background is clear of clutter.  When I go into a client’s home to shoot, I always end up rearranging things around the room.  I’ll clear tables of tchotchkes, roll up distracting rugs, move chairs, open or close blinds and move plants.  Anything that will show up in the background that might distract the viewer from the subject of the photo.  Your house does not have to be spotless to be an ideal location for a portrait.  That’s why I assure moms, when I come to shoot their newborns, that they do not need to scrub their house for our shoot.  It takes no time at all to create a clutterless space by moving a few things out of the way.  Here are a few examples of clutterless backgrounds.
2.  Fill your frame with your subject!
Don’t be afraid of getting close to your subject and eliminating as much background as you can. I think that’s one of the most common mistakes made when shooting people.  Unless the background adds context to your image, you don’t need it.
Even though this snapshot has too many mistakes to become a portrait, look what happens when I get closer and fill my frame with my subjects. The boys become the focus of the picture again.
Here are some more examples of filling your frame with your subject.
3.  Open up your aperture!
(We’ll discuss aperture in detail in week 6)

The aperture of a lens is the diameter of the lens opening and is usually controlled by an iris. The larger the diameter of the aperture, the more light reaches the film / image sensor.

Aperture is expressed as F-stop. The smaller the F-stop number (or f/value), the larger the lens opening (aperture).

Aperture is what allows you to hone in on your subject and leave the rest of the photo out of focus.  If you have distractions in your background that you have no way of removing, opening up your aperture is a great way of eliminating them by blurring them.  For example, if you were taking a picture of someone sitting in the bleachers at a football game with lots of other people around and behind them, shooting with an open aperture would allow your subject to be in focus while the people behind them would be blurry.

If you know how to change the aperture (f-stop) of your camera, set it to a LOW number (f/1.4-f/4).  Remember, the smaller the F-stop number (or f/value), the larger the lens opening (aperture.)

Here are some examples of how your images look when you open up your aperture.


So, this week as you’re out shooting, pay attention to what’s behind, in front of, and around your subject.  And try out some of these ways of eliminating distractions in your photos.

  • Declutter your background
  • Fill your frame with your subject
  • Open up your aperture
You’ll be one step closer to turning your snapshots into portraits!
Next week:  Composition!

Wendy

 Thanks Wenderful! 
I can’t wait for next week!
For more photography ideas and inspiration,
make sure to check out her blogs:
Wenderful and 
Wenderful 365!
Happy Earth Day!
Some Projects Celebrating Earth Day will be coming up later on!
 XOXO
Tweet

Posted By: Jen · In: Uncategorized

More Inspiration!
Happy Earth Day!

You’ll Also Love

How to Make a Shadow Box Photo Travel Frame. Going on a big trip this summer? Display those special moments in your home by creating a ShadowBox Photo Travel Frame!How to Make a Travel Shadow Box Photo Frame!
make a guest book for your homeMake a Guest Book for YOUR Home
Free webinar on how to be the BEST photographer for your home, family and/or business! Kristen Duke talks about must-have lenses.FREE Webinar – Must-Have Lenses for Mom Photographers!

Comments

  1. Kelley says

    April 23, 2010 at 6:03 PM

    Great tips thank you!

  2. Ana [email protected] Get Craftin says

    April 23, 2010 at 5:25 AM

    Oh my heck those baby pictures are to die for!!! These are really helpful tips. Thank you so much!!

  3. bbcd mama says

    April 23, 2010 at 3:20 AM

    So now you have me wanting to climb into my front-load washer, and have my husband take a picture of me like that!

    SO FUN!

  4. Jesse says

    April 23, 2010 at 2:54 AM

    Super helpful! Thank you for sharing this series!

  5. Kelli says

    April 23, 2010 at 2:15 AM

    I LOVE that you are doing these tips…thank you.

  6. Michelle M. says

    April 22, 2010 at 9:28 PM

    I LOVE all of these tips! Thank you so much for featuring Wenderful and her amazing talent!

  7. jennykate77 says

    April 22, 2010 at 9:02 PM

    SUCH wonderful photos and very helpful tips!!

    Hope you're having a great week, Jen!♥

  8. dimpleprints says

    April 22, 2010 at 8:37 PM

    thanks for the tips! Carli

  9. Laura says

    April 22, 2010 at 8:32 PM

    That you for the great information.

    I wanted to tell you that I gave you the Sunshine Award over on my blog!

  10. Tricia says

    April 22, 2010 at 7:00 PM

    Such fantastic tips! I look forward to continuing this series.

  11. Lacy Key says

    April 22, 2010 at 6:45 PM

    Thank you for another great tip!

  12. Meet Virginia says

    April 22, 2010 at 6:18 PM

    Holy Gorgeous! You are amazing!!

    ~Morgan

    Meet Virginia!
    Meet Virginia!
    Meet Virginia!

  13. MiMi says

    April 22, 2010 at 6:13 PM

    Oh my goodness! I've been trying to read my camera instructions and find out what Fstop means for a week! Now I know! Thank you so much!

  14. Angel Muly says

    April 22, 2010 at 6:03 PM

    Thank you for all the great tips!! I will definitely be trying them. Love and Blessings, Angel
    allthemus.blogspot.com

  15. heldam says

    April 22, 2010 at 5:42 PM

    Thanks so much for this series!! I am always struggling to capture my kid's beautiful lives in the ways I see on lovely blogs such as yours. I can't wait to get home and play with my F-stop.

  16. Jenny says

    April 22, 2010 at 5:04 PM

    More great tips, thanks!

  17. Tamber says

    April 22, 2010 at 4:22 PM

    Thank you so much for organizing this series. It is my weakest part of blogging. I really wish I could photograph better, but it just doesn't happen. Hopefully by the end of the series I will be a little better.

  18. pk @ Room Remix says

    April 22, 2010 at 3:45 PM

    She's so talented and I love all of this great advice! That dryer photo is too much fun… 🙂

  19. Liz @ Sugarplum Creations says

    April 22, 2010 at 3:17 PM

    I absolutely love this series! Anything to make me a better phtogorapher. Thanks!!! 🙂

  20. KMfamily ;-) says

    April 22, 2010 at 2:59 PM

    Awesome Awesome Awesome!!
    Keep the info coming!!

  21. Pretty Things says

    April 22, 2010 at 2:51 PM

    Awesome article!

  22. Kelli @ RTSM says

    April 22, 2010 at 2:37 PM

    Great tips and great pictures! I love the one with the dryer:)

  23. Lisa says

    April 22, 2010 at 2:16 PM

    Very useful tips!
    Thanks
    Lisa

  24. The Buchingers says

    April 22, 2010 at 2:11 PM

    Love this series! I can't wait till next week! Great tips!

    Emileigh

  25. My Mercurial Nature says

    April 22, 2010 at 2:10 PM

    Love these tips (now I wish I had a better camera)!

  26. Soulfuldancer says

    April 22, 2010 at 1:56 PM

    thanks so much for the ideas. My 50mm lens is making it so much easier to eliminate those distractions! LOVE LOVE LOVE the pic of the mom in the dryer!

  27. Carrie says

    April 22, 2010 at 1:53 PM

    Loving these tips! I'm a horrible photographer!

  28. Carrie says

    April 22, 2010 at 1:53 PM

    Loving these tips! I'm a horrible photographer!

  29. KRISTINA CIPOLLA PHOTOGRAPHY says

    April 22, 2010 at 1:50 PM

    Thanks so much for the great tips! Love the newborn photos, so precious! 🙂

  30. Art by Ruth Sagrario Macotela says

    April 22, 2010 at 12:50 PM

    Good Morning Jen, Thanks for these tips i'm learning a lot, Thank your sister for sharing her knowledge too ♥

  31. Andrea says

    April 22, 2010 at 12:48 PM

    Great tips!
    Andrea @ TheTrainToCrazy.com

  32. ourlifeinaclick.blogspot.com says

    April 22, 2010 at 12:45 PM

    Thanks for this easy to understand lesson. I've had my Canon Rebel XT for 4 years and just started playing with the manual setting since I started blogging and reading blogs.

    Jennifer loving your blog! I just started blogging about a month ago and I'm loving it!
    -heather

  33. [email protected] says

    April 22, 2010 at 12:44 PM

    Thank you for more great photography advice!!

  34. Cheryl @ a pretty cool life. says

    April 22, 2010 at 12:42 PM

    I really love reading these posts.

    Now I must get rid of my lowly point and shoot so I can take better pics!!

  35. Becca says

    April 22, 2010 at 12:38 PM

    I LOVE LOVE LOVE this series!! Your sister is SO VERY talented- I've been following her 365 blog for a few months and she never ceases to amaze me with her beautiful shots!!

    Thanks for featuring her! I love learning from her!!

    ~Becca

  36. Amanda @ Serenity Now says

    April 22, 2010 at 12:36 PM

    I {heart} this series big time! Great tips. 🙂 My question for Wendy is, can you adjust the aperture on a regular old point and shoot digital camera (I have a Sony Cybershot)? 🙂

  37. Rebekah Greiman says

    April 22, 2010 at 12:28 PM

    Thanks for featuring my scarf shirt. Let me know how it works out! I loved the Wendy installment, by the way. What a great photographer!

  38. Red Door Home says

    April 22, 2010 at 11:47 AM

    Thank you again! Great tips.

  39. Love Being a Nonny says

    April 22, 2010 at 11:14 AM

    Great tips! Thanks so much!

Hi! I'm Jen Hadfield. I'm a mom of 5 restoring an 1891 home in the heart of Salt Lake City. I love being creative and sharing simple ideas to make your life easier and more beautiful!

Receive the Latest Crafts, DIY, Recipes and More in your INBOX!

Follow us on Pinterest! It's awesome!

Top Posts & Pages

Copycat Panera Spinach and Artichoke Egg Soufflés - SO good!
Kids Outdoor Easter Scavenger Hunt - with printable clues!
Spruce up Your Outdoor Space with a DIY Recirculating Fountain! (tutorial)
DIY Black Painted Window Frames
How to Make a Simple Garden Planter Box
How to Change a Recessed Can Light into a Pendant Light with No Remodeling!


Popular Posts

  • Copycat Panera Spinach and Artichoke Egg Soufflés - SO good!
    Copycat Panera Spinach and Artichoke Egg Soufflés - SO good!
  • Kids Outdoor Easter Scavenger Hunt - with printable clues!
    Kids Outdoor Easter Scavenger Hunt - with printable clues!
  • Spruce up Your Outdoor Space with a DIY Recirculating Fountain! (tutorial)
    Spruce up Your Outdoor Space with a DIY Recirculating Fountain! (tutorial)
  • DIY Black Painted Window Frames
    DIY Black Painted Window Frames
  • How to Make a Simple Garden Planter Box
    How to Make a Simple Garden Planter Box
  • How to Change a Recessed Can Light into a Pendant Light with No Remodeling!
    How to Change a Recessed Can Light into a Pendant Light with No Remodeling!
  • 12 Must-Have Items to Pack on an Alaskan Cruise!
    12 Must-Have Items to Pack on an Alaskan Cruise!

As seen in


Amazon Affiliate

Tatertots & Jello is a participant in the Amazon Services LLC Associates Program, an affiliate advertising program designed to provide a means for sites to earn advertising fees by advertising and linking to amazon.com.
  • About Me
  • Advertising
  • Get Featured

Copyright © 2023 Tatertots and Jello · Privacy
This site is a place for positive discussion and ideas. Negative talk, comments that disparage others, and similar are not welcome and may be removed.