Hi TT&J readers! I’m Holly from My Sister’s Suitcase and I’m back this month to show you guys a simple way to update a little girl’s bedroom with this whimsical yarn tassel bed skirt!

When I first discovered tissue tassels, I made them for parties, holiday decor, and even created a tissue tassel mobile for my baby’s nursery. The downside of the tissue paper tassels is that they can get torn or smashed easily. I wanted to incorporate them in my toddler’s bedroom but I knew she would ruin the the tissue ones so I went with YARN instead!
 I found this awesome Neon Pink yarn at JoAnn’s (Lion Brand), along with some Red Heart boutique yarns on clearance (Trio for the blue tassels, and Sashay for the silver ones). Here’s what I used to make my tassels:
- Yarn (Lion Brand – 81 yard skein made 6 tassels)
- Something to wrap your yarn around that is the desired length of your tassel (a clipboard worked perfect for these 8″ tassels)
- Scissors
The process for making a yarn tassel is so easy! It is a perfect thing to do while you are watching a movie or catching up on Netflix.  1. Take the end of the yarn and hold it in place on the front of the bottom of the board. Now wrap it over the front and around the clipboard. Keep wrapping it until you have the desired thickness for your tassel. I wrapped mine 18 times. 2. Cut the yarn at the bottom of your board. 3. Now you will cut a small piece of yarn to tie the tassel together. Mine was about 8 or 9 inches but I just eyeballed it.
  4. Thread the smaller piece of yarn underneath your rows of yarn and pull it to the top of the board. 5. Tie it together once, and hold the ends securely. Now flip the board over to the other side (still holding on to the yarn at the top.)
  6. Now you are ready to cut! Cut the yarn carefully across the bottom of the board, and that’s it! Starting to look like a tassel, huh? Make sure the ends are even and then tie the top once more into a knot to make it secure.
  7. Now you will cut one last piece of yarn, a little longer than double the length of your tassel. Just eyeball it! 8. Use this piece to tie off your tassel, about an inch down from the top. Tie in a knot and trim the ends to match your tassel length. ALL DONE!! Once I got going, it only took me about 3 or 4 minutes per tassel. Aren’t they gorgeous?
Here is what my daughter’s bed skirt looked like before:
 It is really cute, but I wanted to add some color since her comforter is also white. I decided to add my tasssels at the top of the bedskirt for a few reasons… First, it was really easy to attach them and they are not permanently sewed on, so I can still take them off and wash the bedskirt easily. I used regular masking tape to attach them to the part of the bed skirt that’s hidden by the mattress.
  Second, Her comforter is a twin size on a full bed, so it doesn’t hang much over the sides. The way I attached the tassels, I can see the full tassel and it looks like they are almost part of the comforter when her bed is made. I like how it looks both ways!

My daughter loves the new “icing” on her bed!

You can check out some other projects in my daughter’s room here. Thanks for having me Jen!

************
Thanks Holly! The tassels added to the bedskirt make it so fun! I love the bright colors, and the whimsical feel to your daughter’s bed. What little girl wouldn’t love that? Holly has amazing ideas on her blog, My Sister’s Suitcase. Here are a few of her recent projects that I think you should check out:
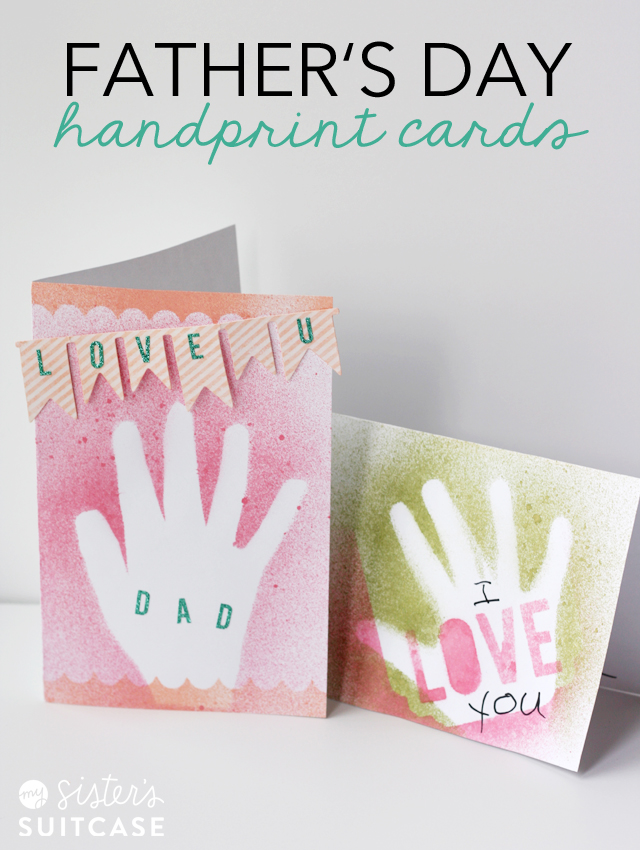
These Easy Handprint Father’s Day Cards are such a good idea for a sweet, personalized card for Father’s Day!
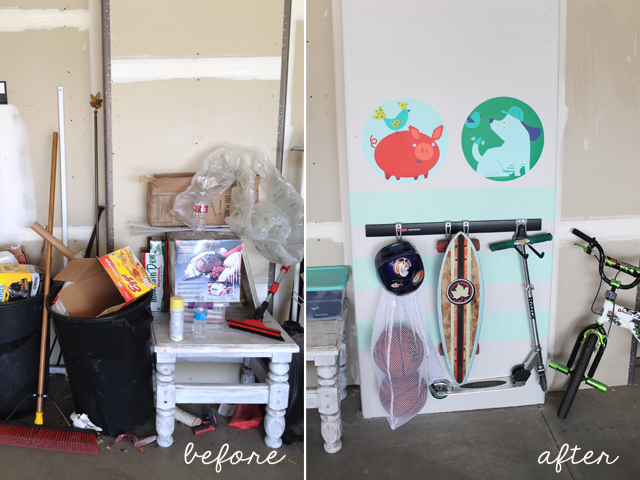
And if you’re looking for a good summer organization project, this post with 4 Ways to Refresh Your Garage for Summer is a great place to start!
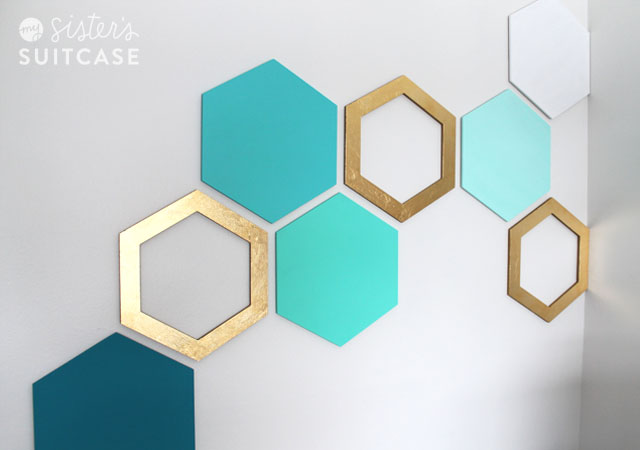
They also just opened their own Etsy Shop where you can buy amazing home decor like this Hexagon Accent Wall.


I got the cheapo white fabric from Walmart and then I found the grey at Joannes. It was like 1.25 a yard or something crazy cheap like that. It was kinda ugly on the bolt… but I looked past it’s ugliness and saw it’s potential. haha 😉
súper idea. preciosa, te imaginas en color otoño para el cuarto de uno felicitaciones gracias por compartir
This is such a pretty idea! I really love the colour choices too x
How many tassels did you use for the bed? I’m trying to estimate how much I will need for my bed, but I have a queen size bed.
On my daughter’s bed, which is a full size, I used 42 tassels. I have 17 on each of the long sides, and on the front side I have 8. I had to space them out more on that side because of the cast iron bed. I wanted to have them hang in between the iron bars on the front. I hope that makes sense! You could always space them out more so you wouldn’t have to make as many tassels 🙂
SO fun – what a great idea!
pretty! thats a great way to add color to a bed! pinned!
That was soo beautiful and creative!! I bet your daughter loved it!!
So so cute!! LOVE the colors!
These are simply too cute! I don’t have children but I love this idea even on a headboard of a bed or a bulletin board to dress it up a little. I wonder how they would look with different types of fabric strips or yarn.
Thanks for sharing!
xo Rachel
Great idea!! It looks lovely
L x
http://workingmumy.blogspot.com
This is absolutely adorable! Love everything about it.
Absolutely Adorable! Pinned!
Holly-I love tassels almost as much as I love pom poms! And I love that you didn’t do anything permanent. Where did the bed skirt come from? It’s adorable. And the pom pom comforter?? They’d both look amazing in my daughter’s room.
Sami,
The bedskirt and pom pom comforter are both Pottery Barn brand, but I got them at DownEast Home (http://www.downeasthome.com/) in Idaho Falls. I got amazing deals on both because they were clearance and an extra 30% off when I purchased them! I seriously love that store!
I love this tassel bedskirt! It is too bad I have cats, they would think the tassels are toys!
What a cute way to add some pops of color!! Love it!
That is super cute!! I never really thought about how tassels were made but you can bet even if I don’t make this particular project, I’m bookmarking it for possible tiebacks for the new drapes!