Wow… am I really posting one of my projects on Tatertots & Jello? After months of stalking this awesome blog (not in a creepy way of course) I am so excited to be spot lighted!
So just a little about me, since most have probably never heard of me or my little blog. My name is Robyn and I stumbled in to the crafting/blogging world after my hubby and I purchased our new home. I needed ideas to decorate and one of my friends directed me to the world of crafting and D.I.Y blogs. I fell in love! Now with any free time I have, I craft. I think my husband has gotten used to the fabric scraps, sewing shears, and glue gun left laying around. I had been cluttering up our fam blog with all things creative, but recently created a solely craft blog of my own, Something Pretty. Believe me, it’s a project in the making, but feel free to check it out.
So my project is a headboard made from an old window pane. I love being thrifty, so when I saw this at a garage sale for FREE I had to take it. After racking my brain for where to put it and how to re vamp it, I realize it would be the perfect size for a double bed headboard.
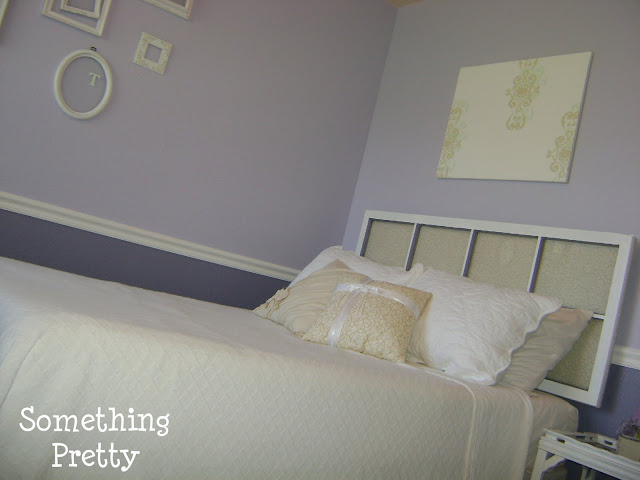 What you’ll need:
A window pane (or you can skip that part and go straight for the MDF)
MDF
Four 2′ pieces of 2″x2″ (especially if you don’t have a saw like us)
Fabric
Batting
Foam (if you are nixing the window pane)
Screws and a staple gun

I started by sanding, priming and repainted the window pane to match the guest room. After painting I saw that the blue paint still showed through from the back side. Just take a razor blade and start removing. As you can tell, I had A LOT to remove.

After you have it all painted set it aside and start on the MDF. If you have a window pane you can just cover your MDF with a layer of batting and fabric. If you are going sans pane, put in the extra foam then batting covered by the fabric so it is cushy.
Pull fabric and batting taught and staple around edges. I did the top and bottom first and then each side so that I didn’t pull the fabric in a skewed way.
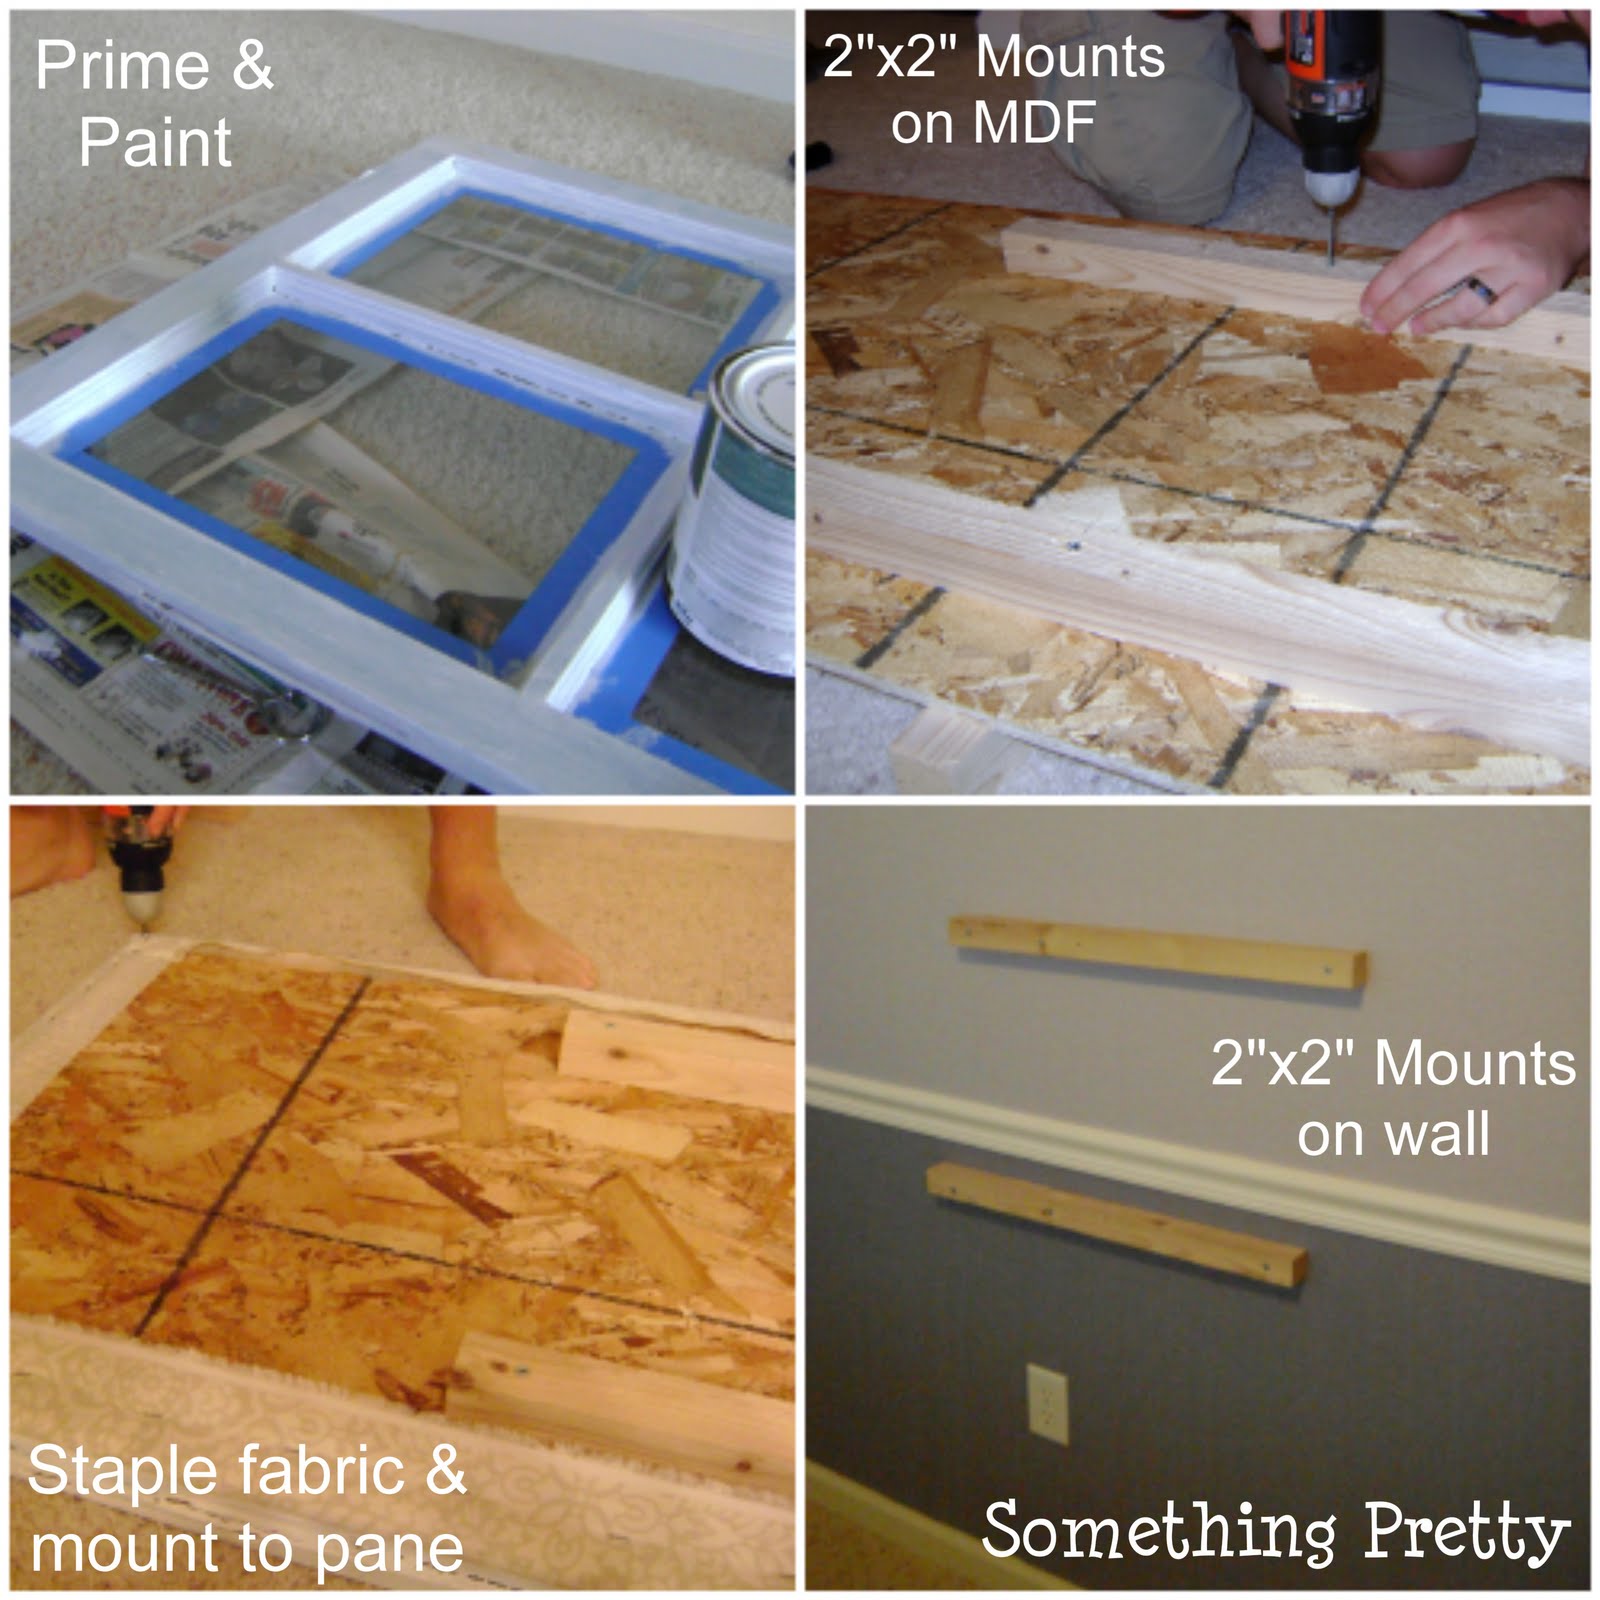
Before or after you put the fabric on (we did this before) mount 2 of the 2″x2″ pieces to the center of the MDF. Make sure they are centered! This will be used to mount the headboard to the wall.
After the fabric is on, mount the back (the fabric covered MDF) to the pane using screws every few inches.
* On a side note: I found it worked best to stretch the fabric and batting taught while drilling the screw holes so that you don’t end up with these little guys on your hubby’s drill bits.
Now comes the mounting part. Because we don’t have a saw we had to do things a little differently. Take the remaining two 2″x2″ pieces and screw them into the wall, centered over the bed and spaced far enough apart so that the headboard mounts rest on each wall mount (As shown above). Once in place screw the two mounting pieces together from the top.
Now your headboard is set and ready to be used…or just looked at 🙂

Thanks so much Jen for letting me share this on your blog. And I hope all of you come see what I’ve been crafting at Something Pretty!





Stunning. Very beautiful. I love the refab!
Love all the ideas….from the headboard to that fabulous shower curtain.
Thanks
I will never look at an old window frame the same again.
🙂 And the ruffled shower curtain is cute!!
What a great idea! Nice job!
I really want to try this. Please forgive me, I must be an idiot, but what is MDF? I don't understand.
Very cute! I'm off to go check her out!
That headboard is amazing! I have a few old windows in my house, but I never thought to turn them into something like that! Great job! And I love your bathroom too!