How to Create a Beautiful Gallery Wall Using a Butcher Paper Template. Create a beautifully collected gallery wall with perfect spacing using this easy butcher paper template method, plus a clever way to disguise an awkward light switch.
How to Create a Beautiful Gallery Wall Using a Butcher Paper Template
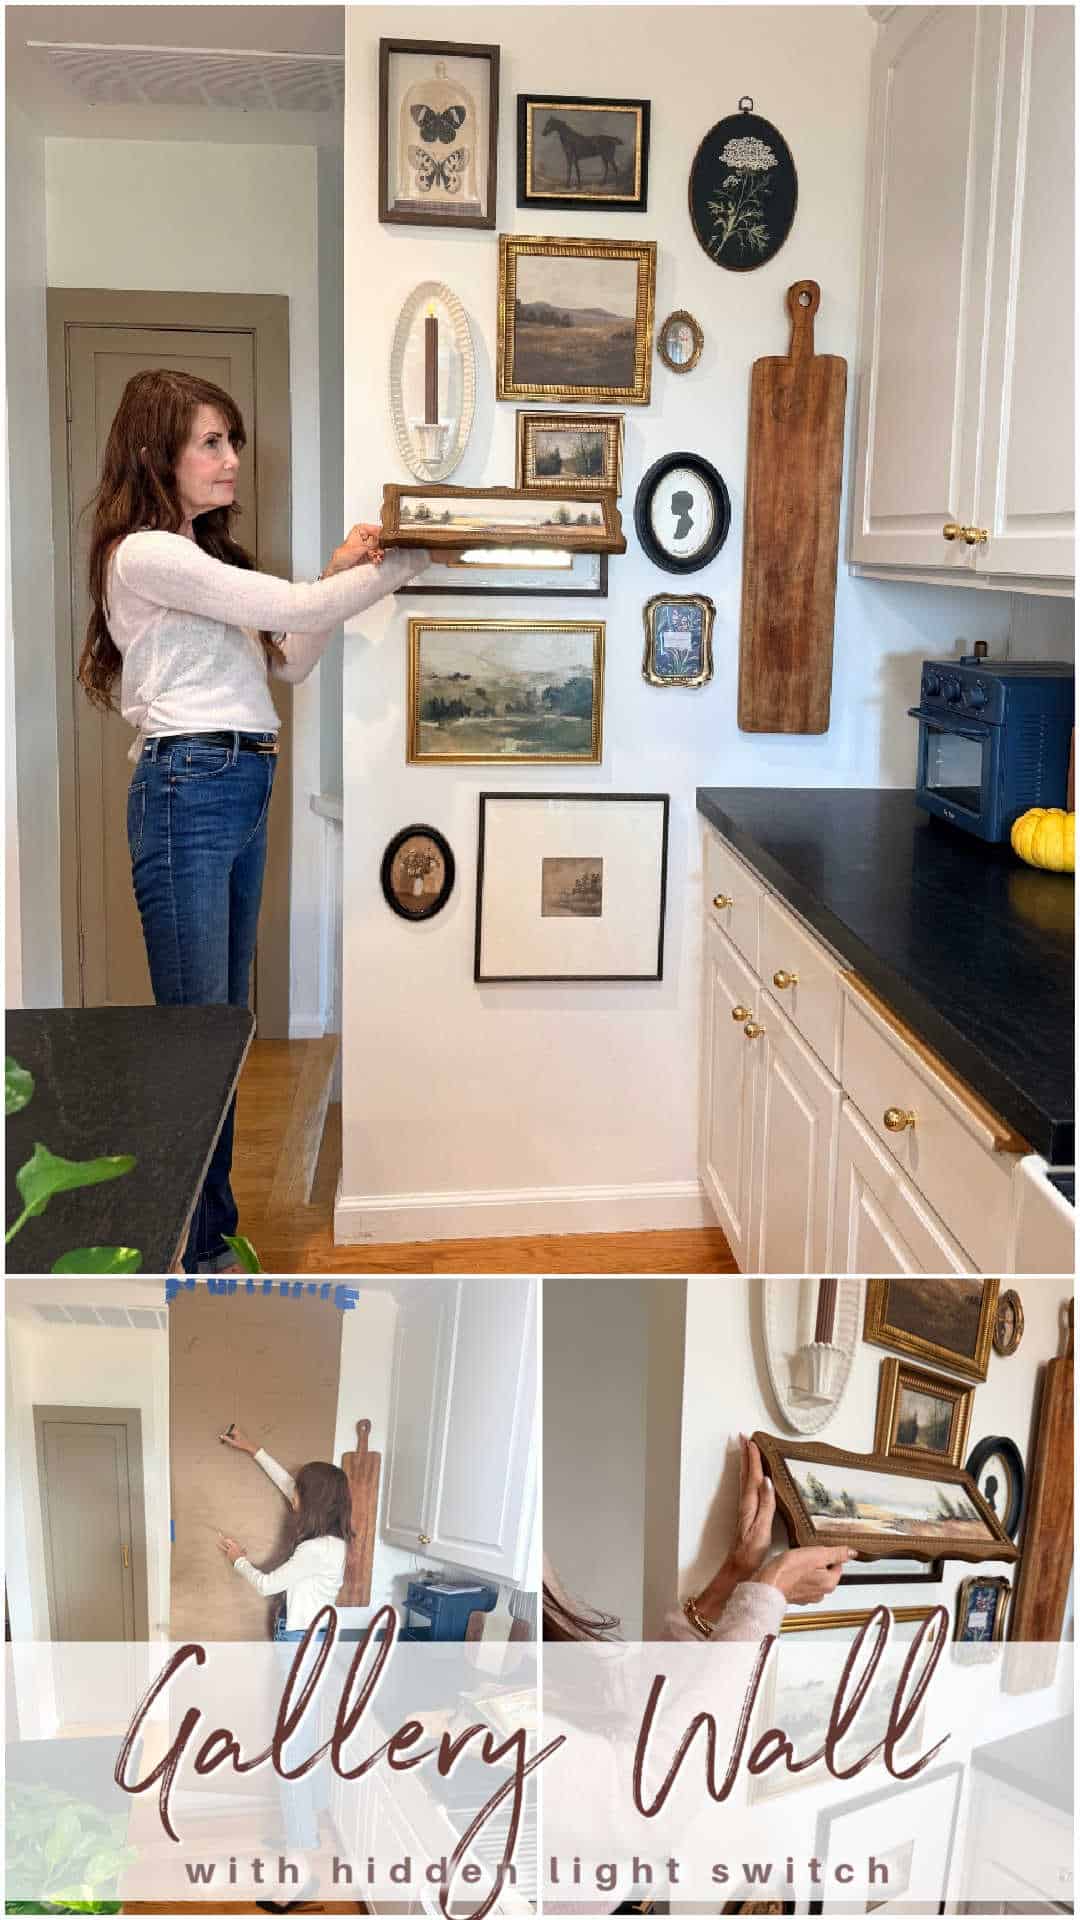
A Gallery Wall Made for My Small 1932 Tudor Kitchen
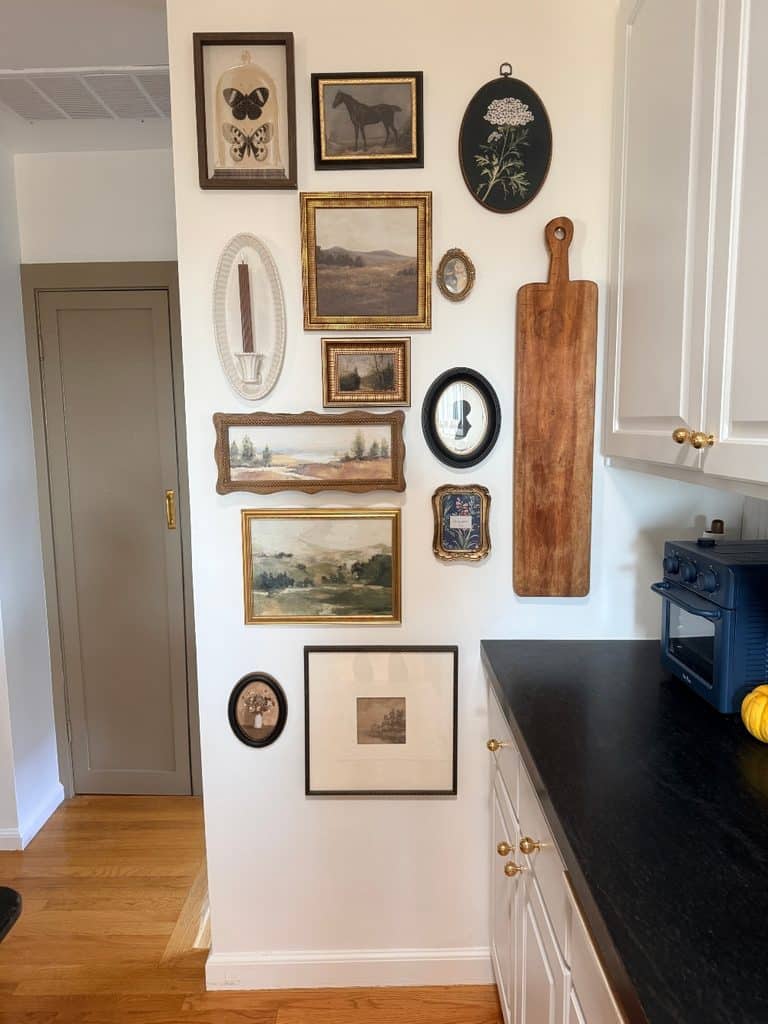
One of my favorite things about living in an older home is finding creative ways to work with all of its little quirks. My 1932 Tudor is filled with beautiful original details, but it also has a few things that can be challenging to decorate around.
The wall in our small kitchen is a perfect example. A huge five-gang light switch sits right in the center of it. Because we have original lath-and-plaster walls, moving five switches would have been difficult, messy, and expensive. Instead of fighting the placement, I decided to turn the entire wall into something beautiful.
Reusing Art from My Previous Home
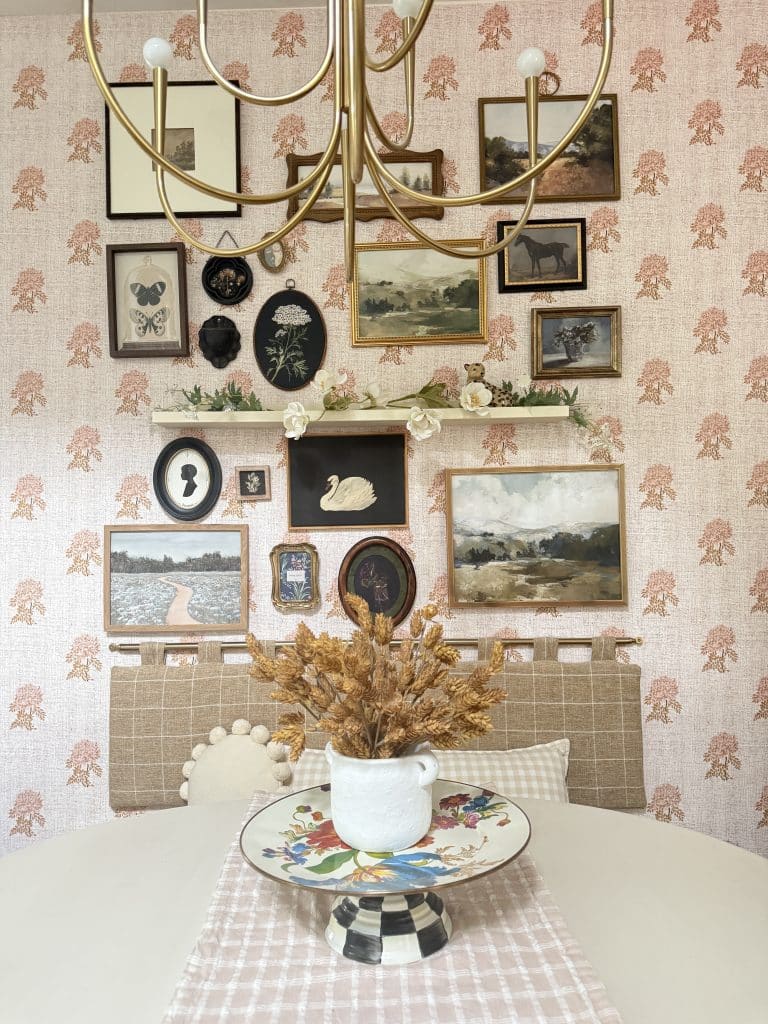
I brought out a collection of paintings that I had displayed in my last home and started experimenting with different arrangements. I love reusing meaningful pieces because they instantly make a new home feel familiar, layered, and collected.
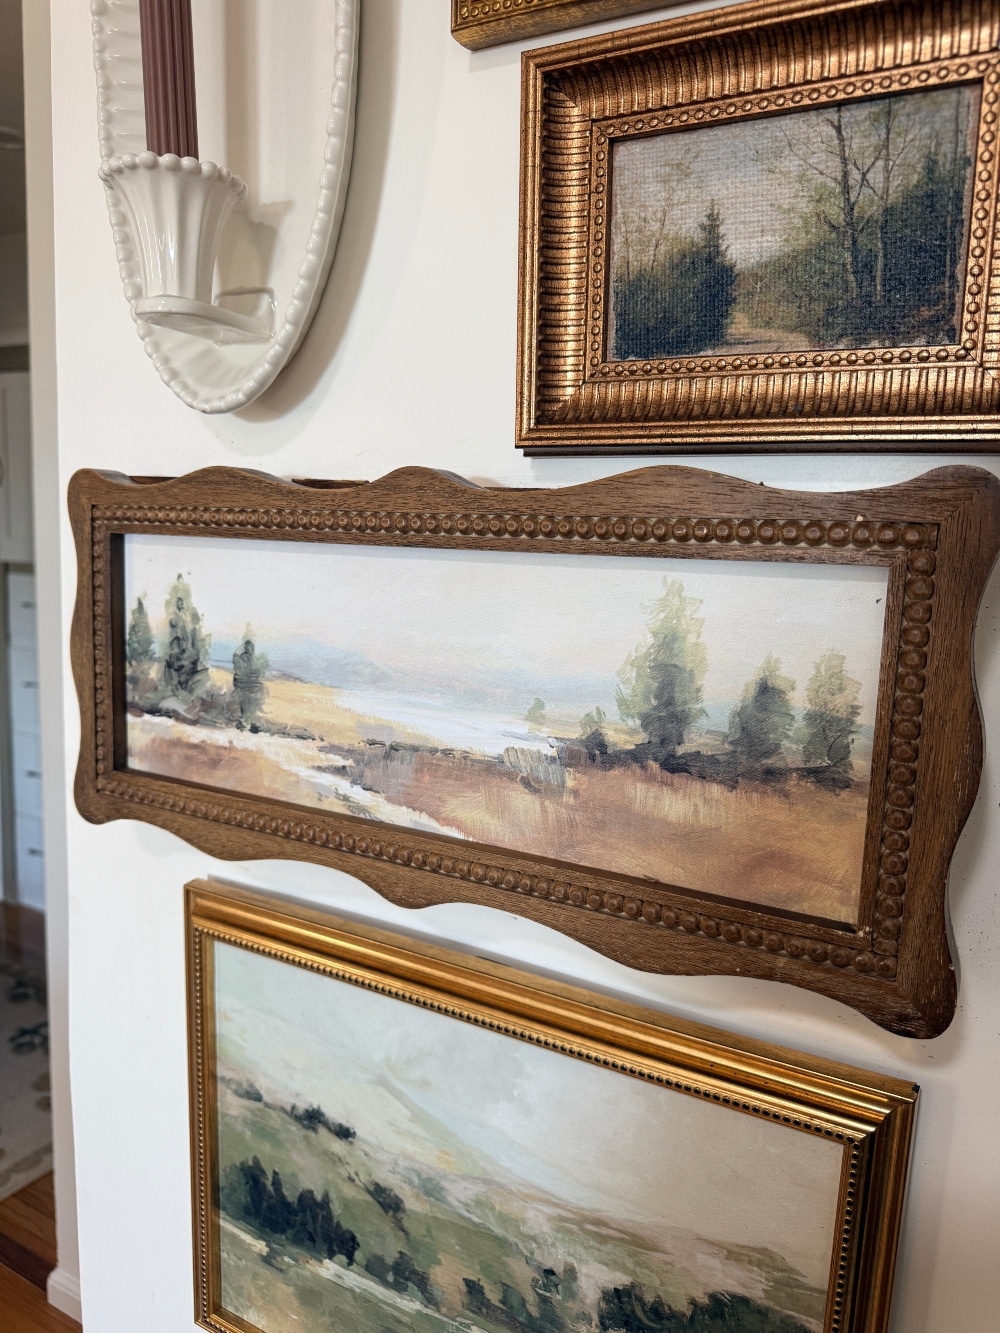
Gallery walls are also a wonderful way to mix art that might not work anywhere else on its own. The paintings do not need to match perfectly. Repeating a few colors, wood tones, or frame finishes will help a varied collection feel intentional.
Hiding a Five-Gang Light Switch Behind a Painting
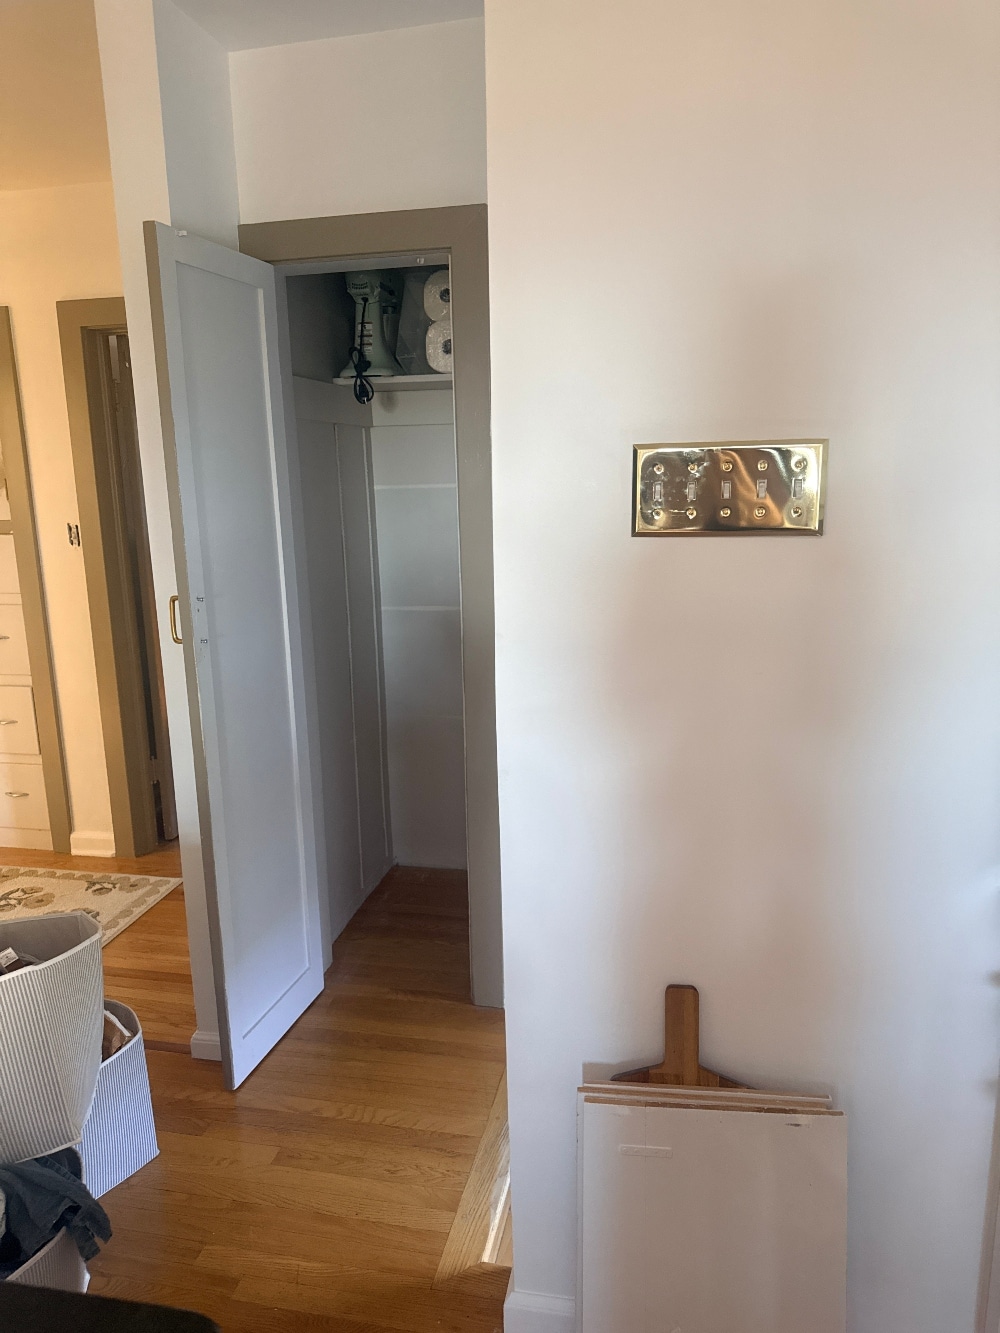
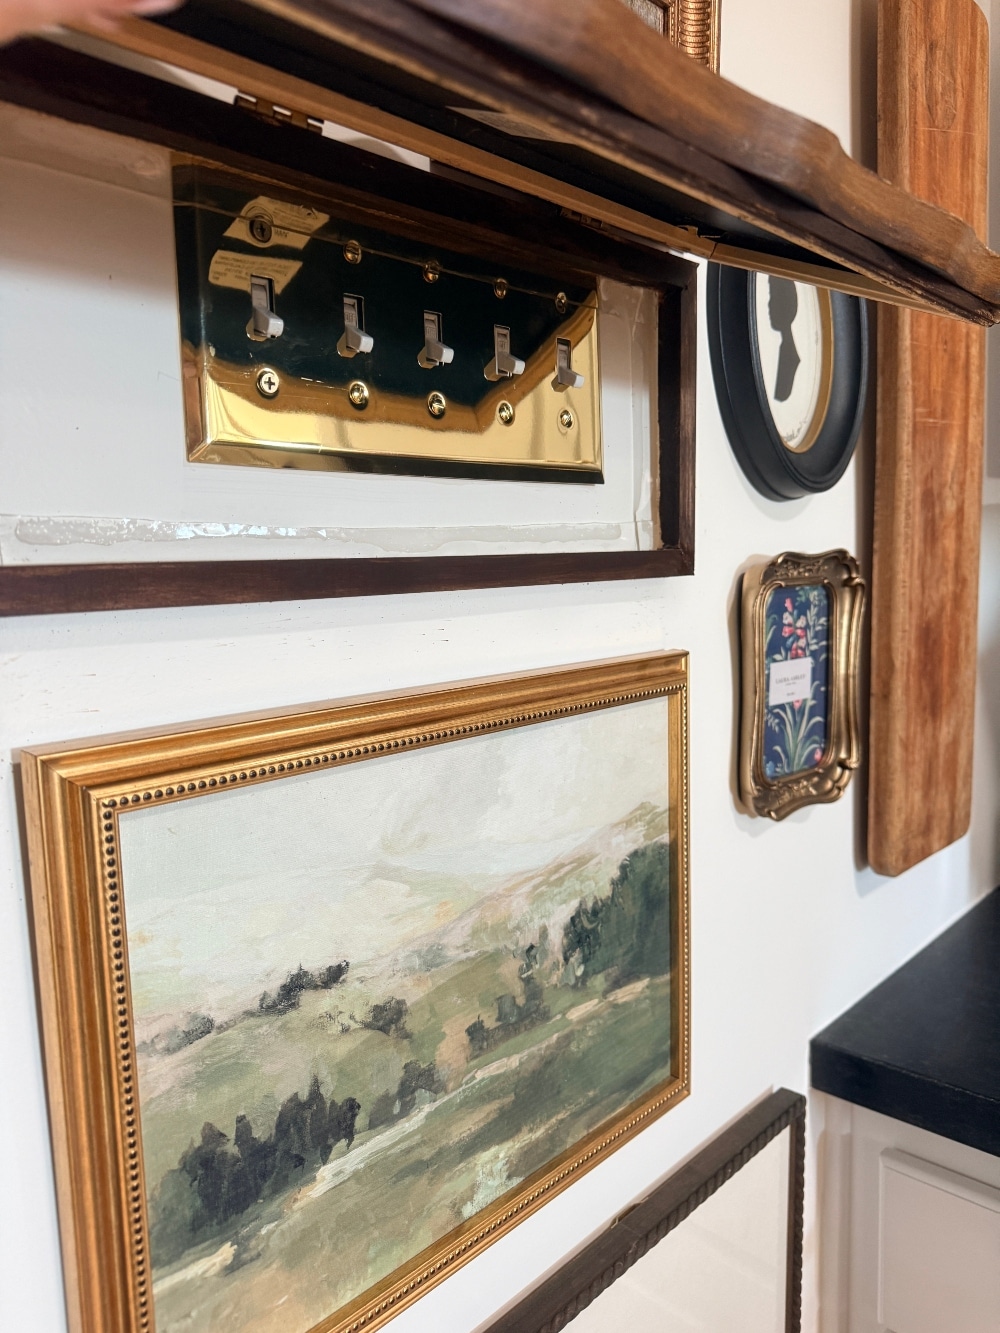
One of my paintings happened to be the perfect size to cover the entire five-gang switch plate. I created a simple hinged frame behind the painting so it could sit flat with the rest of the gallery wall and lift open whenever we need to use the switches.
It is so easy to flip up the painting, turn the lights on or off, and close it again. The switches remain completely accessible, but no one would ever guess they are hiding behind the art.
If you would like to make one, I created a separate step-by-step tutorial showing [how to make a DIY hinged painting wall plate cover — ADD LINK WHEN PUBLISHED].
Planning the Gallery Wall Around the Hinged Painting
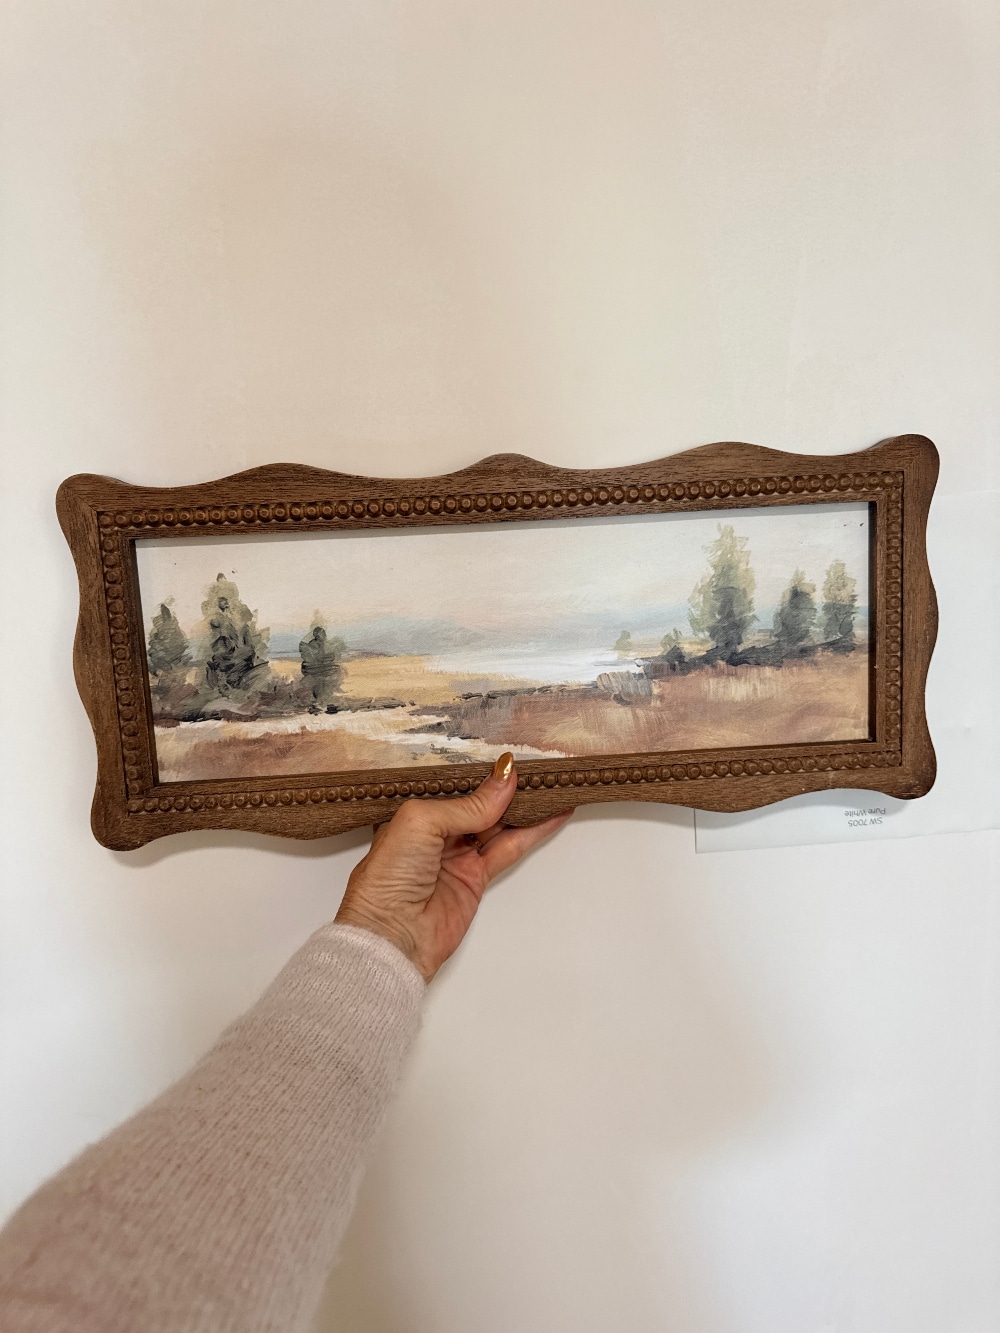
Because the hinged painting needed to remain centered over the switches, I used it as the anchor for the gallery wall and arranged everything else around it.
I wanted the finished wall to look collected rather than overly symmetrical, but I still wanted the spacing to feel balanced. With original plaster walls, I also did not want to make a dozen unnecessary nail holes while figuring out the arrangement.
That is where the butcher paper template made the entire project so much easier.
How to Make a Butcher Paper Template for a Gallery Wall
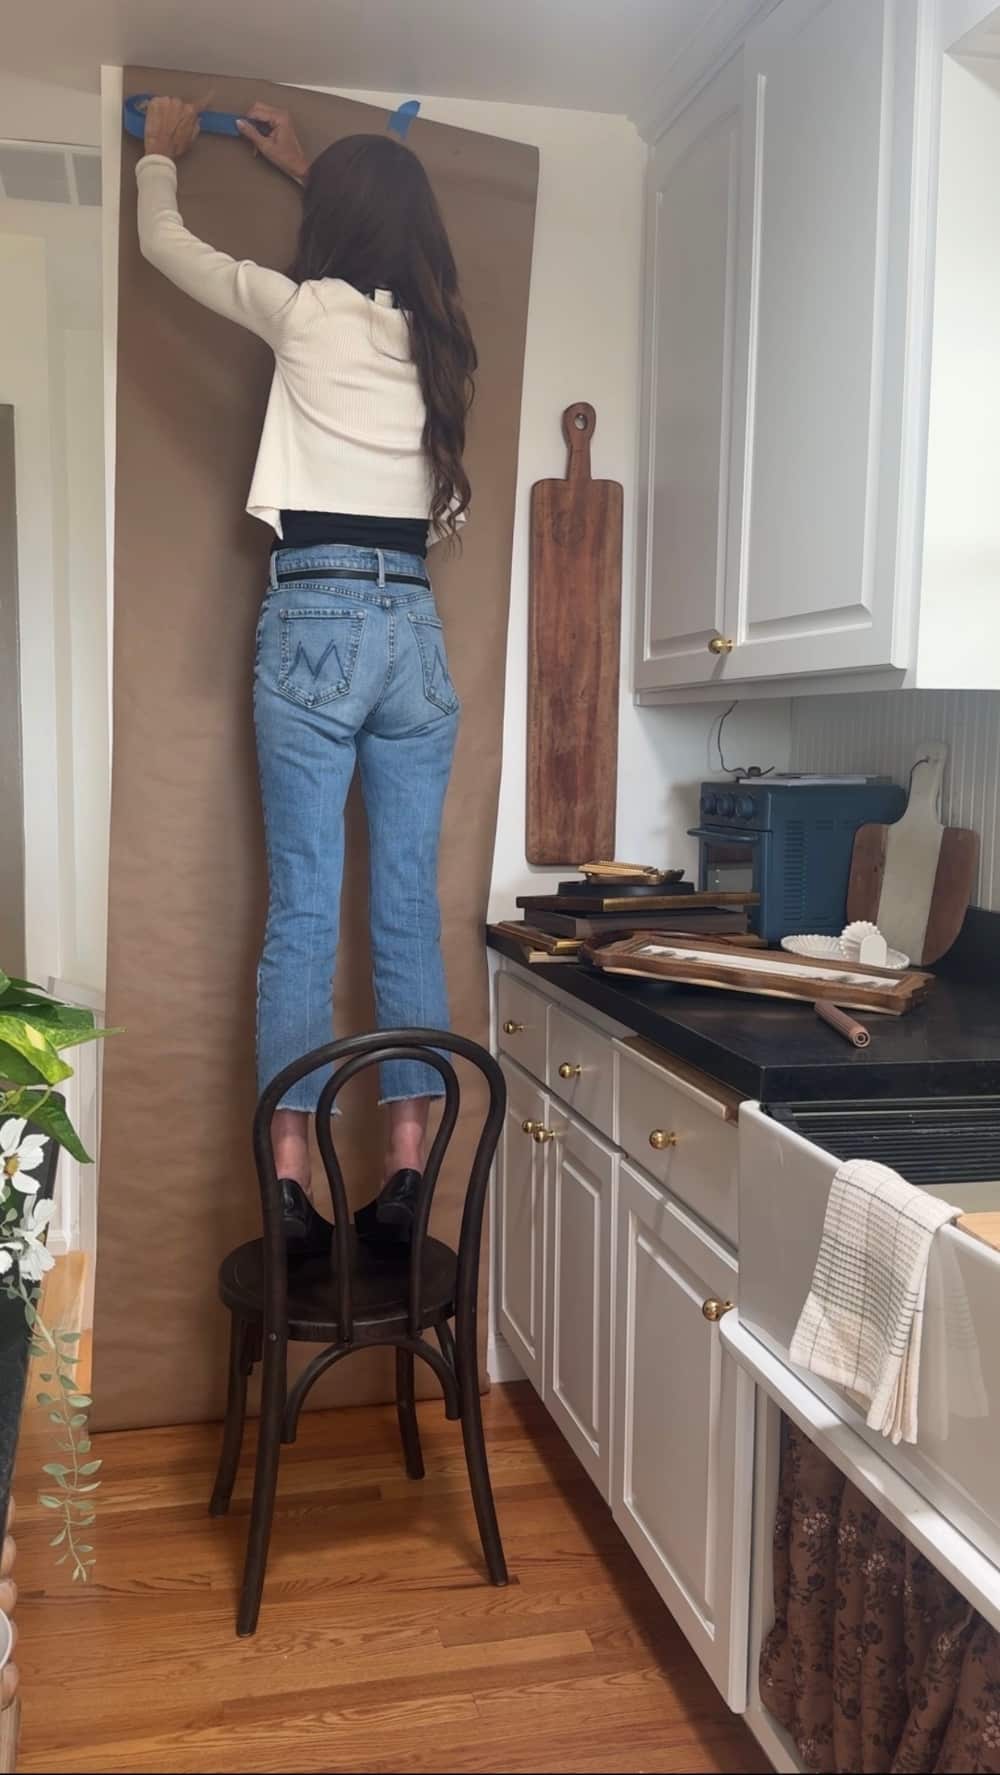
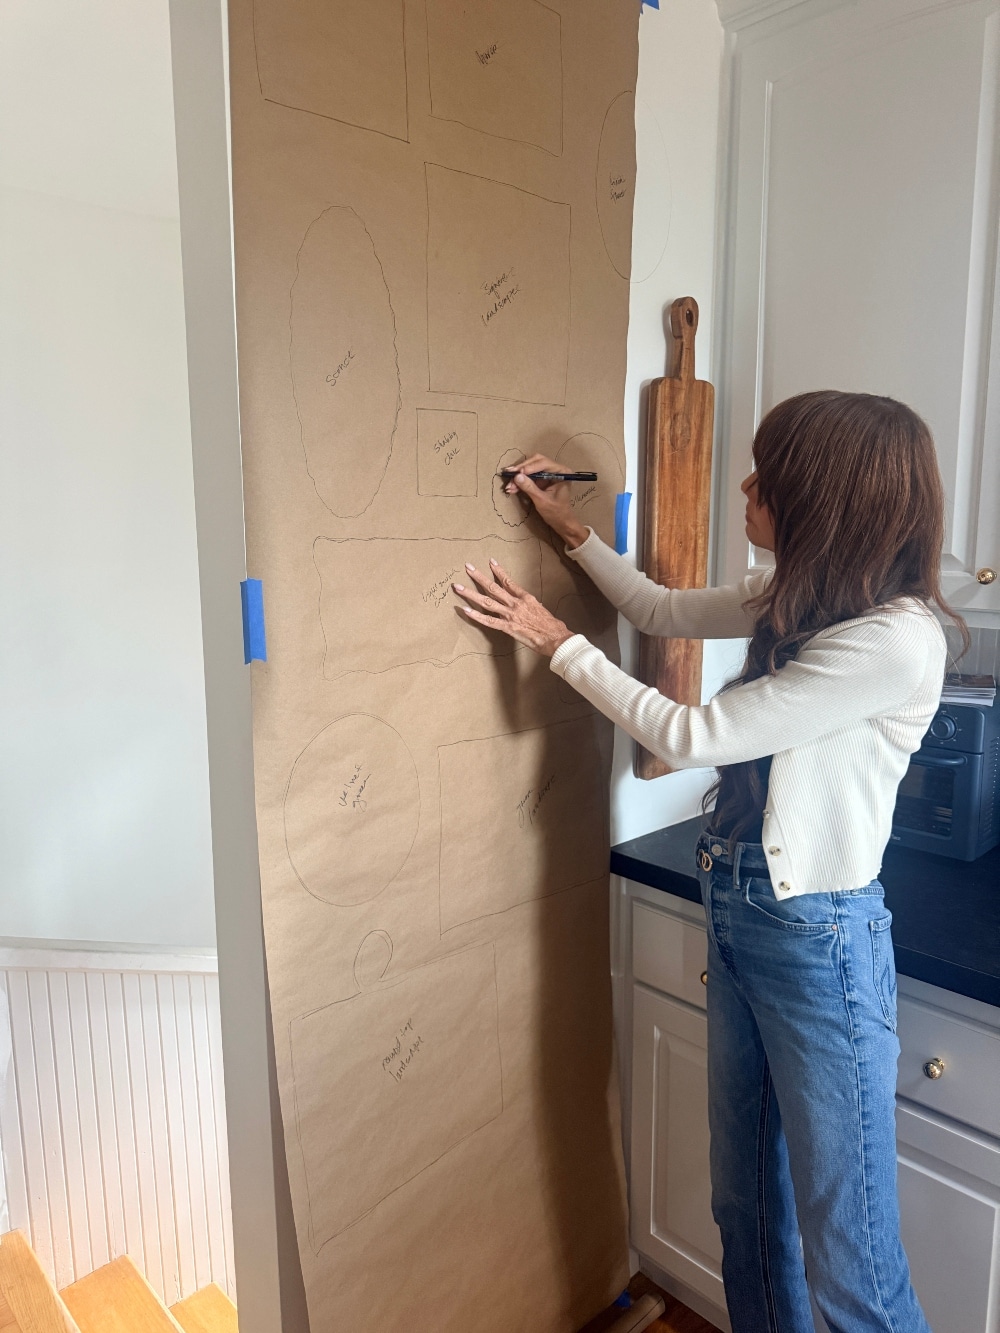
This full-size paper template lets you experiment with the placement of every painting and decorative object before putting any nails in the wall. You can erase, rearrange, and step back as many times as you need until the gallery wall feels just right.
Supplies for a Gallery Wall Paper Template
- Butcher paper, kraft paper, or wide wrapping paper
- Painter’s tape
- Pencil and eraser
- Black permanent marker
- Measuring tape
- Level
- Your framed paintings, art, sconces, and decorative objects
- Nails or picture hangers appropriate for the weight of each item and your wall type
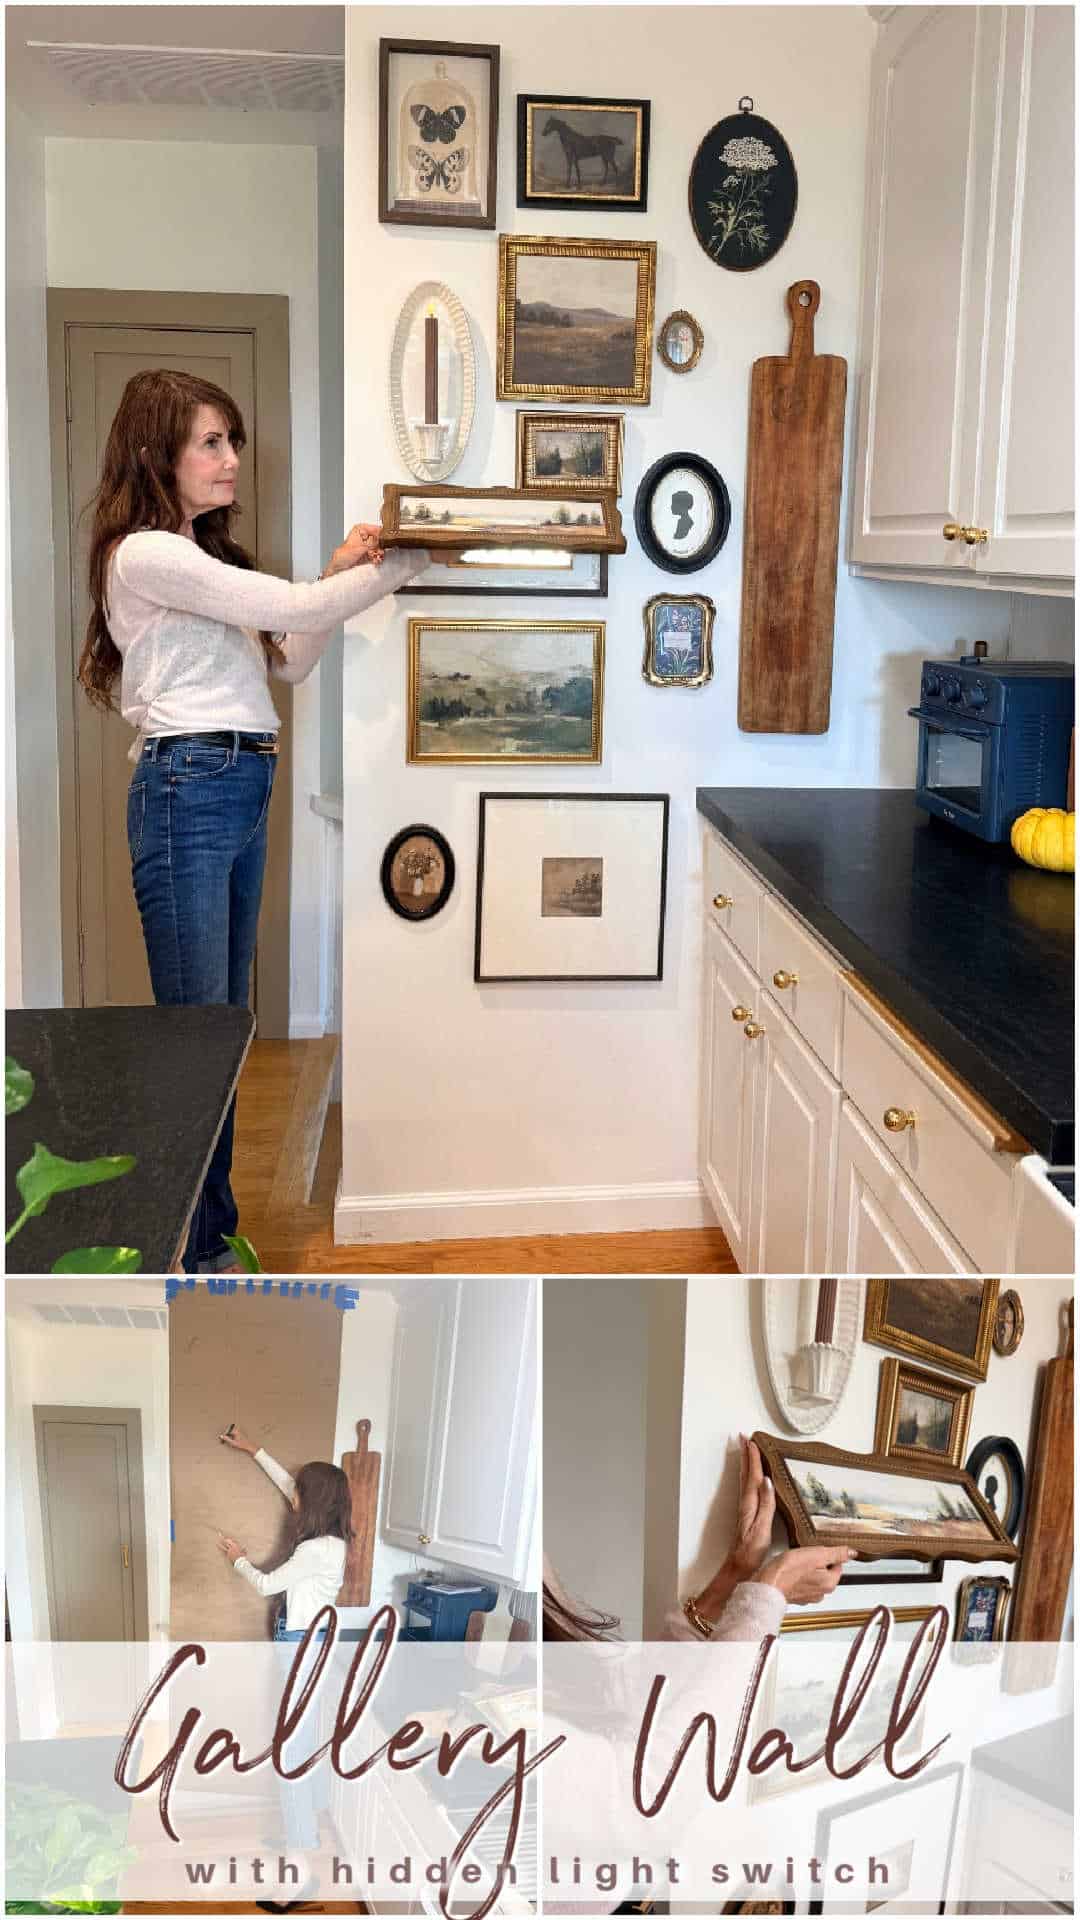
Step 1: Cover the Gallery Wall Area with Butcher Paper
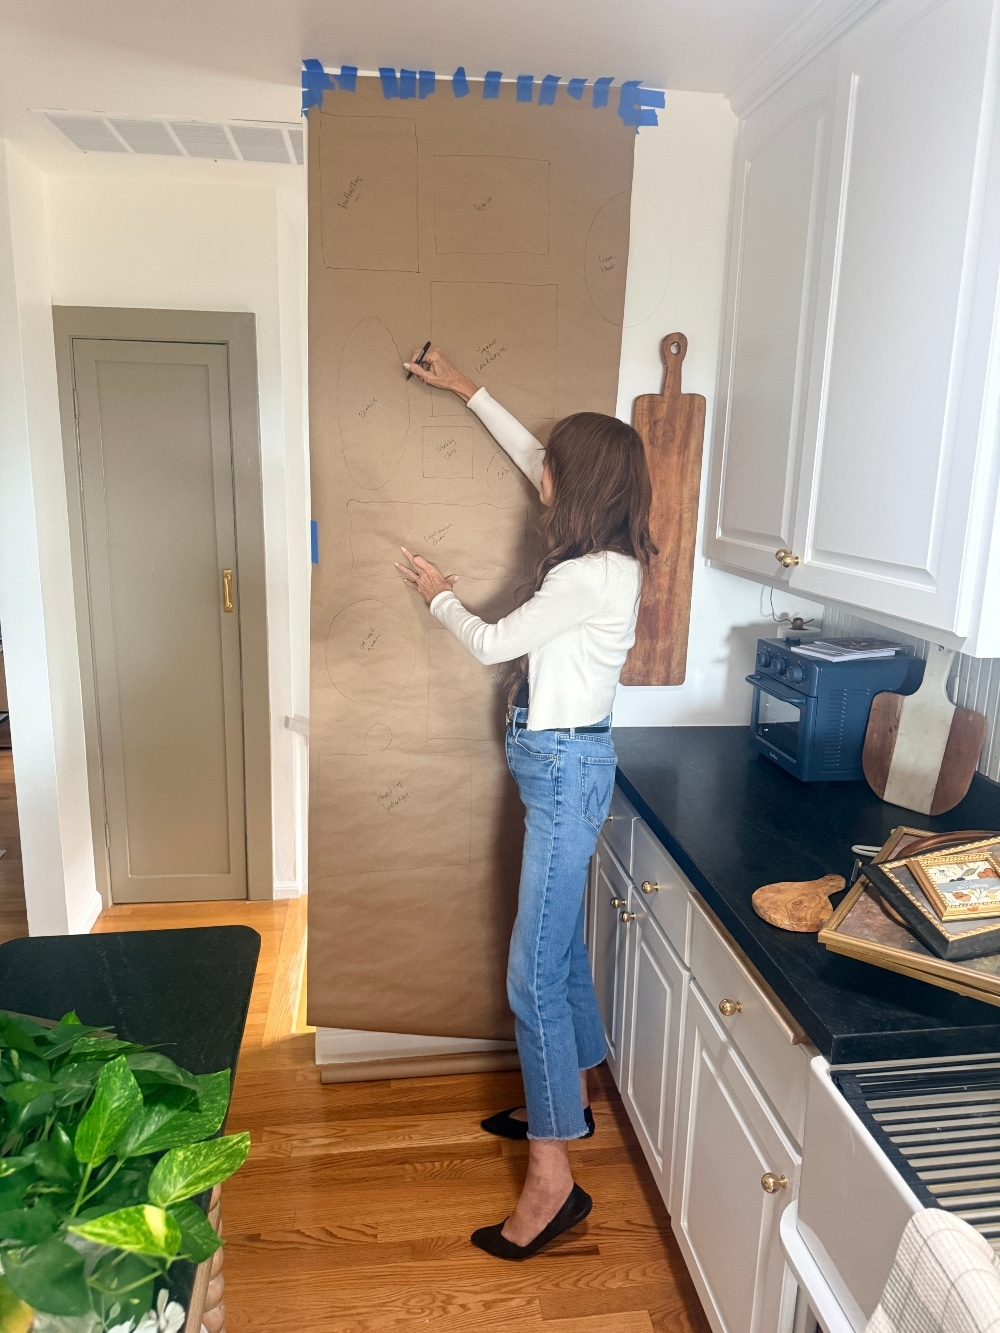
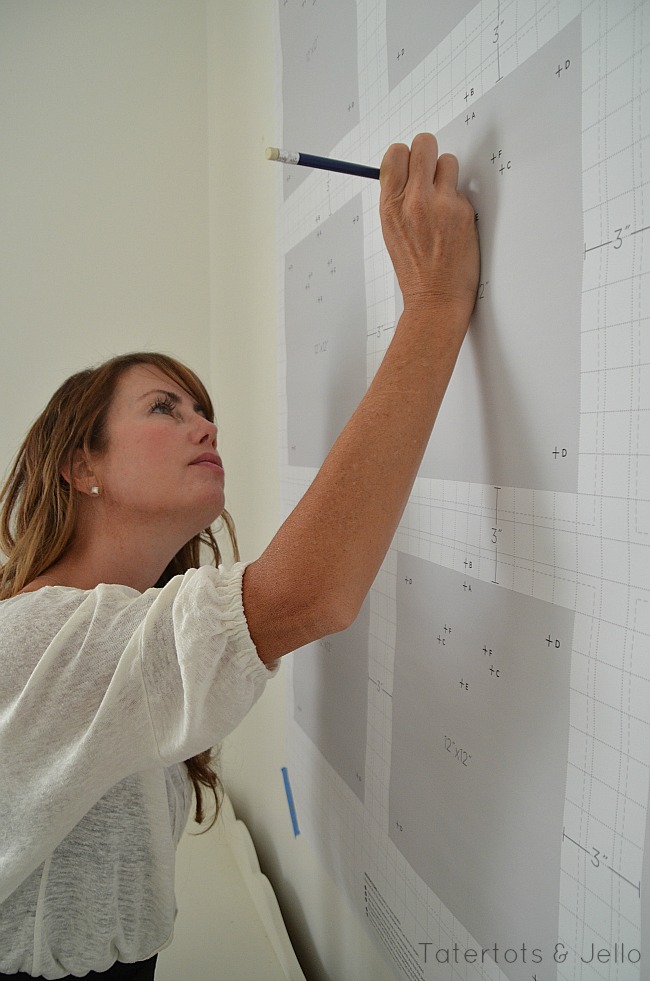
I cut a piece of butcher paper large enough to cover the entire area where I wanted the gallery wall. I attached it to the wall with painter’s tape and made sure the paper was straight and smooth.
If your paper is not wide enough, overlap several pieces and tape the seams together. The finished template only needs to be sturdy enough to take down and put back up once your layout is complete.
Step 2: Position and Trace Each Piece of Art
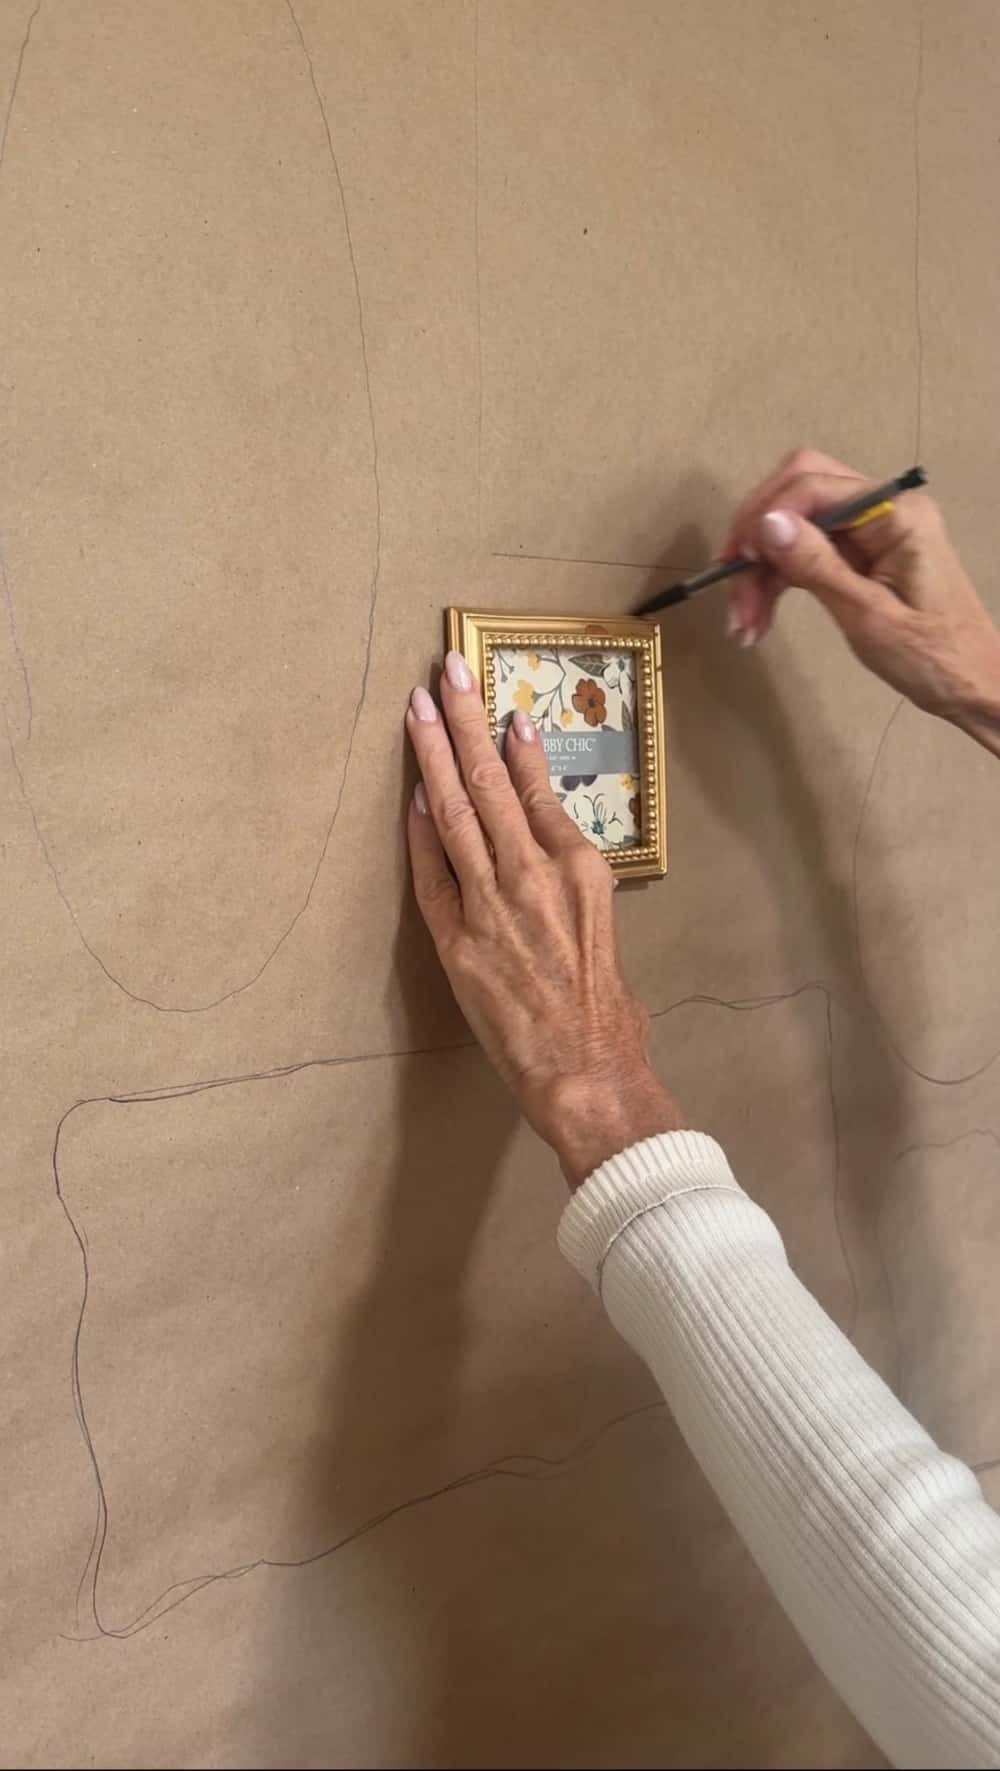
I held each painting and decorative item against the paper where I thought it might go and lightly traced around it with a pencil.
Using pencil is important during this stage because it lets you erase any placement you do not like. I moved several pieces more than once before I found an arrangement that felt balanced.
Step 3: Build the Arrangement Around an Anchor Piece
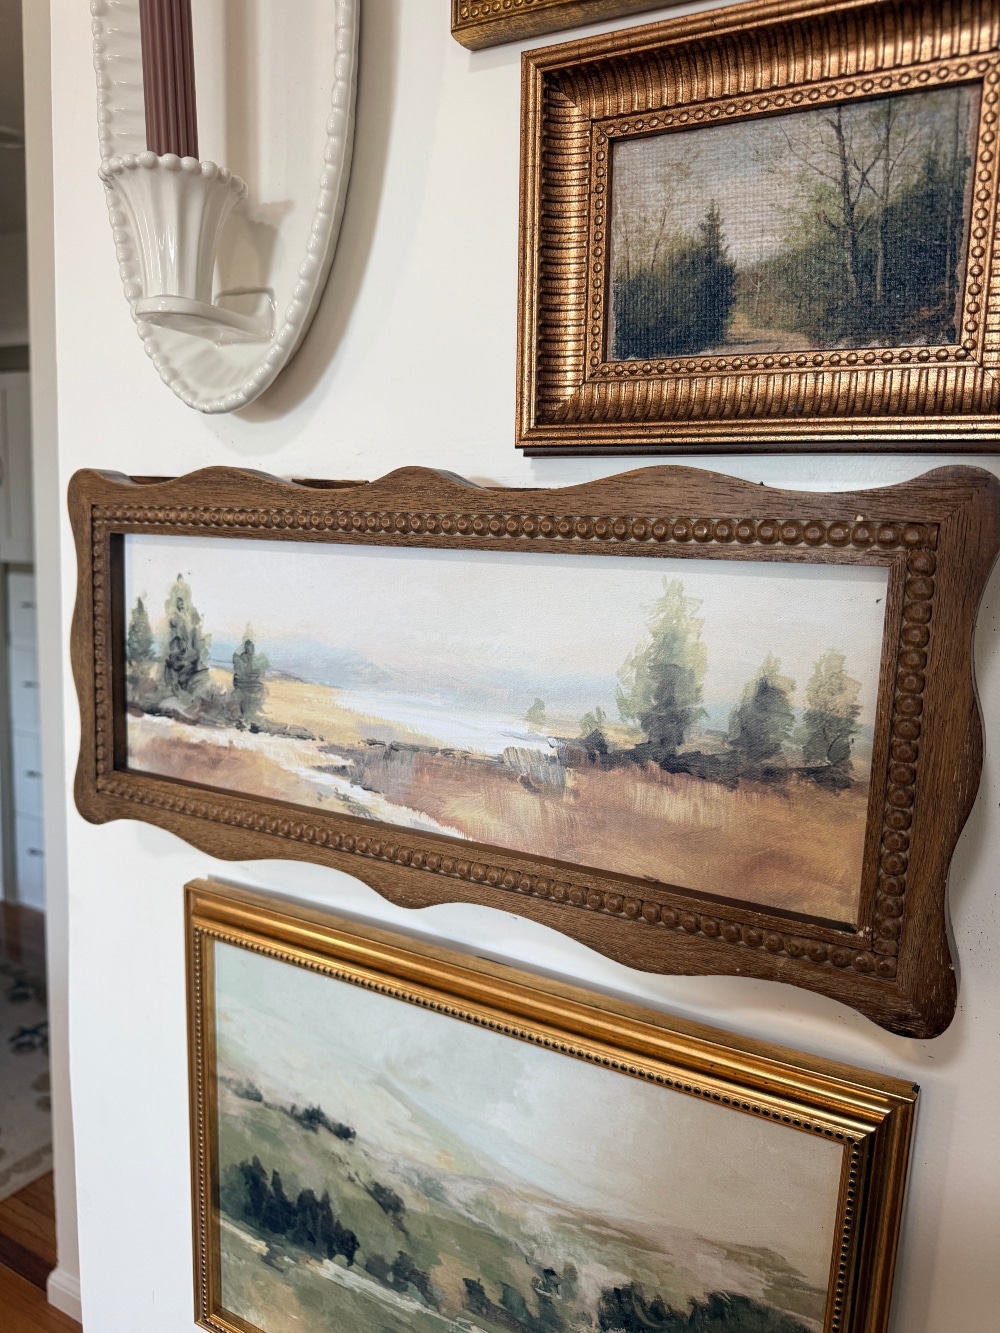
Every gallery wall benefits from an anchor. It might be the largest painting, a mirror, a favorite family photograph, or another meaningful object.
For my wall, the hinged painting hiding the light switch had to remain in one exact location. I treated it as my anchor and built outward, mixing horizontal and vertical paintings with smaller pieces to fill the spaces around it.
Step 4: Check the Gallery Wall Spacing
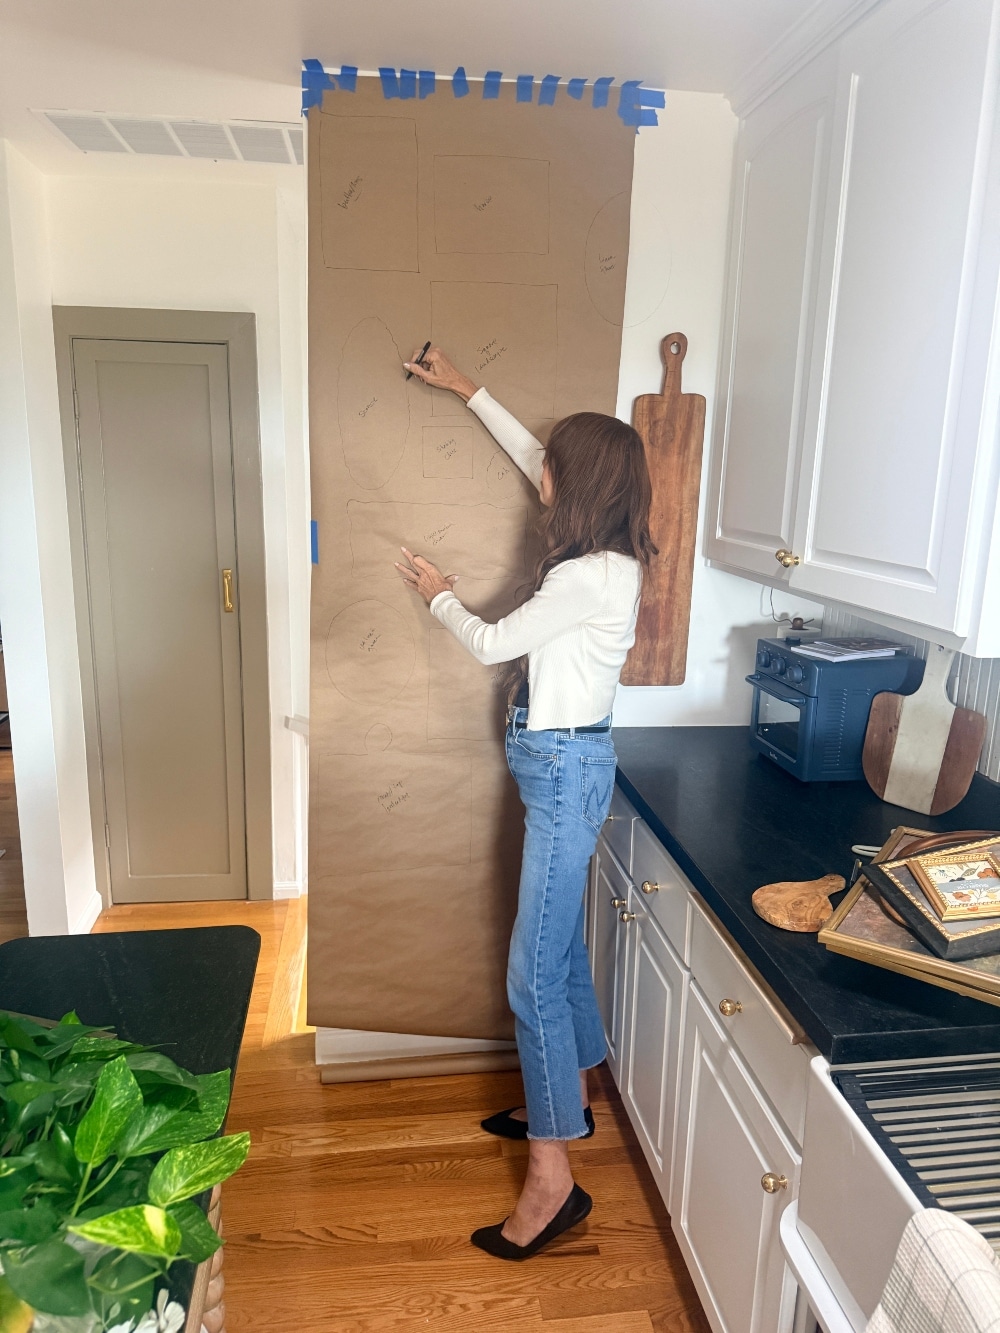
Step back often and look at the template from across the room. I tried to keep the amount of space between the pieces consistent without making the arrangement feel too rigid.
It also helps to look at the overall outer shape of the gallery wall. The individual pieces can be different sizes and shapes while the complete arrangement still feels visually balanced.
Step 5: Trace the Final Arrangement with a Marker
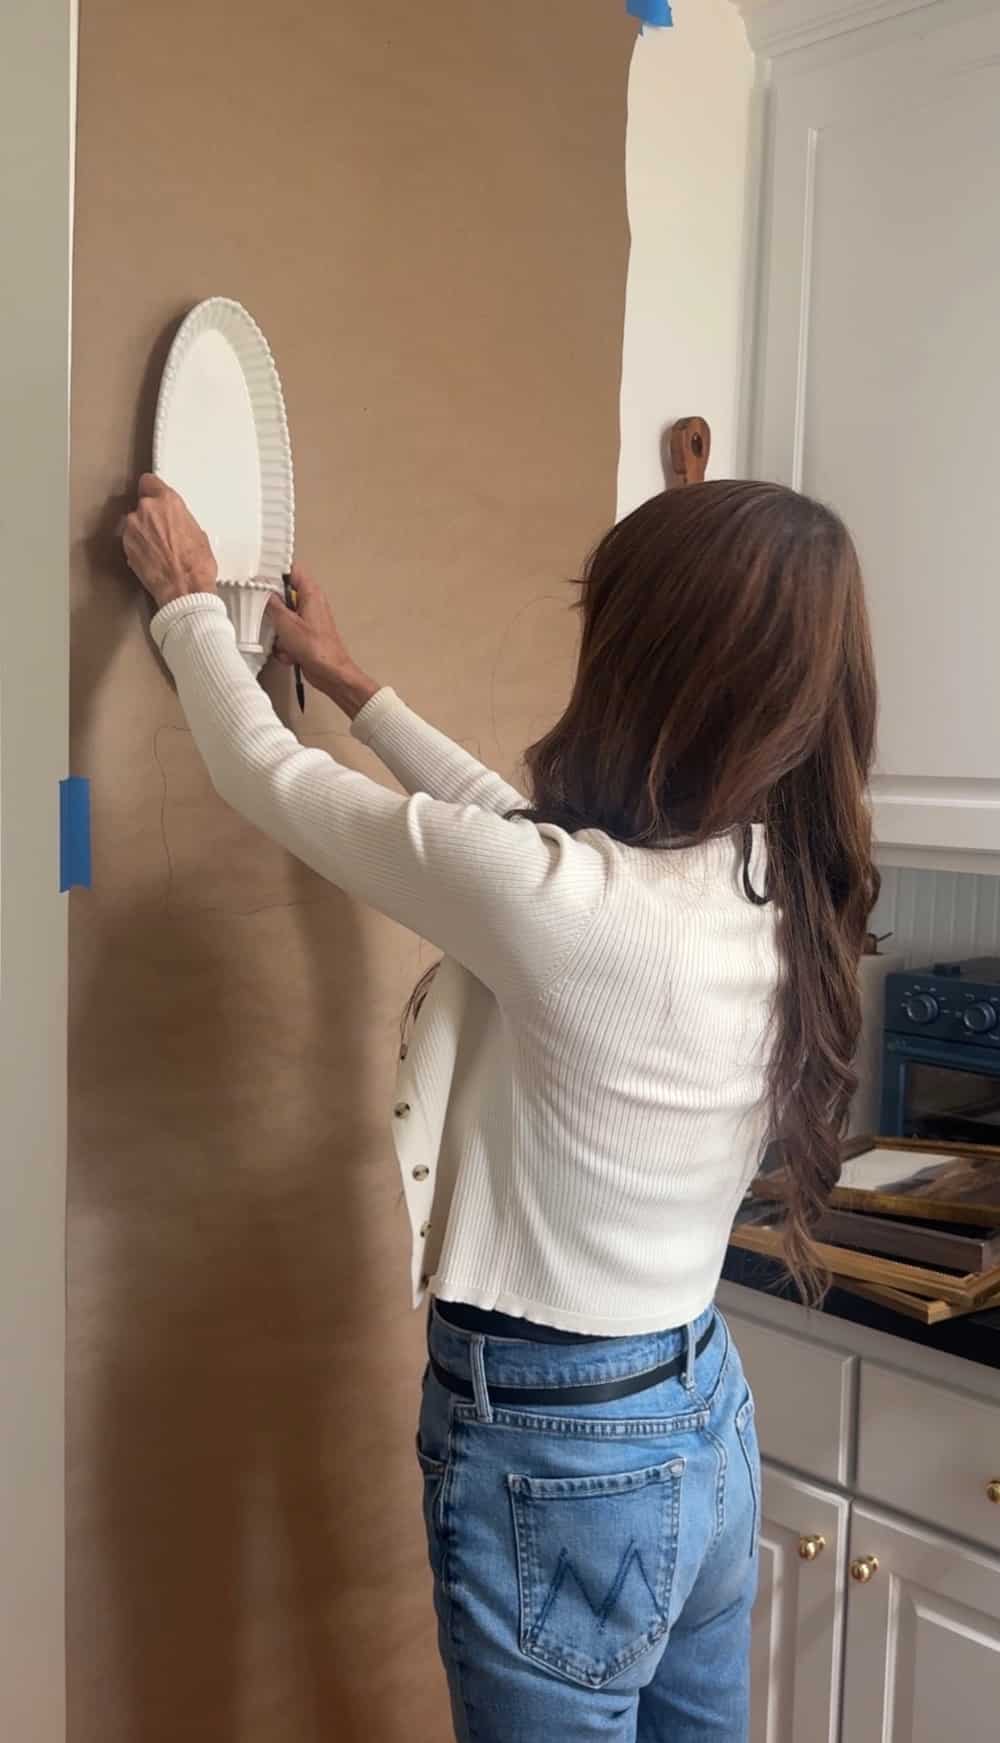
Once I loved the placement, I went over the final pencil outlines with a black permanent marker. This made the finished arrangement easy to see and kept any earlier pencil marks from confusing me during installation.
You can also write the name or a quick description of each item inside its outline so you remember exactly where everything belongs.
Step 6: Mark the Nail Placement for Every Frame
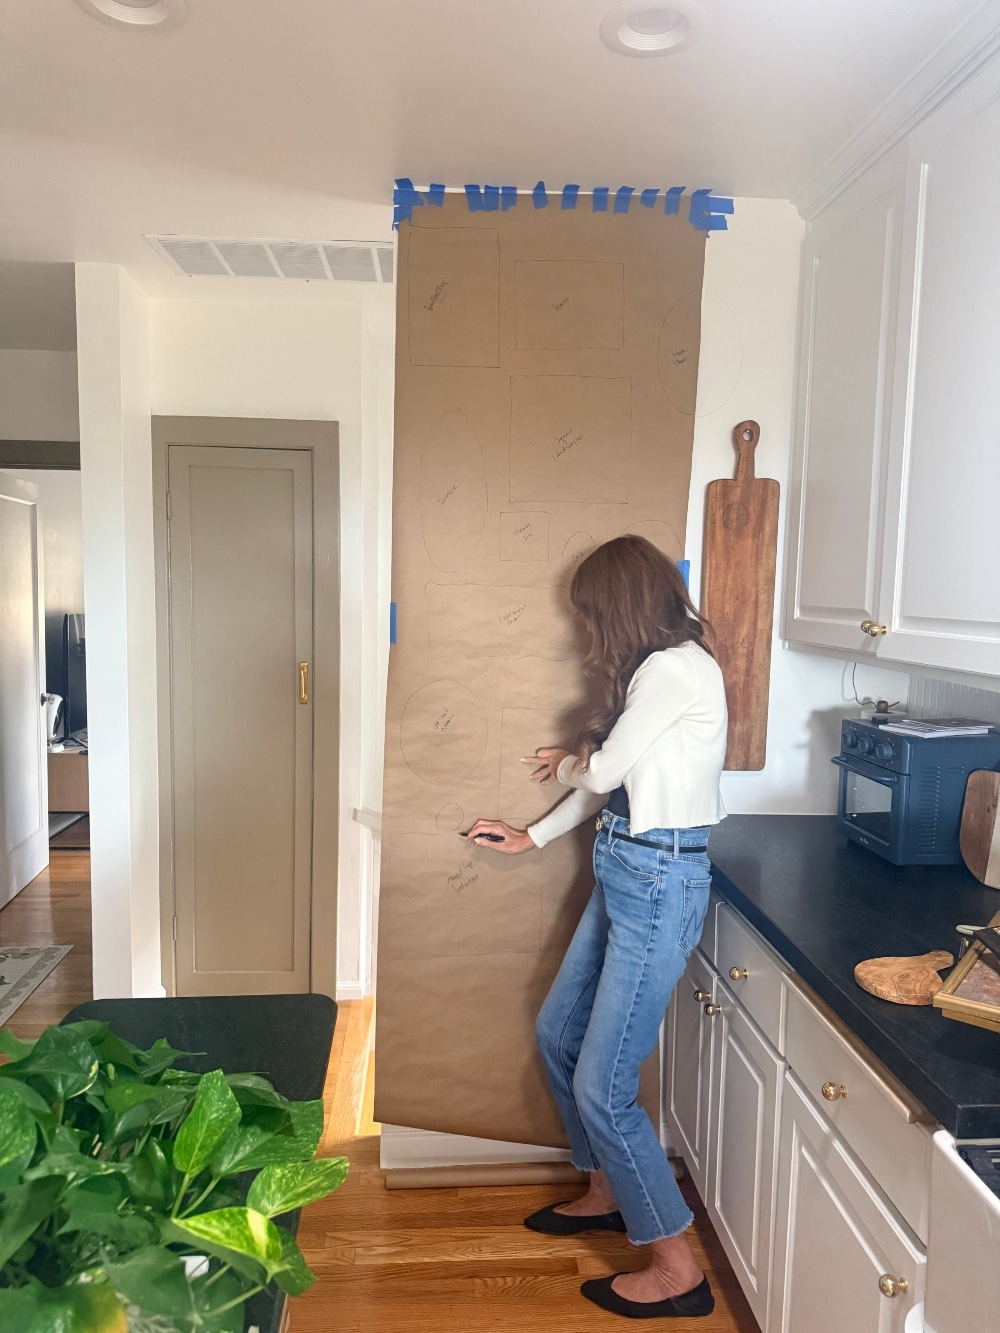
Before adding any nails, I measured the hanger location on the back of each painting and transferred that point to the corresponding outline.
This step is especially important because the nail does not always sit at the very top of the frame. If your artwork hangs from a wire, pull the wire upward the way it will rest on the nail and measure from that point.
Step 7: Install the Picture Hangers Through the Paper
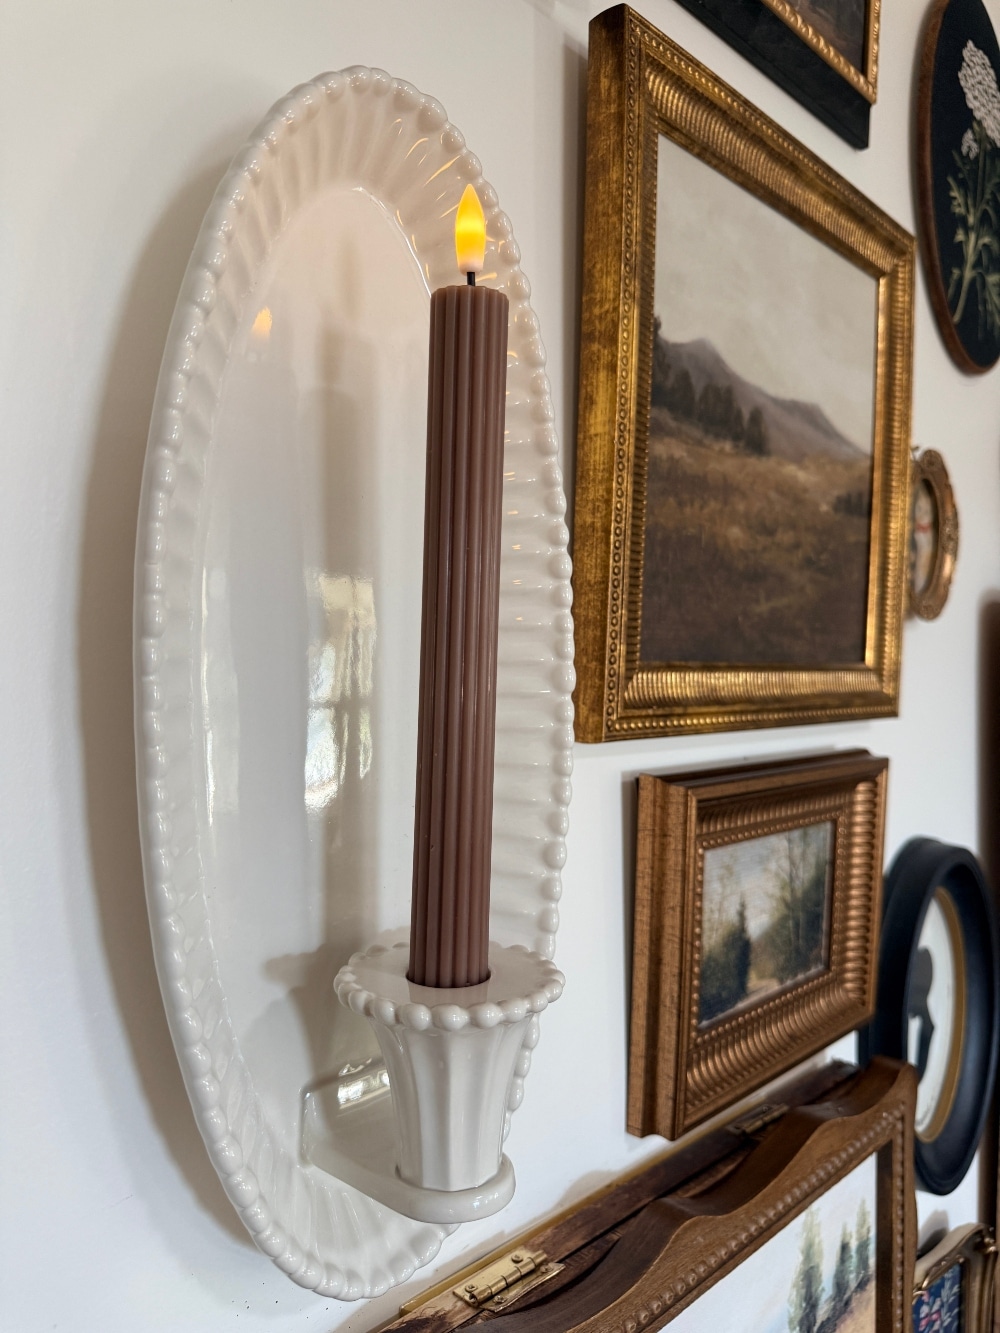
When I was ready to hang everything, I put the butcher paper template back on the wall and installed the nails or picture hangers directly through the marked points.
Then I carefully removed the paper and hung each piece. Everything landed exactly where I had planned it, and I did not have to measure the same spaces over and over.
Add Dimension with a Ceramic Candle Sconce
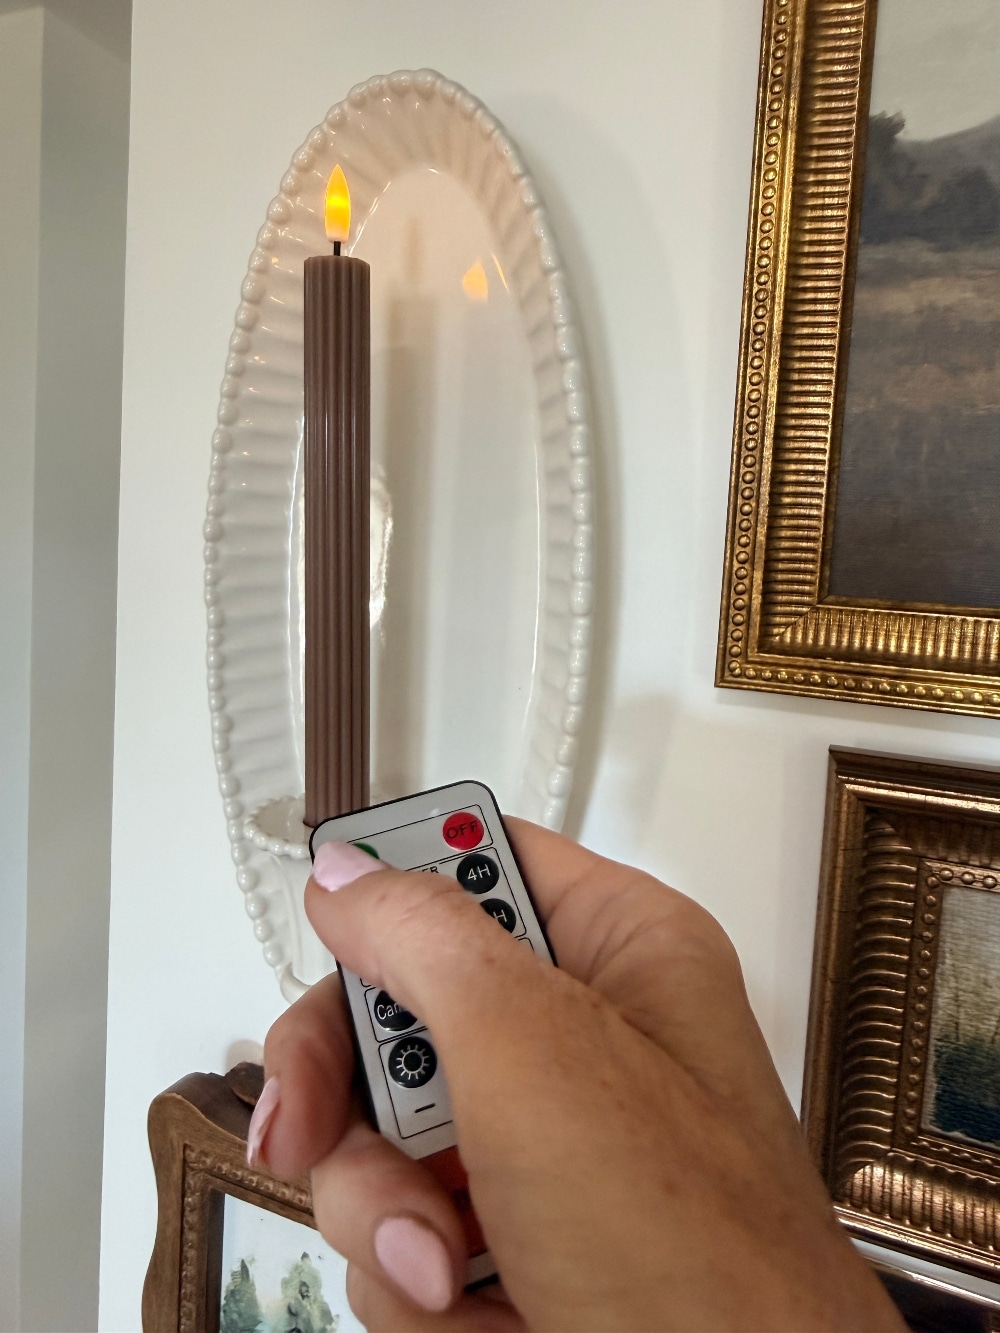
I love mixing dimensional objects into a gallery wall because they keep the arrangement from feeling flat or too formal. Along with my paintings, I included one of my favorite ceramic beaded candle sconces and a battery-operated taper candle.
The creamy ceramic sconce has beautiful beaded detailing and looks like a much more expensive designer piece. You can see all the details in my $30 ceramic candle wall sconces post.
A Battery-Operated Candle Adds a Cozy Glow
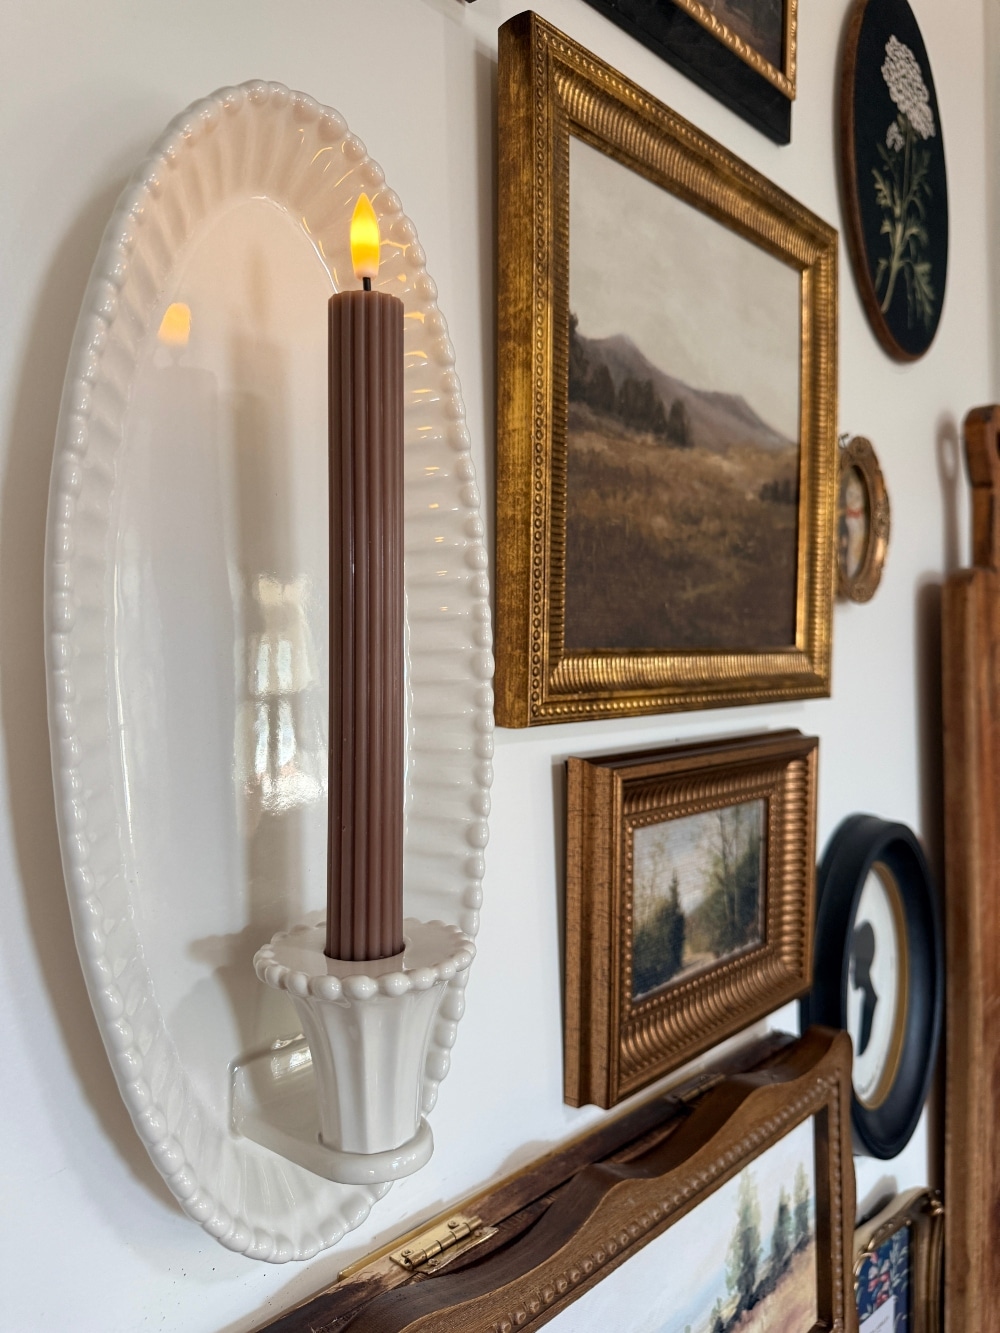
The brown fluted taper candle has a shimmering flame that looks so much like a real candle. It comes with a remote, adjustable brightness, and two-, four-, and six-hour timer settings.
I can turn it on from across the kitchen or set the timer and let it turn off automatically. It gives this little corner such a cozy evening glow without adding electrical wiring to our original plaster walls.
Where to Find Affordable Gallery Wall Art
If you are starting from scratch, thrift stores, estate sales, antique shops, Facebook Marketplace, and printable art are all wonderful sources. Look for a mix of horizontal and vertical pieces, different frame widths, and one or two dimensional accents.
Do not overlook art you already own. A painting that feels too small or awkward by itself can look completely different when it becomes part of a larger arrangement.
More Gallery Wall Inspiration from My 1905 Cottage
I created another collected gallery wall in my 1905 Cottage. You can see that space and read my six bedroom gallery wall tips for more ideas about mixing shapes, meaningful pieces, and favorite quotes.
See My DIY Plate Rack Wall with Scallop Molding
How to Create a Beautiful Gallery Wall Using a Butcher Paper Template. Create a beautifully collected gallery wall with perfect spacing using this easy butcher paper template method, plus a clever way to disguise an awkward light switch.
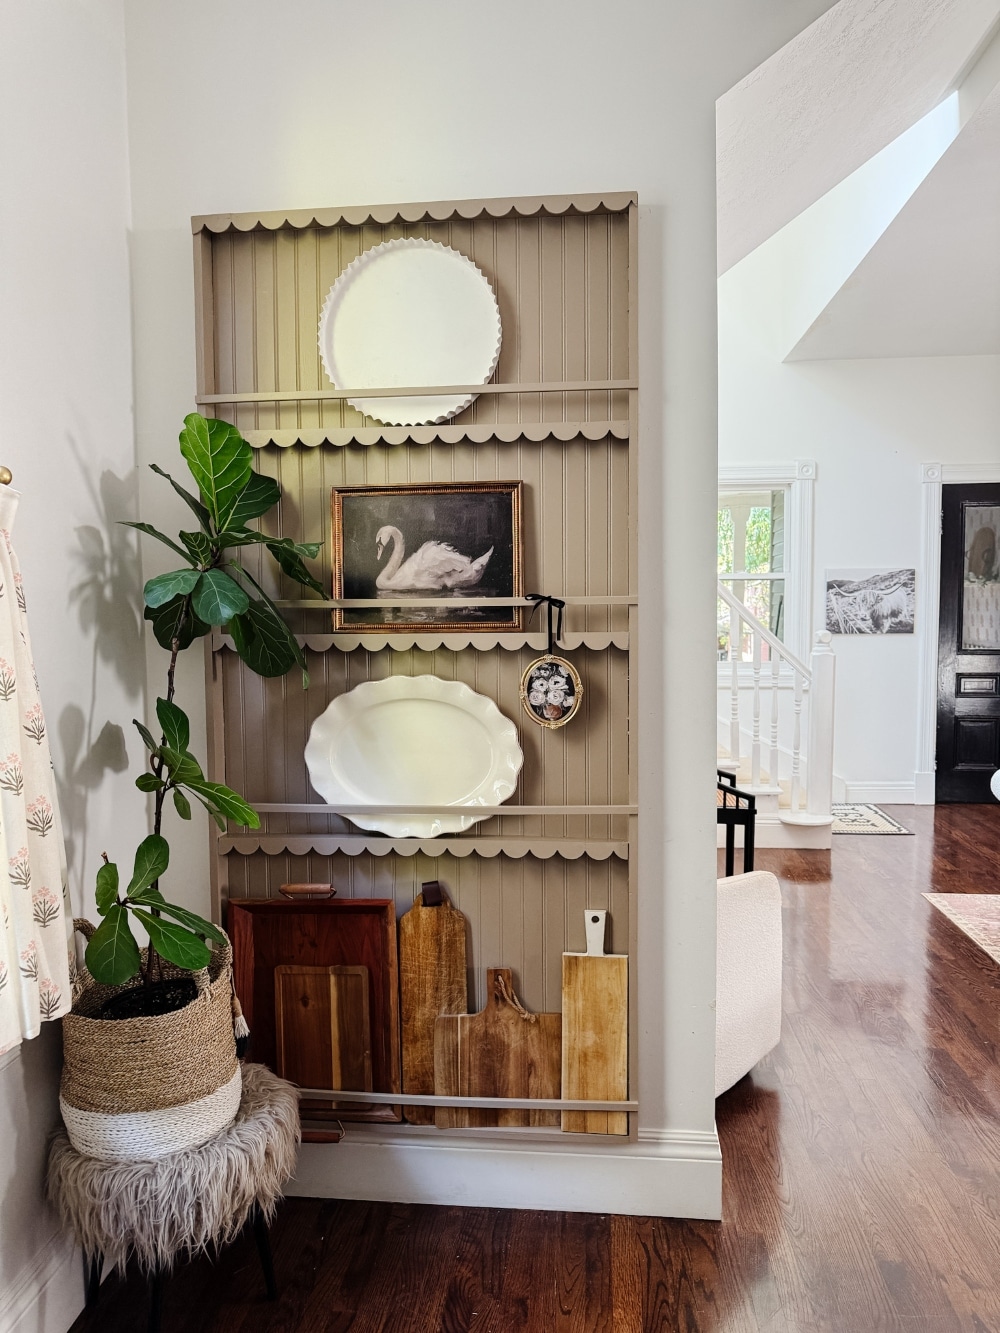
If you love adding vintage character and functional storage to a kitchen, take a look at my DIY plate rack wall with scallop molding. It is another project that transformed a plain kitchen wall into something useful and full of cottage charm.
A Functional Gallery Wall for a Small Kitchen
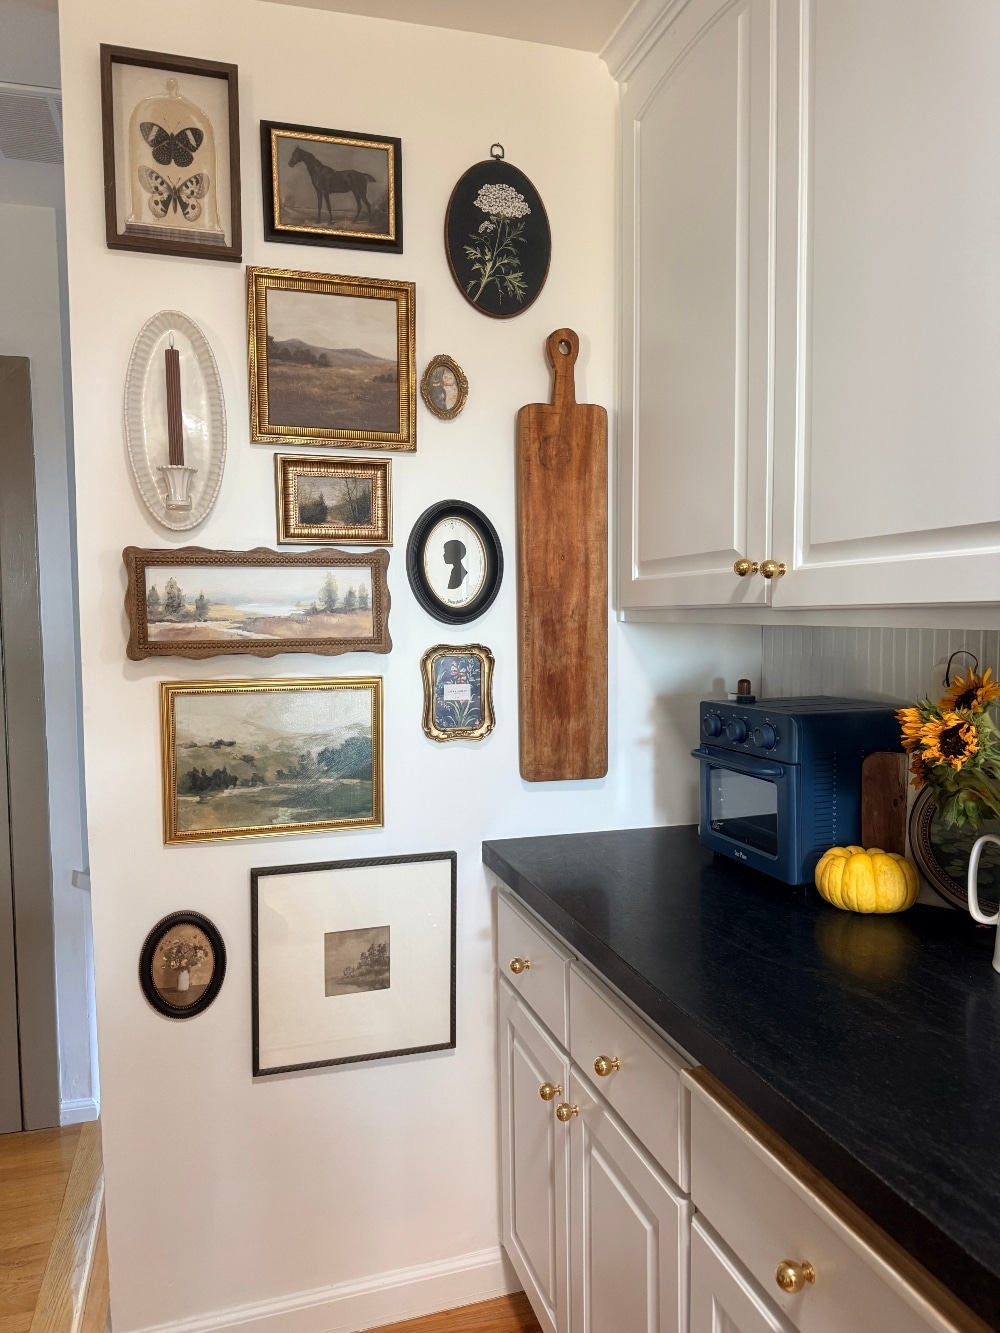
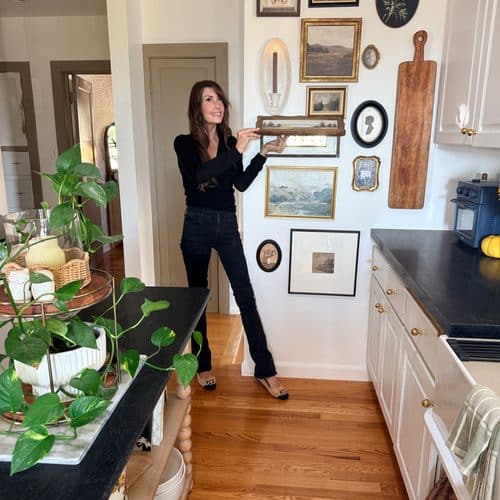
I love the way this gallery wall looks in our small 1932 Tudor kitchen. It adds warmth, color, candlelight, and a sense of history while solving a very practical problem.
The oversized five-gang switch is still exactly where it has always been, but now it is hidden behind a painting that looks like it was always meant to be there.
Be sure to see the companion tutorial for [how to create the DIY hinged painting wall plate cover — ADD LINK WHEN PUBLISHED].
Next: A Smaller Gallery Wall to Hide the Thermostat
This project worked so well that I am planning a second, smaller gallery wall on the opposite wall to disguise our thermostat. I love finding ways to make the necessary parts of a home blend into the design, especially when the solution lets me use art I already own.
Would You Create a Gallery Wall with a Hidden Surprise?
Do you have an awkward switch, thermostat, or wall control that you would love to disguise? Let me know what you would hide, and tell me if you use the butcher paper template to create your own gallery wall! Pin this post so your can find it later! I am going to create a smaller gallery wall on the other side of the kitchen and hide the thermostat nexy! Stay tuned! And let’s connect on Instagram @tatertotsandjello – where I show video tutorails!
xoxo



Liked it? Leave a comment! Thanks! xoxo