Welcome to the Summer of Paper series – where we’ve invited fabulous guests to create projects using supplies from my Home + Made paper decor line.

Hello, friends! I’m Michele from The Scrap Shoppe, and I am SO excited to be here sharing a fun project using Jen’s new collection. Prior to crafting I was a†scrapbooker, but I really don’t have†a lot of time for my original hobby anymore. However, scrapbook paper has remained one of my favorite medias to work with!

You can image how excited I was to receive Jen’s new Hand+Made collection in the mail to play with!
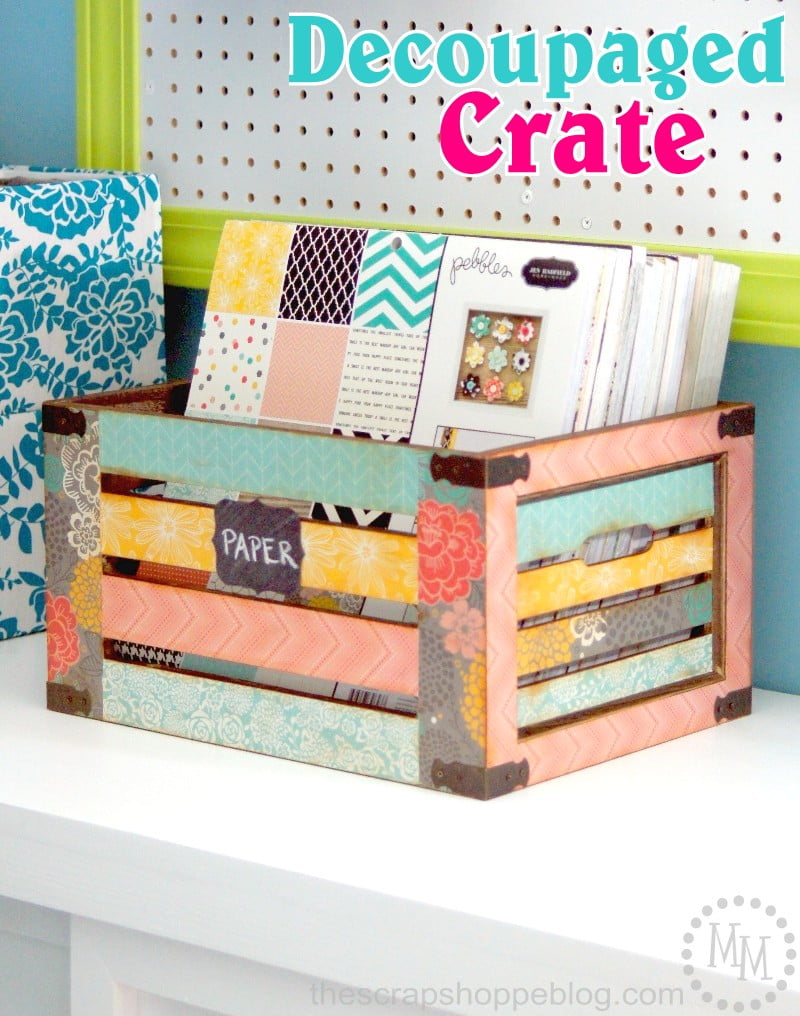 One of the reasons I love scrapbook paper so very much is that it is so versatile. You can do just about anything with it! Except wear it… maybe. The point I’m trying to make: Scrapbook paper is not just for scrapbooking. It’s also an easy way to give just about anything a fun and colorful makeover. Like this decoupaged crate! Which now happens to be holding a big stash of my own scrapbook paper collection.
 The Hand+Made collection is full of fun bright colors and a lot of gold accents. I have LOTS of big plans to use more of these supplies, but you’ll have to see them later on my own blog.
From the Home+Made collection you will need the following for this project:
Supplies
12×12 Paper Pad
Ombre Wave double sided paper
Chalkboard Sticker
Other supplies needed
wooden crate
decoupage
sponge brush
 You can find inexpensive crates just about anywhere these days. This one is from a local home decor store. What drew me to it was that it was already stained and the extra hardware it contained. Before we decoupage the crate we need to remove all of the hardware.
 Cut the scrapbook paper according to the slats and size of the crate. Apply decoupage to the crate with sponge brush, applying one sheet of paper at a time. Press firmly for good adhesion and smooth to remove any bubbles. Any excess decoupage that happens to seep out from under the paper will dry clear.
After adding the paper, realign†the hardware to find the holes for the screws. Use a paper piercer or some other sharp instrument to poke holes in the paper to mark their positions.
Because the crate gives the entire project a rustic feel, I inked the paper with distress ink to match accordingly.
Apply a layer of decoupage on top of the paper once the ink is dry. Once the decoupage is dry, reinstall the hardware.
 I added one of the chalkboard stickers to the front of the crate for labeling. Don’t forget that on new chalkboard surfaces you need to “cure” them by rubbing them all over with chalk then wiping it off. Then you can write whatever you wish on them.
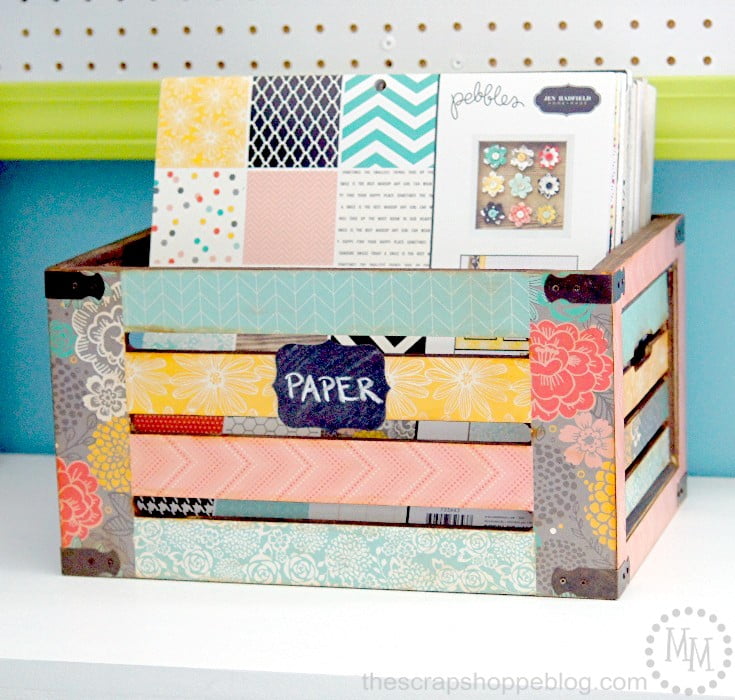
This wooden crate happens to be the perfect size to fit several of my 12×12 paper pads! It’s a great addition to my craft space. And the colors and patterns really brighten up the space!
I hope you enjoyed this craft idea! I would love to have you stop by The Scrap Shoppe. Thanks so much for having me, Jen, and congratulations on all your success!
**********
Thanks Michele! I just love that crate! Such a fun idea to store all your craft supplies too!
Michele has great ideas on her blog. Here are a few I know you’ll love:

She has this free pattern for this Retro Camper Keychain!

And these Glow in the Dark Water Balloons would definitely be a big hit at parties!

And this Potting Shed Makeover is just gorgeous! I love all of her ideas!


This is super cute!!! Love it!!
This is so cute Michele!! I love the paper you used – Jen your line is gorgeous! It’s perfect on the crate, what a fun way to have something cute and functional!