Summer’s here, let the fun begin!!!
Although we plan to spend plenty of time at the pool and goofing around this Summer, I always try to emphasize reading and quiet time too.
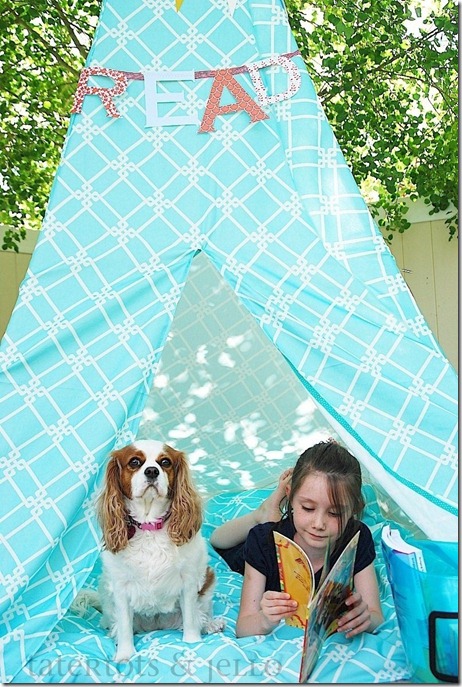
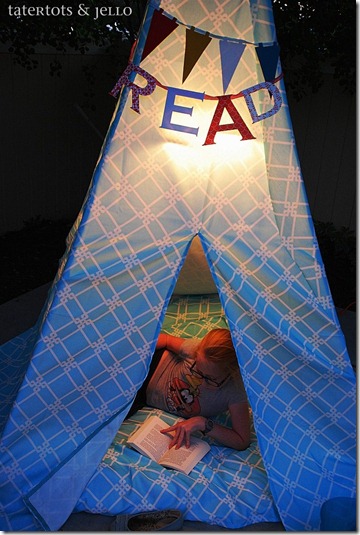
So I decided to make a Reading Tent.
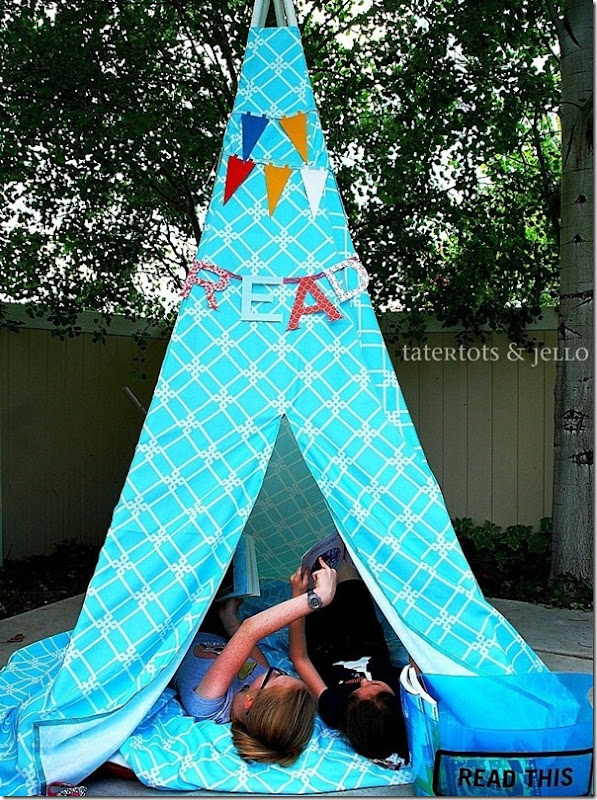
After thinking about it for a few days, the plan kind of evolved into more of a teepee than a tent, but I am really pleased with how it turned out.
Now, I have only been sewing for about a year, so this project was a little tricky and did involve a little swearing LOL. The seams turned out a little wonky, but overall I am so happy with the way it turned out.
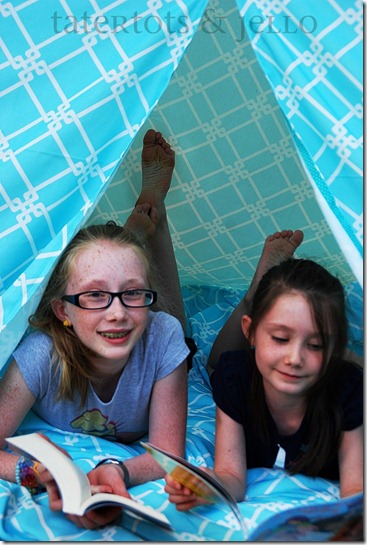
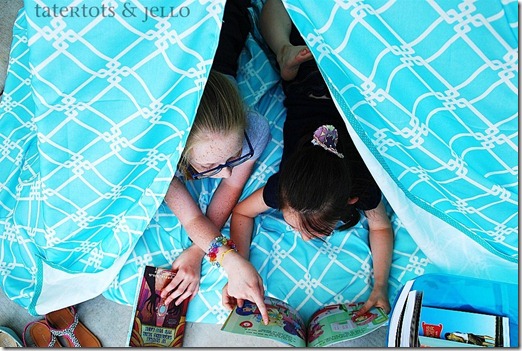
And more importantly, the kids love it.
Even my 15-year-old wants to spend some time in the Reading Teepee!!
Here’s a little rundown of what I did if you might want to make one for your house.
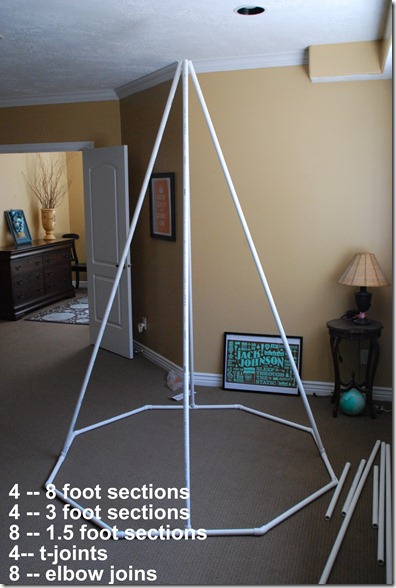
I considered buying wood for the teepee sides, but decided to go with PVC pipes. Not only are they cheaper, but with the joints you can buy, it’s like putting legos together.
And I was able to construct a base that will retain it’s shape and hold up better with rambunctious kids. With PVC pipes, you can make any shape you want. From a square tent, to a house, to a teepee!!
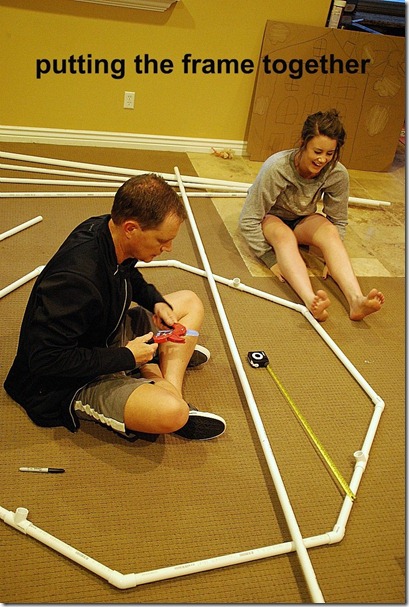
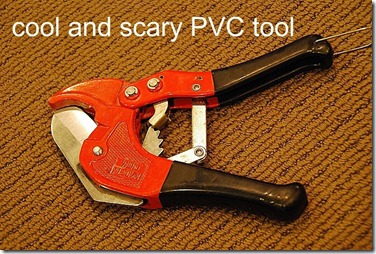
When we got home we mapped out the area we wanted the tent to be. I decided that 6 feet in width and length was a good size. Jeff helped me with this part. He also has this really cool PVC pipe cutter tool which fascinated and scared me. It’s so dangerous looking!!
Once we cut the pipes, we put the 8 foot poles in the t-joints and drilled holes in the tops of the poles. We secured the poles at the top with zipties, but you could use string too.
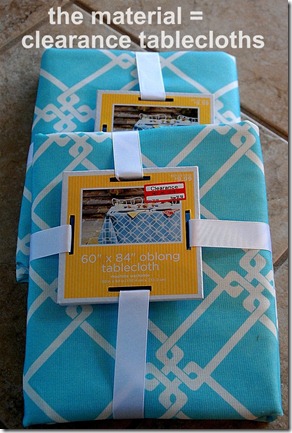
Now I started on the tricky part – making the cover. I picked up some tablecloths that were on clearance at Target. But as I was thinking about it later, you could totally use drop clothes, and not only would it be cheaper, but the seams wouldn’t show as much.
The PVC pipes cost $17 and the tables clothes $21 = total cost of about $40
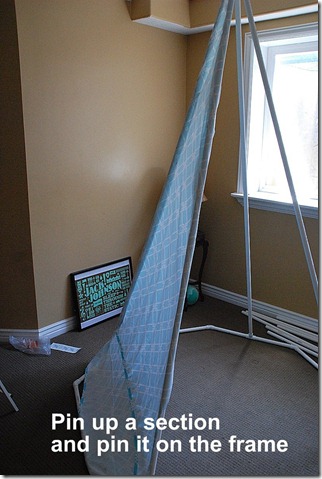
I measured one panel and cut that size out of my material. I added a couple of inches to each seam just in case. Then I held it up to the PVC panel and pinned it onto the panel. Make sure to pin the material BACKWARDS If you are using material that has a right or wrong side. You want your seams to face outwards.
I did this with each of the panels and then I pinned them together while they were on the teepee frame. Use TONS of pins, you want to be able to see where to sew each of the seams and not get confused once you take the material off the teepee frame.
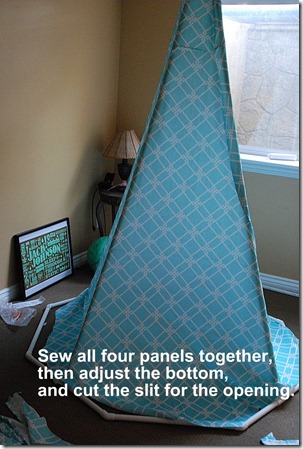
Once it was all pinned, I took the slipcover upstairs and sewed the whole thing together. Then I flipped it right side out and put it back on the frame.
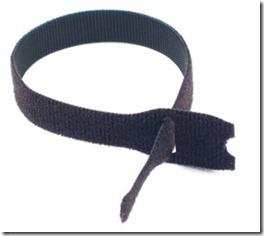
Now I hemmed the bottom of the slipcover. I left a couple of extra inches at the bottom, so it could be tucked under. I also sewed velcro ties every couple of feet on the slipcover. These velcro ties wrap around the PVC pipes at the bottom of the frame.
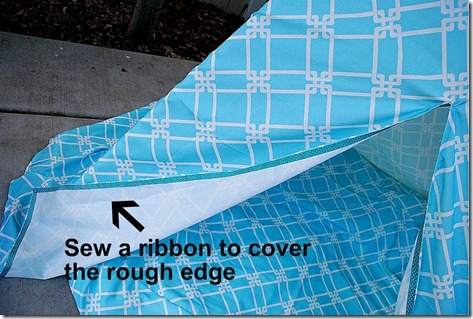
And I also cut a slit in the one side of the teepee for the entrance. I cut it about 4 feet high. Then I took the cover back up and sewed the bottom of the slipcover and also hemmed the front slit. To cover up the rough edges of the slit, I sewed ribbon over those edges, so when the tent flaps are folded back, the ribbon shows.
I also made a cushion for the bottom of the teepee with an old duvet and covered it with leftover material. The last thing I did was installed a chandelier that I had leftover from my oldest daughter’s room. I ziptied it to the top of the teepee poles, so the kids can have light if they are reading in the evening, or if they want to have a camp out in the teepee.
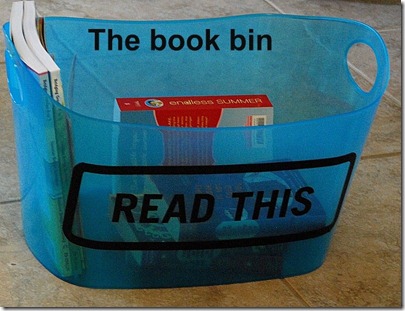
I also made a Reading Bin where they can store the books they are reading.
I printed out the “Read This” saying with my Silhouette machine.
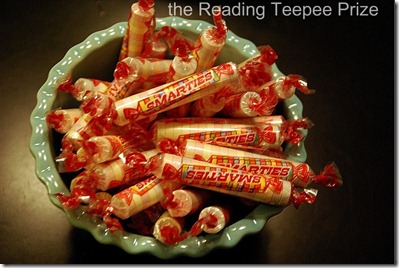
And I keep a bowl of Smarties in the reading tent as a little treat.
Reading = makes you smart (ie)!!
Happy Summer!!
And just to clarify, the Reading Teepee will end up permanently in our basement, but the light is so bad down there, that I set it up outside to get some better pictures 🙂
xoxo









Hi wow I just popped by from Shropshire in UK I love this TeePee I am hoping that I can recreate this for my adorable grandsons. I am planning to source some PVC Table cloths as it will be for their child centered garden .
Thank you for taking time to show and explain step by step how this will work. I might actually look for a cheap tent that would be easier to sew with
I have a bleheim cavalier too!! His name is Fletcher! I hope you love your as much as I love mine.
Love the teepee…adore the dog!
Hey! I love this tent idea! Especially the lighting. Just letting you know I plugged you in a post I did about DIY reading tents. You can check it out here: http://www.pvcfittingsonline.com/resource-center/diy-reading-tents/
Keep up the awesome crafts!
What a lovely idea! And the result is just stunning. Great job! Thanks for sharing.
Ana
http://ellaplays.wordpress.com
Wow! What an amazing teepee. You are very creative! I love the chandelier idea too. What a fun mom you are!
I love this! Plan on making it for my granddaughter who at 6 months was crazy for her books!!! She’s got a sister on the way so hopefully they will both utilize it. Thanks for your creativity!!
Fantastic looks like fun thinking of making one for the grandchildren. Thanks for the idea
love itt!
Wow!!! Thanks so much for sharing this! I agree with you on the PVC pipe cutter. It is scary looking, but it is the coolest tool ever!
Thank you so much for putting this online. My daughter has been dreaming of something just like this. She watched Nim’s Island and ever since wanted a tree house or T-pee of her own. I am going to see if I can make mine half as enchanting as yours.
Sincerely,
Jen Morley
And I would like to know how you got the chandelier in there too.
Chandelier!!! You have to tell me how you did that!Awesome tricked out teepee!
I made my teepee yesterday and finished up the cover today. I ended up using 2 king flat sheets and had to make 6 panels about 53″ wide at the base and 98″ tall. Took it outside and set it all up and it looks great – the kids are very excited about it, and so am I! Thanks for the great tutorial!!
This is awesome but I always wonder with beautiful things like this, what happens if it rains?? Thanks for info on that, gorgeous!
This is such a great idea and too, too cute!!! btw, I think if you sew and don’t curse, you aren’t doing it right. 😉
Great idea!! Can’t wait to make it for my little one. Did you use 1/2 in” or 3/4 In” PVC? Thanks 🙂
I featured this on my blog here http://jolynnshobbyshop.blogspot.com/2012/02/tuesday-likes.html after seeing on Pinterest
So freaking cute idea/tutorial
I want one! For me, though. I guess the kids would need their own!
One Word:
FANTASTIC!!!!
Love this idea…would be great for a library as well…my wheels are rolling.
Saw this via Ann's blog at:
A Holy Experience
She has good taste!:)
Blessings!
Joanne
I want one!!! Guess I'll need to make two-one for me and one for the kids! Great job! Thank you for sharing.
I just bought a bunch of shower curtains on clearance for $3.00 each. I was going to use the material for curtains but changed my mind. Had NO idea what to do with them and then I see this. PERFECT!!!! Thank you so much for this design idea. I'm doing this for sure. 🙂 Heather
love this! so cute and would be perfect for an outdoor reading adventure.
kathryn
http://www.thedragonsfairytail.blogspot.com
Love this! and the fabric, from the pictures you would of never guessed it is a table cloth it looks so bright and perfect for the summer! thanks for sharing..
Love Love Love this idea! My girls each want one of their own. I don't sew but want to give it a try!
I love love love this idea! Both my girls want one of their own, but I think they'll have to settle for sharing 🙂
I don't sew but want to give this a try. Can you tell me how many tablecloths you used? Also do you think vinyl coated table cloths would work? I was thinking they'd be soft on the inside and easy to wipe down on the outside…but not sure if it will sew together well.
Thanks for the insipiration!
I love, love, love this idea. My girls each want one! I've never sewn before but want to give this a try. Can you tell me how many tablecloths you used? Also, do you think vinyl tablecloths would work? I'm thinking the that way the inside is soft and the outside would be easy to wipe down…but not sure if it will sew together well.
Thanks for the great ideas!
This looks like so much fun! Holy cow. Our kids love to read outside but I'm always worried about them getting overexposed to the sun. When we go out I make them slather on sunscreen and I have to wear my reading sun glasses if I want to read for 5 minutes without getting a headache. I can't say I would have thought of teepee building as a solution to this.
Really so fun and creative! Love it!
Jo-Anna
My kids are smitten with this tent! What an awesome summer spot for kids to read, relax and imagine!
You are the coolest mom ever! What a fun get-away for your girls! I have the same tablecloth…love it!
Have a wonderful day!
Jenn
Shut up, there's a chandelier in your teepee. Now THAT is just awesome.
I'm seeing all these tent type projects all over and I want to make one so badly! I mickey-moused something together in my backyard last week that involved a laundry line, milk jugs filled with water as weight, twine, six thousand clothespins, and screwdrivers used as stakes because I only have two milk jugs to use as weights. My husband was considerably less impressed than my girls were. I definitely need to take the plunge and make one of these more 'permanent' setups!
You could totally make this with drop clothes and paint it with your kids for a cool look… and you could scotch guard it if you wanted it to be outside and used dropcloths. Tons of possibilities out of a shared idea. Love it!
Jen, You are incredible! This teepee has got to be 'THE' place to be this summer, for reading and more. I love it! The chandelier and the cute clearance fabric were a perfect touch. I made a reading spot for my kids this summer too. Of course it had to be Dr. Seuss themed. – Not as elaborate as yours- but McElligot's Reading Pool has been a hit at our house. http://www.obseussed.com/2011/05/diy-mcelligots-pool-summer-reading-spot.html Hope you have a great time on your trip!
"can't"
YOU ARE JUST TRULY THAT AMAZING!!! i adore it, and what fab. tablecloth material/print. i adore TARGET!!! The reading T.P. IS AMAZING just like you. You can go wrong with stimulating those brain cells either. HAVE A FAB. WEEKEND FRIEND. winks-jen
This is such a great idea, and I agree that you ARE the coolest Mom ever for putting this together for your kids. I'm trying to think of where I could put a reading teepee/tent in my house for me, my hubby & our cats.
This is SO INCREDIBLY AWESOME!!!! i love it as a mom, as a teacher, and as a book lover!! Read, read, read!!! Yay! Happy weekend!
How neat!!
Angela
beautiful!
Great idea. Looks like the perfect place to hide out and enjoy!
What great fun. My kiddos are loving any kind of tent right now – I should really make them something more permanent like this. You must have made your kids feel so special!
Such a fun idea for summer! Your kids will always remember it!
Jenny
http://www.seaminglysmitten.blogspot.com
Oh my gosh…..*I* want one of those! SUCH a cool idea!
This is so cute.. You reminded me of the teepee and tents I used to make with my brothers and spend so many hours playing and have camp outs every summer.. fun days!!
Have to make one when my son grows old enough for this activity.. 🙂
You are officially the coolest mom ever. The tent is amazing!
so cute and fun Jen!!
Oh my gosh I would love this in adult size. I think I need one for my backyard 🙂 hehe. Great idea the kids look happy!
That is so much fun!I don't have any kids yet but I kinda want to make one for me and my husband to rad in 🙂 Thanks for sharing! <3
I love this! I would love to put this in my yard but I'm afraid that the winds would pick it up and deposit into my neighbors yard…..
I love this! I would love to put this in my yard but I'm afraid that the winds would pick it up and deposit into my neighbors yard…..
Great idea! Question though, how many table cloths did you purchase? Just the 2, as pictured, or did you need more than that???
thanks for sharing!
amy
We've been doing so much reading this summer…love the tent idea! However, AZ is too hot, so unless it was an inside tent we'd sweat like pigs. Fabulous idea!!
love that idea. i've been eyeballing that same tablecloth trying to decide what i could do with it. very clever
This is adorable! The colors are fantastic. I love how it is for the whole family. Y'all did a great job! And the paint chip banner *brilliant*
What an adorable idea!!
Crystal
I have the perfect set of clearance sheets that I have been waiting to use. Now I just how to figure out how to make it so the dog doesn't think she's getting a super cool new bed, LOL! ~merrilee
I want one!!!
For myself, I don't have kids!
LOL.
I do however LOVE fun reading spaces.
Awesome idea!
ILOVE this idea!It's 100 degrees here with 95% humidity so I don't think my son would get much reading done outdoors but I'm going to make this a permanent fixture in his playroom. Summer reading. Year-round reading. Yay!
I absolutely love this idea! Now if only I had a place to put it.. Maybe I can buy waterproof materials, set it up outside, make it a little bigger.. Hmm ☺
Summer reading is so important. What a great way to encourage the love of reading for enjoyment!
I bought the same material/tablecloth. It was a deal at Target! Cute teepee!
Jen that is such a cute idea! I wish I had room in my house for something like that…my boys would love it! The bucket to hold books is really smart too! I need to do something like that for our library books:)
How fun! I would have loved to have one of these growing up…hECK i'D LOVE TO have one now 🙂
I adore your teepee! I made one last summer (for outdoor use- using whatever I could find). I was surprised that it lasted as long as it did outside (with all the snow we got this winter!). I think I'm going to try again- I really love the idea of using PVC pipes as the base. I have feeling that would hold up slightly better than the tree limbs tied with twine at the top.
I'm wondering- is that chandelier battery operated?
Great job Jen!! This reading teepee is adorable!! I'm sure your girls are going to love it!!
ooooo my daughter would LOOOOOVE, just love that!
This is a spectacular teepee! What a great idea!
Oh my gosh, Jen this turned out ADORABLE! I bet your kiddies LOVE IT! 🙂
Oh my goodness! Your kiddos are very lucky. I love the pic of you putting together the tepee. 🙂
Jen at
Creative and Curious Kids!
I love this! I need to find a tent that doesn't require power tools though – I've got my eye out!
This came out super cute!
the PVC cutter is my favorite tool!! my guy lets me make all the cuts when he's working with it at home because he know how fun i think it is! 🙂
great idea
Cute! I remember helping to make teepees similar to this {in the 70's} for my brothers.